The Scope and Purpose of a Home Inspection
Purchasing property involves risk
The purpose of a home inspection is to help reduce the risk associated with the purchase of a house by providing a professional opinion about its condition. A home inspection is a limited visual inspection and it cannot eliminate this risk. Some homes present more risks than others. We cannot control this, but we try to help educate you about what we don’t know during the inspection process. This is more difficult to convey in a report and one of many reasons why we recommend that you attend at least part of the inspection.
A home inspection is not an insurance policy
This report does not substitute for or serve as a warranty or guarantee of any kind. Home warranties can be purchased separately from insuring firms that provide this service.
A home inspection is visual and not destructive
The descriptions and observations in this report are based on a visual inspection of the structure. We inspect the aspects of the structure that can be viewed without dismantling, damaging or disfiguring the structure and without moving furniture and interior furnishings. Areas that are concealed, hidden or inaccessible to view are not covered by this inspection. Some systems cannot be tested during this inspection as testing risks damaging the building. For example, overflow drains on bathtubs are generally not tested because if they were found to be leaking they could damage the finishes below. Our procedures involve non-invasive investigation and non-destructive testing which will limit the scope of the inspection. Where moisture meter testing is indicated in this report a Protimeter Surveymaster was used.
This is not an inspection for code compliance
This inspection and report are not intended for city / local code compliance. During the construction process structures are inspected for code compliance by municipal inspectors. Framing is open at this time and conditions can be fully viewed. Framing is not open during inspections of finished homes, and this limits the inspection. All houses fall out of code compliance shortly after they are built, as the codes continually change. National codes are augmented at least every three years for all of the varying disciplines. Municipalities can choose to adopt and phase in sections of the codes on their own timetables. There are generally no requirements to bring older homes into compliance unless substantial renovation is being done.
This is just our opinion
Construction techniques and standards vary. There is no one way to build a house or install a system in a house. The observations in this report are the opinions of the home inspector. Other inspectors and contractors are likely to have some differing opinions. You are welcome to seek opinions from other professionals.
The scope of this inspection
This inspection will include the following systems: exterior, roof, structure, drainage, foundation, attic, interior, plumbing, electrical and heating. The evaluation will be based on limited observations that are primarily visual and non-invasive. This inspection and report are not intended to be technically exhaustive. We follow the InterNACHI Standards of Practice.
Your expectations
The overall goal of a home inspection is to help ensure that your expectations are appropriate with the house you are proposing to buy or sell. To this end we assist with discovery by showing and documenting observations during the home inspection. This should not be mistaken for a technically exhaustive inspection designed to uncover every defect with a building. Such inspections are available but they are generally cost-prohibitive to most homebuyers.
Your participation is requested
Your presence is requested during this inspection. A written report will not substitute for all the possible information that can be conveyed verbally by a shared visual observation of the conditions of the property.
How to Read This Report
Getting the Information to You
This report is designed to deliver important and technical information in a way that is easy for anyone to access and understand. If you are in a hurry, you can take a quick look at our "Summary Page” and quickly get critical information for important decision making. However, we strongly recommend that you take the time to read the full Report, which includes digital photographs, captions, diagrams, descriptions, videos and hot links to additional information.
The best way to get the layers of information that are presented in this report is to read your report online, which will allow you to expand your learning about the inspected property. You will notice some words or series of words highlighted in blue and underlined – clicking on these will provide you with a link to additional information.
This report can also be printed on paper or to a PDF document.
Chapters and Sections
This report is divided into chapters that parcel the home into logical inspection components. Each chapter is broken into sections that relate to a specific system or component of the home. You can navigate between chapters with the click of a button on the left side margin.
Most sections will contain some descriptive information done in black font. Observation narrative, done in colored boxes, will be included if a system or component is found to be significantly deficient in some way or if we wish to provide helpful additional information about the system or the scope of our inspection. If a system or component of the home was deemed to be in satisfactory or serviceable condition, there may be no narrative observation comments in that section and it may simply say “tested,” or “inspected.”
Observation Labels
All narrative observations are colored, numbered and labeled to help you find, refer to, and understand the severity of the observation. Observation colors and labels used in this report are:
- Procedure:Description of the procedure I follow while inspecting various components of a house.
- Note:Refers to aside information and/or any comments elaborating on descriptions of systems in the home or limitations to the home inspection. These also include contextual photos of the house and pictures of various components of the house while operating.
- Tier 1 - Major Concern:These represent priority items like major safety issues, active issues causing damage to the house, or items of significant expense that are looming in the near future.
- Tier 2 - Repair:These are lower priority deficiencies that may not need immediate attention, but should be addressed in the near/medium term future. These are usually deferred maintenance items, occupant safety concerns, or sub-par construction/installation problems.
- Tier 3 - Improve:These are things that are working but could be better. These are minor nuisance type concerns, or things related to safety, efficiency, or reliability issues. Often these are improvements that may not have been necessary--or even have existed--when the property being inspected was constructed (e.g. changes in building standards over time.)
- Future Project:A repair that may be deferred for some time but should be on the radar for repair or replacement in the future.
- Due Diligence:Observations that may require further investigation and/or clarification that could not be provided during the home inspection.
- Monitor:Items that should be watched to see if correction may be needed in the future.
- Recommended Maintenance:These are items that should be considered "routine home ownership," such as servicing the furnace, cleaning the gutters or changing the air filters in the furnace. Generally a house costs ~1% of the purchase price per year to maintain.
- Homeowner Info:These are pieces of "good to know" information about the house. For example, the location of the main water shut-off valve, gas shut-off valve(s), etc.
Summary Page
The Summary Page is designed as a quick-to-read bulleted overview of all the observations noted during inspection. This overview is not a substitution for reading the entire inspection report. The entire report must be read to get a complete understanding of this inspection report as the Summary Page does not include photographs or photo captions, and most of the comments in the report will have photos of what is being discussed. Click on the link next to each comment to jump to the section in the report with the photos and the captions which may provide additional detail on the specific comment.
Summary
Tier 1 - Major Concerns
- EDPB-3 Exteriors, Decks, Porches, and Balconies:
The horizontally installed siding (lap siding) was not installed correctly; the butt joints were not properly sealed. The manufacture installation instructions for butt joints are below; there are several options, but the most common way I see it is having the gap caulked. For the open butt opens, there should be flashing behind them (there did not appear to be flashing, just building paper) and they should only have factory primed edges exposed (many of the edges I saw were cut, not primed or painted, see example photos.) Improper sealing will allow water to be absorbed into the siding, causing it to fail. Recommend repair by a qualified contractor.
- B-1 Bathrooms:
An active leak was observed from the bottom of the faucet of the second level bathroom sink (only when it was on), see photos/video. Recommend repair by a qualified plumber.
Tier 2 - Repairs
- EDPB-4 Exteriors, Decks, Porches, and Balconies:
Some areas of siding needed resealing, see photo(s.) Worn gaps in sealants are a conducive condition for rot and pests as they allow water to penetrate into, or behind, the siding. This is normally a DIY repair using exterior grade caulk, though larger gaps may need repair by a qualified contractor.
- EDPB-5 Exteriors, Decks, Porches, and Balconies:
Damaged siding was observed on the exterior of the house, see photo(s.) This can allow water to penetrate the exterior envelope of the house, which can lead to rot, mold, and wood destroying pest activity. Recommend repair by a qualified contractor.
- CSB-1 Common Spaces and Bedrooms:
Door(s) did not latch and stay closed in the following location(s): Third Level SE Bedroom. Recommend repair by a qualified contractor.
- CSB-2 Common Spaces and Bedrooms:
The window in the second level dining room was not latching/locking. Recommend repair by a qualified contractor.
- B-2 Bathrooms:
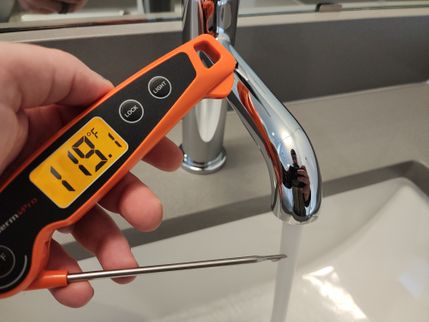
Hot and cold controls were reversed on the primary bathroom left sink with hot on the right and cold on the left, see thermal video. This is an incorrect installation. Recommend repair by a qualified plumber.
- P-3 Plumbing:
Water pressure was high; see photo of a water pressure gauge on an exterior hose spigot. Normal residential water pressure is between 40 and 60 PSI. Anything over 80 PSI is considered excessive. This can be hard on appliances that use water (washing machines, dishwashers, etc) and can overstrain plumbing fittings, increasing the chance of leaks. Recommend installation of a pressure regulator by a qualified plumber, and adjusting it until water pressure is below 80 PSI.
- P-7 Plumbing:
Hose spigot(s) was not functioning, see photo(s.) Most hose spigots have a shut-off valve somewhere in the house, so it is likely that a shut-off valve is just shut somewhere, which can be opened as a DIY repair. If no shut-off valve can be found, further evaluation and repair by a qualified plumber may be needed.
- E-5 Electrical:
Exterior outlet(s) was missing weather resistant cover, see photo(s.) Recommend adding a proper weather rated cover, available at any Home Depot type store, to protect the outlet. DIY repair.
- E-6 Electrical:
Light(s) were not functioning, see photo(s.) Recommend changing the bulbs, but if that doesn't work, evaluation and repair by a qualified electrician may be needed.
Tier 3 - Improvements
- EDPB-6 Exteriors, Decks, Porches, and Balconies:
Some siding was bowing above the front door, see photo. This was a cosmetic issue only, but was fairly visible. Recommend repair by a qualified contractor.
- RCG-3 Roof, Chimney, and Gutters:
Downspout(s) and/or gutter(s) for the upper roof section drained directly on the lower roof section, see photo(s.) Modern building standards allow this and it is a standard practice. However, it puts more water on certain sections of the roof, and will cause the shingles below the down spouts to wear more quickly due to extra granule loss. I recommend keeping an eye on these sections as they are likely to fail from age first due to the extra use. A roofing contractor might be able to suggest alternatives to prevent the damage this setup can cause.
- A-3 Attic:
Insulation was not spread consistently. This limits its effectiveness. Recommend repair by a qualified contractor. The insulation may just need to be spread out or more may need to be added to areas with lower levels of insulation.
- P-4 Plumbing:
A cleanout had a cover installed that relied on a screw through the cap, see photo. This is a common practice, but often leads to leaks as waste water will seep through the cap around the screw. Recommend replacement of the cleanout cap to one without a hole in it, and either installation of a cover that does not damage the cap, or just not installing a decorative cover over the cap.
- E-2 Electrical:
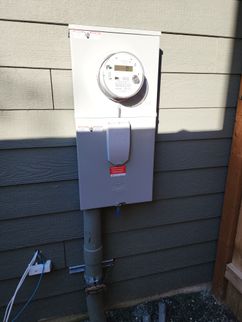
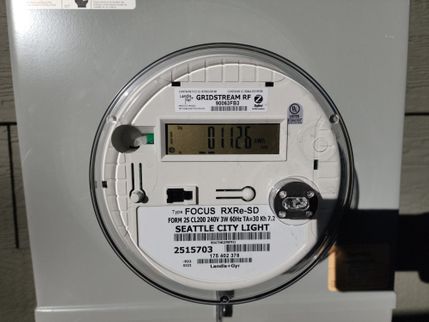
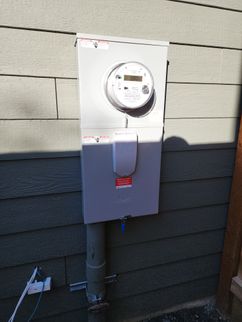
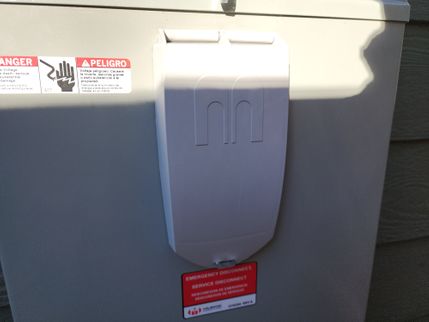
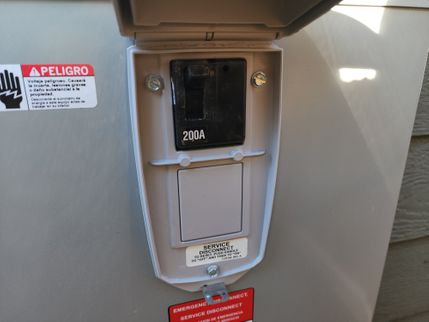
Because the main power shut-off was outside of the house, I would recommend adding two padlocks to it to keep it secure as a DIY home security improvement. There were loops on the breaker cover designed for this.
- E-14 Electrical:
Modern building standards require a heat detector in attached garages. This garage did not have one. Recommend adding a heat detector to the garage ceiling as a DIY safety improvement.
- FSD-3 Fuel Storage and Distribution:
The main gas valve at the gas meter is tight enough to require a wrench and cannot be operated by hand alone. Recommend keeping a properly sized wrench at the gas meter in case of an emergency. Wrenches for this purpose can be purchase for less than $10 (like this one.)
- HCFV-8 Heating, Cooling, Fireplaces, and Ventilation:
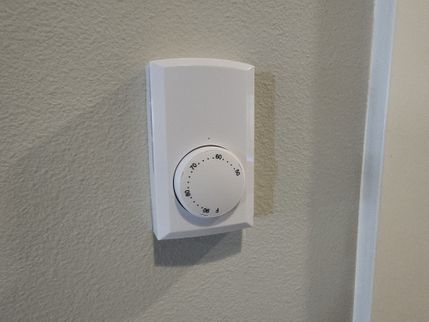
The electric heater in the first level bathroom ceiling was controlled with a switch. This is technically ok, but it is easy to accidentally leave the heater on. I would recommend having a qualified electrician replace the switch with a timer so the heater cannot be left on.
Future Projects
- GC-6 General Comments:
For many new construction properties, they include a one year warranty. Many owners opt to do an 11-month warranty inspection to create a list of things to ask the builder to address before their warranty expires. Some issues do not appear until different seasons, or until a house is actually lived in, so it is a good idea to have it looked at again in about a year.
- FSD-2 Fuel Storage and Distribution:
Consider improving the safety of the gas meter connection with a seismic detecting gas valve. These are seismic protection devices that will automatically shut off the gas in the event of an earthquake.
- HCFV-5 Heating, Cooling, Fireplaces, and Ventilation:
Much of the equipment for a cooling system (AC or heat pump) had already been installed. Recommend asking the builder what it would take to get a cooling system installed.
Note: The only duct work was on the second and third levels, so the first level would not have any cooling.
Due Diligence
- GC-1 General Comments:
Please note that mold, mold testing, and indoor air quality are beyond the scope of this inspection. That being said, any suspected mold or conducive conditions for mold that I observed will be reported on. If mold or indoor air quality is a particular concern, I recommend additional inspection by a specialist.
- GC-2 General Comments:
Radon level testing is not included as part of this inspection. While radon is a concern in many areas of the United States, according to the EPA, the Seattle area has low risk for radon levels (see EPA heat map of radon risk.) If radon levels are of specific concern, I recommend contacting a company that provides this service. Note that it takes 48+ hours to accurately measure radon levels.
- GC-4 General Comments:
As this is a newer construction building, there is a chance that building plans, permits, drainage plans, construction records, a list of sub-contractors, and warranty information may be available. I recommend trying to obtain and keep this information for your records and for future re-sale.
- EDPB-7 Exteriors, Decks, Porches, and Balconies:
Exterior door(s) had a code for entry. Be sure to obtain the code from the seller.
- G1-1 Garage:
There was a timer installed in the garage. I could not figure out what it controlled. Recommend asking the builder what this was for.
- SCSB-1 Structure and Crawl Space / Basement:
Based on the year of construction, this structure likely had earthquake resistance devices installed. However, because all of the exterior walls were covered in drywall, I could not visually verify this. Confirming that earthquake resistance devices were installed would require an invasive inspection (cutting into the walls) by a qualified contractor.
- E-1 Electrical:
No bonding connections were observed on the gas pipes. This is an important safety feature to ensure safe control of stray voltage on metal systems in the house. Recommend evaluation by a qualified electrician.
Note: It is possible and common that the metal plumbing was bonded, but in an area that was not visible during a non-invasive visual inspection.
- E-4 Electrical:
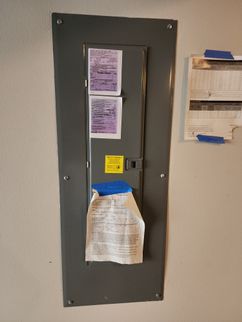
I could not inspect the interior of the main electrical panel because a security tag had been installed on the box. Recommend inspection of the interior of the box by a qualified electrician or inspector when it is made available.
- E-8 Electrical:
Outlets without an obvious reset are not tested for GFCI protection as I may not be able to re-engergize them after they turn off. Recommend testing the outlets in the location(s) listed below for GFCI protection using an outlet tester (like this one.) If the outlet(s) are not GFCI protected, repair by a qualified electrician is recommended.
For this house, outlets were not tested for GFCI protection in the following location(s): Laundry Room
Note: GFCI protection has become more extensive over time. The guidelines for GFCI coverage based on the year of construction is in the image below. If the house was built prior to any of these dates, there is a decent chance that coverage is not what it should be, and I may not have been able to accurately test for it.
- E-15 Electrical:
This photo shows the low voltage wiring box (sometimes called the high tech wiring box.) This is often designed to be the central point where cable boxes, routers, etc can be installed. This system is outside the scope of a home inspection, so it was not tested. I recommend asking the seller how the house is wired.
Areas to Monitor
- GC-5 General Comments:
In new construction, expect to see minor drywall cracking and nail pops (circles where nails come loose) for about the first year of occupancy. As the moisture level in the house rises due to cooking, showering, etc, the drywall will expand slightly, causing these cosmetic blemishes to occur. Many builders provide a warranty to come address all these cosmetic blemishes about a year after moving in.
- G-1 Grounds:
Lot grading and drainage have a significant impact on the building, simply because of the direct and indirect damage that moisture can have on the foundation. It is very important that surface runoff water be adequately diverted away from the home. Areas of concern, if any, are noted in photos. Recommend monitoring the grounds, especially near the house, during the rainy season. If excess water or pooling is observed during the rainy season, further evaluation by a drainage specialist is recommended.
- G-4 Grounds:
Downspouts were discharging into storm drains. These could be susceptible to restrictions, clogs or backups. Monitor during wet weather and improve or repair as needed. It is important to ensure roof runoff is successfully carried away from the building.
- EDPB-2 Exteriors, Decks, Porches, and Balconies:
The siding appears to be an OSB product made by Louisiana Pacific siding. Based on the age of the installation, it is likely the newer version of this siding called, Smart System. The previous version of this siding, Inner Seal, was the subject of a class action law suit regarding premature failure. This siding is not implicated in that suit and some improvements have been made to this product. However, this siding is generally unproven in this climate and may be subject to premature failure if not carefully installed and maintained. Nails should not be over-driven and if they are, they should be caulked and painted to prevent failure at exposed nails. All butt joints and the bottom lips of boards should be carefully painted and sealed to prevent failure. The siding seems to be performing well to date. Visual inspection did not find any need for repairs at this time. Monitor and keep well maintained.
- B-4 Bathrooms:
Flat surfaces in showers, see photo(s), can be problematic. Water tends to pool on these surfaces, which puts additional wear on any caulking/grout that is present. Recommend monitoring these surfaces especially closely for caulk/grout condition to prevent leaks.
- G1-2 Garage:
Minor hairline shrinkage cracks in garage slab concrete floors are normal for properties of any age. They should, however, be monitored for expansion, which could be an indication of something more significant.
- SCSB-2 Structure and Crawl Space / Basement:
Typical small cracks were noted in the foundation. The purpose of the foundation is to connect the weight of the building to well-compacted soils below the house so that the house does not move or settle. Concrete cracking can indicate poorly compacted soils below the house which could require a repair, but small cracks such as these can also be a sign of routine concrete shrinkage. It is not possible to determine or verify the cause of these cracks during a visual inspection. The easiest way to prevent on-going settlement in buildings is by controlling roof runoff and site drainage to promote dry soils around the foundation; wet soils do not bear weight well. This will also help to prevent moisture problems. In my experience, small cracks like these are common in concrete foundations of any age. I would monitor these cracks. If continued movement is noted, I would seek additional inspection by a structural engineer or qualified contractor to determine an accurate scope and urgency for repair to ensure a reliable connection between the foundation and well-compacted, weight-bearing soils.
Recommended Maintenance
- G-2 Grounds:
Keep 6 to 8 inches of exposed concrete foundation between the siding and the soil below. This will help protect against moisture or pest intrusion into the siding and structure.
- G-3 Grounds:
Make sure to keep all downspouts discharging 5+ feet away from the foundation. Not doing so can cause moisture problems in the structure, or even foundation settling.
- G-5 Grounds:
When landscaping, keep plants, even at full growth, at least a foot (preferably 18 inches) from house siding and windows. Keep trees away from foundation and roof. Plants in contact or proximity to home can provide pathways for wood destroying insects, as well as cause rubbing damage to siding, screens, and roofs.
- EDPB-1 Exteriors, Decks, Porches, and Balconies:
Maintain all exterior finishes, caulking, and other sealants at any dissimilar material abutments and all penetrations to the walls and roof. This inexpensive task aids in the prevention of moisture intrusion and saves on expensive repairs.
- RCG-1 Roof, Chimney, and Gutters:
Architectural grade asphalt shingles have a life expectancy of 25 - 30 years with good maintenance. Maintenance includes removing tree debris and cleaning moss. DO NOT use a pressure washer to remove moss as it can severely damage a roof. Instead, use a moss killer treatment (spray or powered) found at any Home Depot-type store.
- RCG-2 Roof, Chimney, and Gutters:
Keep gutters and drains cleared of organic debris to prevent downspouts from being clogged, which will cause gutters to overflow. Overflow at gutters can lead to water pooling at the foundation, which can lead to rot, pests, and even structural failure eventually.
- B-3 Bathrooms:
Ongoing maintenance of the caulk and grout around any shower or tub is important to prevent leaking. If the caulk begins to crack or the grout begins to wear down and get thin, leaks can occur.
- K-2 Kitchen:
Kitchen vent filters need regular cleaning to prevent grease buildup which is a potential fire hazard. Most metal filters can be put in the dishwasher for easy cleaning.
- LUR-1 Laundry / Utility Room:
Recommend cleaning dryer vent at least annually as lint buildup can be a fire hazard. This is usually a DIY maintenance item, but depending on the length of the dryer vent, special tools may be required. Please note that I cannot verify how clean/dirty the vent is at the time of the inspection, so it might be due for a cleaning.
- A-2 Attic:
I recommend that owner looks around the attic at least twice a year just to become familiar with what's up there, and see potential issues early. Many attic issues are a result from excess water (either roof leaks or excess humidity coming from living space) which can quickly lead to rot, mold, and pest problems. The majority of these issues can be minimized or prevented if they are caught early on.
- P-5 Plumbing:
This house had hot water provided by a tankless hot water heater. Annual flushing is typically recommended for these types of water heaters to ensure safe and reliable performance. I recommend having this water heater professionally serviced annually as a part of routine scheduled maintenance. With proper maintenance, the life expectancy of a tankless water heater is 20 years.
- E-13 Electrical:
Smoke detectors are reliable for approximately 10 years before needing replacement. Carbon monoxide detectors are reliable for approximately 6 years before needing replacement. Batteries (if applicable) should be replaced in both every six months to ensure reliable performance.
- HCFV-1 Heating, Cooling, Fireplaces, and Ventilation:
Furnaces should be serviced annually to verify safe and efficient operation. With proper maintenance, the life expectancy of a furnace is 20 years.
- HCFV-3 Heating, Cooling, Fireplaces, and Ventilation:
The air filter(s) should be inspected at least monthly and cleaned or replaced as required, typically every 3 months. Dirty filters are the most common cause of inadequate heating or cooling performance. Note the size and airflow direction before removing the already installed filter. There are two types of filters commonly used, either of which can be purchased at any Home Depot type store:
- Washable filters, (constructed of aluminum mesh, foam, or reinforced fibers) these may be cleaned by soaking in mild detergent and rising with water.
- Fiberglass or fabric disposable filters.
- HCFV-7 Heating, Cooling, Fireplaces, and Ventilation:
Recommend cleaning electric heaters every 6 months to avoid dust buildup which is a potential fire hazard. Best practices are to turn power off to the heater and use compressed air to clean the dust from the heating elements. The fan blades (if any) can be wiped or vacuumed as needed, then restore power.
Homeowner Info
- GC-3 General Comments:
This is a generic life expectancy chart for many different materials in a house. Please note that many of these products were not present in the inspected house, however this list contains a lot of good information for homeowners to keep on general home maintenance.
- K-1 Kitchen:
The sink had an air admittance valve (AAV) (often called a "cheater vent") installed for venting the drain line. This is a one way valve that allows air into the drain line to assist with smooth draining (normally done by a pipe that runs up clear through the roof) but does not allow sewer gas to vent into the living space. AAVs are commonly used when adding a vertical vent pipe is difficult/impossible (like on a kitchen island sink.) However, sometimes they can stick open or closed. If the valve sticks open, sewer gas will waft into the living space. If the valve sticks closed, the drain will gurgle as it's used; the gurgling is caused by air bubbles coming back up the pipes. If either of those issues are observed in the future, it's time to replace the vent. Any Home Depot type store sells them, and removing it and installing a new one is a simple (it just screws off/on) DIY job.
- LUR-2 Laundry / Utility Room:
Laundry room fan was operating as a "whole house" ventilation fan. This fan is designed to help cycle fresh air throughout the whole house. Most manufactures recommend operating the fan for 3+ hours a day (does not need to be consecutive) to cycle air through the house. There was a timer installed to help accommodate this.
- P-1 Plumbing:
This shows the location of the water meter. The first photo is the location of the box, the second photo is a close-up of the interior of the box. If the secondary water shut-off valve was visible, it is circled.
- P-2 Plumbing:
This photo shows the location of the main water shut-off valve.
- P-6 Plumbing:
The water heater condensate drain and TPR valve discharge tube had an air admittance valve (AAV) (often called a "cheater vent") installed for venting the drain line. This is a one way valve that allows air into the drain line to assist with smooth draining (normally done by a pipe that runs up clear through the roof) but does not allow sewer gas to vent into the living space. AAVs are commonly used when adding a vertical vent pipe is difficult/impossible (like on a kitchen island sink.) However, sometimes they can stick open or closed. If the valve sticks open, sewer gas will waft into the living space. If the valve sticks closed, the drain will gurgle as it's used; the gurgling is caused by air bubbles coming back up the pipes. If either of those issues are observed in the future, it's time to replace the vent. Any Home Depot type store sells them, and removing it and installing a new one is a simple (it just screws off/on) DIY job.
- E-3 Electrical:
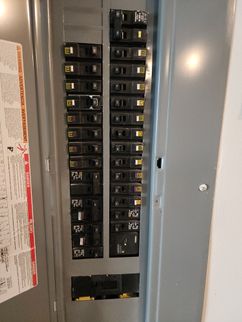
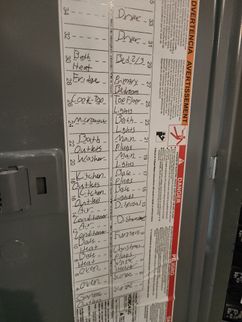
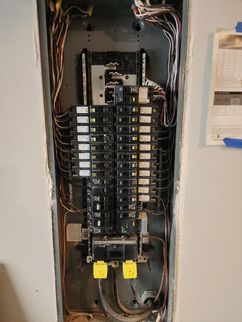
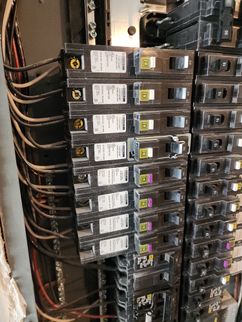
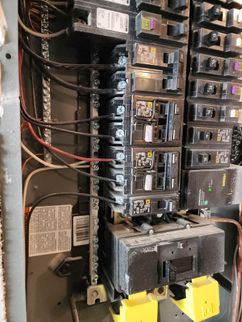
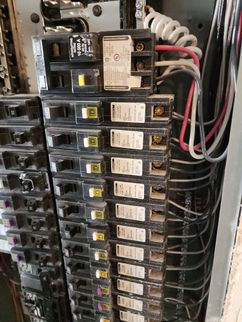
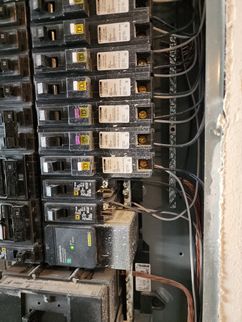
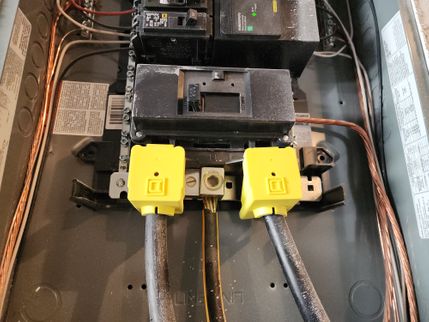
The main electrical panel was technically just a single breaker mounted on the outside of the house, serving a sub panel located in the living space. The sub panel had all the breakers for the living space, and can be operated just like a normal electrical panel. This is a standard installation in new construction.
- E-7 Electrical:
During an inspection I test all ground fault circuit interrupter (GFCI) devices that are readily accessible. GFCIs are the electric receptacles with test and reset buttons that you commonly see around water; modern building standards require them in kitchens, bathrooms, garages, exterior outlets, or within 6 feet of a water source (like by a wet bar sink.) GFCIs are important safety devices that limit the duration of electrical shocks and have saved lives.
One GFCI outlet will protect all the outlets installed downstream from it, which can be confusing. I recommend being aware of where reset buttons are located in the house as GFCIs can trip and disable a circuit which can not be re-energized without resetting the button. I avoid testing if a receptacle or circuit is GFCI protected if it is not clear where the reset button is located. This is because reset buttons can be concealed behind stored items, so such a test risks disabling a circuit in the home.
- E-9 Electrical:
GFCI protected outlets on the exterior reset at their respective outlets.
- E-10 Electrical:
GFCI protected outlets in the garage reset in the garage.
- E-11 Electrical:
GFCI protected outlets in the kitchen reset in the electrical panel.
- E-12 Electrical:
GFCI protected outlets in the bathrooms reset in the electrical panel.
- FSD-1 Fuel Storage and Distribution:
This photo shows the gas service entrance, meter, and main gas shut-off valve (circled.) The second photo is a close-up of the main gas shut-off valve. Rotating the valve to line up the holes will shut off gas flow to the house.
- FSD-4 Fuel Storage and Distribution:
Gas valves all operate with a handle that moves 1/4 turn to open/close them. If the handle is parallel to the pipe, the valve is open. If the handle is perpendicular to the pipe, the valve is closed.
- FSD-5 Fuel Storage and Distribution:
This photo shows the gas shut-off valve for the water heater.
- FSD-6 Fuel Storage and Distribution:
This photo shows the gas shut-off valve for the gas fireplace(s.)
- FSD-7 Fuel Storage and Distribution:
Both fireplace gas valves required a tool called a gas key. There was one in a kitchen drawer. Recommend having a specific spot for the key so everyone in the house can immediately find it in the event of an emergency.
- FSD-8 Fuel Storage and Distribution:
This photo shows the gas shut-off valve for the gas oven/cooktop.
- FSD-9 Fuel Storage and Distribution:
This photo shows the gas shut-off valve for the furnace.
- HCFV-2 Heating, Cooling, Fireplaces, and Ventilation:
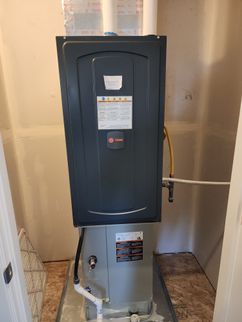
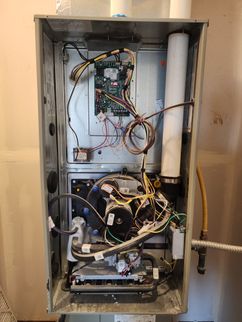
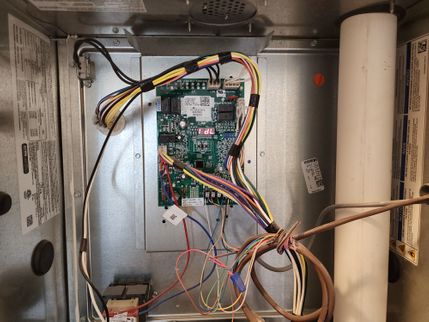
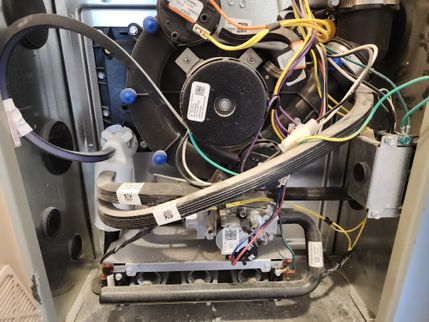
This style of furnace will produce condensate during operating, and there was a pump to eject this moisture from the house. Because this unit was installed in the living space, where a leak could damage the building, it had been installed with a drain pan and a drip sensor to alert the occupant to any leaks that might start.
- HCFV-4 Heating, Cooling, Fireplaces, and Ventilation:
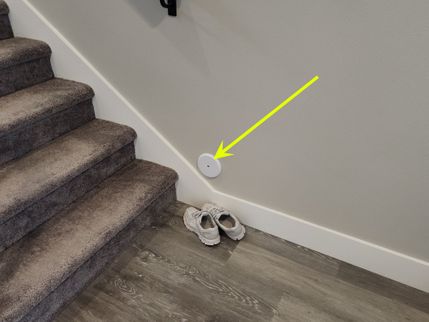
This photo shows the location of the furnace air filter.
- HCFV-6 Heating, Cooling, Fireplaces, and Ventilation:
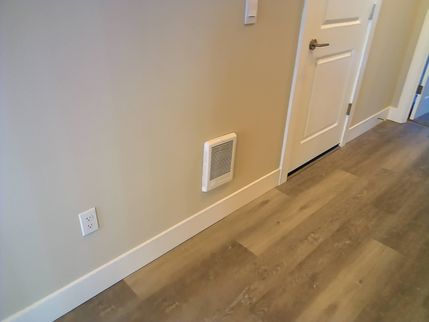
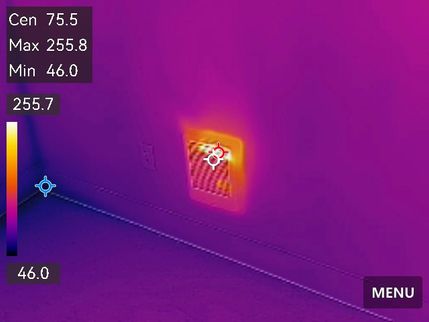
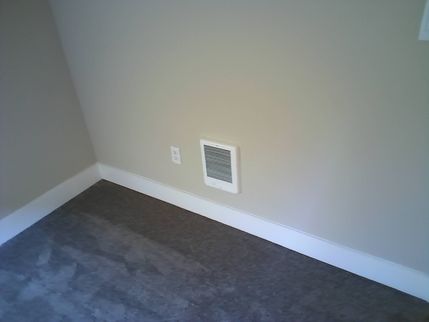
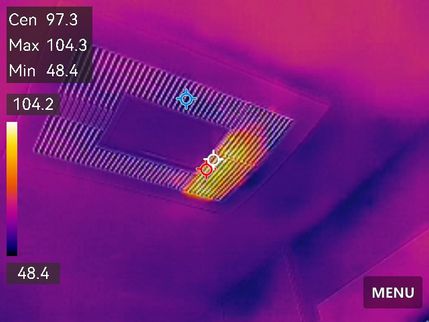
Recommend keeping a buffer of at least 3 feet around electric heaters. Some can reach temperatures well over 100 degrees, and could pose a fire hazard if flammable materials come in contact with them.
The Full Report
Grounds
Grounds Overview
General Grounds Photos
Lot and Drainage
Driveways / Walkways / Flatwork
Trees and Vegetation
Retaining Walls
Fences
Exteriors, Decks, Porches, and Balconies
Exterior Overview
Siding and Trim
Exterior Vent and Exhaust Terminations
Exterior Doors
Exterior Windows Frames
Decks, Balconies, and Porches
Roof, Chimney, and Gutters
Roof System Overview
Method of Roof Inspection
General Roof Photos
Roof Materials
Gutters and Downspouts
Common Spaces and Bedrooms
Interior Areas Overview
General Interior Photos
Door Bell
Floors
Walls and Ceilings
Stairs and Railings
Interior Doors
Windows
Bathrooms
Bathroom Overview
General Bathroom Photos
Sinks and Cabinets
Toilets
Bathtubs / Showers
Bathroom Ventilation
Kitchen
Kitchen Overview
General Kitchen Photos
Sinks and Faucets
Cabinets and Countertops
Ventilation Method
Appliances
Laundry / Utility Room
Laundry / Utility Room Overview
General Laundry / Utility Room Photos
Washer
Dryer
Ventilation
Garage
Garage Overview
General Garage Photos
Garage General
Garage Door and Automatic Opener
Garage Floor
Attic
Attic Overview
Attic Access
General Attic Photos
Roof Framing and Sheathing
Attic Insulation
Attic and Roof Cavity Ventilation
Structure and Crawl Space / Basement
Structure and Crawl Space Overview
Crawl Space Access
Foundation
Posts, Beams, and Footings
Moisture Conditions
Plumbing
Plumbing Overview
Water Meter
Street Supply
Water Pressure
Interior Distribution Pipes
Waste Pipe and Discharge Plumbing
Water Heater
Water Temperature
Hose Spigots
Electrical
Electrical Overview
Electric Service
Electrical Grounding System
Electrical Bonding System
Branch Wiring
Electrical Panel
Sub Panel
Outlets, Switches, and Fixtures
GFCI Outlets
Smoke and Carbon Monoxide Detector Systems
Low Voltage Wiring
General Comments
Building Characteristics, Conditions and Limitations
Type of Building : Detached, Single Family Home, Three Level
Approximate Year of Original Construction: 2023
Approximate Total Square Footage: 2476
Number of Bedrooms: 4
Number of Bathrooms: 3.5
Attending the Inspection: Client, Buyer's Agent, Fully Participated
Occupancy: Unoccupied
Weather during the inspection: Dry, Sunny
Approximate Temperature (Fahrenheit): 35
Ground/Soil surface conditions: Wet
For the Purposes of This Report, the House Faces: North
The approximate square footage listed in the report is listed as a courtesy and is based off of public records and disclosure. An evaluation of square footage of the buildings and property lines is beyond the scope of this inspection.
This house was vacant / unoccupied at the time of inspection. Vacant and unoccupied houses present unique challenges for home inspections, especially the piping and wiring systems which have not be subject to regular use prior to the inspection. While these systems can be tested during inspection, this one-time test is different than regular use and it is difficult to know how these systems will respond to regular use after the inspection. For example, septic systems may initially function and then fail under regular daily use. Plumbing traps may operate with no signs of leaks and then let go when being actively used for a few days. Shower pans may only leak when someone is standing in the shower and taking a shower. Seals for plumbing fixtures can dry up and leak when not is use. Sewer lines with roots may allow water flow, but then fail when waste and tissue are flushed; it can take a few days for that to backup. Please understand we are trying our best to look for clues of past or existing problems to paint a realistic best-guess as to the reliability of these systems during inspection.
The number of bedrooms identified is pulled from the MLS listing or public records. Any observed non-conforming bedrooms will be identified in this report. The simple requirements for a room to be considered a legal bedroom include:
- A heat source.
- An emergency escape and rescue opening (often referred to as fire egress opening.)
- At least 7 foot tall ceilings for at least half the room.
- Lighting.
- At least two outlets.
Note: A closet is not required for a room to be considered a bedroom by modern building standards. This is a common misconception. NWMLS may have a different definition of what is considered a bedroom.
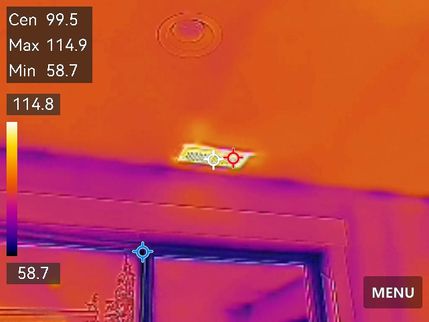
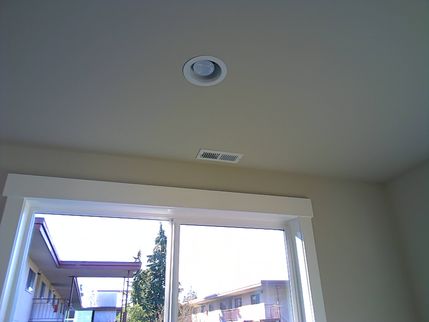
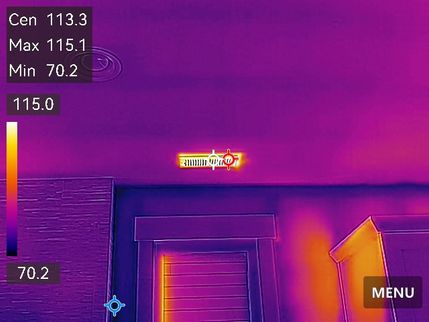
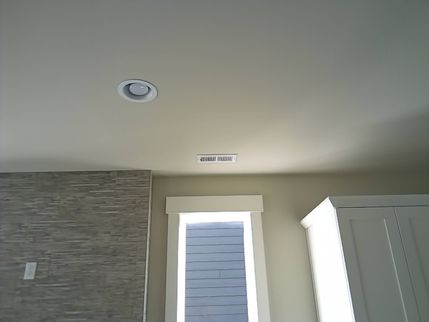
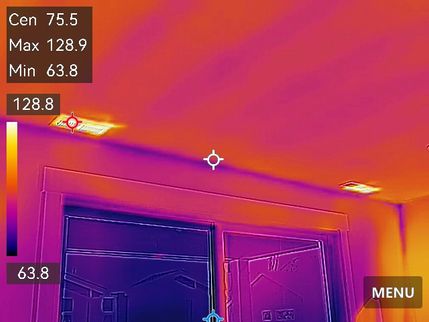
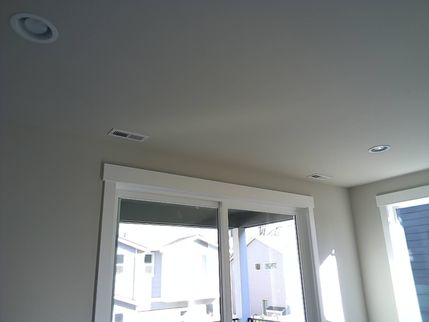
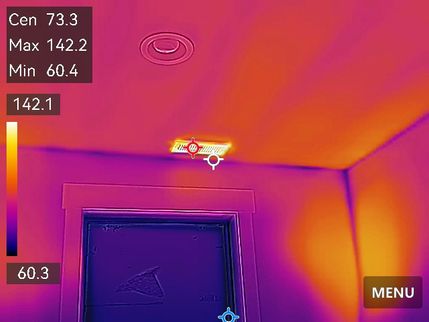
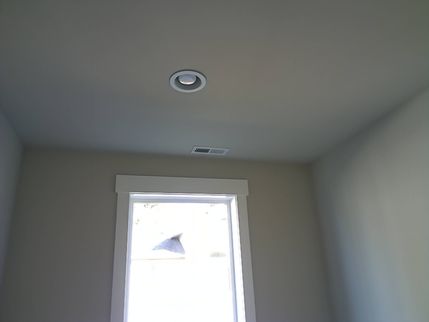
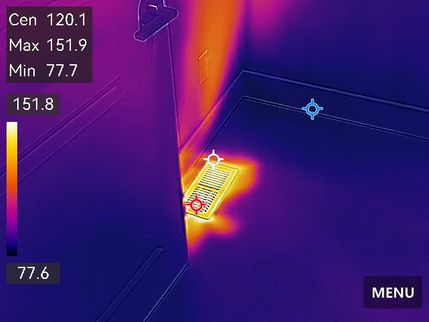
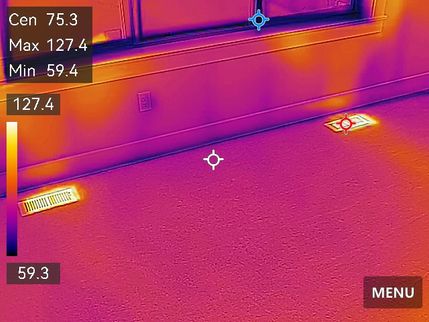
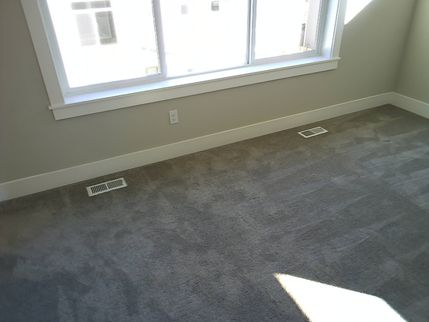
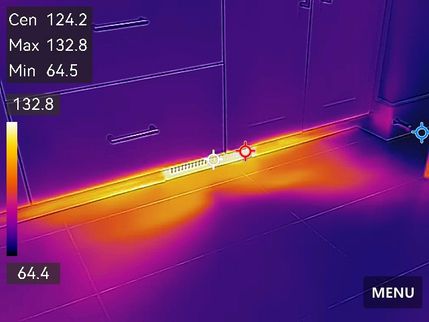
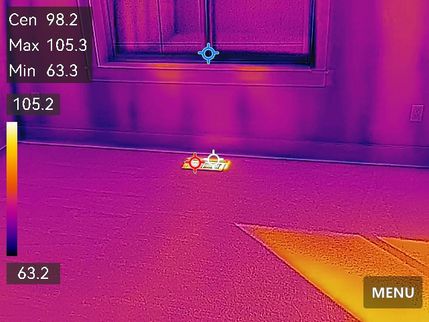
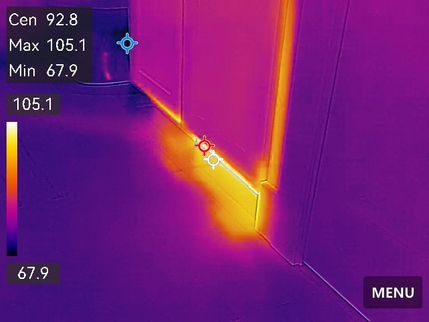
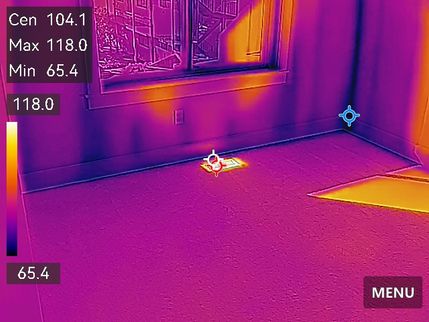
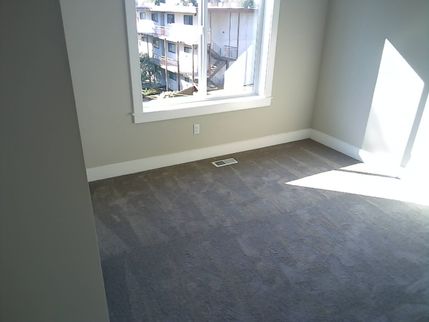
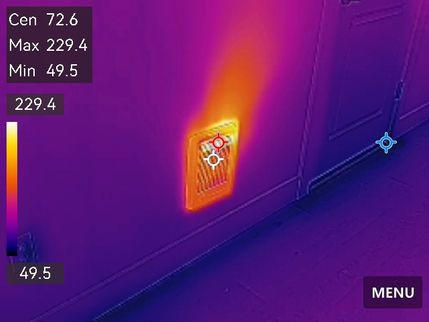
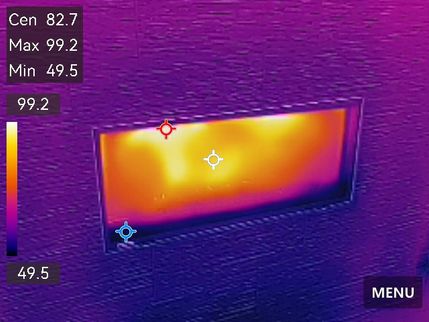
During this inspection, a thermal imaging camera was used to check walls and ceilings for thermal anomalies and also to check specific appliances for verification of proper function. All thermal images will be immediately followed by a normal picture of the exact same frame. Thermal imaging cameras use the infrared light spectrum to build a picture of the house. Experienced thermogrophers look for clues in these thermal images that could lead us to otherwise concealed water leaks or missing air or thermal barriers. In older homes, incomplete air and thermal barriers are so common, we will only report on items that look significantly deficient and are worthy of correction. This service is included with our home inspection; it is limited and is not a complete thermal mapping of the house. The use of a thermal camera is well beyond the minimum standards for a home inspection, but we offer this service because we know it is valuable and can help us help our clients by improving our inspection services. Relevant thermal images will be included in this report.
For many new construction properties, they include a one year warranty. Many owners opt to do an 11-month warranty inspection to create a list of things to ask the builder to address before their warranty expires. Some issues do not appear until different seasons, or until a house is actually lived in, so it is a good idea to have it looked at again in about a year.
Please note that mold, mold testing, and indoor air quality are beyond the scope of this inspection. That being said, any suspected mold or conducive conditions for mold that I observed will be reported on. If mold or indoor air quality is a particular concern, I recommend additional inspection by a specialist.
Radon level testing is not included as part of this inspection. While radon is a concern in many areas of the United States, according to the EPA, the Seattle area has low risk for radon levels (see EPA heat map of radon risk.) If radon levels are of specific concern, I recommend contacting a company that provides this service. Note that it takes 48+ hours to accurately measure radon levels.
As this is a newer construction building, there is a chance that building plans, permits, drainage plans, construction records, a list of sub-contractors, and warranty information may be available. I recommend trying to obtain and keep this information for your records and for future re-sale.
In new construction, expect to see minor drywall cracking and nail pops (circles where nails come loose) for about the first year of occupancy. As the moisture level in the house rises due to cooking, showering, etc, the drywall will expand slightly, causing these cosmetic blemishes to occur. Many builders provide a warranty to come address all these cosmetic blemishes about a year after moving in.
This is a generic life expectancy chart for many different materials in a house. Please note that many of these products were not present in the inspected house, however this list contains a lot of good information for homeowners to keep on general home maintenance.
Grounds
Grounds Overview
This section is about the lot surrounding the property. It describes adjacent entryway walkways, patios, driveways, vegetation, grading, surface drainage, and retaining walls that are likely to adversely affect the building. For multi-unit housing, like condos or townhouses, only the grounds in the vicinity of the inspected unit were examined.
Lot and Drainage
Inspected, appeared functional and in satisfactory condition at time of inspection other than notes, if any, below.
Site Description: Relatively Level
Downspout Discharge: Below Grade
Siding Clearance to Grade: Standard
While performance of lot drainage and water handling systems may appear serviceable at the time of inspection, predicting drainage performance as conditions constantly change is impossible. Furthermore, items such as leakage in downspout/gutter systems are very difficult to detect during dry weather. Inspection of foundation performance and water handling systems, therefore, is limited to visible conditions and evidence of past problems.
Lot grading and drainage have a significant impact on the building, simply because of the direct and indirect damage that moisture can have on the foundation. It is very important that surface runoff water be adequately diverted away from the home. Areas of concern, if any, are noted in photos. Recommend monitoring the grounds, especially near the house, during the rainy season. If excess water or pooling is observed during the rainy season, further evaluation by a drainage specialist is recommended.
Downspouts were discharging into storm drains. These could be susceptible to restrictions, clogs or backups. Monitor during wet weather and improve or repair as needed. It is important to ensure roof runoff is successfully carried away from the building.
Keep 6 to 8 inches of exposed concrete foundation between the siding and the soil below. This will help protect against moisture or pest intrusion into the siding and structure.
Make sure to keep all downspouts discharging 5+ feet away from the foundation. Not doing so can cause moisture problems in the structure, or even foundation settling.
Driveways / Walkways / Flatwork
Inspected, appeared functional and in satisfactory condition at time of inspection other than notes, if any, below.
Driveway: Concrete
Walkways: Concrete
Trees and Vegetation
Inspected, appeared functional and in satisfactory condition at time of inspection other than notes, if any, below.
When landscaping, keep plants, even at full growth, at least a foot (preferably 18 inches) from house siding and windows. Keep trees away from foundation and roof. Plants in contact or proximity to home can provide pathways for wood destroying insects, as well as cause rubbing damage to siding, screens, and roofs.
Retaining Walls
Inspected, appeared functional and in satisfactory condition at time of inspection other than notes, if any, below.
Retaining Wall Material: Concrete, Block
Fences
Inspected, appeared functional and in satisfactory condition at time of inspection other than notes, if any, below.
According to Washington State inspection standards of practice, only the fencing immediately adjacent to the house and potentially impacting the structure is inspected. I observed the fence anyway, but it wasn't an exhaustive investigation. Please note that individual boards can come loose or be rotten. Depending on your use of the yard, I would recommend a more thorough investigation of the full fence line.
Exteriors, Decks, Porches, and Balconies
Exterior Overview
This section describes the exterior of the structure. It includes the exterior wall coverings, flashing, trim, exterior doors, steps, porches and their associated railings, attached decks, balconies, eaves, soffits, and fascias. The exterior envelope of a house is one of the most important and complicate systems in the structure. Its primary function is to prevent water from entering the house. For multi-unit housing, like condos or townhouses, only the exterior of the inspected unit was examined.
Siding and Trim
Inspected, appeared functional and in satisfactory condition at time of inspection other than notes, if any, below.
Siding Material: LP Smart Side, Stone
Trim Material: Wood
Parts of the exterior siding system were done using manufactured stone veneer. This is a cement-based product that is manufactured to look like natural stone. It is often used as a decorative detail on the exterior of residential construction and it is occasionally used as an extensive part of the exterior siding system. As a general guide to understanding this product, it should be installed in a fashion similar to hard-coat stucco. One critical aspect of the installation that is concealed once the installation is complete is that two layers of underlayment should be used beneath this product.
During inspection, we look for installation issues that are not consistent with the installation details provided by the manufacturer. There are many different manufacturers of this stone and they all seem to use a common installation guide from the MVMA - The Masonry Veneer Manufacturers Association. It is fairly common to find installation techniques that are not consistent with this guide. There seems to be a general lag in the industry to get installers to use this guide.
In general, concerns over installation should be in proportion to the amount of MSV that has been used and the amount of exposure. Those sections that are exposed to the weather will require careful detailing for reliable moisture control. Please see any observations in the report below regarding any specific findings here today.
The horizontally installed siding (lap siding) was not installed correctly; the butt joints were not properly sealed. The manufacture installation instructions for butt joints are below; there are several options, but the most common way I see it is having the gap caulked. For the open butt opens, there should be flashing behind them (there did not appear to be flashing, just building paper) and they should only have factory primed edges exposed (many of the edges I saw were cut, not primed or painted, see example photos.) Improper sealing will allow water to be absorbed into the siding, causing it to fail. Recommend repair by a qualified contractor.
Some areas of siding needed resealing, see photo(s.) Worn gaps in sealants are a conducive condition for rot and pests as they allow water to penetrate into, or behind, the siding. This is normally a DIY repair using exterior grade caulk, though larger gaps may need repair by a qualified contractor.
Some siding was bowing above the front door, see photo. This was a cosmetic issue only, but was fairly visible. Recommend repair by a qualified contractor.
The siding appears to be an OSB product made by Louisiana Pacific siding. Based on the age of the installation, it is likely the newer version of this siding called, Smart System. The previous version of this siding, Inner Seal, was the subject of a class action law suit regarding premature failure. This siding is not implicated in that suit and some improvements have been made to this product. However, this siding is generally unproven in this climate and may be subject to premature failure if not carefully installed and maintained. Nails should not be over-driven and if they are, they should be caulked and painted to prevent failure at exposed nails. All butt joints and the bottom lips of boards should be carefully painted and sealed to prevent failure. The siding seems to be performing well to date. Visual inspection did not find any need for repairs at this time. Monitor and keep well maintained.
Maintain all exterior finishes, caulking, and other sealants at any dissimilar material abutments and all penetrations to the walls and roof. This inexpensive task aids in the prevention of moisture intrusion and saves on expensive repairs.
Exterior Vent and Exhaust Terminations
Inspected, appeared functional and in satisfactory condition at time of inspection other than notes, if any, below.
Exterior Doors
Inspected, appeared functional and in satisfactory condition at time of inspection other than notes, if any, below.
Door Types: Solid Core
Exterior door(s) had a code for entry. Be sure to obtain the code from the seller.
Exterior Windows Frames
Inspected, appeared functional and in satisfactory condition at time of inspection other than notes, if any, below.
Materials: Vinyl
Decks, Balconies, and Porches
Inspected, appeared functional and in satisfactory condition at time of inspection other than notes, if any, below.
Deck Structure: Standard
Decking Material: Functional
Railing / Guardrail: Standard
Roof, Chimney, and Gutters
Roof System Overview
The roof is one of the major systems in a house as it is one of the primary ways that water is kept away from the structure. Especially in a climate like the Pacific Northwest, the roof condition of any structure is critical. The roofing material, flashing, and any penetrations will be inspected and any deficiencies will be documented here. For multi-unit housing, like condos or townhouses, only the roof above the inspected unit was examined.
Note: Some roofs are not safe to walk on due to slope, access, materials, or weather conditions. In those cases, Washington State's standards of practice require inspectors to observe the roof as best they can from vantage points on the ground.
Method of Roof Inspection
Drone
A drone was used to inspect the roof. The roof was not mounted due to the height and pitch making mounting of the roof dangerous. Using a drone does not provide as complete of an inspection as I could not touch the shingles or see things as clearly, but it is much better than the alternative of using binoculars from the ground. If a more thorough roof inspection is desired, I recommend contacting a roofing contractor who will have the proper safety equipment to mount a roof like this one.
Roof Materials
Inspected, appeared functional and in satisfactory condition at time of inspection other than notes, if any, below.
Roof Covering Materials: Asphalt Composition Shingles, architectural style
Approximate Age of Roof Covering: Less than 5 years
Flashings: Standard
Overlay Roof (Multiple Layers of Roofing): No
Roof flashings are used to keep a roofing system water proof where the roofing material starts, stops, changes direction or is penetrated. During inspection, I look for standard flashing techniques that could be considered normal or standard in our region. Damaged, incomplete or non-standard flashings can be a sign of an older or less reliable roofing system and may require repair. Any non-standard flashings noted during inspection will be reported on below if found.
Architectural grade asphalt shingles have a life expectancy of 25 - 30 years with good maintenance. Maintenance includes removing tree debris and cleaning moss. DO NOT use a pressure washer to remove moss as it can severely damage a roof. Instead, use a moss killer treatment (spray or powered) found at any Home Depot-type store.
Gutters and Downspouts
Inspected, appeared functional and in satisfactory condition at time of inspection other than notes, if any, below.
Downspout(s) and/or gutter(s) for the upper roof section drained directly on the lower roof section, see photo(s.) Modern building standards allow this and it is a standard practice. However, it puts more water on certain sections of the roof, and will cause the shingles below the down spouts to wear more quickly due to extra granule loss. I recommend keeping an eye on these sections as they are likely to fail from age first due to the extra use. A roofing contractor might be able to suggest alternatives to prevent the damage this setup can cause.
Keep gutters and drains cleared of organic debris to prevent downspouts from being clogged, which will cause gutters to overflow. Overflow at gutters can lead to water pooling at the foundation, which can lead to rot, pests, and even structural failure eventually.
Common Spaces and Bedrooms
Interior Areas Overview
The Interior Areas section covers areas of the house that are not considered bathrooms, kitchens, laundry rooms, garages, or areas covered elsewhere in the report. Interior areas usually consist of bedrooms, hallways, foyers, living rooms, dining rooms, and other open areas. Within these areas a visual inspection is conducted for visible damage and safety improvements.
Door Bell
Door Bell: Operated normally
Floors
Inspected, appeared functional and in satisfactory condition at time of inspection other than notes, if any, below.
Floor Slope: No significant slope observed
Walls and Ceilings
Inspected, appeared functional and in satisfactory condition at time of inspection other than notes, if any, below.
Stairs and Railings
Inspected, appeared functional and in satisfactory condition at time of inspection other than notes, if any, below.
Interior Doors
Inspected, appeared functional and in satisfactory condition at time of inspection other than notes, if any, below.
Door(s) did not latch and stay closed in the following location(s): Third Level SE Bedroom. Recommend repair by a qualified contractor.
Windows
Inspected, appeared functional and in satisfactory condition at time of inspection other than notes, if any, below.
Window Glazing: Double Pane
Interior Window Frame: Vinyl
Window Styles: Sliding
Any installed window coverings (blinds/drapes) were not systematically tested. Their operation is outside of the scope of a home inspection.
The window in the second level dining room was not latching/locking. Recommend repair by a qualified contractor.
Bathrooms
Bathroom Overview
During the inspection I operated all plumbing fixtures in bathrooms. I ran a moisture meter around toilets and tile shower enclosures to check for concealed leaks and sounded for loose tile and finishes in shower and tub enclosures. I do not test bathtub overflow drains as this risks damaging finishes around the tub. Monitor tubs while filling and avoid pushing water into the overflow. Even well-installed overflow drains can leak as the gaskets that seal the overflow will dry out over time and may no longer provide a watertight seal. Monitor plumbing after moving into a new home as testing during inspection presents less stress on plumbing than daily use. Please note that vacant homes present additional risk as it can be difficult to distinguish how the plumbing system will respond to daily use. Any defects uncovered during inspection are listed in this report.
Sinks and Cabinets
Inspected, appeared functional and in satisfactory condition at time of inspection other than notes, if any, below.
An active leak was observed from the bottom of the faucet of the second level bathroom sink (only when it was on), see photos/video. Recommend repair by a qualified plumber.
Hot and cold controls were reversed on the primary bathroom left sink with hot on the right and cold on the left, see thermal video. This is an incorrect installation. Recommend repair by a qualified plumber.
Toilets
Inspected, appeared functional and in satisfactory condition at time of inspection other than notes, if any, below.
Bathtubs / Showers
Inspected, appeared functional and in satisfactory condition at time of inspection other than notes, if any, below.
Flat surfaces in showers, see photo(s), can be problematic. Water tends to pool on these surfaces, which puts additional wear on any caulking/grout that is present. Recommend monitoring these surfaces especially closely for caulk/grout condition to prevent leaks.
Ongoing maintenance of the caulk and grout around any shower or tub is important to prevent leaking. If the caulk begins to crack or the grout begins to wear down and get thin, leaks can occur.
Bathroom Ventilation
Inspected, appeared functional and in satisfactory condition at time of inspection other than notes, if any, below.
Kitchen
Kitchen Overview
The kitchen is used for food preparation and often for entertainment. Kitchens typically include a stove, dishwasher, sink and other appliances. Any safety concerns, water leaks, or inoperable appliances will be reported. Testing the effectiveness of appliances is not part of this inspection.
Sinks and Faucets
Inspected, appeared functional and in satisfactory condition at time of inspection other than notes, if any, below.
The sink had an air admittance valve (AAV) (often called a "cheater vent") installed for venting the drain line. This is a one way valve that allows air into the drain line to assist with smooth draining (normally done by a pipe that runs up clear through the roof) but does not allow sewer gas to vent into the living space. AAVs are commonly used when adding a vertical vent pipe is difficult/impossible (like on a kitchen island sink.) However, sometimes they can stick open or closed. If the valve sticks open, sewer gas will waft into the living space. If the valve sticks closed, the drain will gurgle as it's used; the gurgling is caused by air bubbles coming back up the pipes. If either of those issues are observed in the future, it's time to replace the vent. Any Home Depot type store sells them, and removing it and installing a new one is a simple (it just screws off/on) DIY job.
Cabinets and Countertops
Inspected, appeared functional and in satisfactory condition at time of inspection other than notes, if any, below.
Ventilation Method
Inspected, appeared functional and in satisfactory condition at time of inspection other than notes, if any, below.
Vent Type: Exterior Vented
Kitchen vent filters need regular cleaning to prevent grease buildup which is a potential fire hazard. Most metal filters can be put in the dishwasher for easy cleaning.
Appliances
Inspected, appeared functional and in satisfactory condition at time of inspection other than notes, if any, below.
Refrigerator: No Refrigerator Installed
Dishwasher: Operated
Dishwasher Air Gap: Present
Range / Oven / Cook-tops: Gas Cooktop, Electric Oven
Garbage Diposal: Operated
Microwave: Operated
Microwave leak and/or efficiency testing is beyond the scope of this inspection.
All the installed kitchen appliances were tested during inspection today (exceptions, if any, are noted in this report.) The typical design life of appliances can range from 4-20 years. Some appliances such as an older electric range are simple and tend to last longer than more complex appliances such as dishwashers and refrigerators or modern appliances with circuit boards. Also, usage of appliances varies widely from house to house depending on the occupant's habits. Because of all these factors, it is impossible to predict the useful remaining life of an appliance. Appliances can also fail without any warning. Any operational defects noted will be listed in this report; however, just because an appliance turns on and runs, it does not necessarily mean is it working effectively. I was inspecting for operation of the appliances, not their effectiveness.
There are companies that offer warranties for appliances such as American Home Shield. While I do not endorse or recommend any specific warranty, I know that some home owners have been very happy with this insurance.
Laundry / Utility Room
Laundry / Utility Room Overview
This section discusses the laundry room in the house. Items inspected include visible plumbing, visible venting, and operation of any installed appliances. Testing the effectiveness of appliances is not practical during an inspection, so I was only testing to see if they would turn on and operate.
General Laundry / Utility Room Photos
Washer
Inspected, appeared functional and in satisfactory condition at time of inspection other than notes, if any, below.
No washing machine was installed.
Dryer
Inspected, appeared functional and in satisfactory condition at time of inspection other than notes, if any, below.
Power Source: Electric
Vent Type: Vented
No dryer was installed.
Recommend cleaning dryer vent at least annually as lint buildup can be a fire hazard. This is usually a DIY maintenance item, but depending on the length of the dryer vent, special tools may be required. Please note that I cannot verify how clean/dirty the vent is at the time of the inspection, so it might be due for a cleaning.
Ventilation
Inspected, appeared functional and in satisfactory condition at time of inspection other than notes, if any, below.
Ventilation Method: Exhaust Fan
Laundry room fan was operating as a "whole house" ventilation fan. This fan is designed to help cycle fresh air throughout the whole house. Most manufactures recommend operating the fan for 3+ hours a day (does not need to be consecutive) to cycle air through the house. There was a timer installed to help accommodate this.
Garage
Garage Overview
This section is about the garage in the house. Inspected items include safety features on garage doors and fire barriers between the living spaces of the house and the garage.
Garage General
Inspected, appeared functional and in satisfactory condition at time of inspection other than notes, if any, below.
Garage Door and Automatic Opener
Inspected, appeared functional and in satisfactory condition at time of inspection other than notes, if any, below.
Garage Door Type: Vinyl
Spring Type: Torsion Springs
Automatic Garage Opener Type: Belt Drive Opener
Photo Eye Sensors: Present and functioning
Auto-Reverse Sensor: Functioning properly
The photo eye sensors are sensors that project an infrared beam across the bottom of the garage door. If something breaks the beam while the door is closing, the door should automatically stop closing and reverse to prevent it from crushing something.
The auto-pressure reverse sensor should trigger when the garage door hits something while closing. It should trigger with 10 pounds of force or less. This sensor will immediately stop the door and cause it to reverse to prevent the door from crushing something.
Garage Floor
Inspected, appeared functional and in satisfactory condition at time of inspection other than notes, if any, below.
Attic
Attic Overview
This section describes any accessible attic(s.) It describes the levels insulation and ventilation. This is also an area where the structure and electrical wires are often more exposed than in the living space of the house. Any damage, such as organic growth or rodent activity, will be documented below. For multi-unit housing, like condos or townhouses, only the attic above the inspected unit was examined.
Attic Access
Attic Access Location: Third Level Hall
Photo of Hatch: Provided
Accessibility: Viewed at access
I did not crawl through the attic where there was no ramp or safe way to access the space. Crawling in the V of trusses or on top of framing risks damaging thermal barriers and ceiling finishes and is not a safe way to access an attic. Crawling through insulation crushes it which results in reduced r-values. This limited inspection of this space.
Full attic access/visibility not possible due to limited clearance in the attic and surfaces blocked by insulation.
I recommend that owner looks around the attic at least twice a year just to become familiar with what's up there, and see potential issues early. Many attic issues are a result from excess water (either roof leaks or excess humidity coming from living space) which can quickly lead to rot, mold, and pest problems. The majority of these issues can be minimized or prevented if they are caught early on.
This photo shows the location of the attic access hatch.
General Attic Photos
Roof Framing and Sheathing
Inspected, appeared functional and in satisfactory condition at time of inspection other than notes, if any, below.
Visible Roof Structure Materials: Wooden Trusses
Visible Roof Sheathing Material: OSB
Attic Insulation
Inspected, appeared functional and in satisfactory condition at time of inspection other than notes, if any, below.
Approximate Insulation Depth: 16 to 18 inches
Insulation Type: Blown Fiberglass, Fiberglass Batts
In our climate, modern building standards recommend insulation with an R-value of between 38 and 60 in the attic. Different materials have different R-values, but in general, around 12 to 14 inches of insulation is the minimum recommended in attics.
The R-value of blown fiberglass is around 2.5 per inch of depth.
The R-value of fiberglass batts is around 3.2 per inch.
Attic and Roof Cavity Ventilation
Inspected, appeared functional and in satisfactory condition at time of inspection other than notes, if any, below.
Attic Ventilation Method: Box vents, Soffit vents
Attic and roof cavity ventilation is a frequently-misunderstood element of residential construction. All roof cavities are required to have ventilation. This is primarily to reduce moisture levels in the attic, which helps prevent organic growth issues, and keeps the roofing material cooler, which extends its lifespan. The general default standard is 1 to 150 of the attic area and ideally, this comes from at least 60% lower roof cavity ventilation and 40% upper, but this is a wild over-simplifications of the subject. As a good guiding principle the most important elements for healthy attic spaces, which are traditionally insulated and ventilated are:
- Make sure the ceiling between the living space and the attic is airtight
- Ventilate consistently across the whole lower part of the roof cavity with low, intake soffit venting
- Upper roof cavity venting is less important and if over-installed can exacerbate air migration into the attic from the living space.
- Avoid power ventilators which can depressurize the attic and exacerbate air migration from the house into the attic.
For more information, please see here.
Structure and Crawl Space / Basement
Structure and Crawl Space Overview
This section is about the structure and crawl space (if applicable.) It describes the foundation, floor, wall, ceiling and roof structures and the method used to inspect any accessible under floor crawl space areas. I inspect and probe the structural components of the home, including the foundation and framing, where deterioration is suspected or where clear indications of possible deterioration exist. Probing is not done when doing so will damage finished surfaces or when no deterioration is visible or presumed to exist. Inspectors are not required to offer an opinion as to the structural adequacy of any structural systems or components or provide architectural services or an engineering or structural analysis of any kind. Despite all efforts, it is impossible for a home inspection to provide any guaranty that the foundation, and the overall structure and structural elements of the building is sound. For multi-unit housing, like condos or townhouses, only the crawl space under the inspected unit was examined.
Crawl Space Access
Access Location: No Crawl Space
Foundation
Inspected, appeared functional and in satisfactory condition at time of inspection other than notes, if any, below.
Building Configuration: Slab on Grade
Foundation Description: Concrete
Evidence of Seismic Protection: Not Visible - Modern House
Western Washington is in a seismic zone and earthquake resistance is an important consideration in any house. The basic idea behind earthquake retrofitting is to tie all the structural elements of the house together--especially bolting the house to the foundation--which makes each individual component stronger. Many older homes built prior to the mid 1970s were built without being bolted to their foundations. Without this anchorage, an earthquake can move the ground and the foundation right out from under the house. Earthquake resistance techniques continue to improve every year, but most houses from the mid 1970s and later have been constructed with mostly modern techniques.
Based on the year of construction, this structure likely had earthquake resistance devices installed. However, because all of the exterior walls were covered in drywall, I could not visually verify this. Confirming that earthquake resistance devices were installed would require an invasive inspection (cutting into the walls) by a qualified contractor.
Typical small cracks were noted in the foundation. The purpose of the foundation is to connect the weight of the building to well-compacted soils below the house so that the house does not move or settle. Concrete cracking can indicate poorly compacted soils below the house which could require a repair, but small cracks such as these can also be a sign of routine concrete shrinkage. It is not possible to determine or verify the cause of these cracks during a visual inspection. The easiest way to prevent on-going settlement in buildings is by controlling roof runoff and site drainage to promote dry soils around the foundation; wet soils do not bear weight well. This will also help to prevent moisture problems. In my experience, small cracks like these are common in concrete foundations of any age. I would monitor these cracks. If continued movement is noted, I would seek additional inspection by a structural engineer or qualified contractor to determine an accurate scope and urgency for repair to ensure a reliable connection between the foundation and well-compacted, weight-bearing soils.
Posts, Beams, and Footings
Inspected, appeared functional and in satisfactory condition at time of inspection other than notes, if any, below.
Visible Post Material: Unknown (not visible)
Visible Beam Material: Unknown (not visible)
Visible Footing Material: Unknown (not visible)
Walls and ceilings were finished/covered and most structural members were not visible. Any observed structural deficiencies will be outlined in this report, however I could not see behind these coverings.
Moisture Conditions
No water was visible or present at the time of inspection
Plumbing
Plumbing Overview
This area of the report describes the exposed water plumbing materials, main water shutoff location, water pressure, the water heater, and plumbing fixtures in living spaces.
Water Meter
Location of Water Meter: NW Exterior
This shows the location of the water meter. The first photo is the location of the box, the second photo is a close-up of the interior of the box. If the secondary water shut-off valve was visible, it is circled.
Street Supply
Inspected, appeared functional and in satisfactory condition at time of inspection other than notes, if any, below.
Water Supply: Public water
Visible Pipe Material: Plastic
Main Water Shut-off Location: Garage, Back Wall
This photo shows the location of the main water shut-off valve.
Water Pressure
Inspected, appeared functional and in satisfactory condition at time of inspection other than notes, if any, below.
Approximate Water Pressure: 85 PSI
Pressure Regulator: None noted
Water pressure was high; see photo of a water pressure gauge on an exterior hose spigot. Normal residential water pressure is between 40 and 60 PSI. Anything over 80 PSI is considered excessive. This can be hard on appliances that use water (washing machines, dishwashers, etc) and can overstrain plumbing fittings, increasing the chance of leaks. Recommend installation of a pressure regulator by a qualified plumber, and adjusting it until water pressure is below 80 PSI.
Interior Distribution Pipes
Inspected, appeared functional and in satisfactory condition at time of inspection other than notes, if any, below.
Visible Supply Pipe Materials: Mostly PEX (plastic), Some Copper
Angle stops are the shut offs located below plumbing fixtures such as sinks and toilets. These are designed so that water can be shut off locally to a fixture without shutting off the water to the entire house so that localized fixtures can be serviced and repaired or replaced. Home inspectors do NOT test angle stops during inspection as there is a risk of leakage which could cause damage to the home.
Please note that many supply pipes were concealed behind walls are were not visible during the inspection. Determination of the supply piping materials used here is an educated guess based on the materials that were visible coming out of the wall and below fixtures.
Waste Pipe and Discharge Plumbing
Inspected, appeared functional and in satisfactory condition at time of inspection other than notes, if any, below.
Discharge Type: Public sewer
Visible Waste and Vent Pipe Materials: ABS Plastic, PVC
Note that the waste piping system was mostly concealed behind finishes and not visible to inspection.
Note that when the sewage discharge type is listed here, it is listed based on public records and disclosure. It is always possible that the system is not as it is listed; for example, a property could be listed as a public sewer system when in fact it is on a private septic system. This is unlikely, but is possible.
A cleanout had a cover installed that relied on a screw through the cap, see photo. This is a common practice, but often leads to leaks as waste water will seep through the cap around the screw. Recommend replacement of the cleanout cap to one without a hole in it, and either installation of a cover that does not damage the cap, or just not installing a decorative cover over the cap.
Water Heater
Inspected, appeared functional and in satisfactory condition at time of inspection other than notes, if any, below.
Location: Garage
System Type: Tankless
Manufacturer: Rinnai
Manufacture Date: 2023
Energy Source: Gas
Expansion Tank: Present
Temperature Pressure Relief (TPR) Value: Present - Not Tested
Combustion Gas Vent: No Issues Observed
The temperature and pressure relief (TPR) valve is arguably one of the most important safety devices in a house. Should the thermostats fail inside your water heater, the TPRV allows excess pressure to "blow off," which will prevent catastrophic build up of temperature and pressure which can make water heaters explosive. I do not test the "blow off valve" during inspection as there is a risk it could stick open and testing could cause the need for a repair.
This house had hot water provided by a tankless hot water heater. Annual flushing is typically recommended for these types of water heaters to ensure safe and reliable performance. I recommend having this water heater professionally serviced annually as a part of routine scheduled maintenance. With proper maintenance, the life expectancy of a tankless water heater is 20 years.
The water heater condensate drain and TPR valve discharge tube had an air admittance valve (AAV) (often called a "cheater vent") installed for venting the drain line. This is a one way valve that allows air into the drain line to assist with smooth draining (normally done by a pipe that runs up clear through the roof) but does not allow sewer gas to vent into the living space. AAVs are commonly used when adding a vertical vent pipe is difficult/impossible (like on a kitchen island sink.) However, sometimes they can stick open or closed. If the valve sticks open, sewer gas will waft into the living space. If the valve sticks closed, the drain will gurgle as it's used; the gurgling is caused by air bubbles coming back up the pipes. If either of those issues are observed in the future, it's time to replace the vent. Any Home Depot type store sells them, and removing it and installing a new one is a simple (it just screws off/on) DIY job.
Water Temperature
Approximate Water Temperature Measured During Inspection (Fahrenheit): 119
Hose Spigots
Inspected, appeared functional and in satisfactory condition at time of inspection other than notes, if any, below.
Hose spigot(s) was not functioning, see photo(s.) Most hose spigots have a shut-off valve somewhere in the house, so it is likely that a shut-off valve is just shut somewhere, which can be opened as a DIY repair. If no shut-off valve can be found, further evaluation and repair by a qualified plumber may be needed.
Sewer Scope
Sewer Scope of Sewer Lateral
Inspected, appeared functional and in satisfactory condition at time of inspection other than notes, if any, below.
Sewer Scope Access Location: First Level, Bottom of Stairs
Sewer Lateral Materials: ABS (black plastic), SDR 35 (green plastic)
This is the video of the sewer scope.
This is a photo of where I accessed the sewer line for the sewer scope.
Electrical
Electrical Overview
This section is about the electric system in the house. It includes the amperage rating of the service, the location of the main disconnect, the location of any sub panel(s), the presence of solid conductor aluminum branch circuit wiring, and wiring methods. Inspectors are required to inspect the visible portions of the service drop from the utility to the house, the service entrance conductors, cables and raceways, the service equipment and main disconnects, the service grounding, the interior components of the service panels and sub panels, the conductors, the over-current protection devices (fuses or breakers), ground fault circuit interrupters, and a representative number of installed lighting fixtures, switches, and receptacles.
Electric Service
Inspected, appeared functional and in satisfactory condition at time of inspection other than notes, if any, below.
Service Entrance Location: East Exterior
Service Entrance Description: Below Ground
Meter Base Rating: CL200 (up to 200 amp service)
Measured Voltage: 240
This is a photo of the electrical service entrance, meter, and any visible service wires.
Electrical Grounding System
Inspected, appeared functional and in satisfactory condition at time of inspection other than notes, if any, below.
During a home or property inspection, every effort is made to inspect the visible components of the electrical system grounding. The grounding system is critical for safely discharging electrical surges, especially in the case of lightning strikes. There is no way in the context of a home inspection to verify the "effectiveness" of the grounding system as much of the system is not visible and there are not practical tests one can perform in the way we can test a furnace or a plumbing fixture. However, there are many things that can lead me to recommend further evaluation of the grounding system by a licensed electrical contractor and they will be documented in the observations below if discovered.
Electrical Bonding System
Inspected, appeared functional and in satisfactory condition at time of inspection other than notes, if any, below.
Visible Bonding Locations: No bonding observed on Gas Pipes, Non-metallic water pipes
During the inspection, I attempt to visually document electrical system bonding. There is no way in the context of a home inspection to verify the "effectiveness" of system bonding. All metallic systems (metal water pipes and metal gas pipes) in the building are required to be "bonded" (connected) to the building's electrical grounding system. Bonding creates a pathway to shunt static charges (that would otherwise build up on the system) to earth, and to provide a pathway to trip a breaker in the event that these bonded metallic components became energized.
The water pipes were primarily non-metallic so no bonding was needed.
No bonding connections were observed on the gas pipes. This is an important safety feature to ensure safe control of stray voltage on metal systems in the house. Recommend evaluation by a qualified electrician.
Note: It is possible and common that the metal plumbing was bonded, but in an area that was not visible during a non-invasive visual inspection.
Branch Wiring
Inspected, appeared functional and in satisfactory condition at time of inspection other than notes, if any, below.
Visible Wire Material: Copper, Multi-strand Copper, Multi-strand Aluminum
Visible Wiring Type: Non-metallic sheathed cable (commonly called Romex. This is modern wiring.)
Electrical Panel
Inspected, appeared functional and in satisfactory condition at time of inspection other than notes, if any, below.
Main Electric Panel Location: South Exterior
Main Panel Amperage: 200 amps
Main Electrical Shut-off Location: By Meter
Photos of the electrical panel are provided for context.
I could not inspect the interior of the main electrical panel because a security tag had been installed on the box. Recommend inspection of the interior of the box by a qualified electrician or inspector when it is made available.
The main electrical panel was technically just a single breaker mounted on the outside of the house, serving a sub panel located in the living space. The sub panel had all the breakers for the living space, and can be operated just like a normal electrical panel. This is a standard installation in new construction.
Sub Panel
Inspected, appeared functional and in satisfactory condition at time of inspection other than notes, if any, below.
Sub Panel Location: Garage
Sub Panel Amperage: 200 amps
Sub Panel Manufacturer: Square D
Outlets, Switches, and Fixtures
Inspected, appeared functional and in satisfactory condition at time of inspection other than notes, if any, below.
Inspection Method: Random Testing
Electric Receptacles: Three prong receptacles
Exterior outlet(s) was missing weather resistant cover, see photo(s.) Recommend adding a proper weather rated cover, available at any Home Depot type store, to protect the outlet. DIY repair.
Light(s) were not functioning, see photo(s.) Recommend changing the bulbs, but if that doesn't work, evaluation and repair by a qualified electrician may be needed.
GFCI Outlets
Inspected, appeared functional and in satisfactory condition at time of inspection other than notes, if any, below.
Outlets without an obvious reset are not tested for GFCI protection as I may not be able to re-engergize them after they turn off. Recommend testing the outlets in the location(s) listed below for GFCI protection using an outlet tester (like this one.) If the outlet(s) are not GFCI protected, repair by a qualified electrician is recommended.
For this house, outlets were not tested for GFCI protection in the following location(s): Laundry Room
Note: GFCI protection has become more extensive over time. The guidelines for GFCI coverage based on the year of construction is in the image below. If the house was built prior to any of these dates, there is a decent chance that coverage is not what it should be, and I may not have been able to accurately test for it.
During an inspection I test all ground fault circuit interrupter (GFCI) devices that are readily accessible. GFCIs are the electric receptacles with test and reset buttons that you commonly see around water; modern building standards require them in kitchens, bathrooms, garages, exterior outlets, or within 6 feet of a water source (like by a wet bar sink.) GFCIs are important safety devices that limit the duration of electrical shocks and have saved lives.
One GFCI outlet will protect all the outlets installed downstream from it, which can be confusing. I recommend being aware of where reset buttons are located in the house as GFCIs can trip and disable a circuit which can not be re-energized without resetting the button. I avoid testing if a receptacle or circuit is GFCI protected if it is not clear where the reset button is located. This is because reset buttons can be concealed behind stored items, so such a test risks disabling a circuit in the home.
GFCI protected outlets on the exterior reset at their respective outlets.
GFCI protected outlets in the garage reset in the garage.
GFCI protected outlets in the kitchen reset in the electrical panel.
GFCI protected outlets in the bathrooms reset in the electrical panel.
Smoke and Carbon Monoxide Detector Systems
Smoke Detector Location(s), Third Level: Hall, All Bedrooms
Smoke Detector Location(s), Second Level: Dining Room, Office
Smoke Detector Location(s), First Level: Hall, Bedroom
Carbon Monoxide Detector Location(s), Third Level: Hall
Carbon Monoxide Detector Location(s), Second Level: Dining Room, Office
Carbon Monoxide Detector Location(s), First Level: Hall
Testing of smoke or carbon monoxide detectors is not included in this inspection. Pushing the "Test" button only verifies that there is power at the detector--both for battery and hard wired versions--and does not actually test the operational workings of the detector. To test functionality of a detector, either smoke or carbon monoxide must be presented to the unit, and is outside the scope of this inspection. Because of this, I do not push the test button on smoke detectors or carbon monoxide detectors as it can provide a false sense of security.
Smoke detectors are a major safety component of a house. According to current building standards, every floor of a house should have at least one smoke detector in a common area outside of sleeping rooms, and all bedrooms should have a smoke detector inside the room.
Carbon monoxide is a colorless, odorless gas that can cause sickness, nausea and even death. The installation of carbon monoxide alarms is recommended for all homes that have fuel burning appliances such as gas or oil furnaces, gas water heaters, gas ovens and cook-tops, gas fireplaces and wood stoves. In addition, Washington State law (WAC 51-51-0315) now requires UL 2034 approved carbon monoxide alarms in all homes and condominiums being sold in Washington State. According to the law, at least one alarm should be installed outside of all sleeping areas (within 15 feet) and at least one on each floor of a residence.
Modern building standards require a heat detector in attached garages. This garage did not have one. Recommend adding a heat detector to the garage ceiling as a DIY safety improvement.
Smoke detectors are reliable for approximately 10 years before needing replacement. Carbon monoxide detectors are reliable for approximately 6 years before needing replacement. Batteries (if applicable) should be replaced in both every six months to ensure reliable performance.
Low Voltage Wiring
Low Voltage Box Location: Primary Bedroom Closet
Low voltage wiring systems are outside the scope of a home inspection, and were not tested. These include systems like speaker systems, security systems, telephone wires, ethernet wires, cable wires, etc.
This photo shows the low voltage wiring box (sometimes called the high tech wiring box.) This is often designed to be the central point where cable boxes, routers, etc can be installed. This system is outside the scope of a home inspection, so it was not tested. I recommend asking the seller how the house is wired.
Fuel Storage and Distribution
Fuel Overview
This section outlines the gas and/or oil source, and supply lines for appliances.
Gas Meter
Inspected, appeared functional and in satisfactory condition at time of inspection other than notes, if any, below.
Gas Service Entrance and Meter Location: NE Exterior
Main Gas Shut-off Valve Location: Left side of meter
Main Gas Shut-off Valve Location Rotation Direction: Quarter Turn Counterclockwise
The main gas valve at the gas meter is tight enough to require a wrench and cannot be operated by hand alone. Recommend keeping a properly sized wrench at the gas meter in case of an emergency. Wrenches for this purpose can be purchase for less than $10 (like this one.)
Consider improving the safety of the gas meter connection with a seismic detecting gas valve. These are seismic protection devices that will automatically shut off the gas in the event of an earthquake.
Fuel Plumbing
Inspected, appeared functional and in satisfactory condition at time of inspection other than notes, if any, below.
Shut-Off Valve Locations
How To: Include
Gas valves all operate with a handle that moves 1/4 turn to open/close them. If the handle is parallel to the pipe, the valve is open. If the handle is perpendicular to the pipe, the valve is closed.
This photo shows the gas shut-off valve for the gas fireplace(s.)
Both fireplace gas valves required a tool called a gas key. There was one in a kitchen drawer. Recommend having a specific spot for the key so everyone in the house can immediately find it in the event of an emergency.
Heating, Cooling, Fireplaces, and Ventilation
HVAC Overview
The heating, ventilation, and air conditioning and cooling system (often referred to as HVAC) is the climate control system for the structure. The goal of these systems is to keep the occupants at a comfortable level while maintaining indoor air quality and ventilation. The HVAC system is usually powered by electricity and/or natural gas, but can also be powered by other sources such as butane, oil, propane, solar panels, or wood.
Washington State's standards of practice require testing the HVAC equipment using standard equipment (the thermostat) if it's safe to do so. For a more thorough investigation of the system please contact a licensed HVAC contractor.
Furnace
Inspected, appeared functional and in satisfactory condition at time of inspection other than notes, if any, below.
Location: Third Level Hall Closet
Energy Source: Natural gas
Furnace Type: Gas forced air furnace, High Efficiency
Manufacturer: Trane
Manufacture Date: 2022
This house had a gas forced air furnace. A critical component to all combustion equipment like this is the heat exchanger. This is the welded clam-shell piece of metal inside the furnace that contains the products of combustion so that moisture, carbon monoxide and other products of combustion do not mix with interior air and get safely vented to the exterior. Heat exchangers on modern furnaces have an average life expectancy of 15-20 years. Unfortunately, heat exchangers are buried inside of heating equipment; they are not visible and specifically excluded from a home inspection.
Furnaces should be serviced annually to verify safe and efficient operation. With proper maintenance, the life expectancy of a furnace is 20 years.
This style of furnace will produce condensate during operating, and there was a pump to eject this moisture from the house. Because this unit was installed in the living space, where a leak could damage the building, it had been installed with a drain pan and a drip sensor to alert the occupant to any leaks that might start.
Vents and Flues
Inspected, appeared functional and in satisfactory condition at time of inspection other than notes, if any, below.
Air Filters
Inspected, appeared functional and in satisfactory condition at time of inspection other than notes, if any, below.
Filtration Systems: Disposable
Filter Location: Air Return, Third Level Hall
Filter Size (approx): 20 x 25 x 1
Air Flow Direction: Up
The air filter(s) should be inspected at least monthly and cleaned or replaced as required, typically every 3 months. Dirty filters are the most common cause of inadequate heating or cooling performance. Note the size and airflow direction before removing the already installed filter. There are two types of filters commonly used, either of which can be purchased at any Home Depot type store:
- Washable filters, (constructed of aluminum mesh, foam, or reinforced fibers) these may be cleaned by soaking in mild detergent and rising with water.
- Fiberglass or fabric disposable filters.
This photo shows the location of the furnace air filter.
Cooling Systems and Heat Pumps
Much of the equipment for a cooling system (AC or heat pump) had already been installed. Recommend asking the builder what it would take to get a cooling system installed.
Note: The only duct work was on the second and third levels, so the first level would not have any cooling.
Heating and Cooling Distribution Systems
Inspected, appeared functional and in satisfactory condition at time of inspection other than notes, if any, below.
Distribution Method: Forced Air / Ducts, Only on Second and Third Levels
Heat Source in Each Required Room: Present
Thermal images show some functioning ductwork. I use these images just to show the system was generally functioning during inspection. These are representative photos. Not every heat register is photographed, but all visible ones were viewed with a thermal camera while the furnace was running. If any did not appear to be operating, there will be a note in this report.
Localized Heat Sources
Inspected, appeared functional and in satisfactory condition at time of inspection other than notes, if any, below.
Location(s): First Level Hall and Bedroom: Electric Wall Heaters, First Level Bathroom: Electric Ceiling Heater
The electric heater in the first level bathroom ceiling was controlled with a switch. This is technically ok, but it is easy to accidentally leave the heater on. I would recommend having a qualified electrician replace the switch with a timer so the heater cannot be left on.
Recommend cleaning electric heaters every 6 months to avoid dust buildup which is a potential fire hazard. Best practices are to turn power off to the heater and use compressed air to clean the dust from the heating elements. The fan blades (if any) can be wiped or vacuumed as needed, then restore power.
Recommend keeping a buffer of at least 3 feet around electric heaters. Some can reach temperatures well over 100 degrees, and could pose a fire hazard if flammable materials come in contact with them.
Thermostat
Inspected, appeared functional and in satisfactory condition at time of inspection other than notes, if any, below.
Location(s): Central Heat: Living Room , Individual controls for each electric heater
Thermostats were not checked for calibration or timed functions.
These are example photos of the thermostats.
Gas Fireplaces
Inspected, appeared functional and in satisfactory condition at time of inspection other than notes, if any, below.
Location: Deck, Living Room
Fireplace Types: Gas Insert
Mechanical Ventilation Systems
Bath Fan Ducting: Not Visible, Ducted to exterior
Kitchen Fan Ducting: Not Visible
Laundry Room Fan Ducting: Ducted to exterior
Determining proper ventilation to the exterior from ventilation fans can be tricky as exhaust fan ductwork is often concealed behind finishes and fan terminations can be all over the house from the roof to the foundation, presenting difficulties for systematically checking every fan termination. During the inspection, every effort is made to verify proper terminations of fan vents to the exterior, but it is possible to miss something that is concealed behind finished surfaces.
Checking Out Procedure
Check Out List
Lights Off: People Still In House
Heating and Cooling Restored to Pre-Inspection Temperatures: Yes
Yes
Doors & Windows Locked: People still in house
Appliances Off / Finishing Cycle: Yes
Yes
GFCI Outlets Reset: Yes
Yes
Receipt -- The Full Report
111 Main Street Seattle, WA 98014
| Single-Family Home (Buyer: Pre-Purchase Inspection) | $625.00 |
| Sewer Scope | $250.00 |
| $875.00 | |
| PAID |
Spotlight Inspection
15833 Mill Creek Blvd
#13345
Mill Creek, Washington 98012
425.200.4166
.png)
.png)
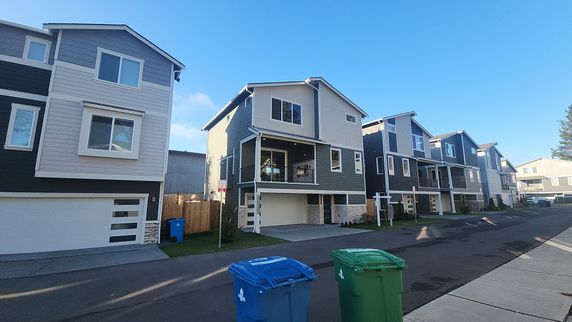
.png)
.png)

.png)
.png)
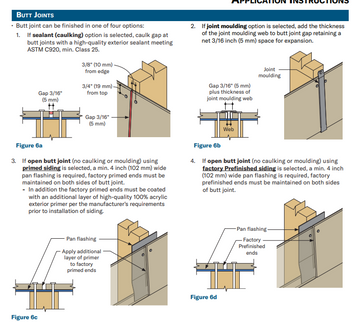
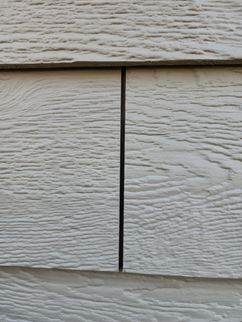
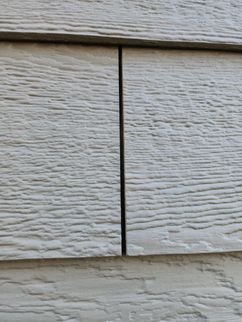
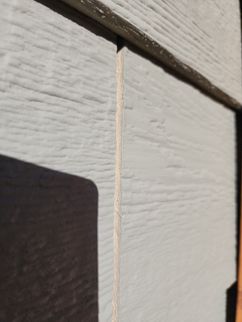
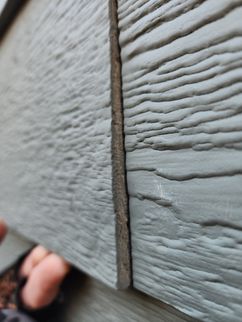
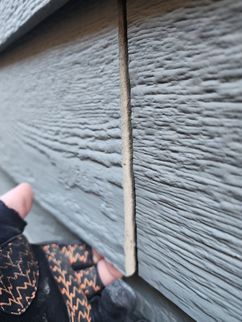
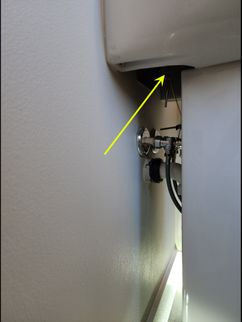
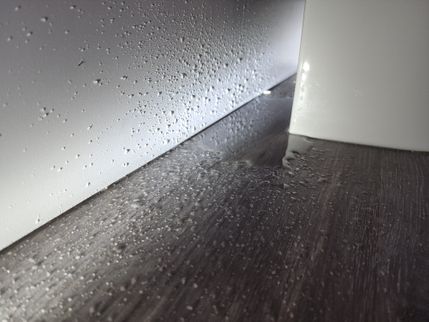


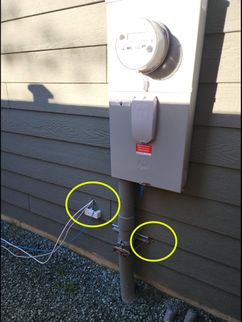
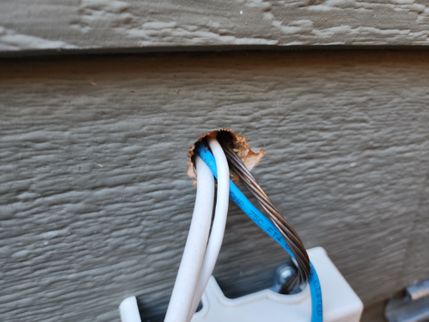
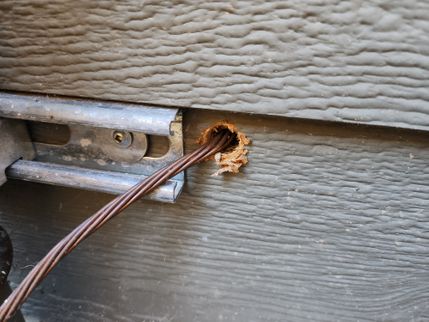
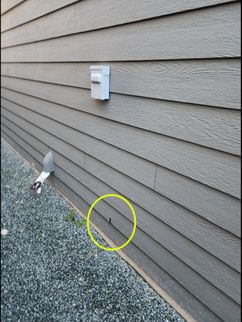
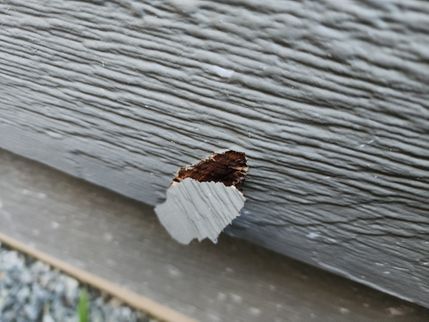
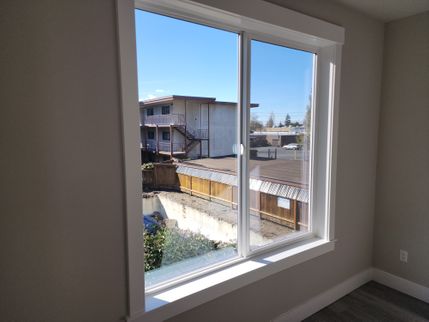


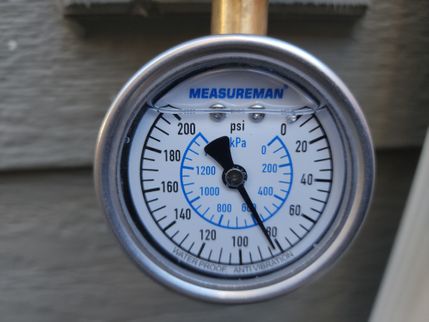
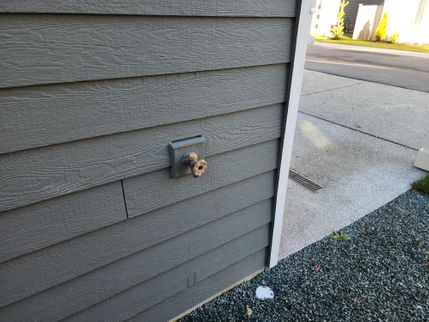
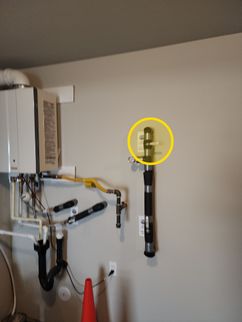
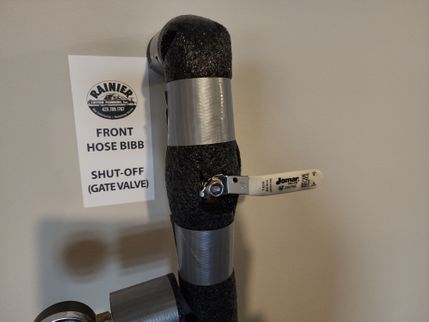
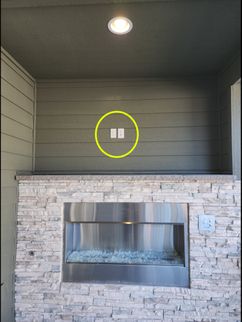
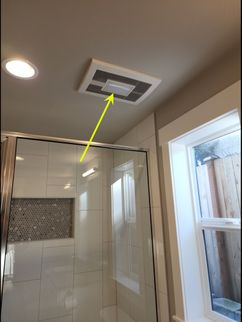
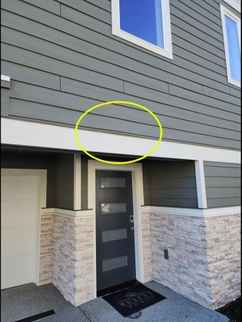
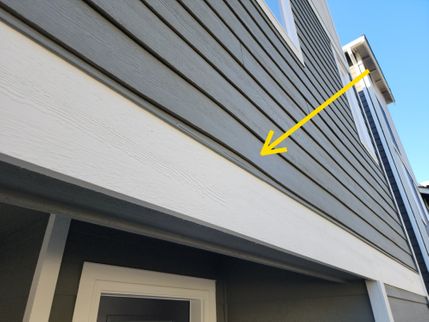
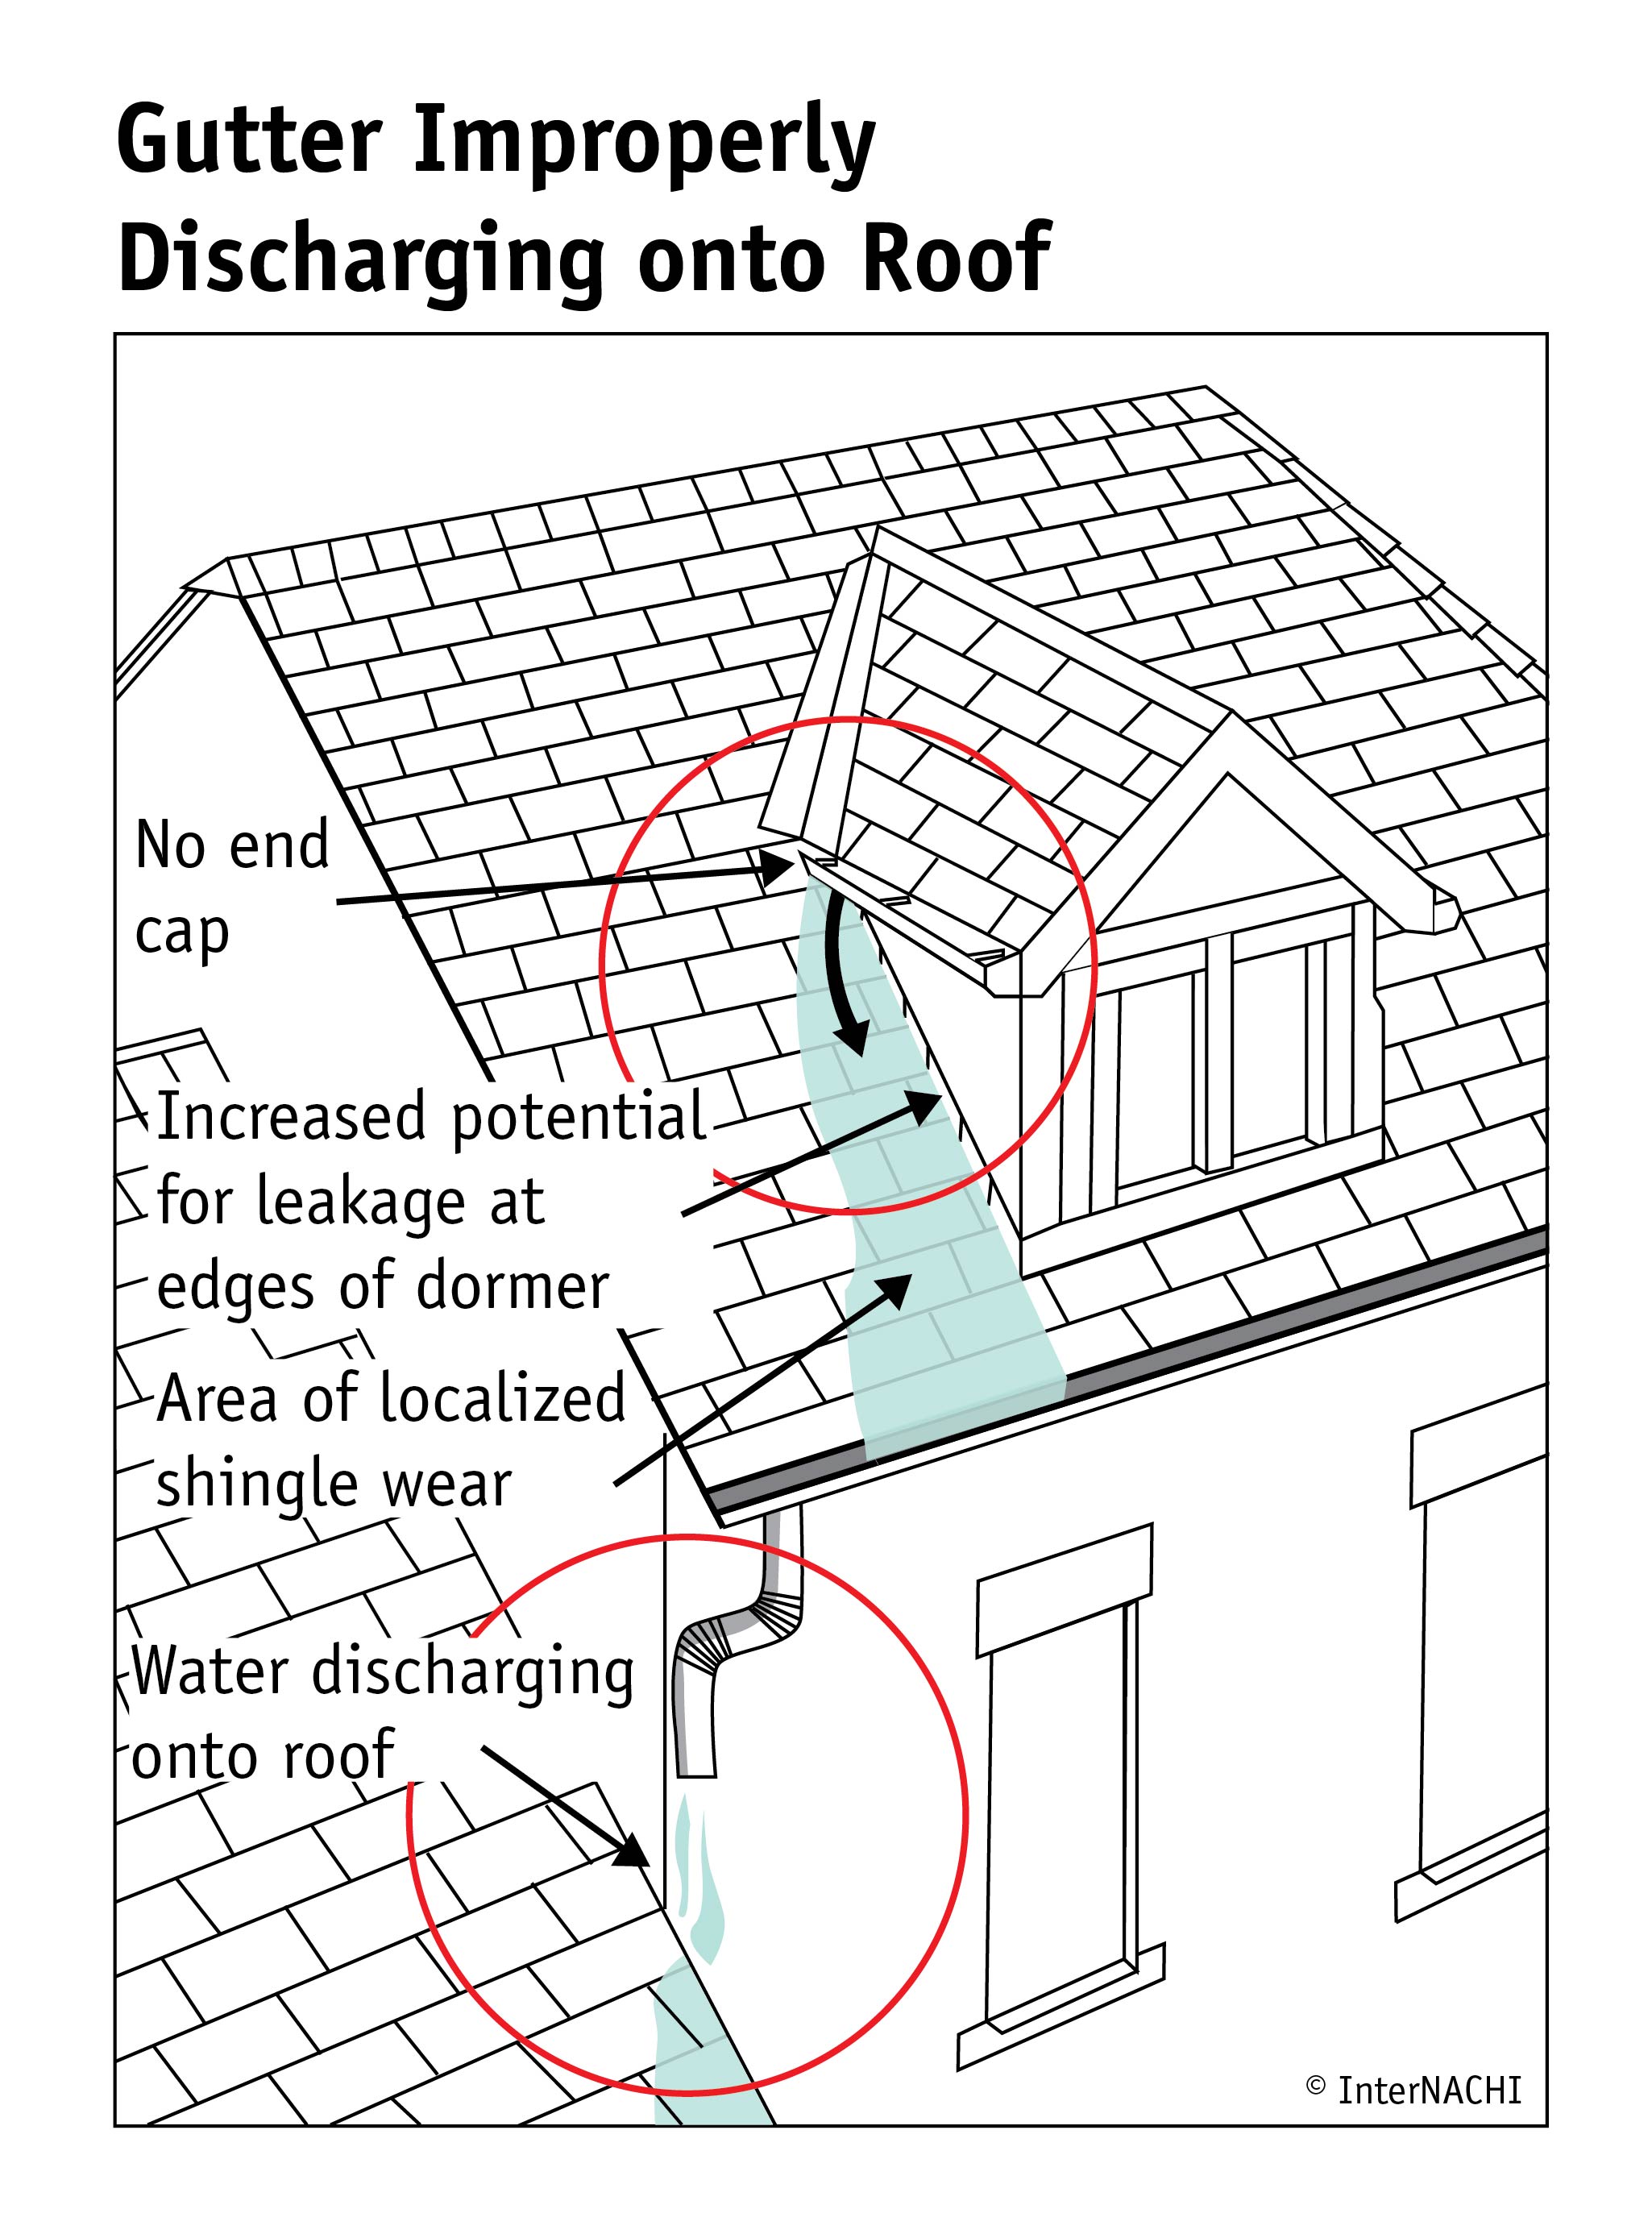
.jpg)
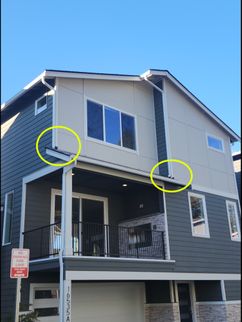
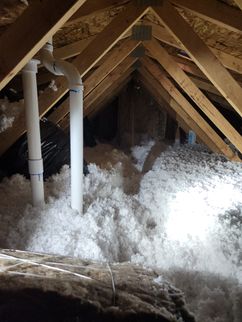
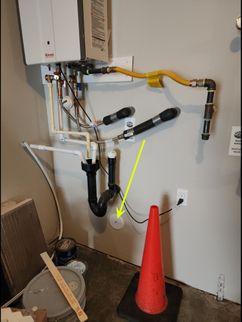
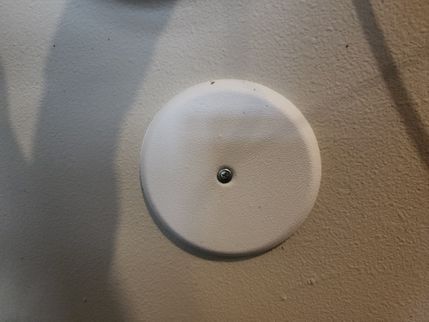
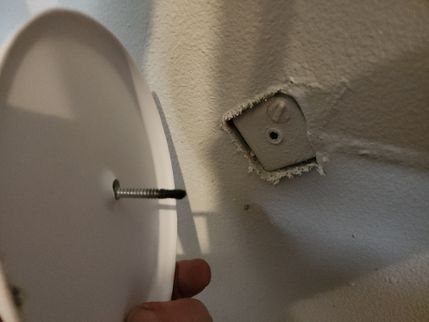
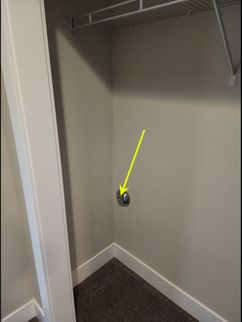
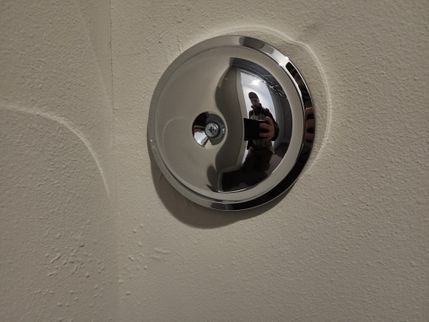
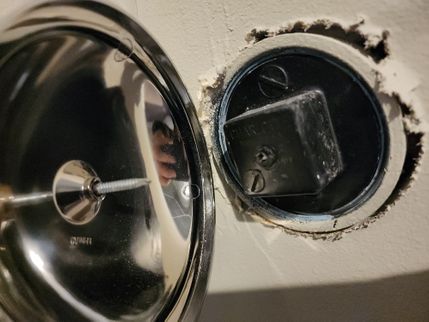
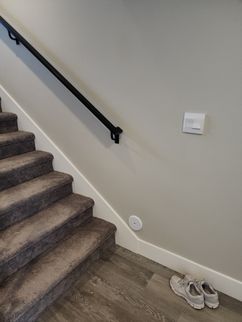
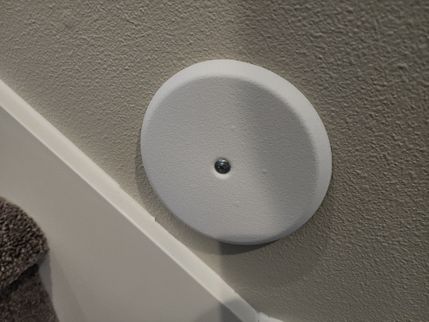
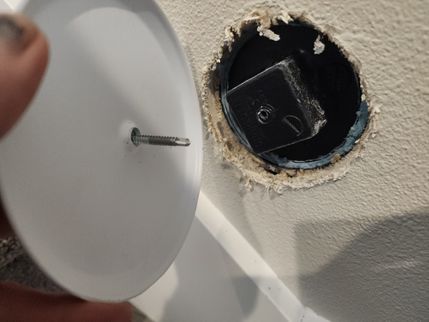
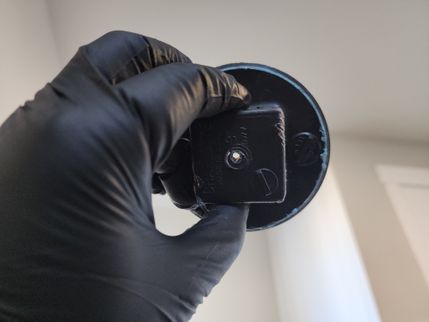
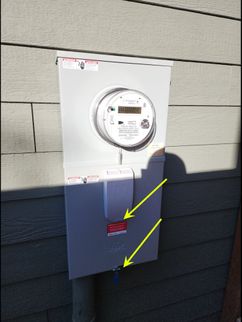
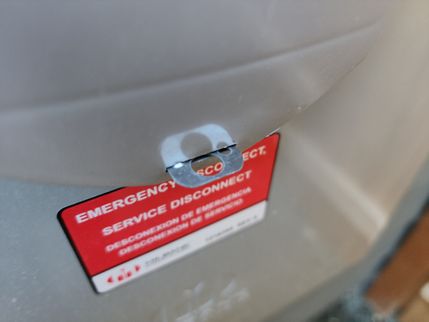
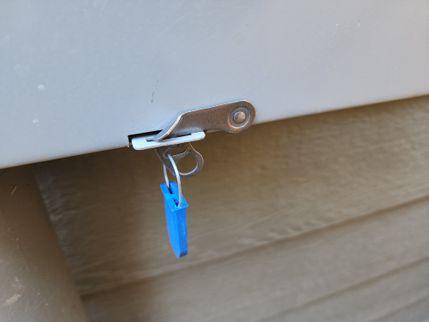
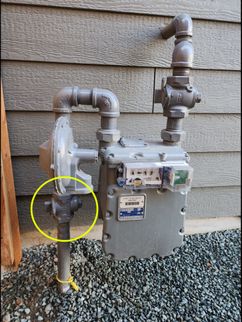
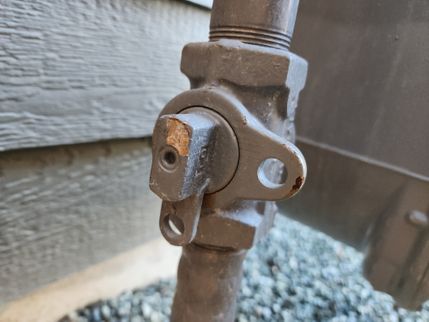
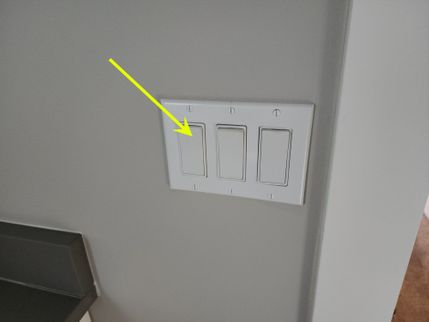
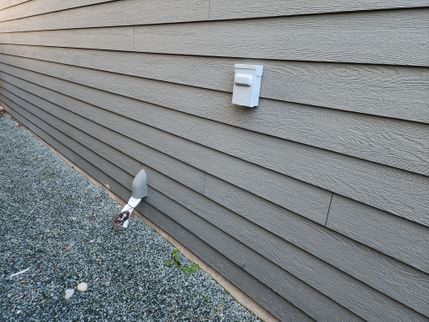
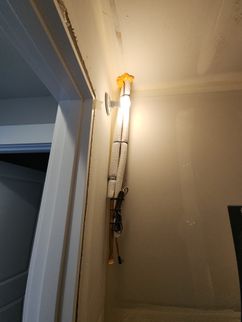
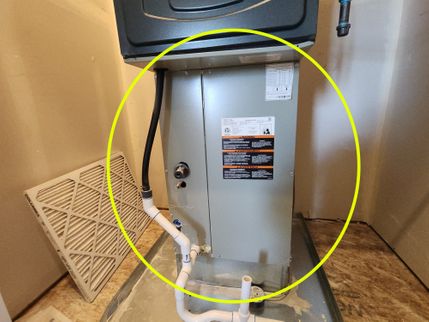
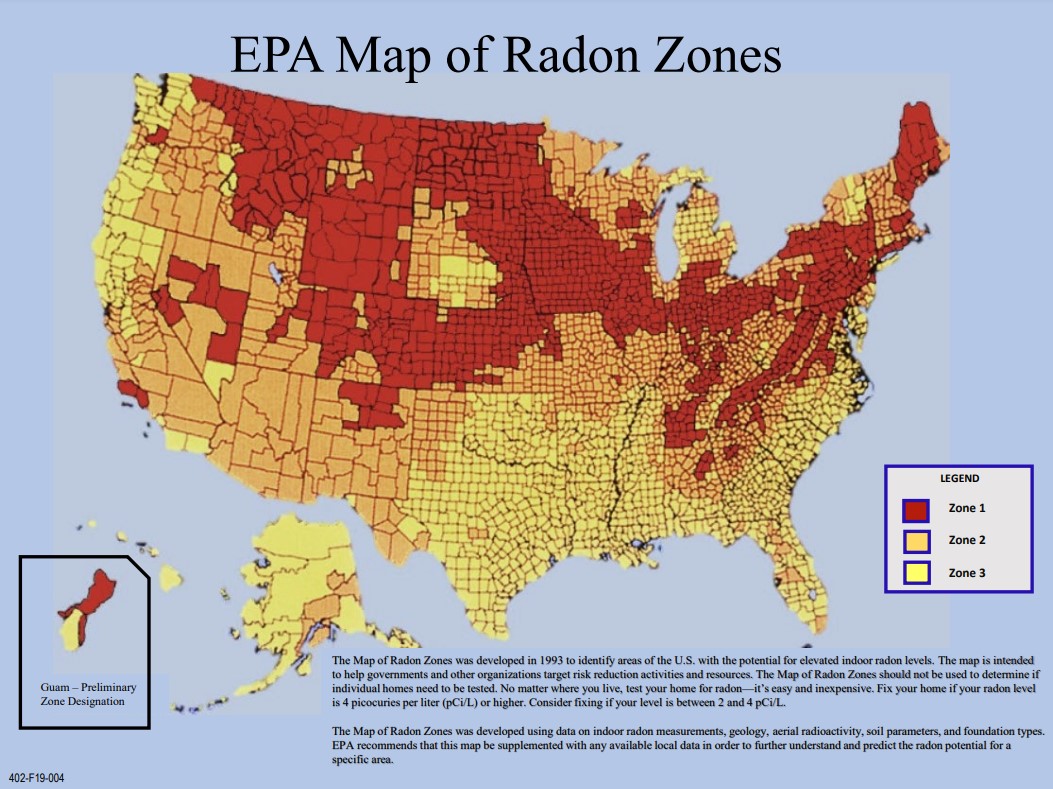
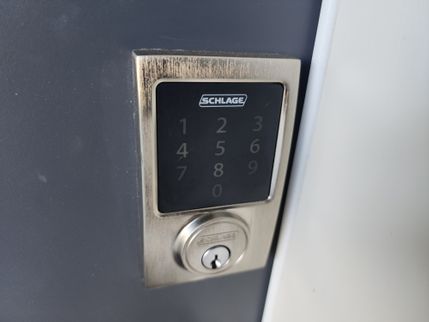
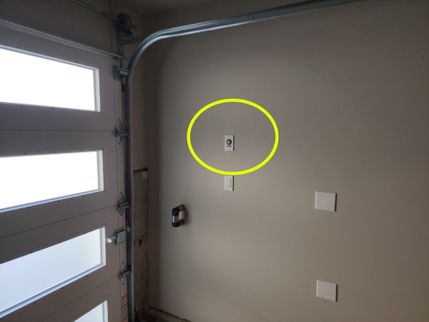
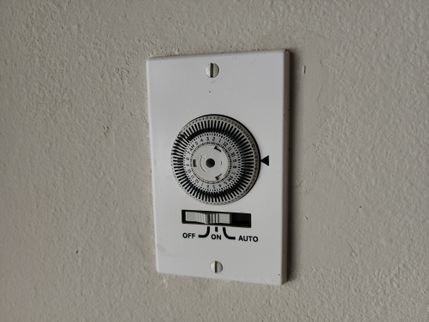
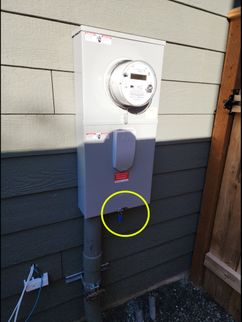
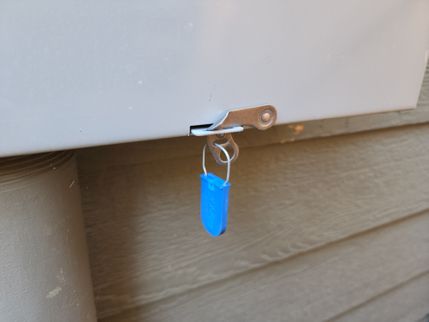
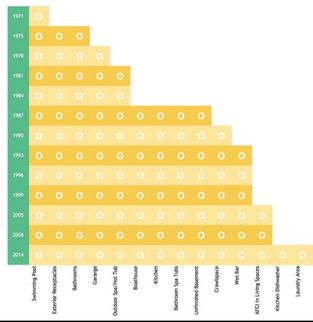
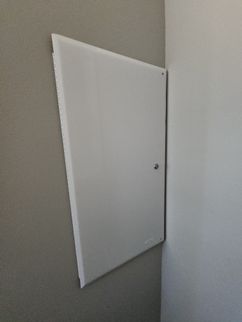
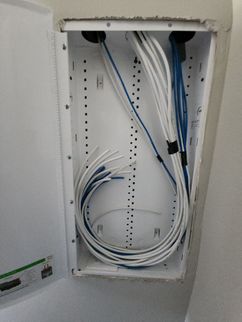
-524627.jpg)
-538706.jpg)
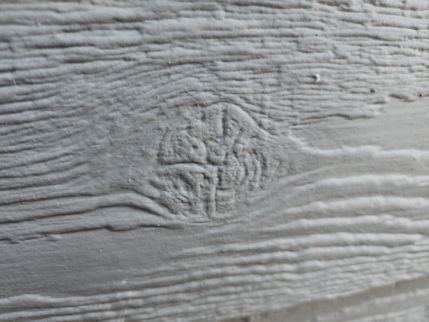
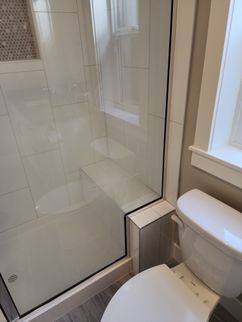
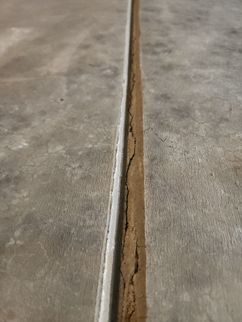
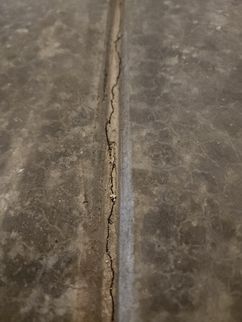
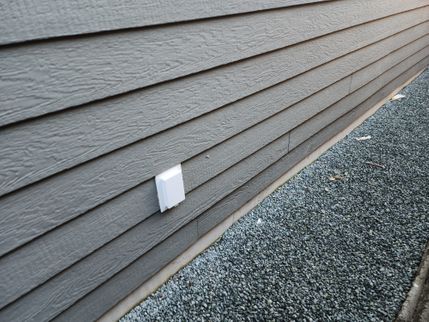
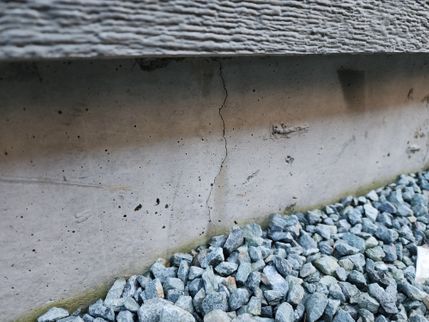
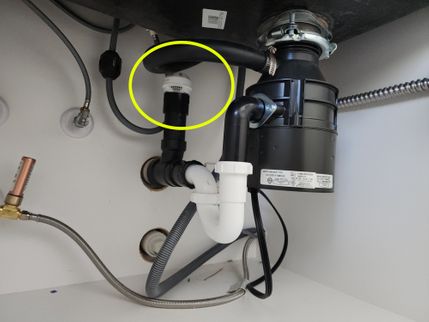
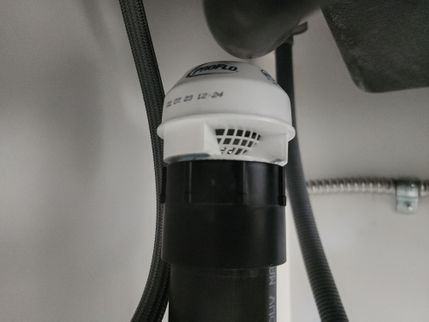
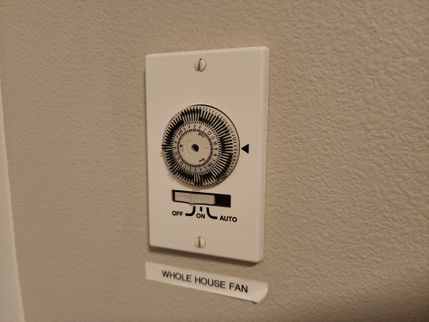
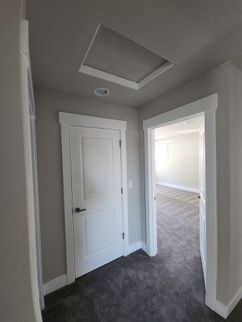
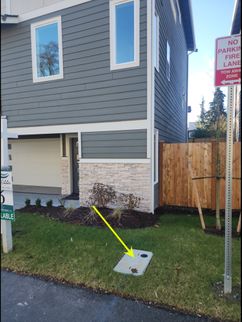
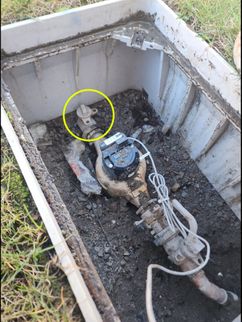
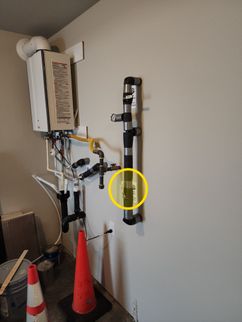
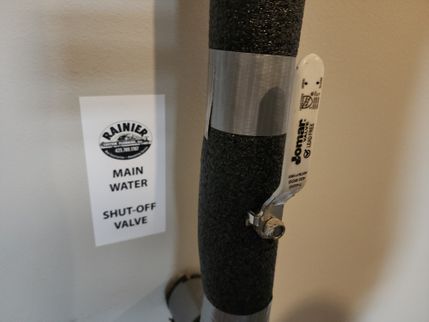
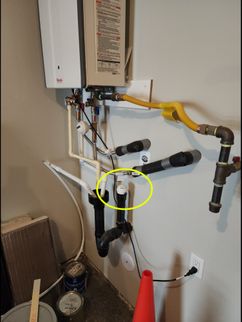
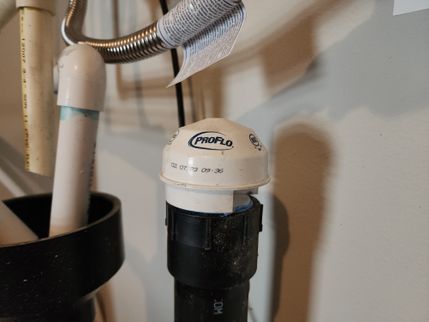
.jpg)
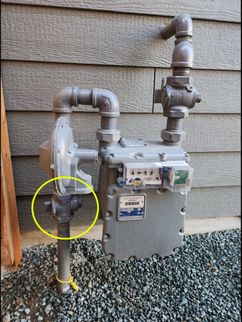
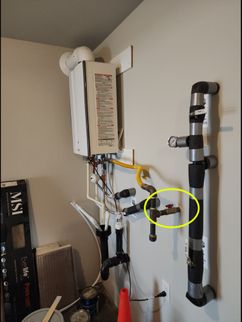
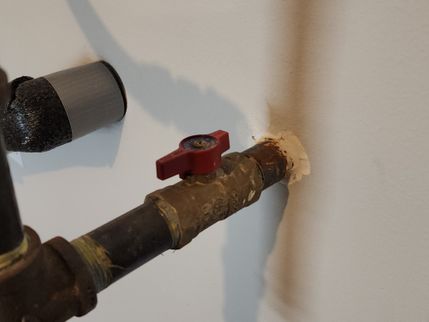
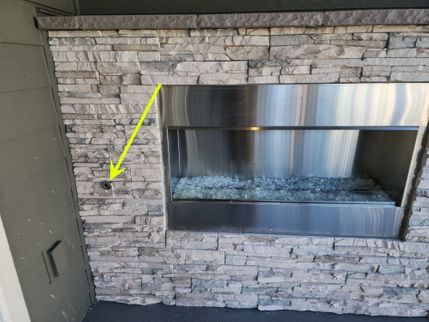
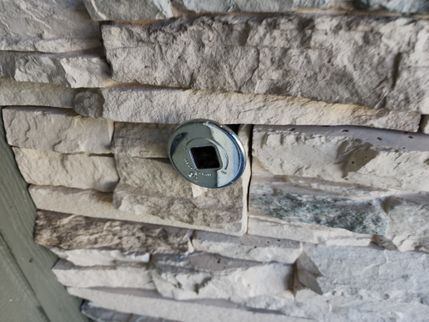
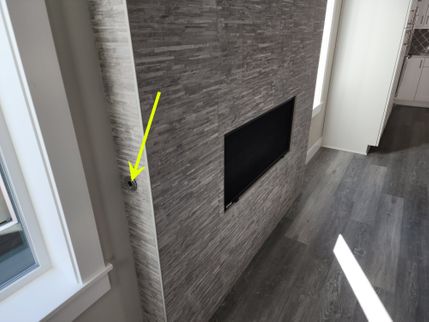
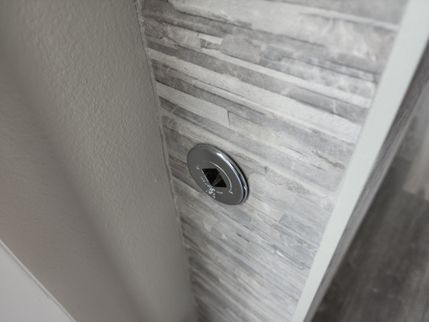
.jpg)
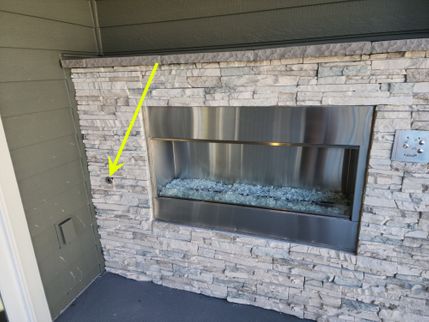
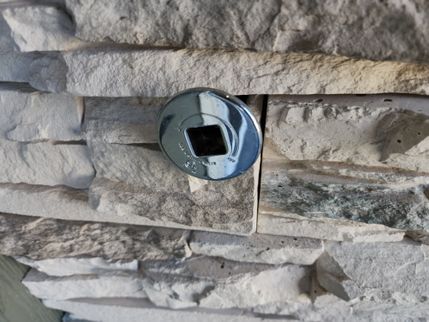
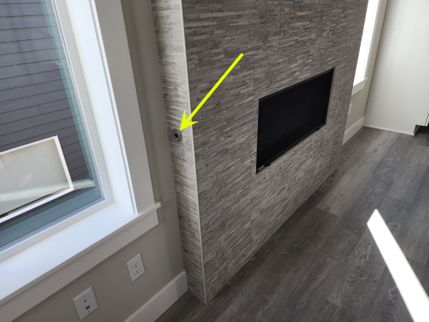
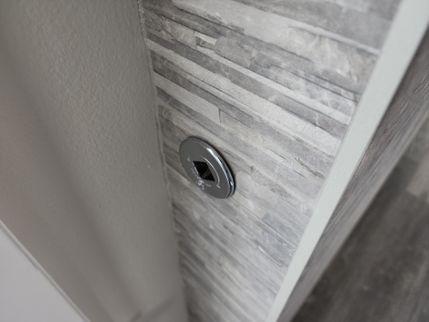
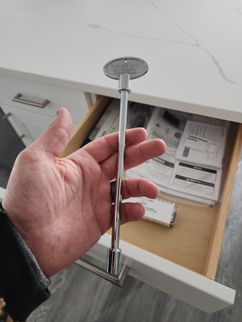
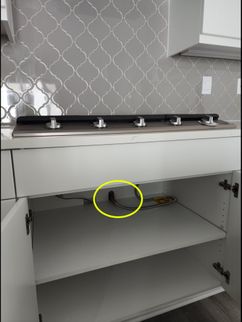
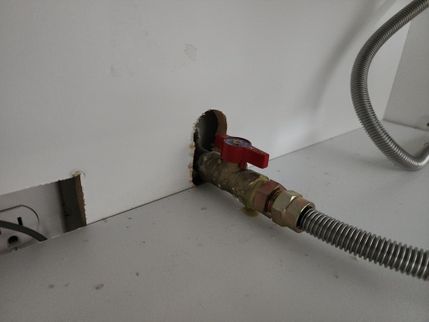
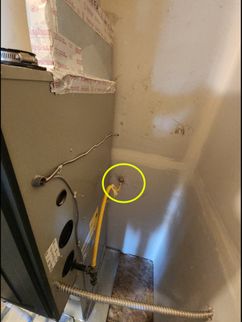
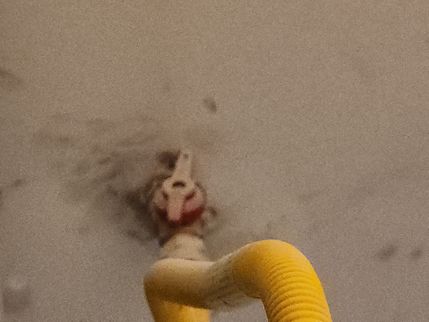
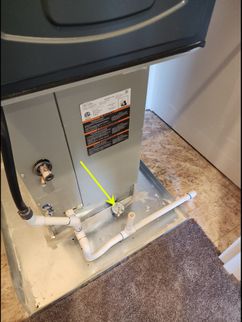
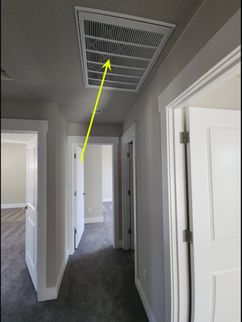
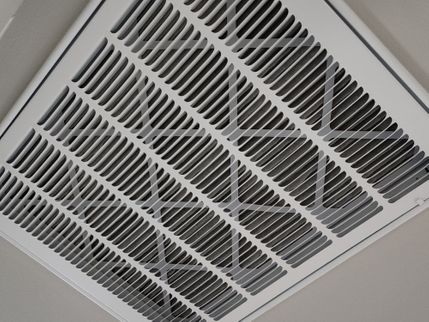
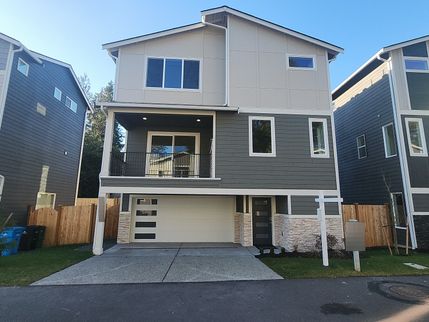
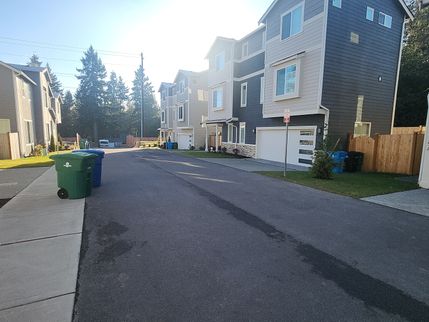
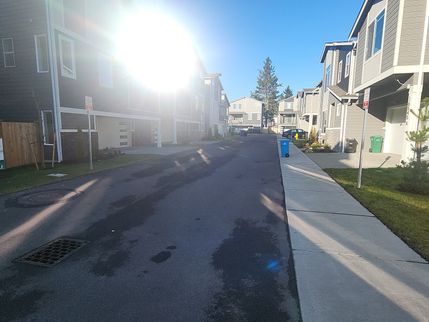
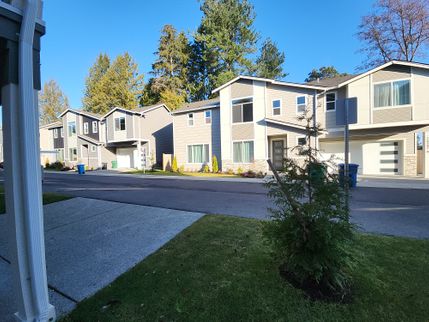
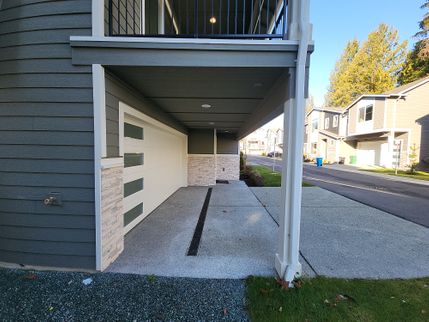
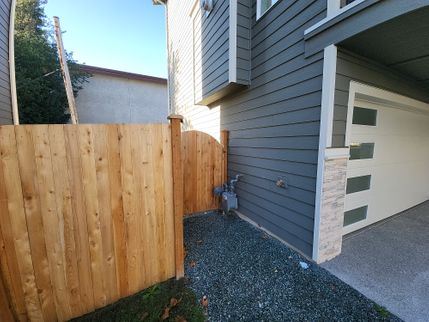
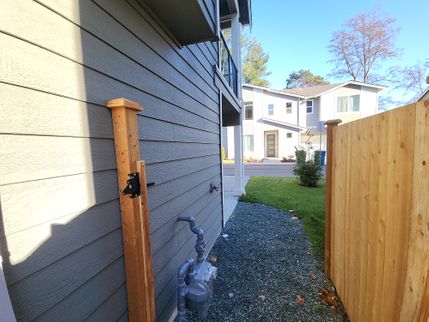
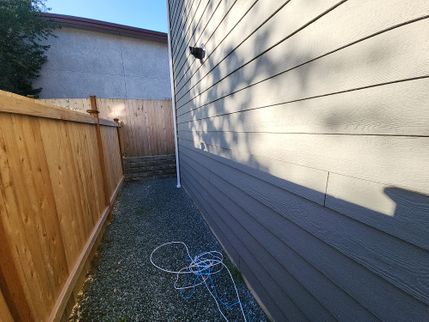
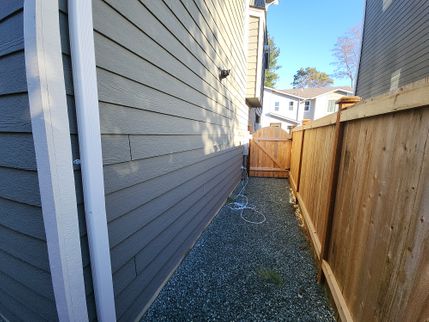
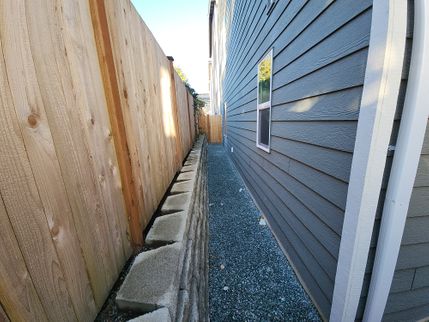
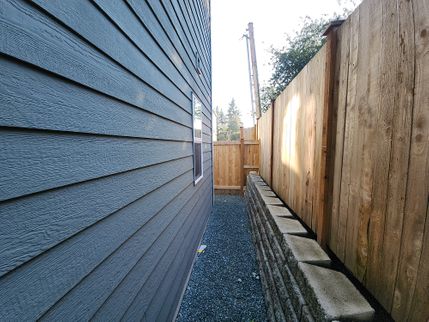
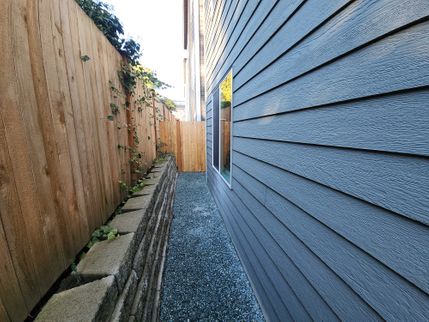
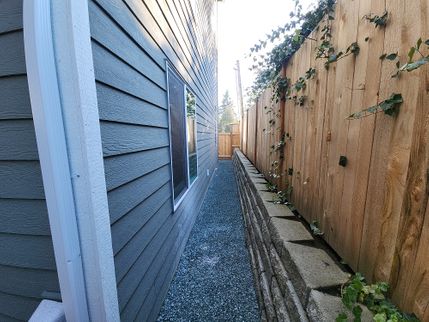
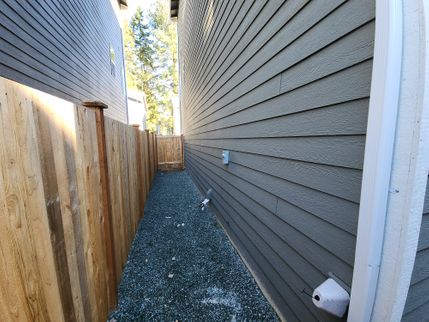
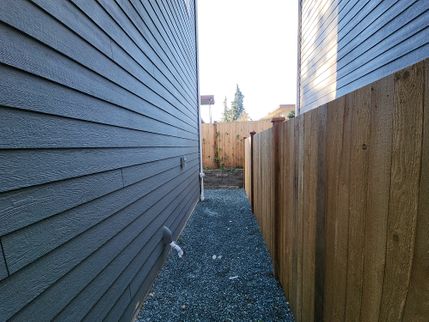
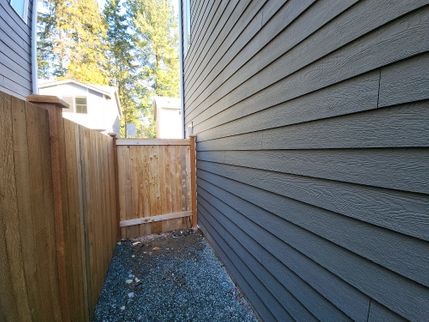
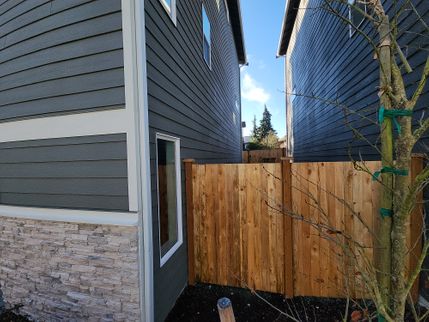
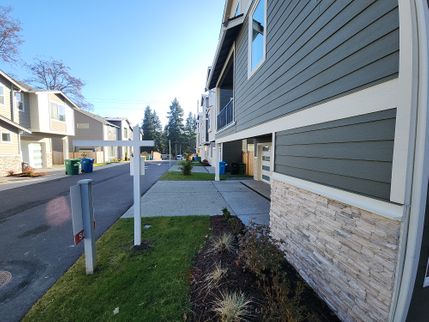
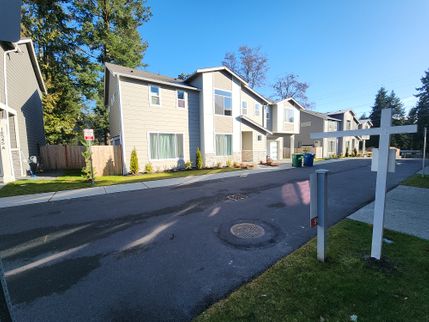
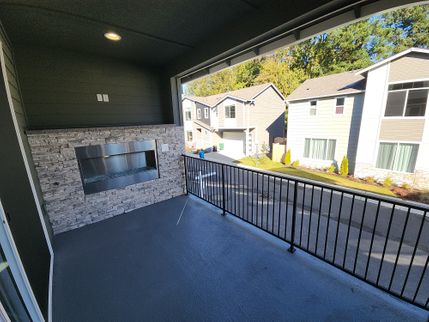
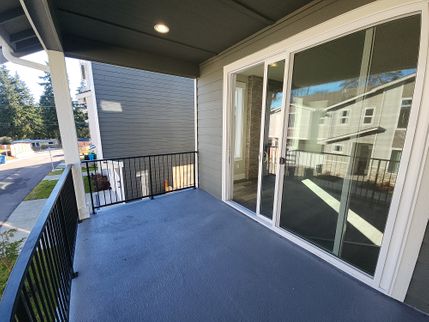
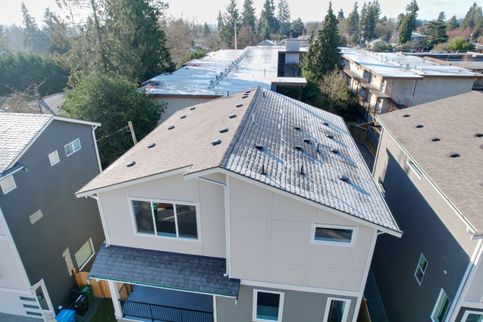
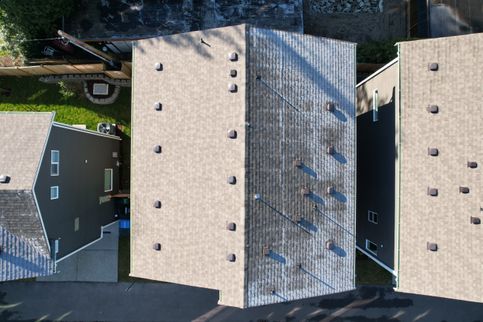
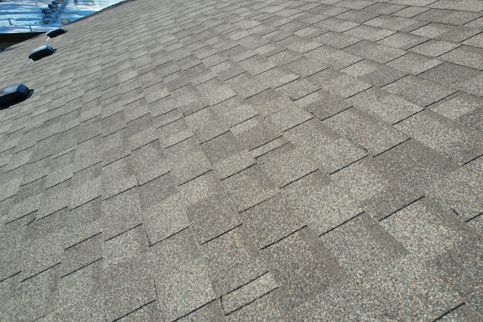
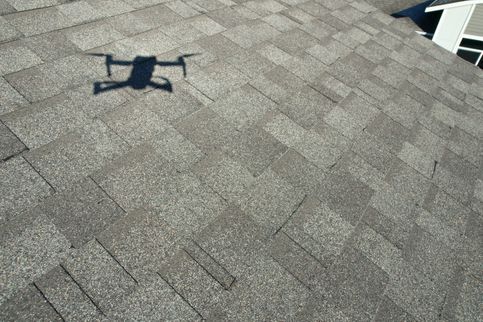
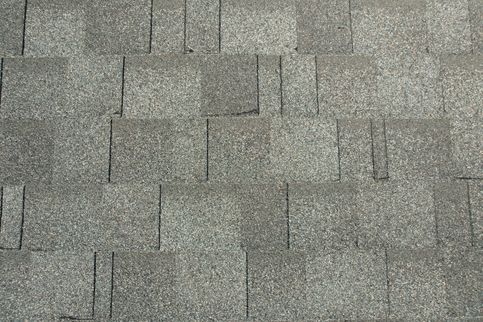
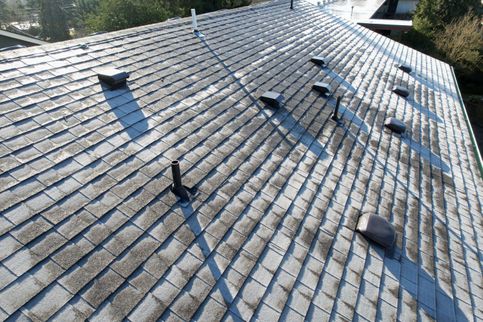
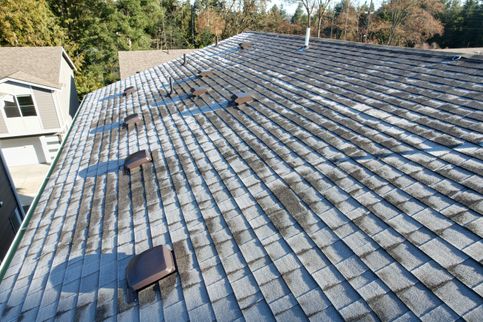
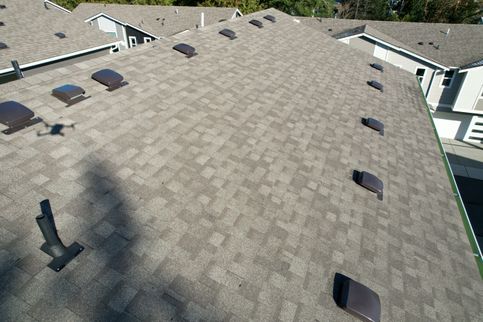
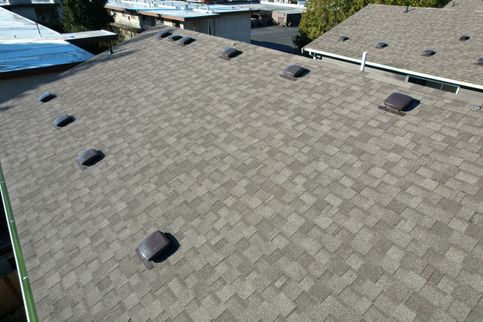
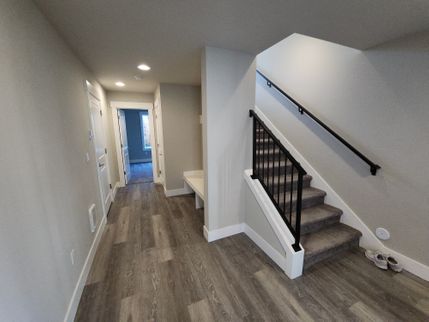
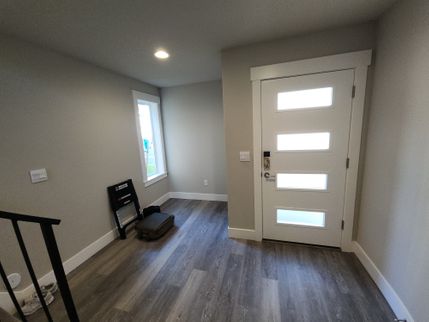
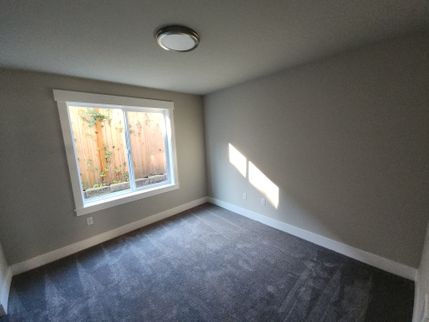
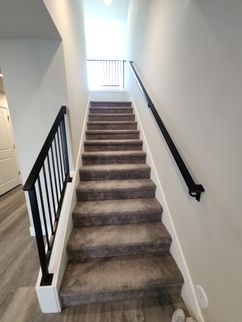
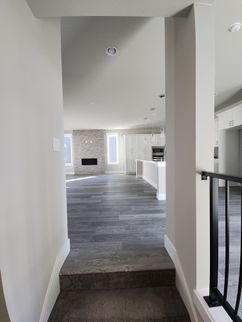
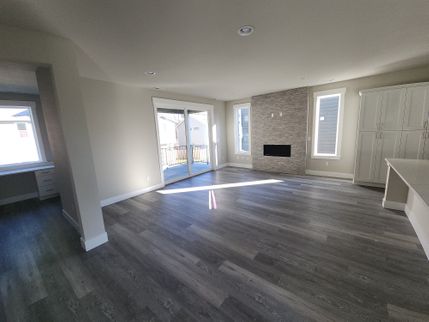
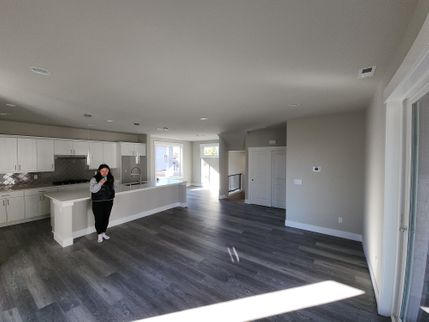
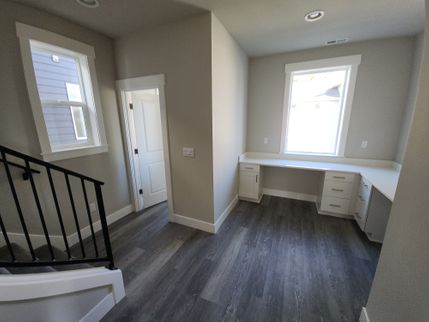
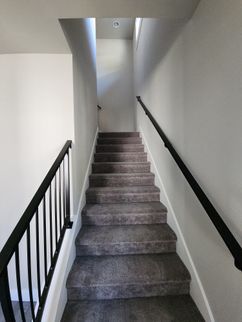
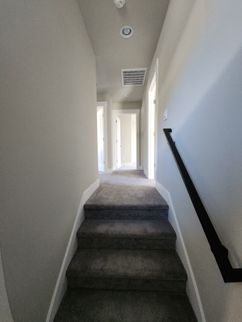
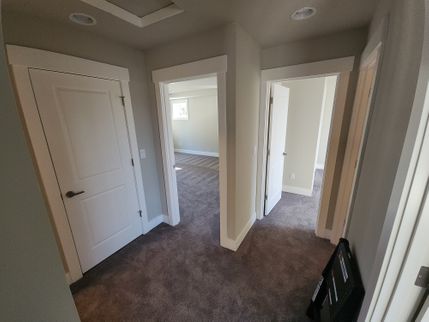
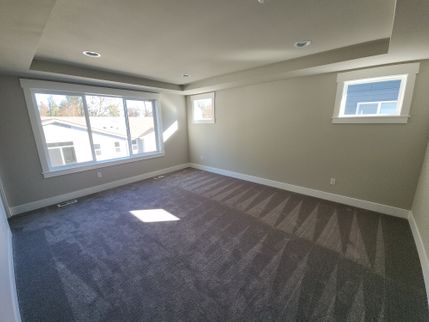
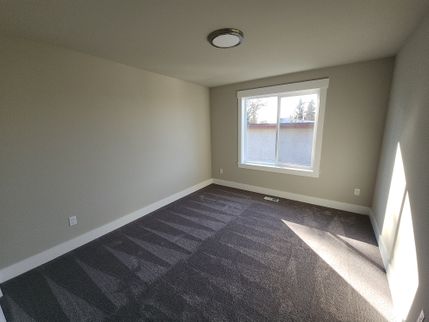
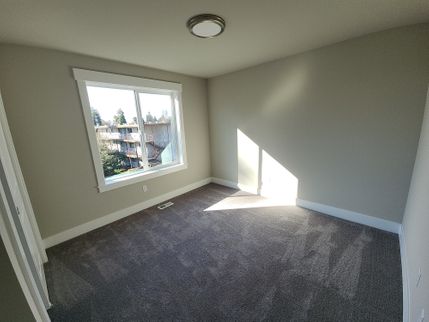
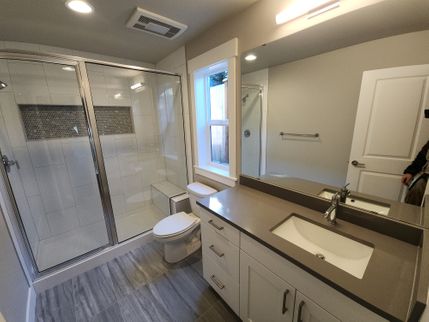
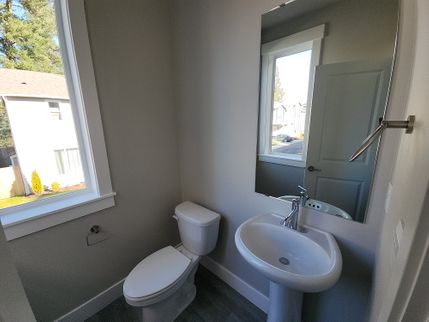
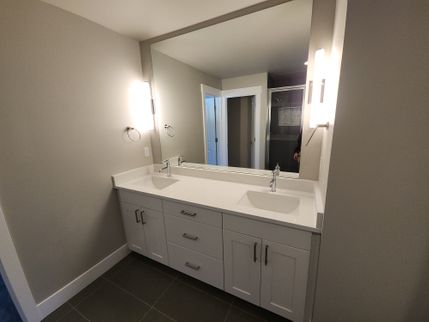
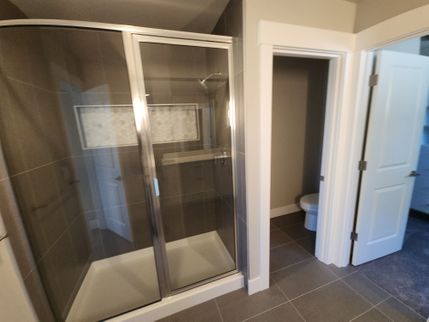
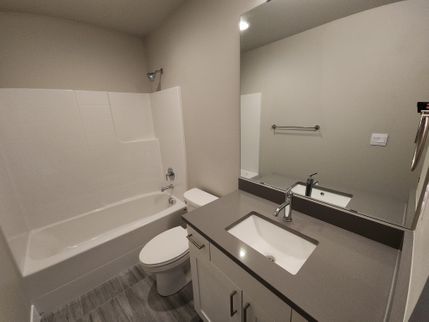
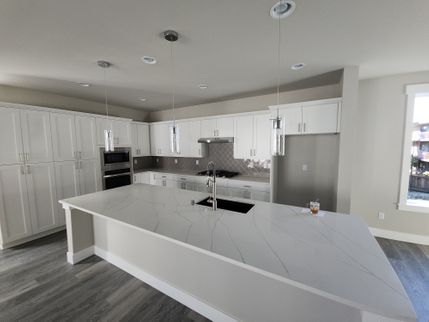
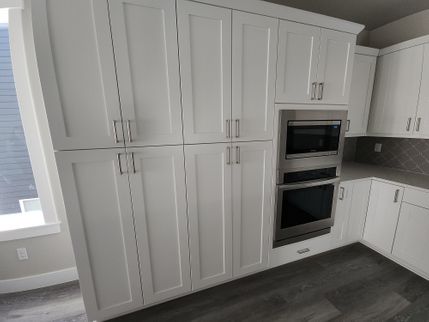
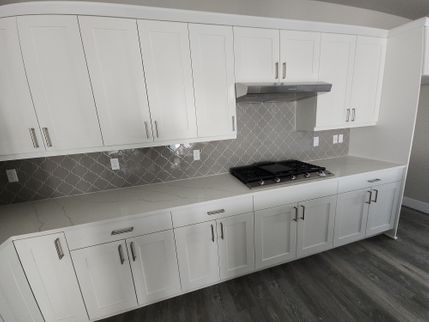
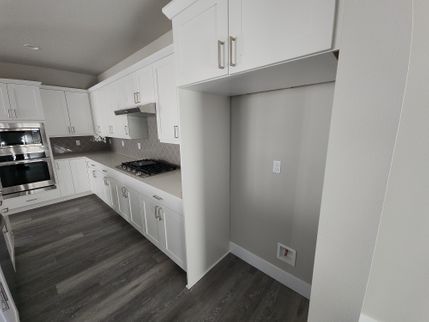
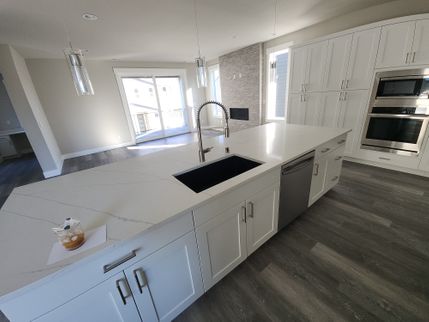
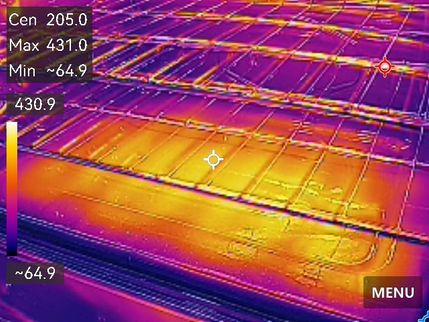
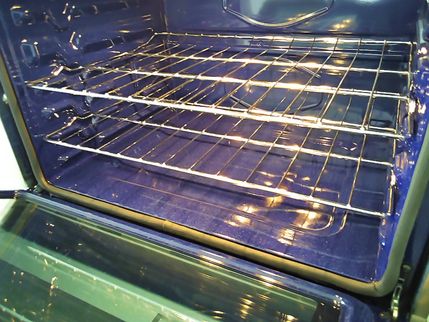
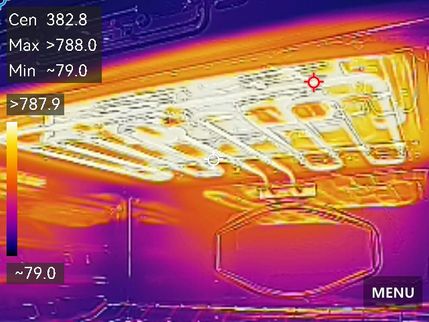
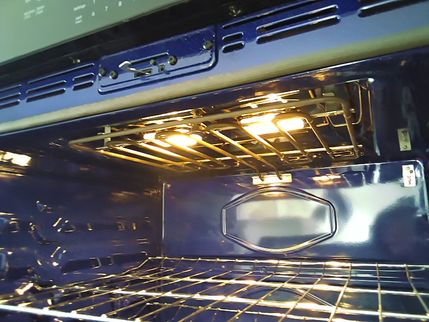
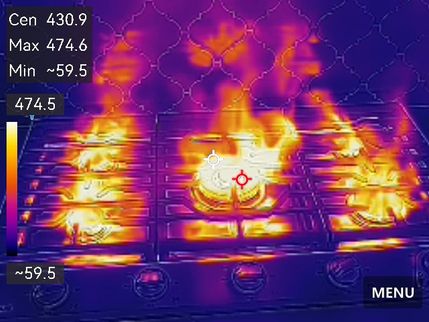
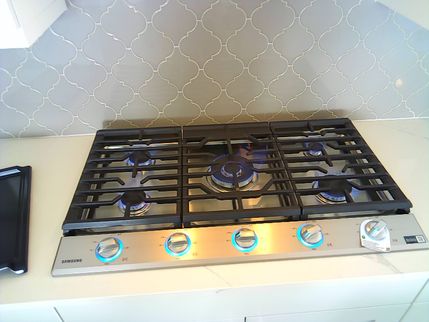
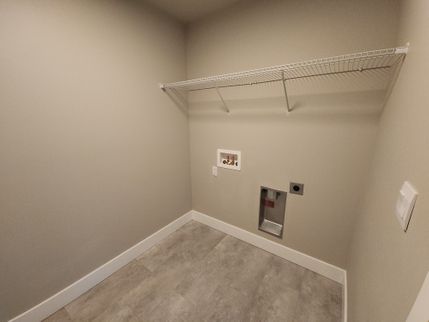
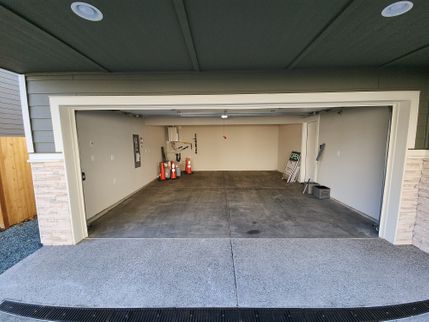
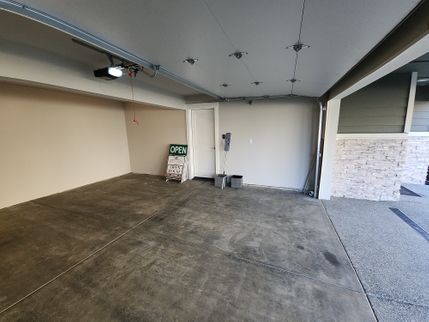
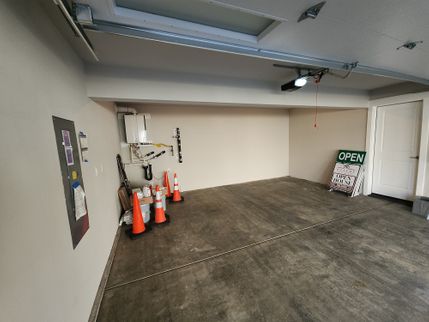
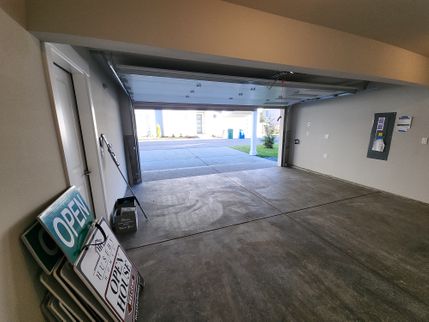
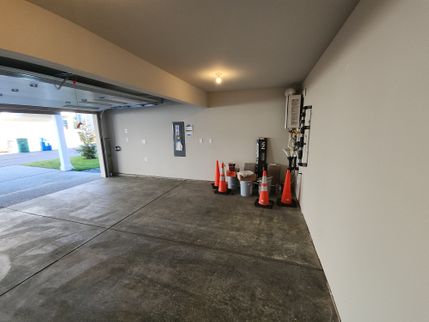
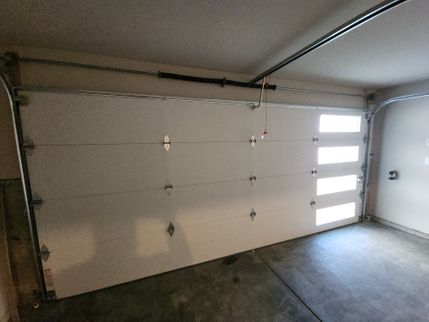
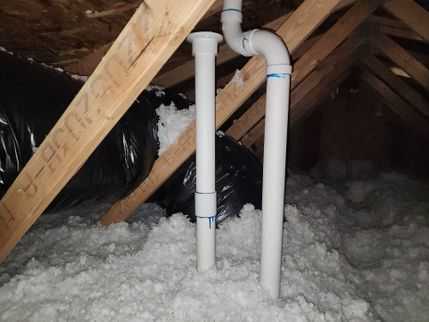
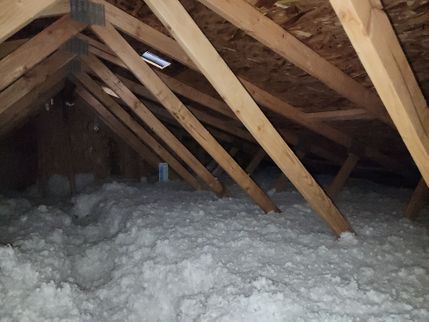
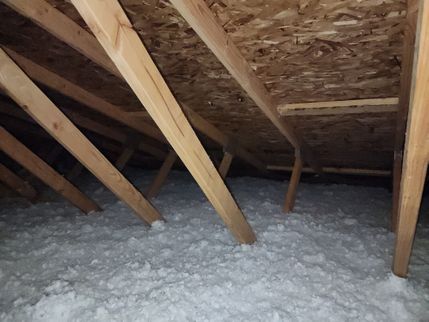
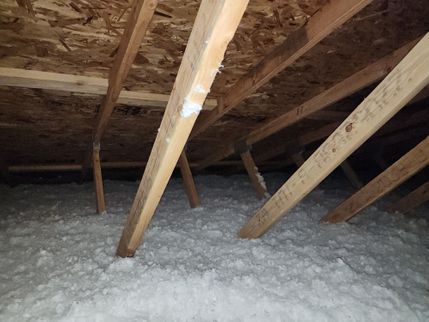
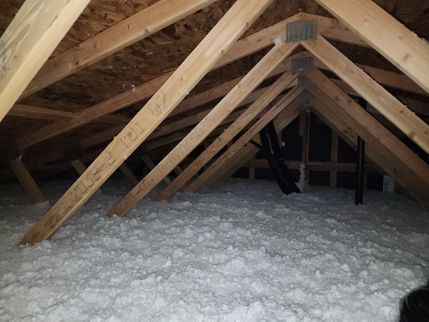
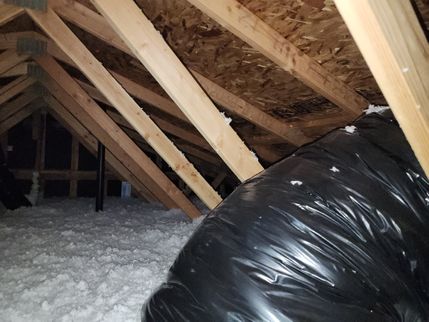
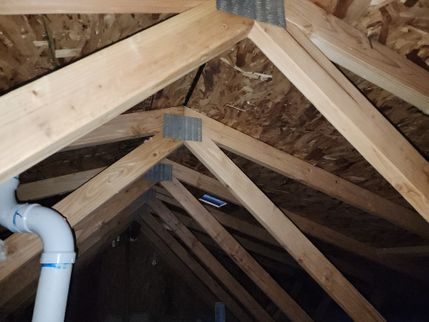
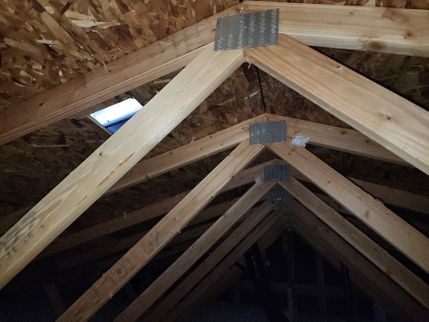
.jpg)
 (1) (1).png)
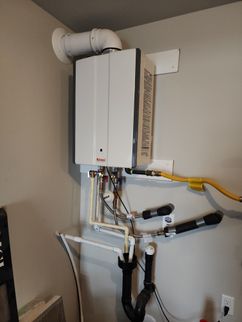
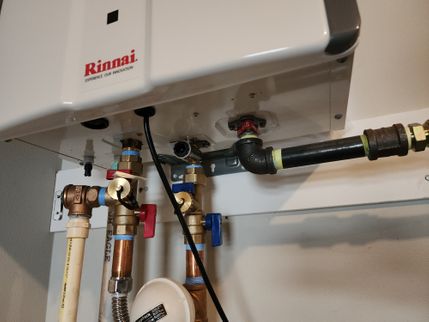
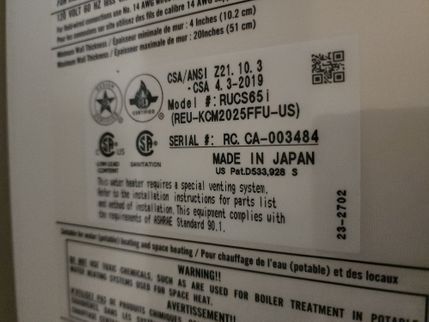
 (1) (1).jpg)
 (1).jpg)
