

DIY (do it yourself)
How to Read This Report
This is a limited, visual, non-invasive inspection. It is not a warranty, a code inspection, or a technically exhaustive evaluation. See the Scope & Limitations chapter at the end of this report for full details.
Getting the Information to You
This report is designed to deliver important and technical information in a way that is easy for anyone to access and understand. If you are in a hurry, you can take a quick look at our "Summary Page” and quickly get critical information for important decision making. However, we strongly recommend that you take the time to read the full Report, which includes digital photographs, captions, diagrams, descriptions, videos and hot links to additional information. This report can also be printed on paper or to a PDF document, but the best way to get the layers of information that are presented in this report is to read your report online, which will allow you to expand your learning about the inspected property.
Chapters and Sections
This report is divided into chapters that parcel the home into logical inspection components. Each chapter is broken into sections that relate to a specific system or component of the home. You can navigate between chapters with the click of a button on the left side margin.
Most sections will contain some descriptive information done in black font. Observation narrative, done in colored boxes, will be included if a system or component is found to be significantly deficient in some way or if we wish to provide helpful additional information about the system or the scope of our inspection. If a system or component of the home was deemed to be in satisfactory or serviceable condition, there may be no narrative observation comments in that section and it may simply say “tested,” or “inspected.”
Observation Labels
All narrative observations are colored, numbered and labeled to help you find, refer to, and understand the severity of the observation. Observation colors and labels used in this report are:
- Note:These are informational comments that aren't deficiencies. They describe how we inspected different components of the house, add detail about the home's systems, and explain any limitations that affected the inspection. They also include contextual photos of the house and photos of components while they were operating.
- Tier 1 - Major Concern:These represent priority items like major safety issues, active issues causing damage to the house, or items of significant expense that are looming in the near future.
- Tier 2 - Repair:These are lower priority deficiencies that may not need immediate attention, but should be addressed in the near/medium term future. These are usually improperly functioning components, deferred maintenance items, occupant safety concerns, or sub-par construction/installation problems.
- Tier 3 - Improvement:These are things that are working but could be better. They are less significant issues like nuisance repairs, minor safety updates, energy efficiency improvements, or potential reliability problems. Often these are improvements that may not have been necessary--or even have existed--when the property being inspected was constructed (e.g. changes in building standards over time.)
- Due Diligence:Observations that may require further investigation and/or clarification that could not be provided during the home inspection.
- Future Project:These are longer term considerations for the house and include things like repairs that may be deferred for some time but should be on the radar for repair or replacement in the future, optional upgrades to the house's function, and potential future hidden costs.
- Monitor:Items that should be watched to see if correction may be needed in the future.
- Maintenance:These are items that should be considered "routine home ownership," such as servicing the furnace, cleaning the gutters or changing the air filters in the furnace. Generally a house costs ~1% of the purchase price per year to maintain.
- Homeowner Info:These are pieces of "good to know" information about the house, essentially an owner's manual. For example, the location of the main water shut-off valve, gas shut-off valve(s), etc.
Summary Page
The Summary Page is a quick, bulleted overview of the observations from this inspection, grouped by category. The Tier 1, Tier 2, and Tier 3 sections list the deficiencies we found. The remaining sections, like Monitor, Due Diligence, Maintenance, and Homeowner Info, are listed for easy reference. This overview is not a substitution for reading the entire inspection report.
DIY (do it yourself)
Tier 1 - Major Concerns
- 13.9.4 Electrical - Smoke & Carbon Monoxide Detectors:
There were no visible smoke detectors on the first level. I recommend installing smoke detectors in hallways and bedrooms as a significant safety feature for occupants. Each level should have at least one smoke detector. DIY project.
Contractor:DIY (do it yourself) - 13.9.5 Electrical - Smoke & Carbon Monoxide Detectors:
There were no visible carbon monoxide detectors on the second level. Current building standards require a carbon monoxide detector on every floor of any residential dwelling. I recommend installation by homeowner as a DIY project.
Contractor:DIY (do it yourself)
Tier 2 - Repairs
- 3.4.1 Exterior - Exterior Doors:
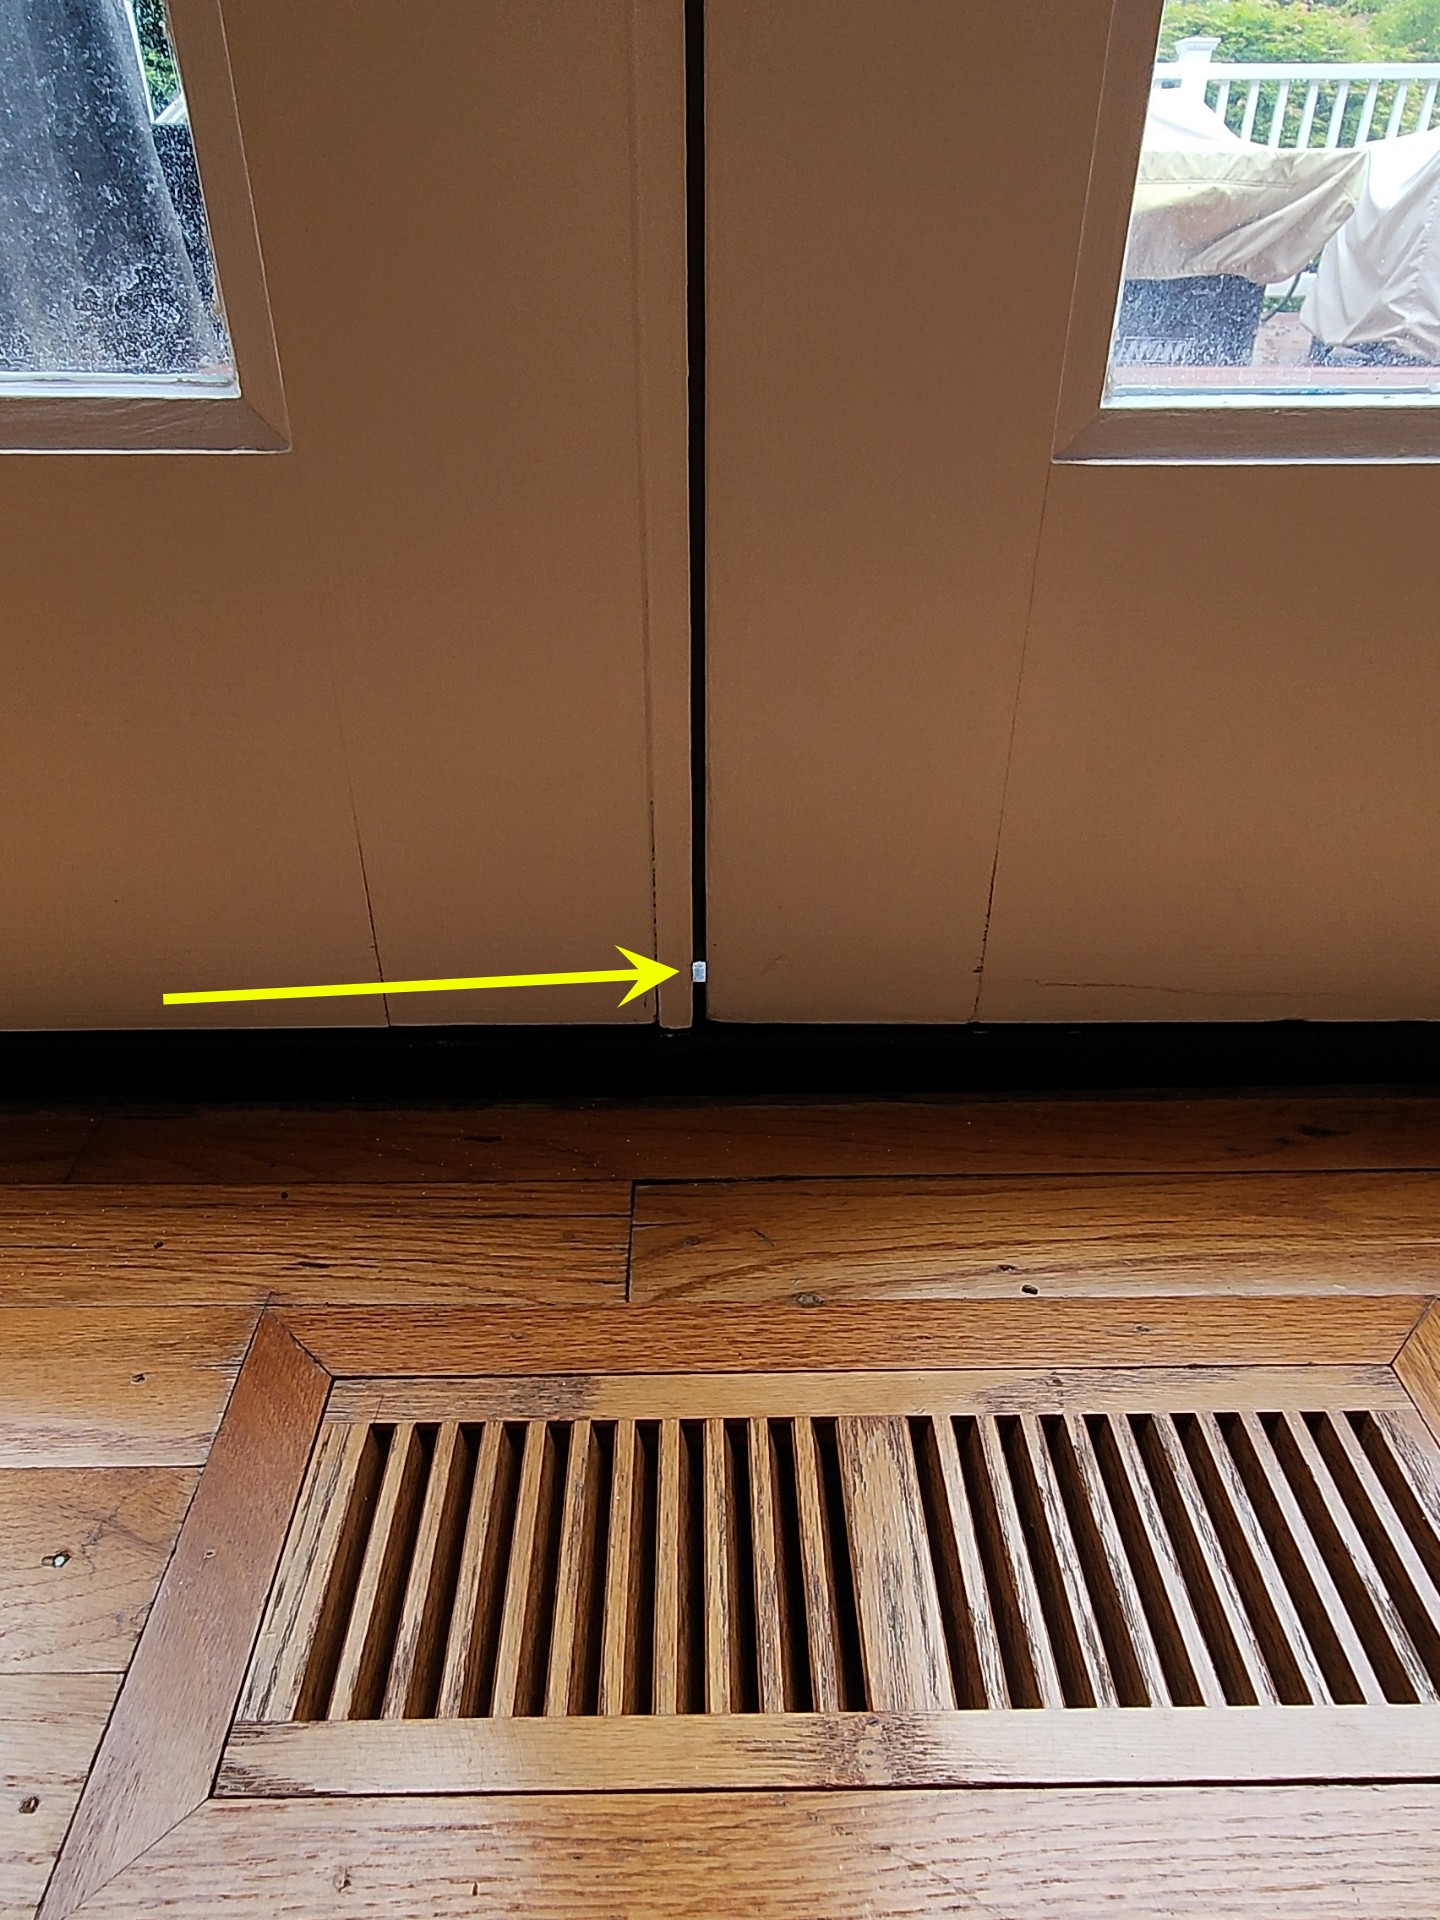
Daylight was visible through exterior door(s), see photo(s). I recommend adding weather stripping to increase energy efficiency. DIY project.
Contractor:DIY (do it yourself) - 6.5.1 Bathrooms - Bathtubs & Showers:
The primary bathroom bathtub was slow to drain. I recommend cleaning as a DIY repair. If that is not successful, further repair by a qualified plumber may be needed.
Contractor:DIY (do it yourself) - 9.4.3 Garage - Garage Doors & Openers:
The garage door auto-reversing pressure sensors did not function properly on either door. The auto-pressure reverse sensor should trigger when the garage door hits something. It should trigger with 10 pounds of force or less. This sensor will immediately stop the door and cause it to reverse to prevent the door from crushing something. Most garage door openers have a way to adjust the sensitivity of this sensor. I recommend adjustment at garage door opener as a DIY repair. If adjustment is not sufficient, or if this opener does not have a way to adjust the sensitivity, recommend repair by a qualified contractor.
Contractor:DIY (do it yourself) - 12.5.3 Plumbing - Supply Plumbing:
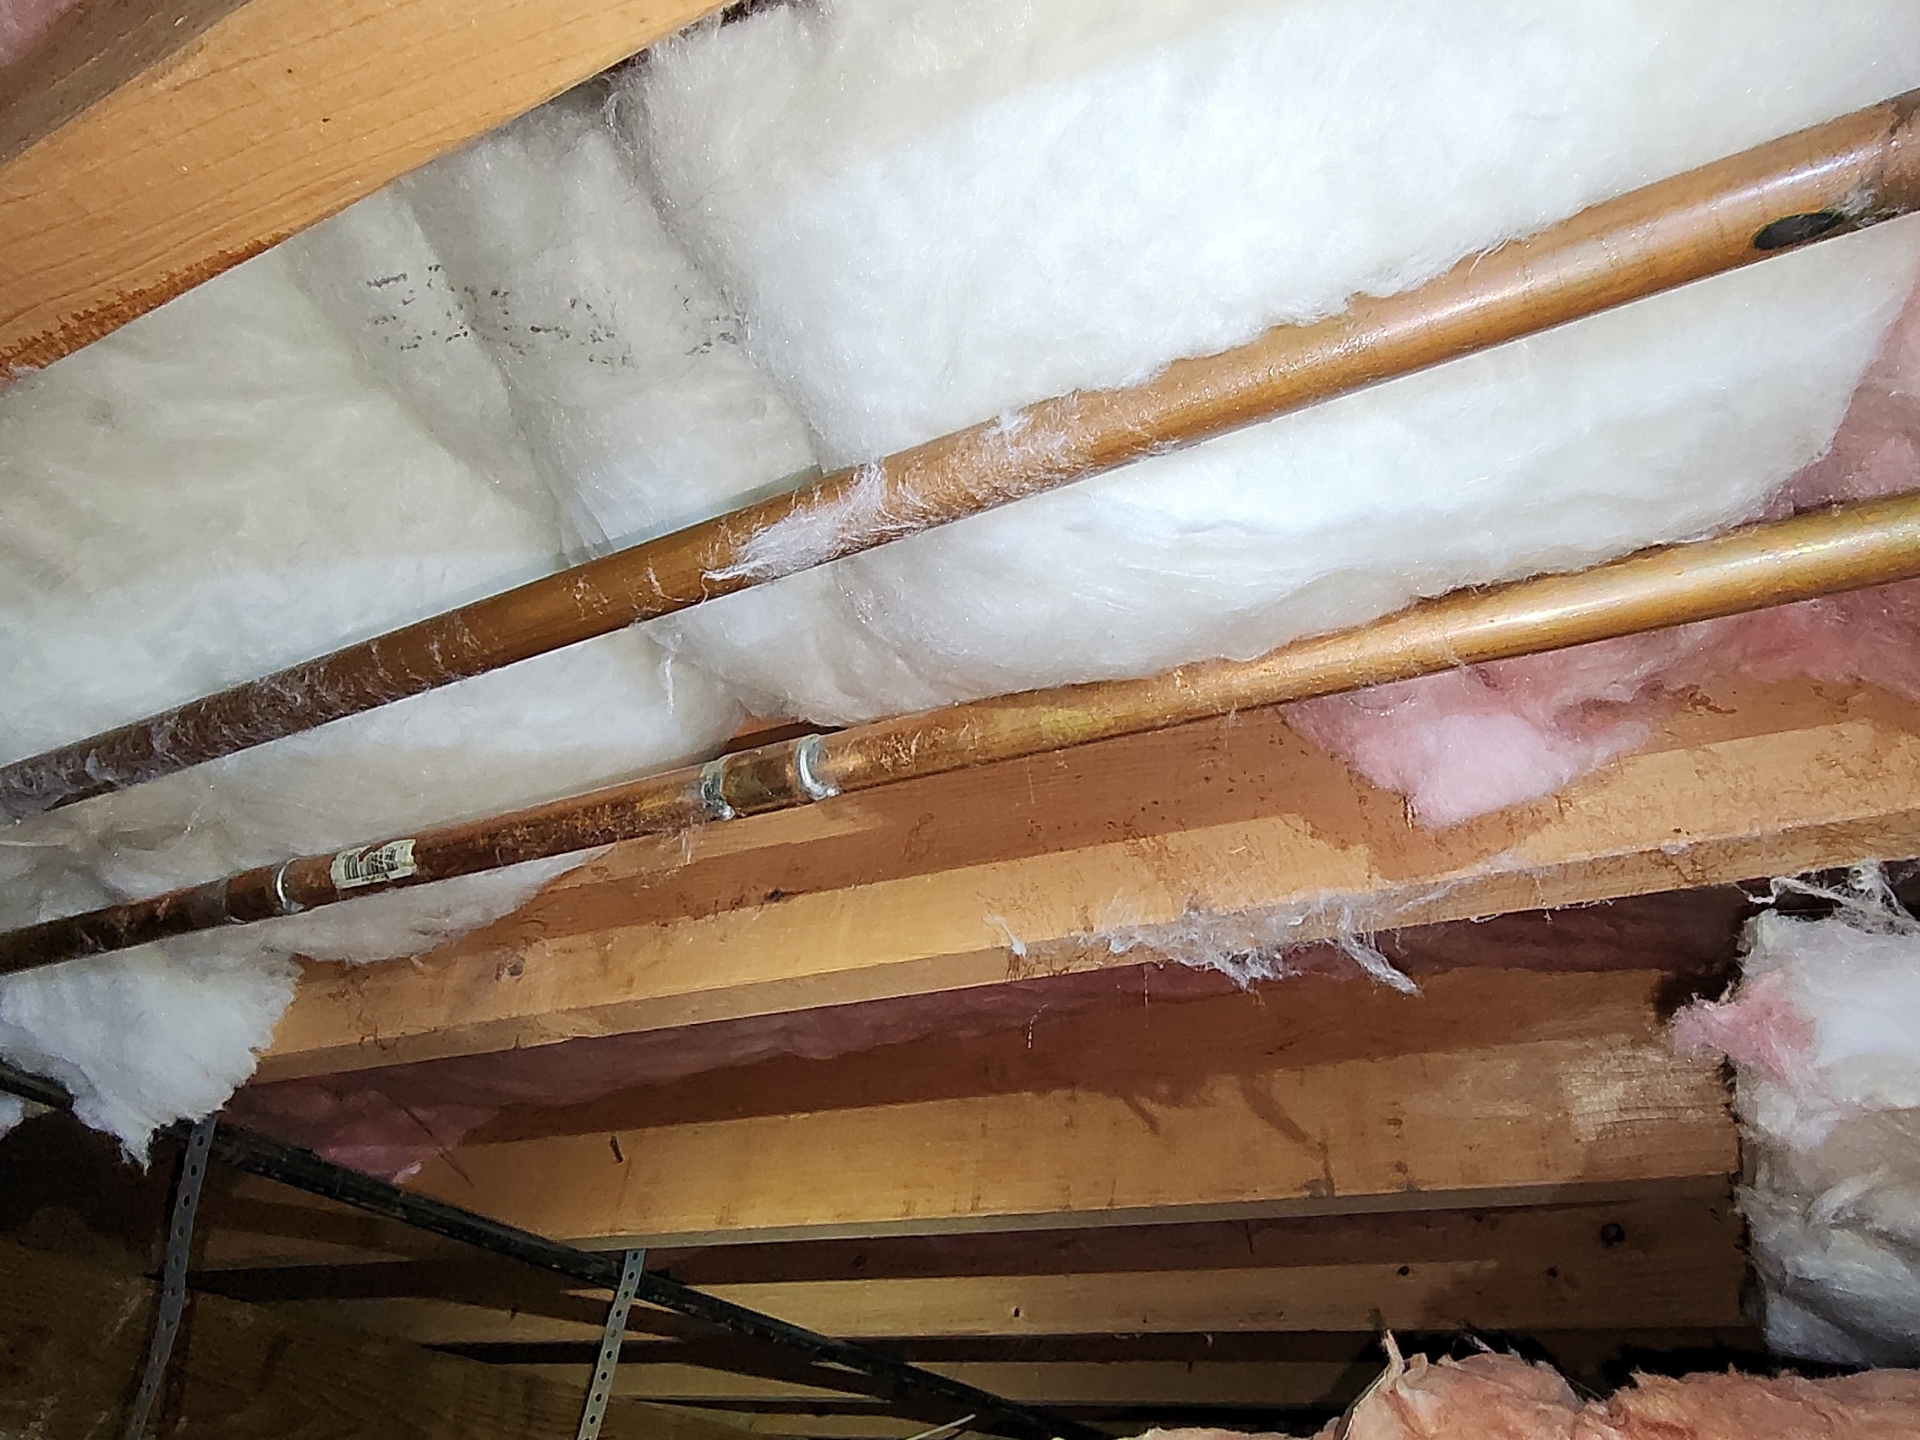
The supply pipe insulation was incomplete in the crawl space, see example photo(s). All supply lines in unheated spaces should be insulated to protect from freezing conditions that could damage the pipes and to prevent heat loss. DIY repair.
Contractor:DIY (do it yourself)
Tier 3 - Improvements
- 5.7.2 Common Spaces & Bedrooms - Windows:
Most of the window(s) were missing screens. I recommend installation of screens as a DIY improvement.
Contractor:DIY (do it yourself) - 5.7.3 Common Spaces & Bedrooms - Windows:
The windows in the front living room and dining room were not opening; they appeared to just be painted shut. DIY repair.
Contractor:DIY (do it yourself) - 9.3.3 Garage - Garage General:
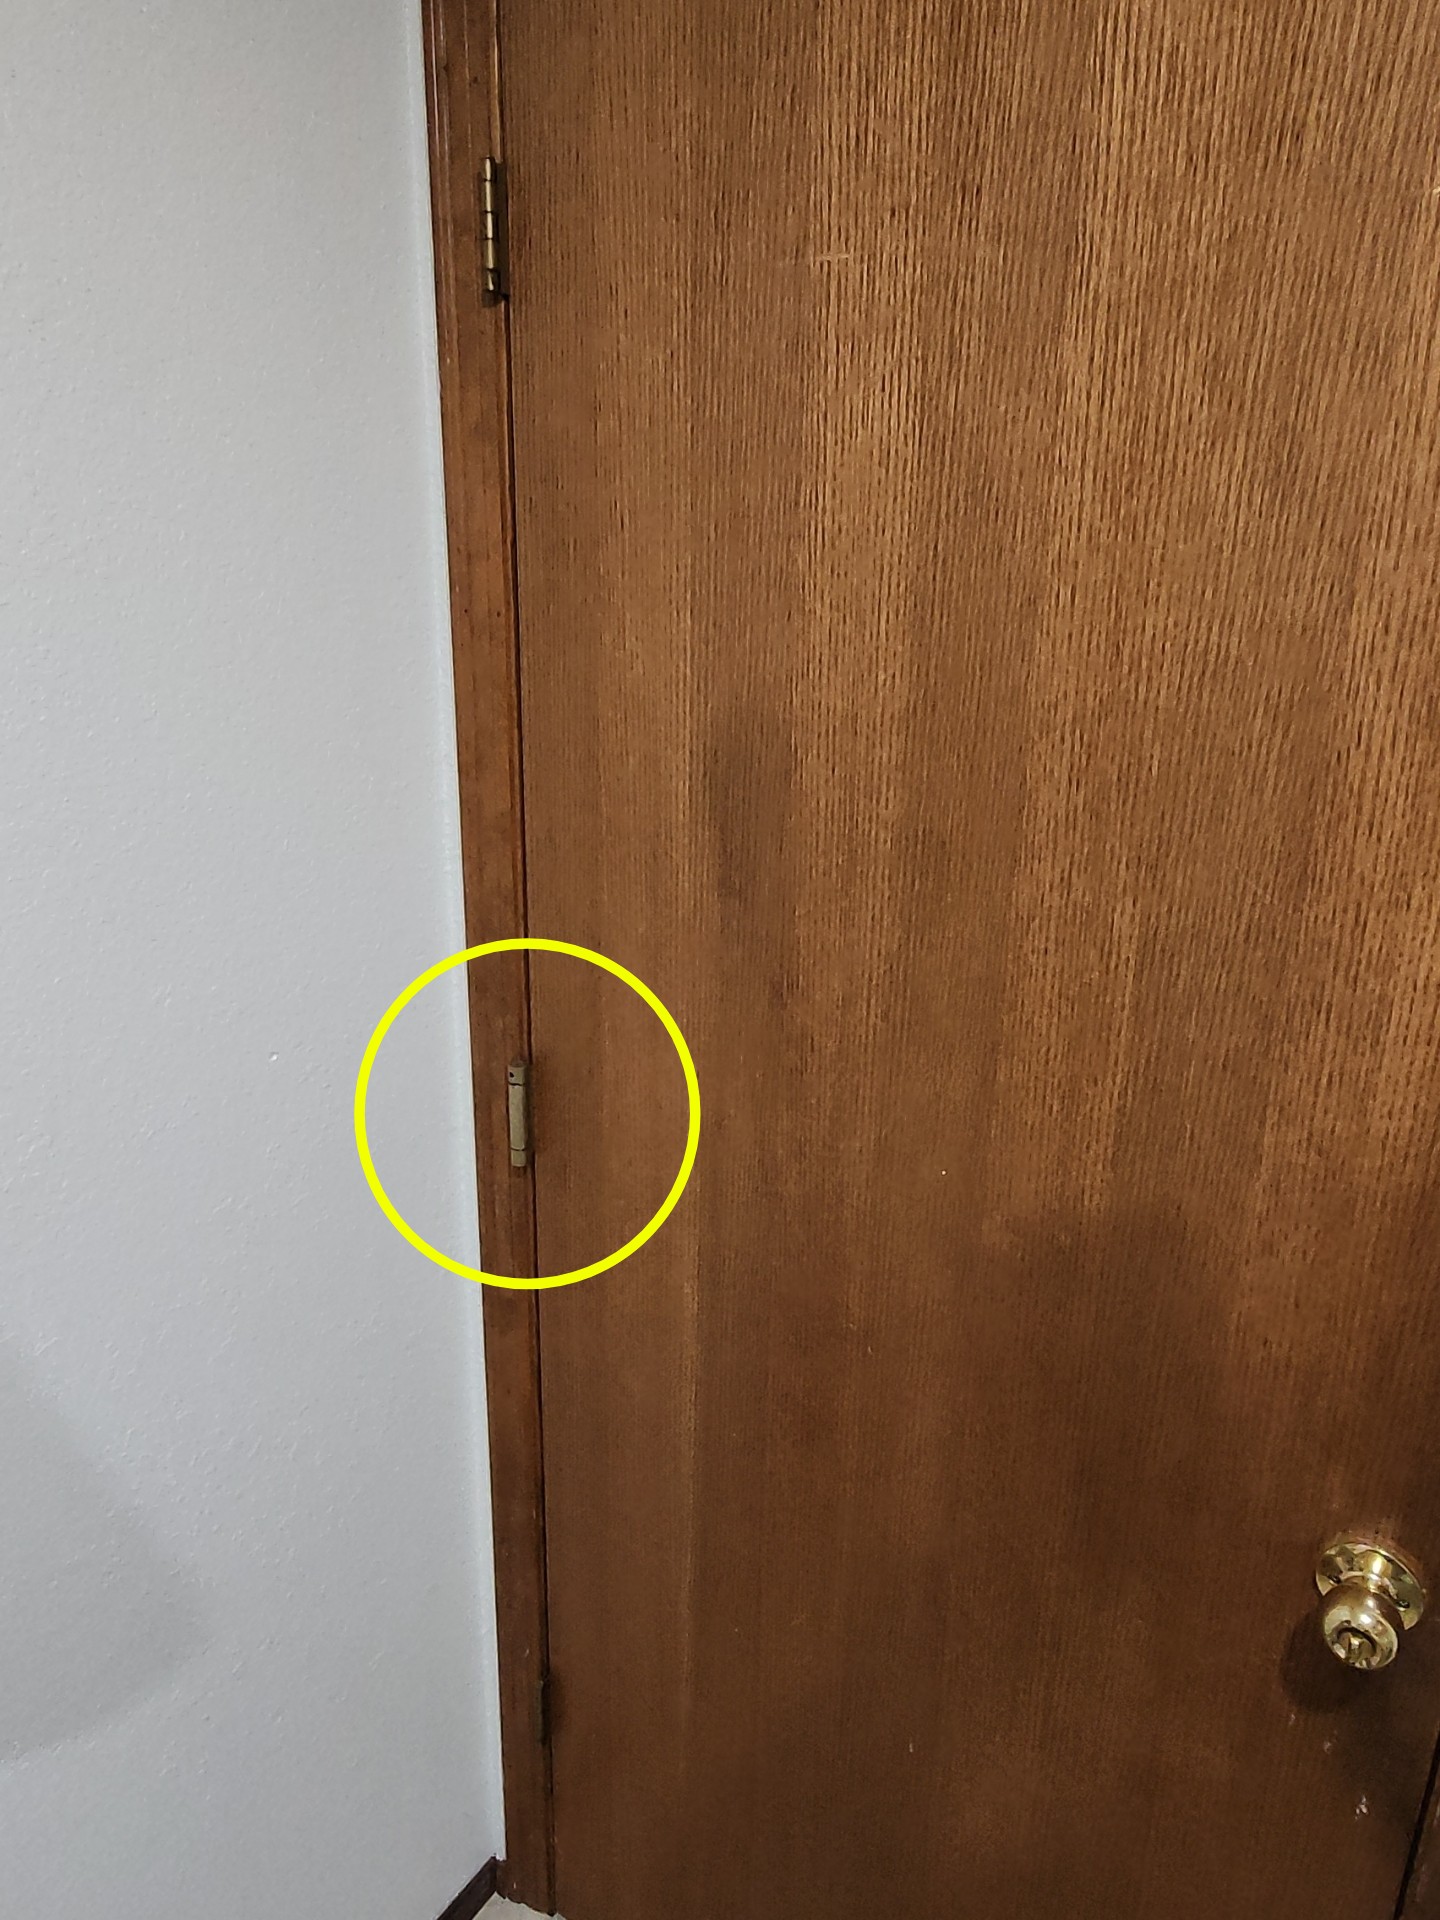
The door between the garage and the living area had disabled self closing hinges. Having a self closing device (usually self closing hinges) are required on doors between the living space and the garage in some municipalities. Regardless of the local building codes, having a door that automatically closes is a good idea to preserve the firewall barrier between the garage and living space. I recommend enabling the self closing hinges. DIY repair.
Contractor:DIY (do it yourself) - 9.4.4 Garage - Garage Doors & Openers:
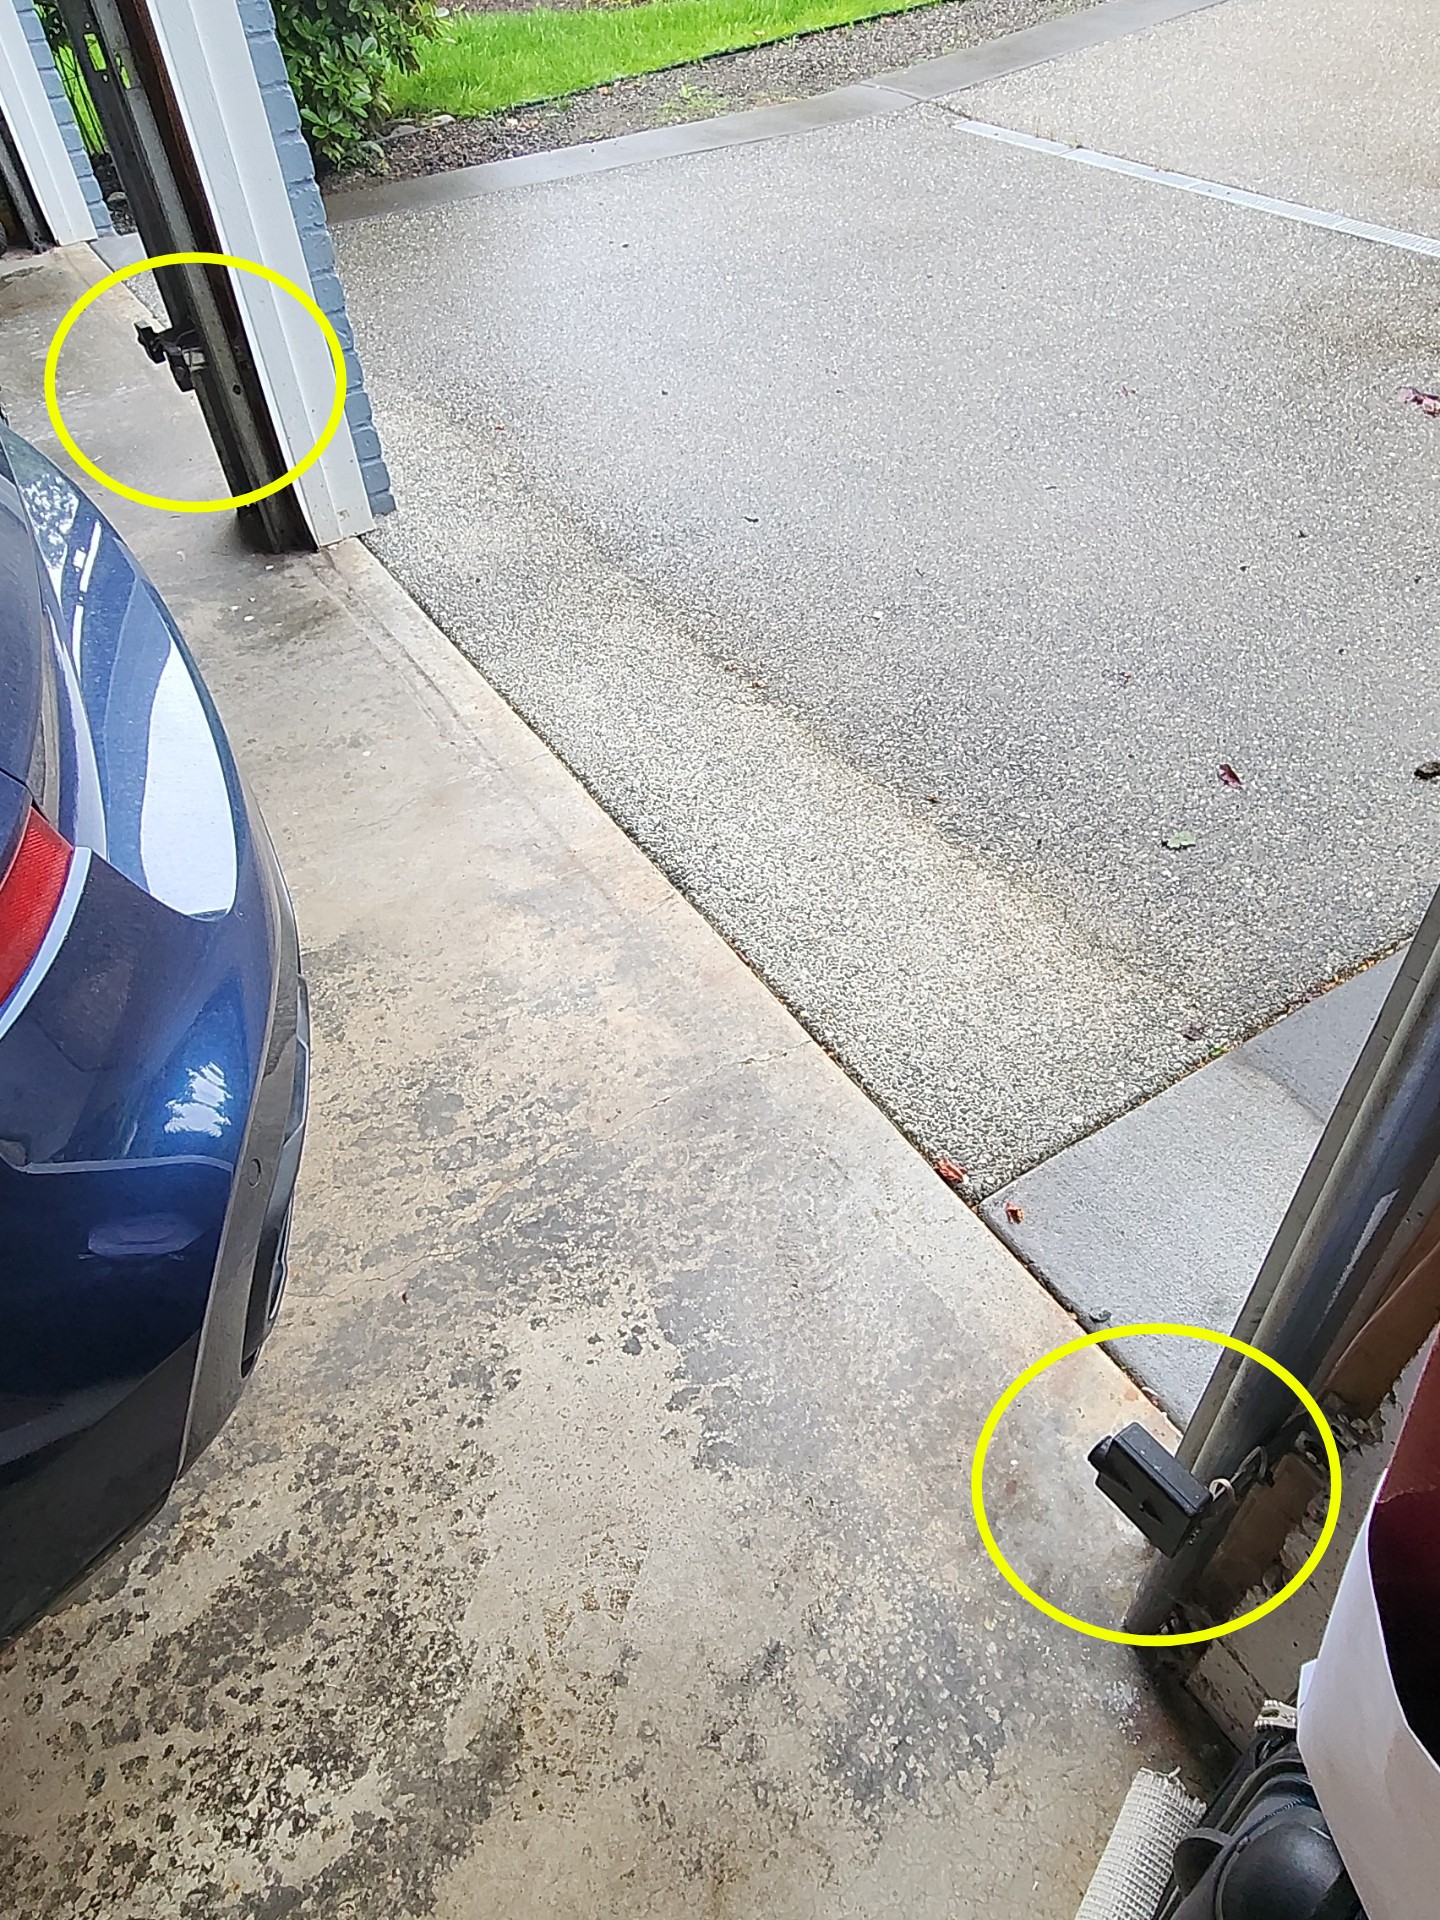
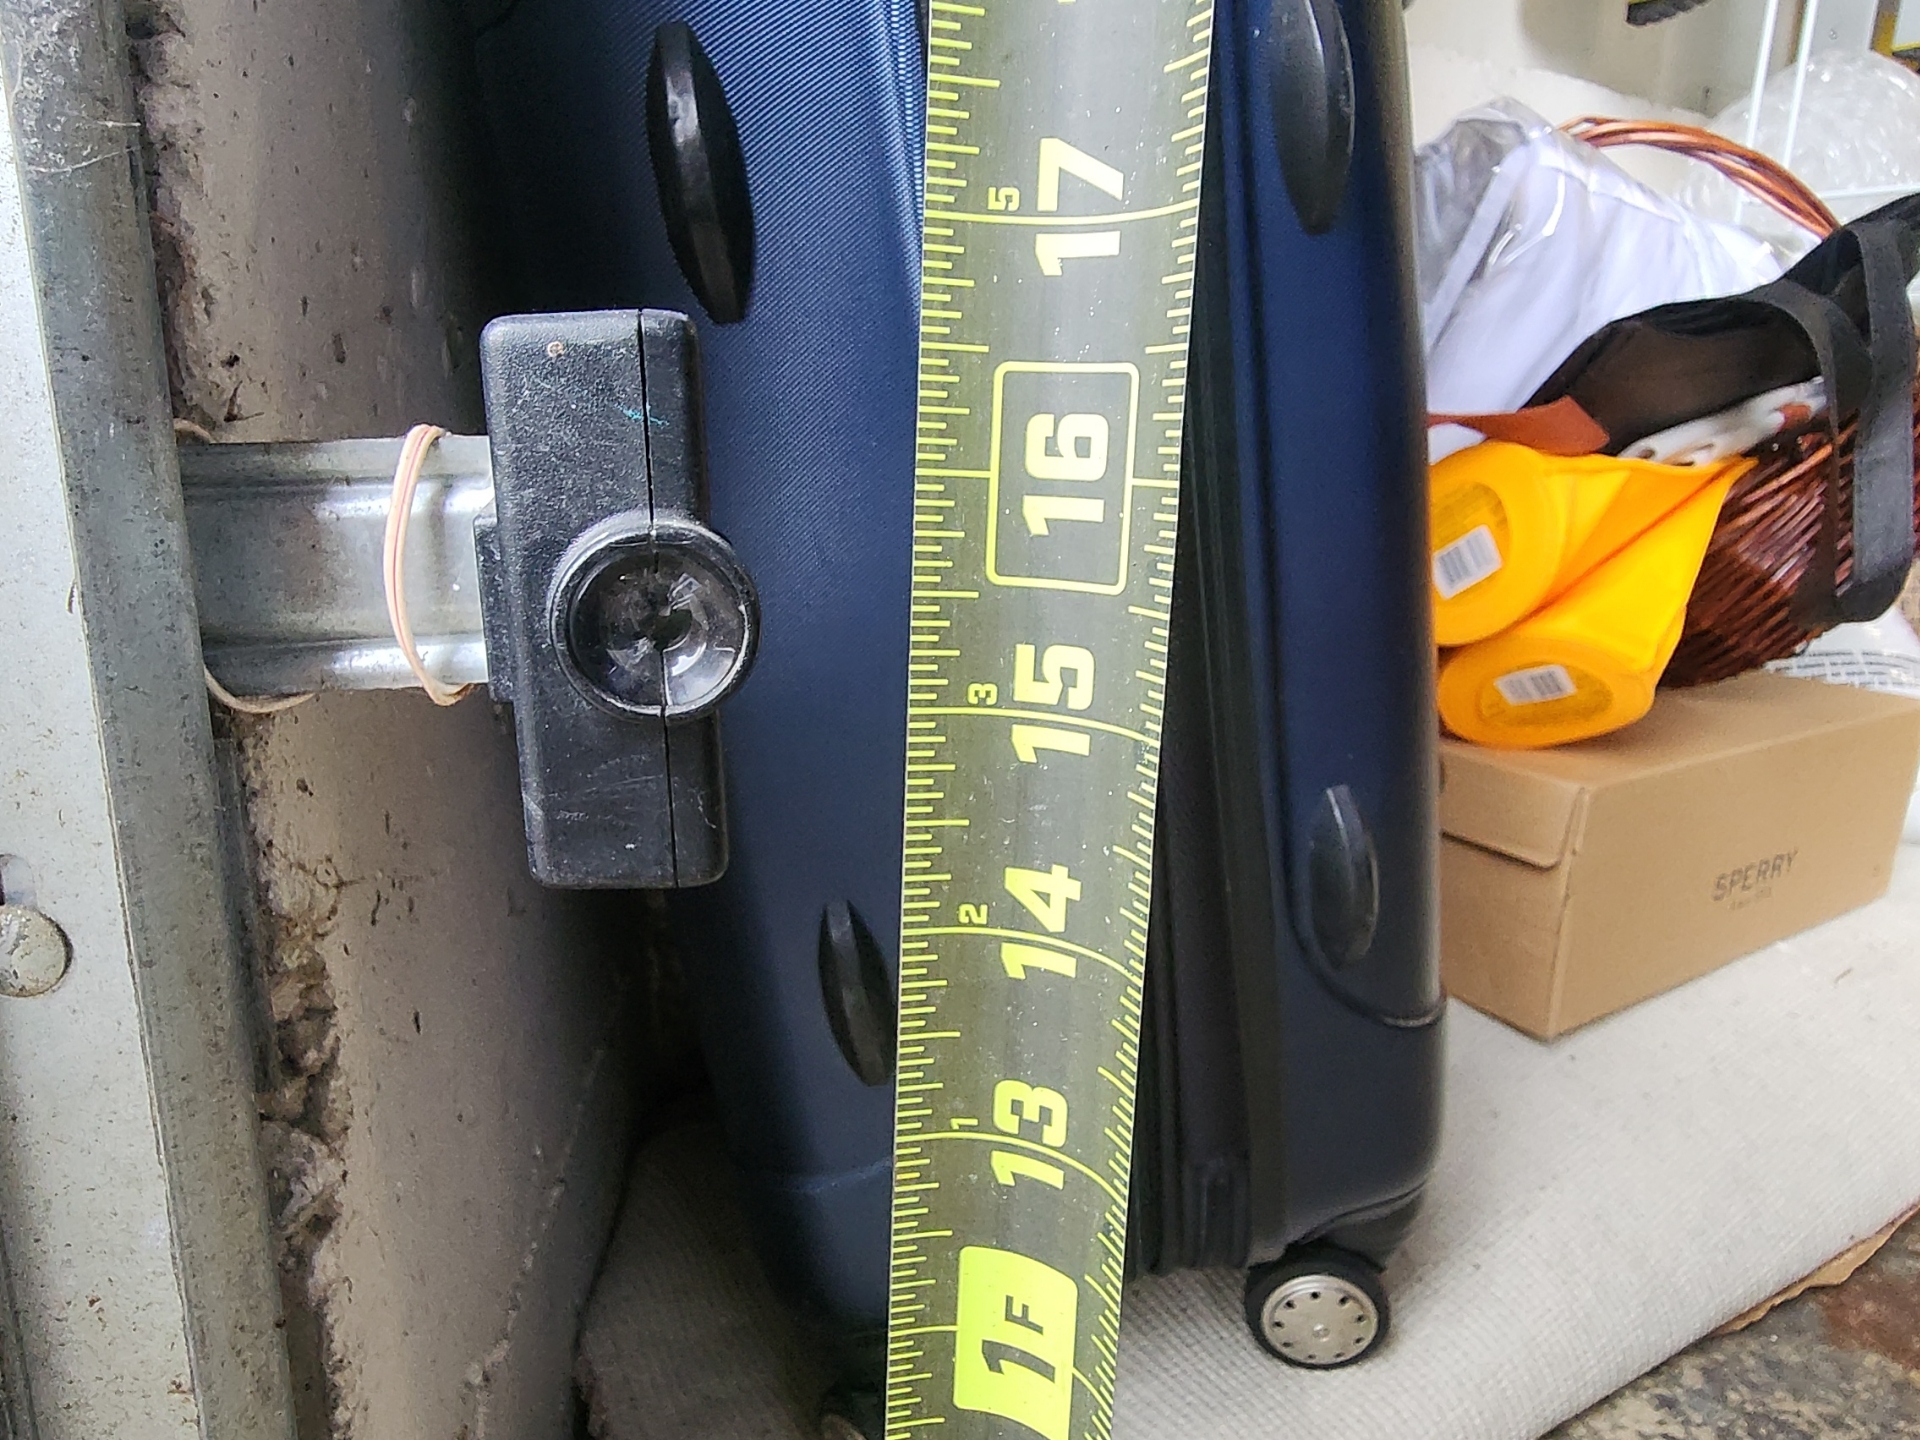
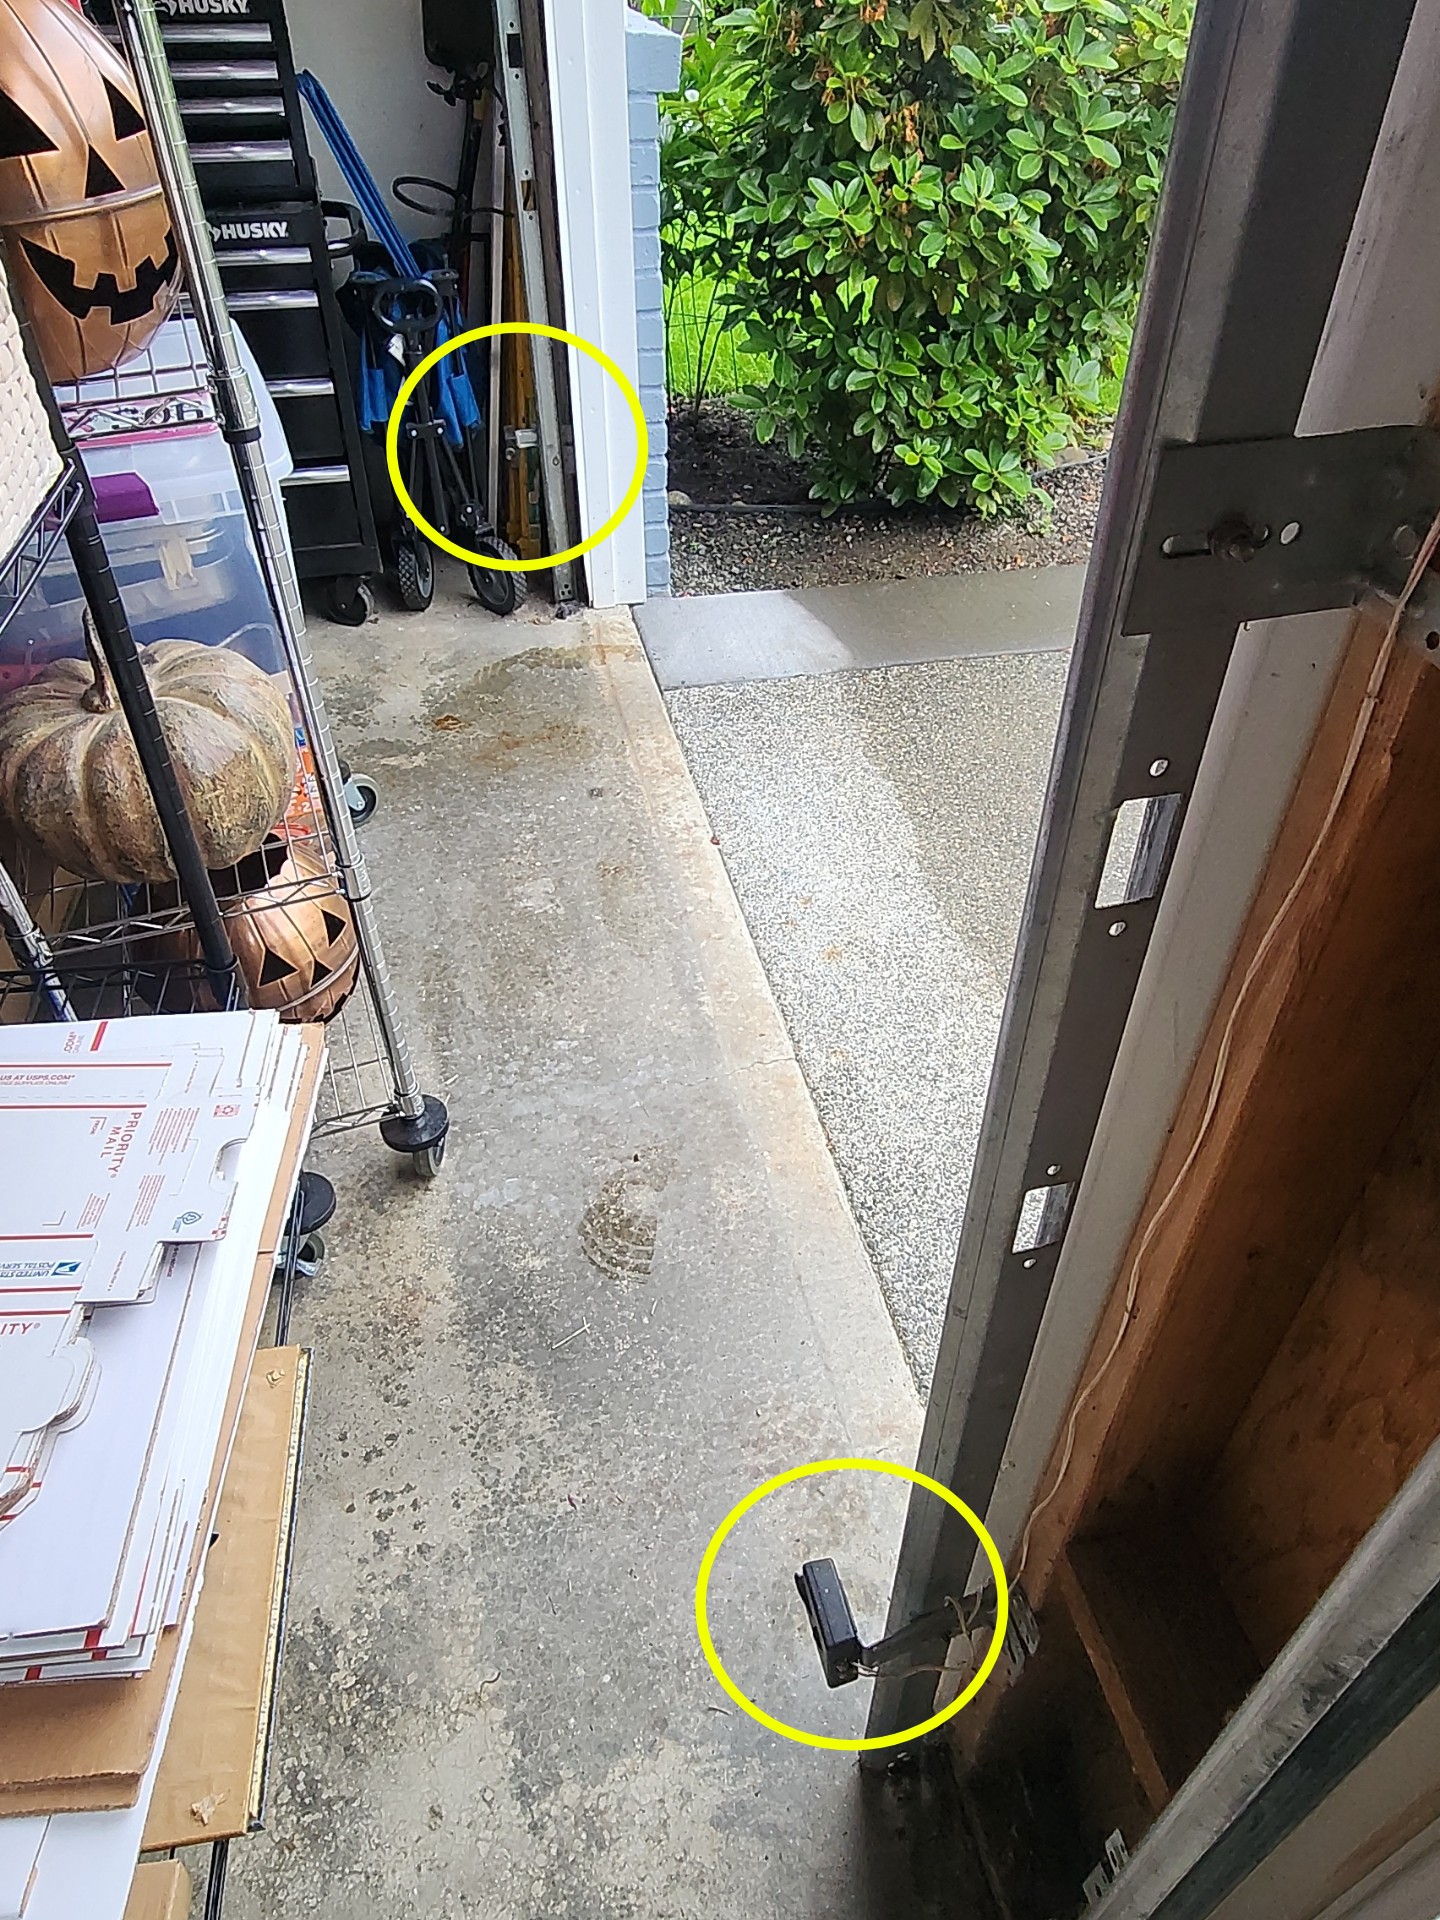
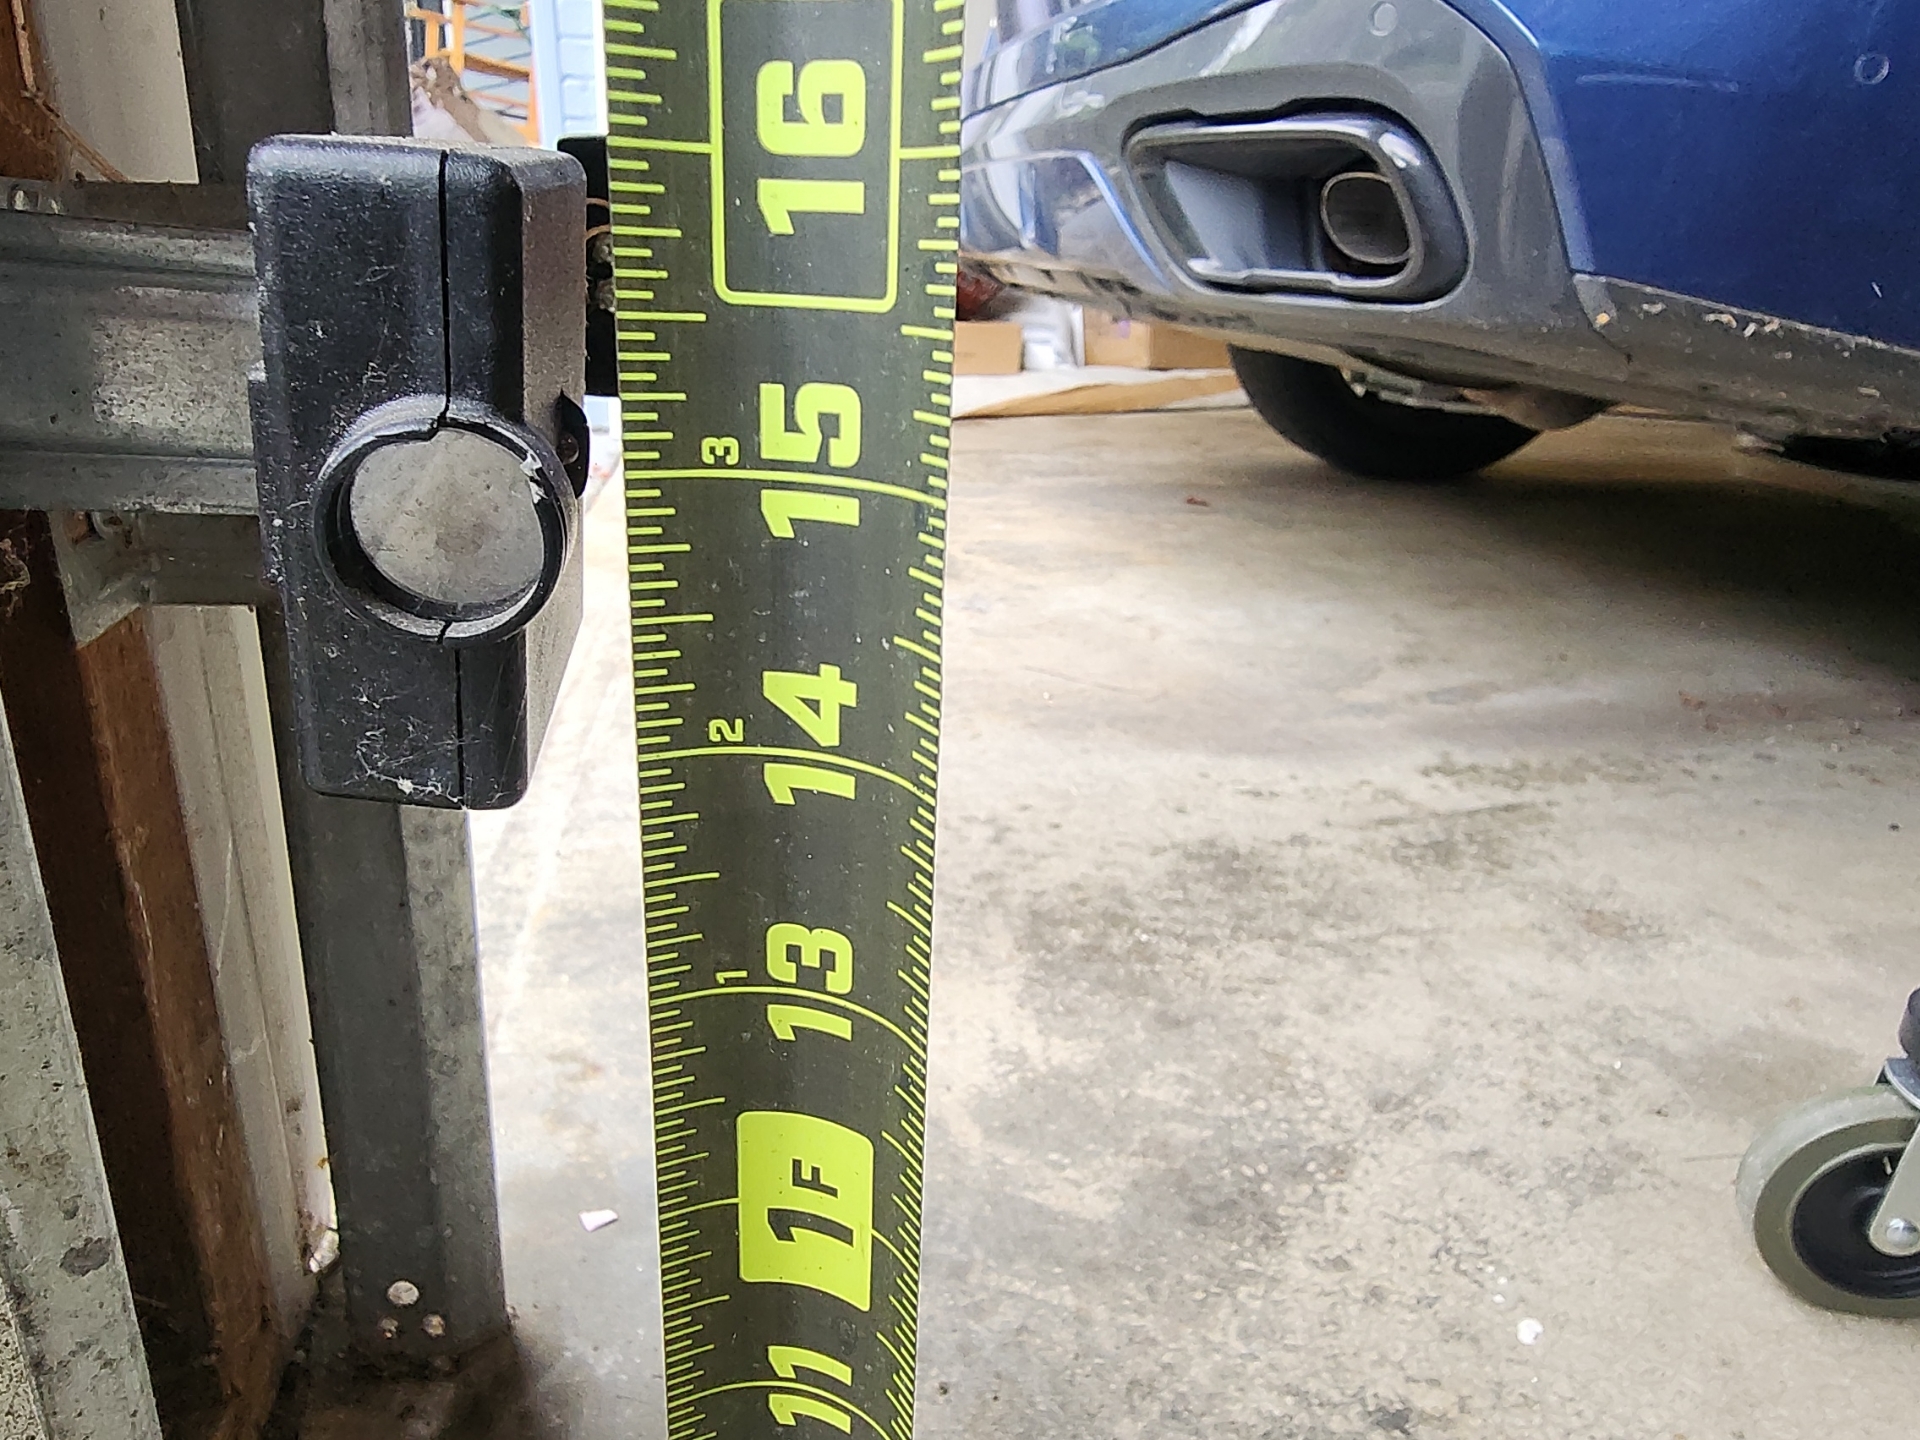
Photo eye sensors were too far off the ground, see photo(s). I recommend moving them to between 6 to 12 inches off the ground. DIY repair.
Contractor:DIY (do it yourself) - 13.9.6 Electrical - Smoke & Carbon Monoxide Detectors:
Modern building standards require a heat detector in attached garages. This garage did not have one. I recommend adding a heat detector to the garage ceiling as a DIY safety improvement.
Contractor:DIY (do it yourself) - 13.9.7 Electrical - Smoke & Carbon Monoxide Detectors:
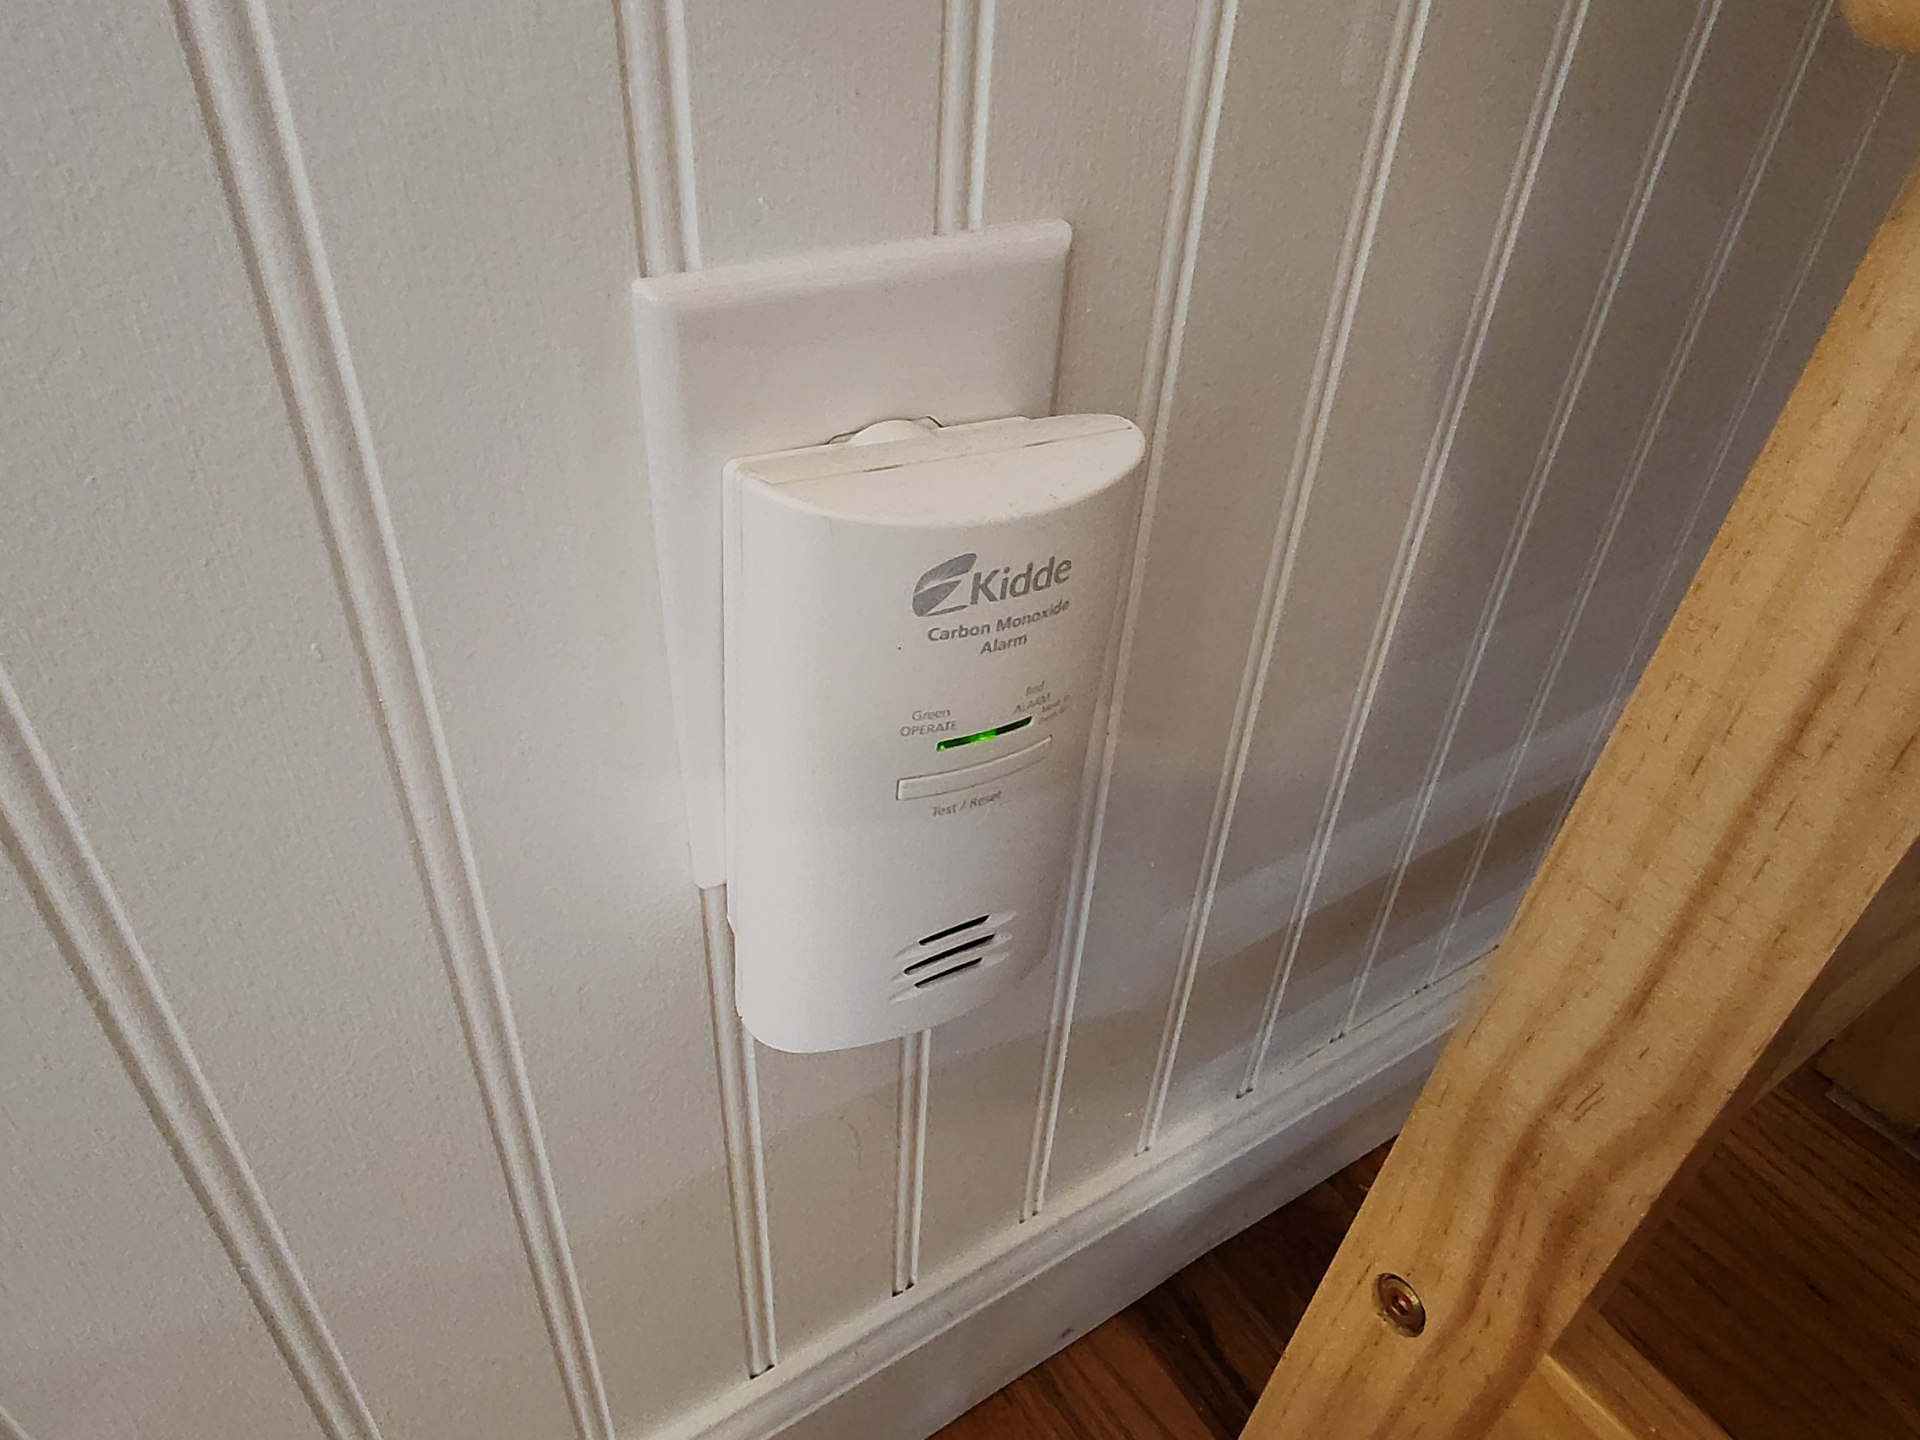
Carbon monoxide detectors installed in the house were the type that are just plugged into a wall outlet, see photo(s). These are easily disabled as a child can simply unplug them. I recommend replacing the plug-in detector(s) with battery operated versions as a DIY safety improvement.
Contractor:DIY (do it yourself) - 13.9.8 Electrical - Smoke & Carbon Monoxide Detectors:
Smoke detectors were not installed in all the bedrooms. According to modern building standards, every bedroom should have a smoke detector installed inside the room. Many older houses only have smoke detectors in the hallways. I recommend adding a smoke detector to each bedroom. DIY project.
Contractor:DIY (do it yourself) - 14.2.2 Fuel Storage & Distribution - Gas Meter:
The main gas valve at the gas meter is tight enough to require a wrench and cannot be operated by hand alone. I recommend keeping a properly sized wrench at the gas meter in case of an emergency. Wrenches for this purpose can be purchased for less than $10 (like this one.)
Contractor:DIY (do it yourself) - 15.2.5 Heating, Cooling, Fireplaces, & Ventilation - Central Furnace:
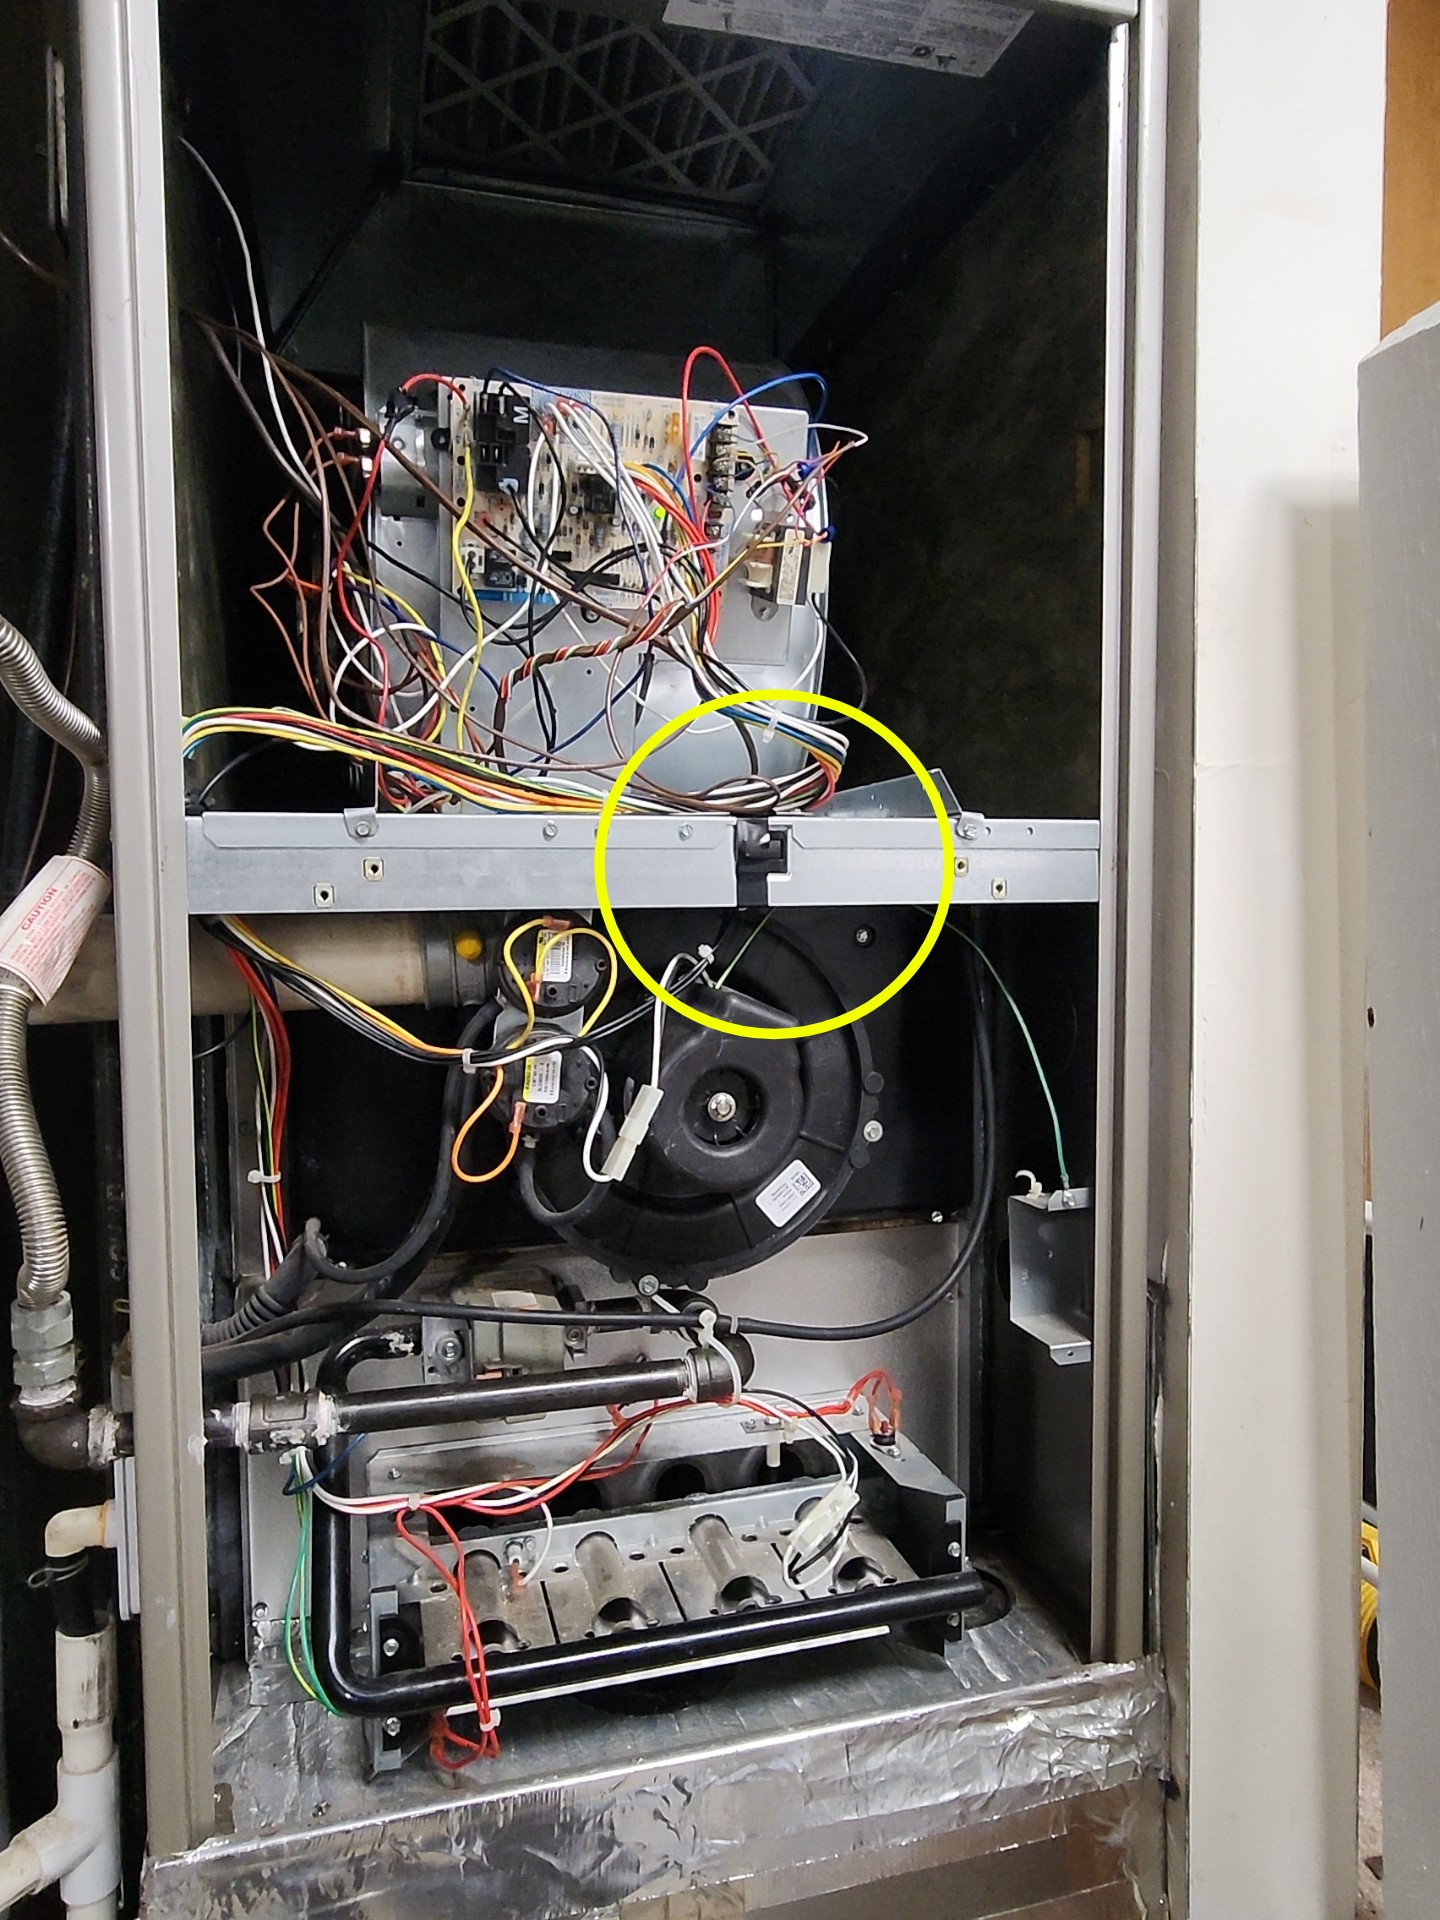
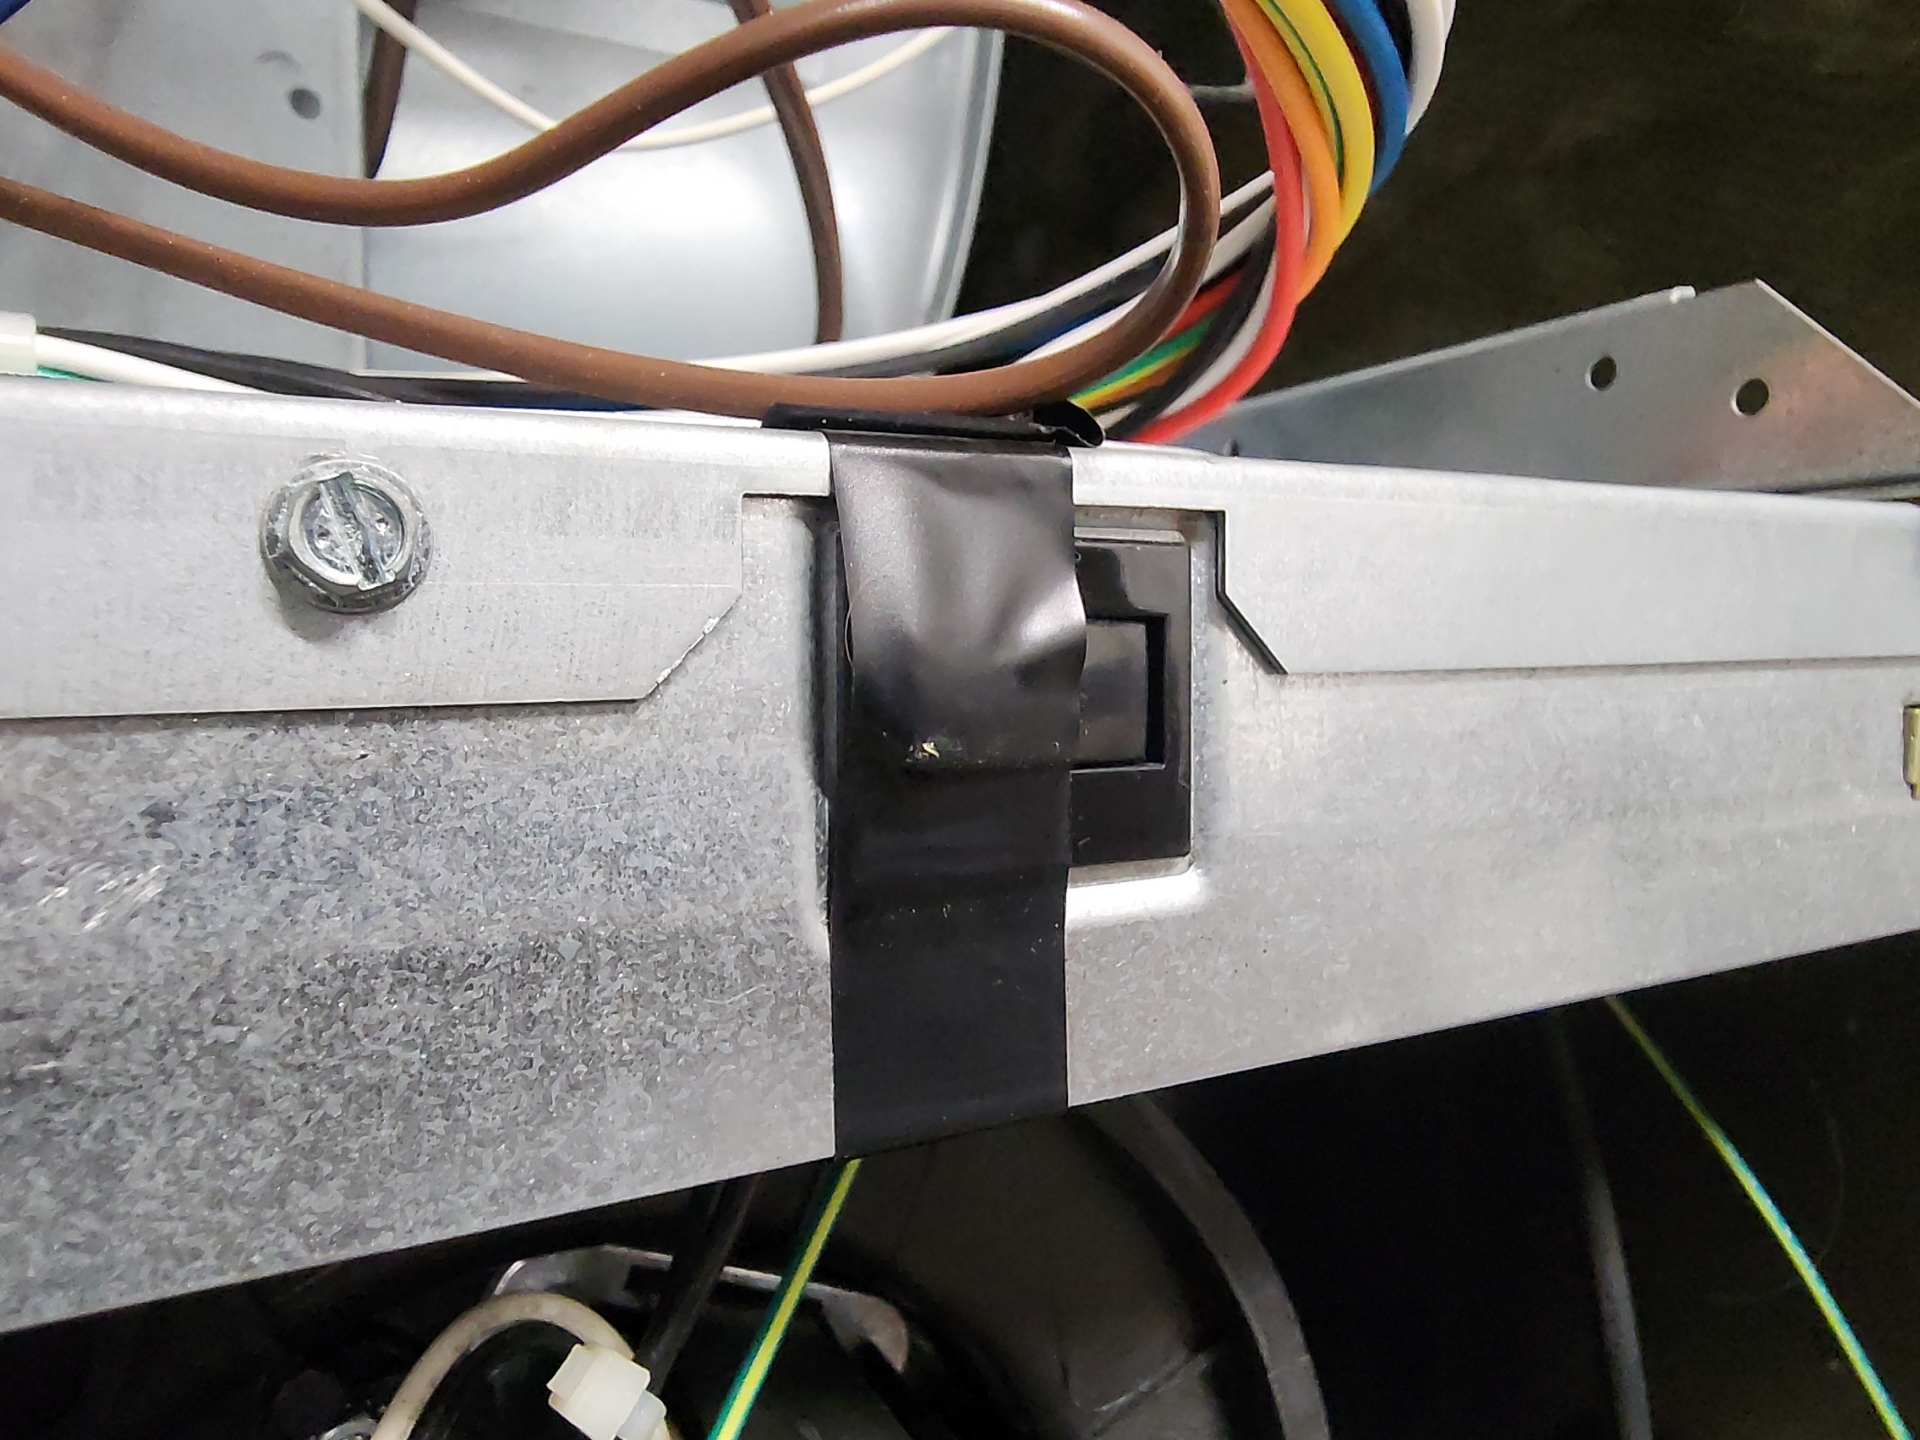
The safety shut-off switch was taped down, see photo(s). This switch is intended to make the furnace shut off when the cover is removed, but when it is taped down, the furnace will continue to run without the cover in place. I recommend removing the tape. DIY repair.
Contractor:DIY (do it yourself)