How to Read This Report
This digital report or a printed version of this report should only be viewed in full color where the photos are discernible and on a device where the report page width is no less than 8.5" wide. Please note, Right and Left of the building are determined as facing the front of building shown on the report cover. The client has the duty and obligation to read the entire report. Feel free to reach out to the inspector should you have any questions or concerns.
This report is designed to inform the client of obvious major structural deficiencies, inoperative conditions and the presence of noticeable, detrimental moisture issues for areas inspected. Additionally, the inspection report may advise regarding notable safety concerns and appropriate upgrades recommended by the inspector that you should consider and act on when appropriate. Please note, undesirable conditions pertaining to this inspection may be present and unreported for concealed areas and areas with limited or blocked access.
Photos
Photos included in this report are intended to help describe a reported item or area only. The photos, while representative, may not encompass the full scope of work required to correct the item or area listed. Repairs should be based on actual condition of property and not solely on the photos included in this report. Note, when viewing photos in the online report, clicking on a photo will zoom in and enlarge the photo. Clicking on a photo a second time will enlarge and zoom in on the photo one more time.
Repairs
Repairs or corrections needed at the inspected property should be completed by competent qualified professions familiar with the type of work being performed. Obtain competitive bids as needed. Obtain further evaluation when needed.
Getting the Information to You
This report is designed to deliver important and technical information in a way that is easy to access and understand. The best way to get the layers of information that are presented in this report is to read your report online in the HTML format, which will allow you to expand your learning about the inspected property. You will notice some words or series of words highlighted in blue and underlined – clicking on these will provide you with a link to additional information, if desired. Other text colors, if present, have no real meaning. Please read all written text.
This report can also be printed on paper or to a PDF document.
Chapters and Sections
This report is divided into chapters that parcel the home into logical inspection components. Each chapter is broken into sections that relate to a specific system or component of the home. You can navigate between chapters with the click of a button on the left side margin when viewing the report online.
Observation Labels
Narrative observation labels are defined here. Some of the following observation labels may not appear in all reports. Hazardous, Key Concerns and Further Evaluation observation label types, if used, will appear in the report and in the summary. All other observation labels, when used, appear only in the report and will not appear in the summary. All narrative observation label types are labeled, and numbered to help differentiate each reported narrative observation. When narrative observation labels are given a color, the specific color used has no meaning. Some observation labels are given a specific icon to group the observation types. The specific icon used also has no meaning.
Observation labels and colors used for reporting are:
- Key Concerns:Observations listed as key concerns will typically include inoperative equipment, common and significant corrections needed for plumbing, electrical, heating/cooling, structure, interior and exterior areas including the roof covering. When used, this observation will appear in the report and in the summary.
- Periodic Maintenance Needed:Observations listed as periodic maintenance needed are items or areas that are expected to have maintenance performed at some interval. Maintenance neglect may be from lack of maintenance knowledge or lack of adequate funding for periodic maintenance. Some irregular or substandard installations may need more frequent maintenance until properly replaced. Start dates and intervals for periodic maintenance are a matter of personal judgment. When used, this observation will appear only in the report.
- Safety Concerns:Observations listed as safety concerns are items or areas listed to help reduce the risk of personal injury. Safety standards and expectations change. Consideration should be given to evaluate and act upon your risk exposure to help reduce the risk of personal injury. Some observations listed under other labels that are also safety concerns will appear under the other label only, such as electrical repairs, which almost always pose some safety risk. Some safety concerns may also be considered improvements but will fall under the safety concerns label if deemed more appropriate. When used, this observation will appear only in the report.
- Routine Correction Needed:Observations listed as routine correction are not unusual for the type and age property inspected. These routine items are typically not recurring and once properly corrected should not require repetitive correction. When used, this observation will appear only in the report.
- Monitor:Observations listed as monitor are typically items or areas that need subsequent observations and should be monitored over time to obtain historical data. These items may or may not require correction in the future based upon their performance over time. If you are unable to do the monitoring, the inspector recommends you appropriately schedule monitoring by a qualified competent contractor. Some observations listed under other labels that also may require monitoring will appear under the other label only. When used, this observation will appear only in the report.
- Improve:Observations listed as improve are items or areas that were ready for improvement or upgrade. This label is used for predictable expected opportunities to better the property condition or installation deficiencies that may or may not affect equipment function. Some observations listed under other labels that also may be considered improvements will appear under the other label only. When used, this observation will appear only in the report.
- Note:Notes are general remarks or comments elaborating on descriptions of systems, limitations, restrictions, or other similar conditions present during the inspection. Notes do not appear in the summary.
- Inspector Informational Note:Inspector informational note regarding inspection process.
- Description:Descriptive information for various aspects of the property, equipment, items, or areas noted during the inspection. Descriptions do not appear in the summary.
- Deck Description:Description of observed deck conditions and issues.
Summary Page
For convenience, the report contains a summary. The inspector uses the Summary to list non Periodic Maintenance issues that, in his opinion, he would expect to be completed before marketing the home for sale. Be advised, the summary contains only text from the observations listed as Key Concerns, Further Evaluation Needed, Hazardous and when applicable, New Construction Builder Punch List Items. The summary does not show any photos or photo captions that may be listed with an observation. The summary provides the least information for the observations listed.
The report body contains the most information and includes full descriptions, digital photographs, captions, and when applicable, diagrams, videos and hot links to additional information. Refer to the report body when making actual corrections, upgrade or repairs. Please understand that you have a duty and obligation to read the full report.
Summary
Key Concerns
- K-1 Kitchen:
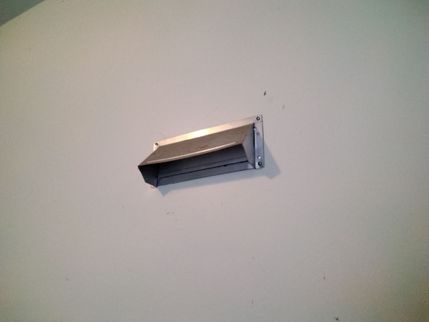
Ducted Exhaust ---
Kitchen exhaust fan did not appear to properly exhaust to the exterior. For safety, the installed type unit should properly exhaust directly to an exterior area. Refer to the installation instructions. Properly correct as needed for function and safety. Correct any affected areas if needed.
- K-2 Kitchen:
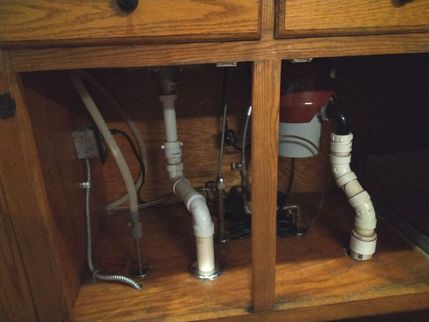
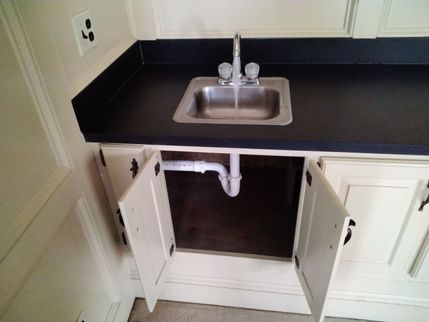
Sink Main Level --- --- ---
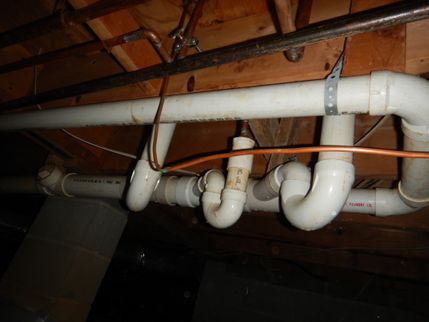
Waste drain beneath sink was irregular. Proper correction of irregular waste drain is recommended.
- P2-1 Plumbing:
Water Heater --- ---
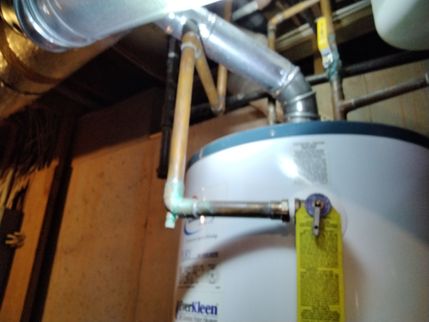
Water heater relief valve should have discharge extension pipe that is installed so that valve and discharge piping drain completely. Installed discharge pipe did not appear to be self draining. Properly correct water heater relief valve discharge pipe as needed for function and safety.
- P2-2 Plumbing:
Water Heater --- ---
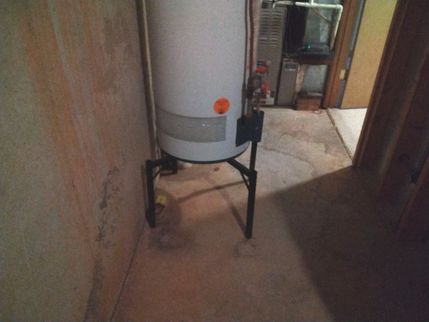
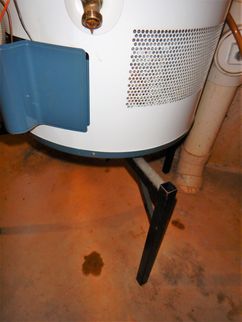
It is recommended that water heaters installed at or adjacent to interior type areas have contingency measures installed to mitigate expected leakage or rupture of water heater. Such measures would collect and drain unwanted water to exterior to avoid damaging interior finishes. Consider upgrading water heater installation to help reduce unnecessary damage when the water heater fails.
- P2-3 Plumbing:
Water Heater --- ---
Water heater did not appear to meet manufacturer installation standards for proper installation when inspected. Refer to installation instructions and have a competent contractor correct as needed for function and safety.
- P2-4 Plumbing:
Water Heater --- ---
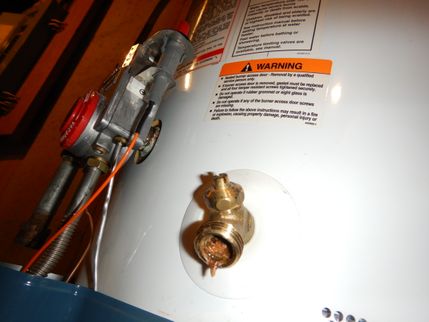
Water was observed near water heater. Determine source of unwanted water, take corrective measures to prevent recurrence and properly repair any affected areas as needed.
- Slight Drip Leak Observed at Water Heater Boiler Drain
- P2-5 Plumbing:
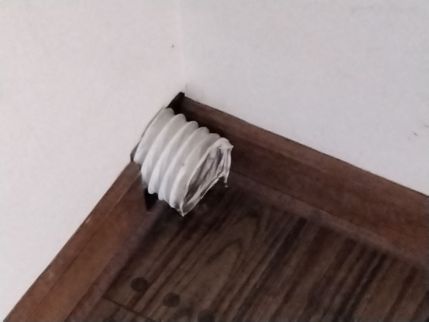
Plastic clothes dryer exhaust was observed.
This type of exhaust is combustible and poses a risk of fire when used with a clothes dryer. Properly install sheet metal exhaust system for clothes dryer that exhausts directly to an exterior area for safety and that is compatible with your clothes dryer.
- P2-6 Plumbing:
Sink Upstairs --- --- ---
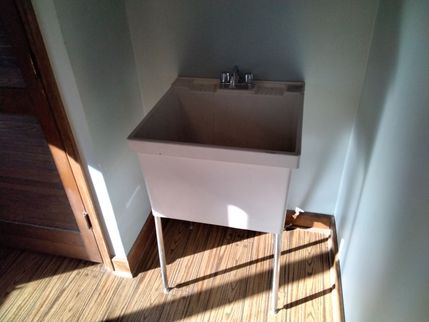
Laundry sink was loose. Properly secure sink as needed to help prevent leaks
- P2-7 Plumbing:
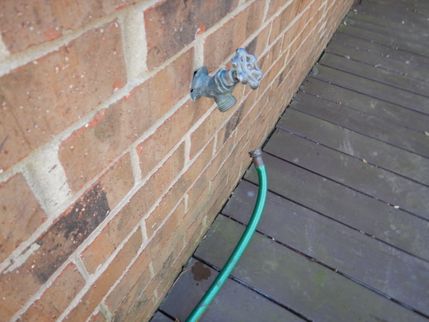
Rear exterior hose faucet was observed inoperative when inspected. Properly correct or replace as needed.
- CHC-1 Central Heating/Cooling:
Cooling system evaporator coils installed at, adjacent to, or above a finished living space should have a properly installed condensate overflow leak pan to help minimize damage to finished areas when the system malfunctions. A properly installed float switch should be present at the overflow pan to switch off the condensing unit when the condensate drain becomes clogged or a separate drain should be present for the overflow pan that drains directly to an exterior area. Consider having a qualified competent heat/cool contractor properly correct area to control unnecessary preventable damage.
- CHC-2 Central Heating/Cooling:
Ductwork System served main level ---
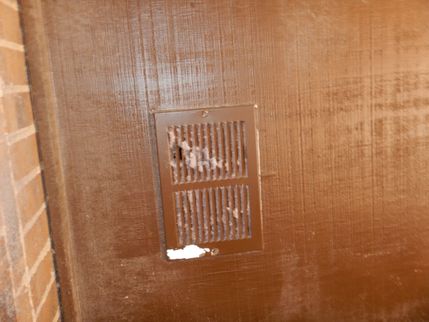
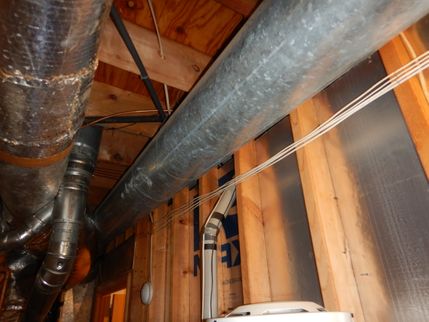
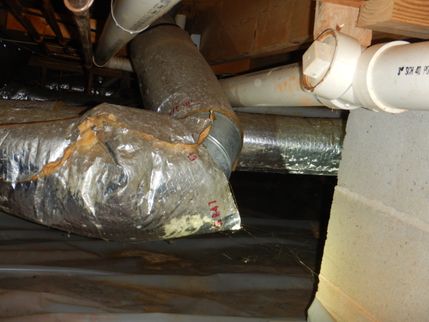
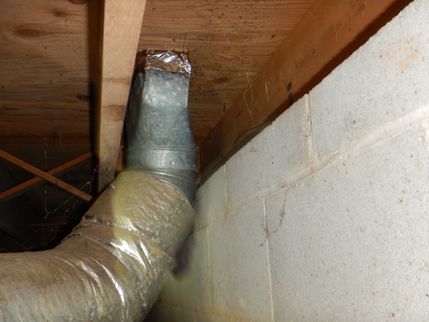
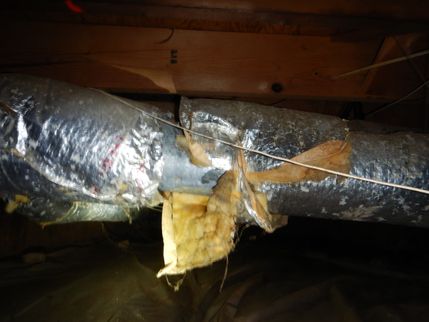
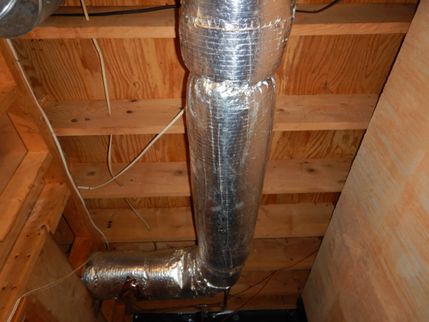
Ductwork insulation observed in need of correction for some areas. Have a competent heating contractor check all ductwork properly correcting where needed.
- Ductwork insulation observed missing and damaged
- E4-1 Electrical:
GFCI receptacle at rear exterior failed to properly trip when tested using the push button on the receptacle. Properly repair or replace GFCI receptacle as needed for safety.
- E4-2 Electrical:
Electrical Receptacle Outlet ---
Electrical receptacle was found inoperative during inspection.
Check all areas. Properly correct as needed for function and safety.
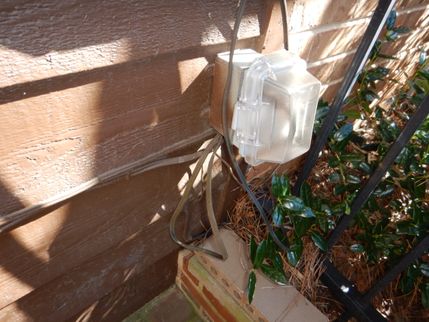
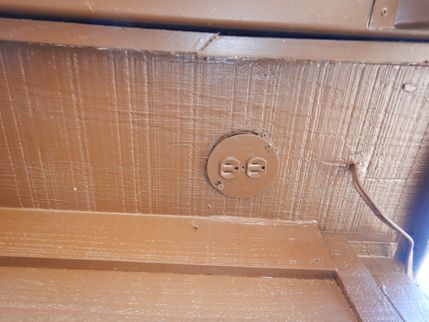
- Electrical receptacle at rear exterior eave was inoperative when tested and lacked a weather-tight cover
- E4-3 Electrical:
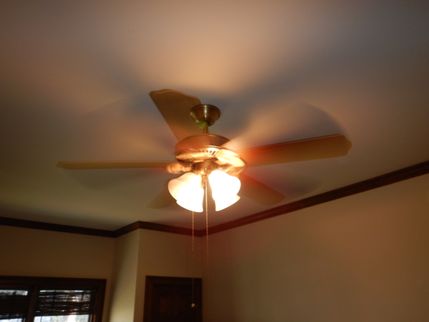
Multiple lighting was inoperative or not fully functional when inspected. Make all lighting/fans functional and safe as needed.
- AL-1 Attic Ladder:
Attic ladder was observed ready for corrections now and before use to improve the function and safety aspects of the attic ladder. Refer to the full report for additional information and photos regarding obvious corrections recommended now for the attic ladder area. A competent qualified contractor capable of reading and following the manufacturer installation instructions should check all attic ladder areas. Make attic ladder functional, safe and structurally sound where needed.
- R-1 Roof:
Roofing was ready for corrections now. A competent roofing contractor should check entire roof system and associated flashings. Repair or replace roof covering system as needed.
- Roofing Age Varied
- Many Shingles Observed Worn
- Some Shingles Observed Damaged
- Temporary Patched Areas Observed
- Flashing at Roofing to Siding Intersection was Ready for Upgrade
- Roof Slope at Swimming Pool Equipment Shed Did Not Have Sufficient Slope for Installed Shingles
- R-2 Roof:
Consider replacement of older roofing.
Weigh your options for repairing roofing now knowing that you should replace it in the near future with the option of proper complete replacement now. Considering that a properly replaced roofing system may last up to three decades it may make better sense to replace the roofing correctly now rather than to repair an older roof system that will have to be replaced soon anyway.
- DAWP-1 Deck Areas / Wooden Porches:
Deck areas were observed ready for corrections now and before use to improve the structure of the deck and to improve the safety aspects for the fall prevention measures installed at deck areas. Refer to the full report for additional information and photos regarding obvious corrections recommended now for any deck areas. A competent deck contractor should check all deck areas. Make deck areas functional, safe and structurally sound where needed.
The Full Report
General Comments
Building Characteristics, Conditions and Limitations
Approximate Square Footage: 5500
Approximate Year of Original Construction: 1982
Interior
Access
Empty Furnishings
Home was empty of furnishings when inspected.
Walls
Wall Materials: Drywall, Paneling
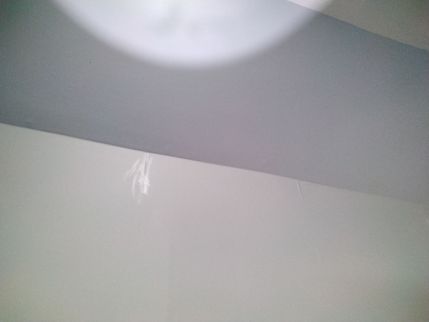
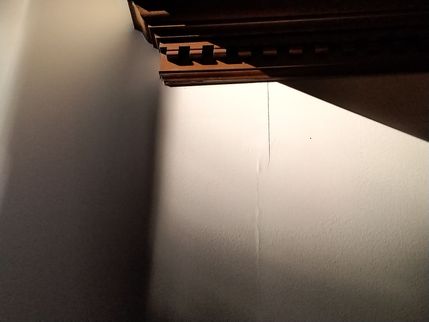
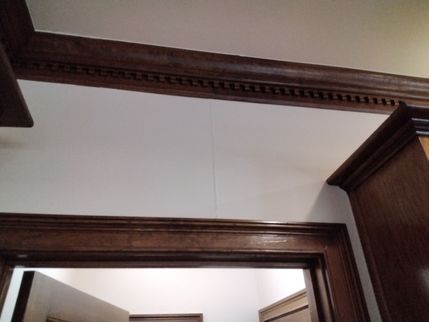
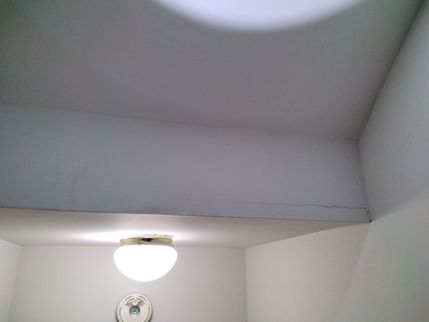
Some settlement type cracking observed.
Wallpaper Painted
Ceilings
Flooring
Floor Covering Materials: Wood, Carpet, Sheet Vinyl, Tile
Wear noted. Properly recondition to meet your needs., Not Level
Flooring --- --- --- ---
Flooring appeared out of level. Consider for proper correction to meet your standards.
Doors at Interior
Doors at Interior: Some door operation could be improved, Correct interior doors to your standard
Door to Unheated Area
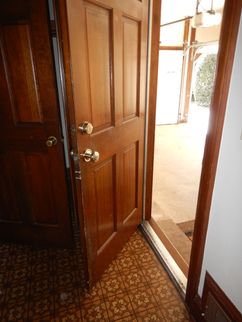
Interior Door Unheated Area, Garage Hinged Door Raised Panel < 1 3/8"
Interior type door was observed leading to unheated area. An interior door should not be used as an entry door from an unheated or non cooled area. Consider upgrading to an exterior rated door with weather stripping to lower utility costs and improve safety.
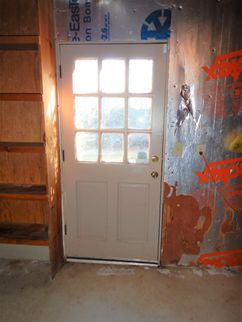
Raised Panel Door < 1 3/8" observed at Garage Hinged Door Leading to a Living Space
An interior type door with recessed panels was observed leading from a living space to a garage area. Due to the recesses in the panels, the installed door was less than 1 3/8" thick where recessed. Such an interior type door typically should not be used as an entry door from a garage area. Evaluate your risk exposure upgrading to an appropriate type door if needed. This door, when replaced, may also need to meet certain separation requirements to separate a garage area from a living space for safety.
Doors to Exterior
Egress: Locked Key Unavailable
Check All, Replace, Repair, Check All
Check all doors to exterior properly making doors functional, secure and weather tight to meet your needs.
- One sliding patio door at rear did not lock
- One sliding patio door at rear did not unlock properly and was not operated.
Replace, repair or upgrade doors to meet your needs. Properly correct any affected adjacent areas if present. Check all doors to exterior properly making doors functional, secure and weather tight to meet your needs.
Glazing/Glass
Insulated glass was present.
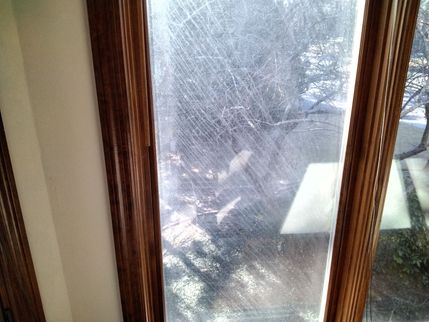
Visibility Obscured, Not Identified Tempered
Obscured visibility was observed at insulated glass at some windows. Obscured visibility at insulated glass can be caused by failure of the seal between the layers of glass, failure of the UV protective film or other cause. Replacement of the glass is typically the best method to cure this problem. Check all areas. Properly replace or repair all obscured or damaged glass as needed.
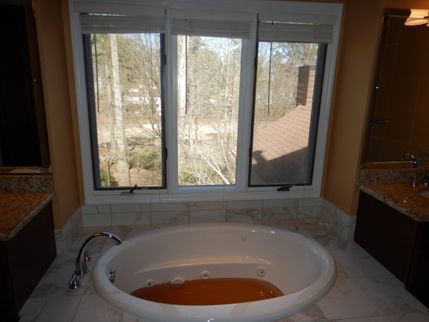
Exterior glass at tub in master bathroom observed subject to fall impact. The window glass did not appear to be tempered glass for safety and should be considered for upgrade. Tempered safety glazing is to minimize possible injury to persons that may fall into glass. Evaluate your risk exposure properly correcting as needed.
Windows
Older wood framed windows were present
Installed Windows Appeared Older.
Wooden framed windows require more periodic maintenance than modern vinyl or metal windows. Properly maintain wooden framed windows to meet your needs. Consider upgrade to a more durable material, if less frequent maintenance is desired.
Older Windows
Older windows often have been neglected and may not operate as intended. Check all windows properly correcting where needed.
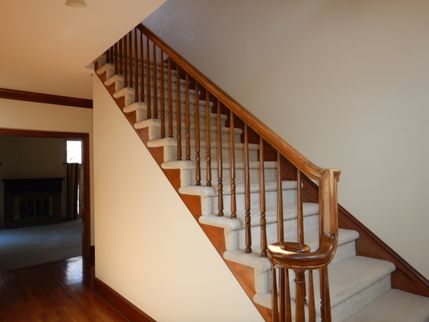
Stairs and Railings at Interior
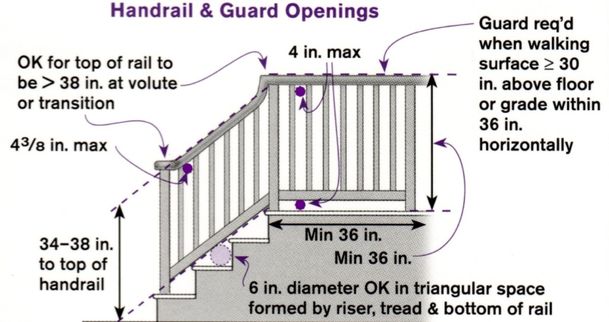
Diagrams: Correction Needed Railing & Stair Diagrams
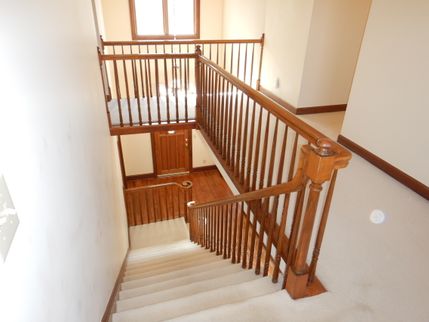
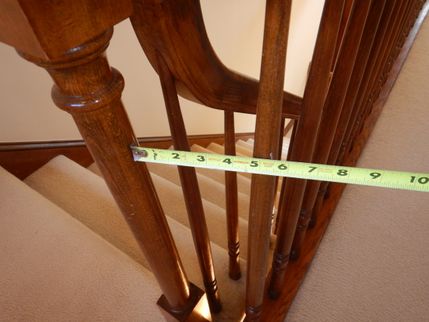
Guardrail: ≥4", Low
One or more openings at railings, such as at balusters, did not reject a 4" sphere at guardrails. Evaluate your risk exposure properly correcting as needed for improved safety and function.
Guardrail observed less than 36" tall was ready for proper correction.
Handrail: Wrong Height, Wobbled No Mid Post
Modern handrails at steps should be 34" to 38" above toe of stair tread for safety. Installed handrails were at a different height and proper correction is recommended.
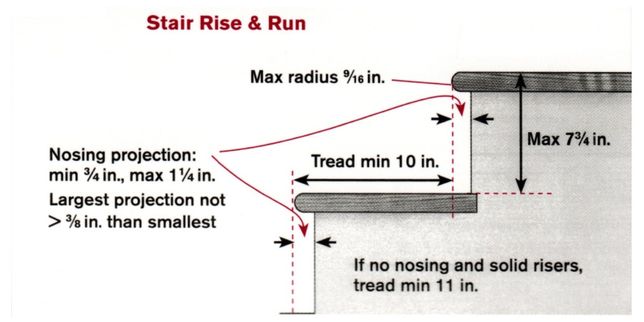
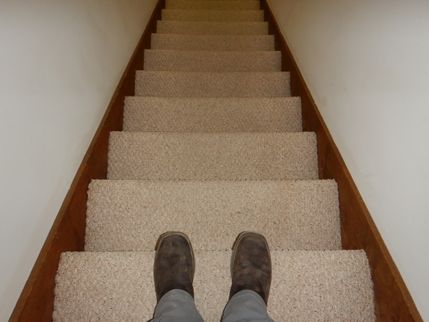
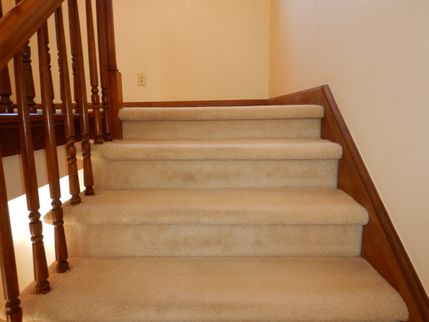
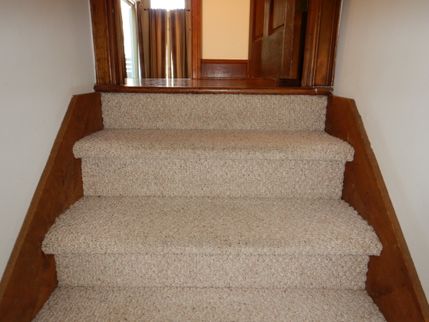
Stairs: Tread <10", Uneven, Stairs Repair/Replace
Stair treads were observed shorter than 10", tread nose to tread nose, where tread nose was 1" or greater. Use caution when walking on steps. Consider correcting stair treads for improved safety.
---
Uneven steps were observed. Differing riser heights are a common cause of falls. For safety, the height between the tallest and the shortest riser on a set of stairs should be no more than 3/8". Proper correction is recommended.
---
Evaluate your risk exposure. Consider proper repair or replacement of steps where needed now for safety and function.
Garage
Garage Area
GARAGE TYPE: Attached
Garage Floor Location: Below Ground
Garage Separation from Living Space: Drywall Missing Wall
Wall framing separating the garage area from the living space was exposed or not completely covered with drywall.
Should a fire occur at an attached garage area, properly installed drywall on framing, where needed, can offer some assistance to slow the spread of fire and smoke from the garage area to living areas. Consider this area for an appropriate improvement or upgrade.
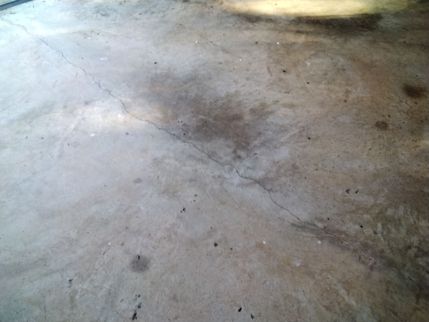
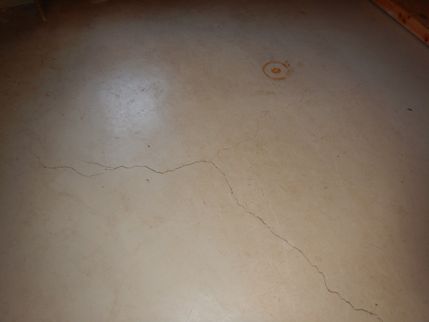
Garage Floor: Floor Cracked
________________________________________________________________________________________________________________________________________________________________
GARAGE OVERHEAD DOOR: Two Installed
Overhead Door Material: Metal
Overhead Door Insulation: Insulated
Overhead Door Operation: Tested Using Operator
________________________________________________________________________________________________________________________________________________________________
GARAGE OVERHEAD DOOR OPERATOR: Testing Garage Overhead Door Operators
Testing Garage Overhead Door Operators
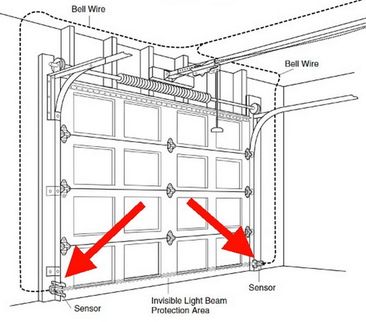
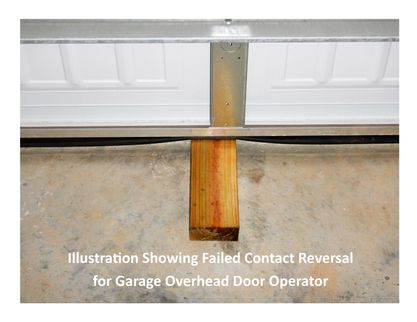
Garage overhead door operators require periodic maintenance to maintain safe operation. Electric overhead operators are checked for function and safety during the inspection. Modern garage overhead door operators have two safety reversal means, Contact Reversal and Non Contact Reversal. Contact Reversal is when the garage overhead door hits an obstruction and the operator should reverse for safety. Non Contact Reversal is when the electronic eye detects an obstruction without the garage overhead door hitting an object and the operator should reverse for safety.
The Contact Reversal of the garage door operator is tested using a 1.5 inch obstruction on the floor at the center point of the door. If the Contact Reversal requires correction this is typically accomplished by a simple adjustment on the operator but other corrections could also be necessary. See operator owners manual for additional details.
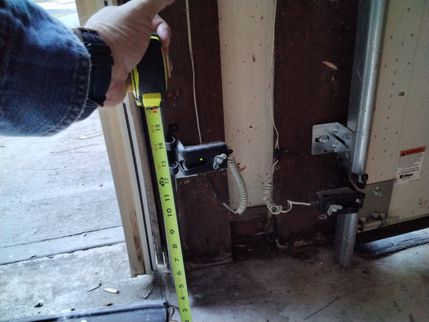
The Non Contact Reversal is tested by obstructing the electronic eyes, if installed properly, while the electric operator is closing the garage overhead door. The installed height of the electronic eyes varies slightly by manufacture but most typically advise installing the electronic eyes no more than six inches above the floor. If the electronic eyes require adjustment this is typically accomplished by remounting or correcting the aim of the eyes but other corrections could also be necessary. See overhead door operator owners manual for additional details. If the electronic eyes are out of alignment the operator will not close the garage overhead door without pushing and holding the wired push button until the garage overhead door is fully closed.
Electronic Eyes / Non Contact Reversal: Eyes Installed High
Contact Reversal: Contact Functional, Contact Failed
Attached Garage Left Overhead Door Operator as facing from interior of garage
Overhead door operator contact reversal means tested functional. This function should be rechecked periodically for safety. Correct when needed.
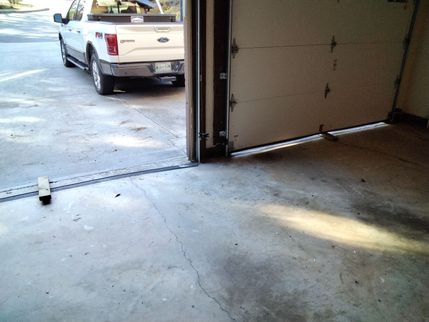
Attached Garage Right Overhead Door Operator as facing from interior of garage
Overhead door operator contact reversal means failed pinning an obstruction. It is not uncommon for the garage overhead door operators to require minor adjustment periodically. See overhead door operator owners manual for how to adjust the operator force for correct function. Correct as needed now for improved safety.
Kitchen
Kitchen Inspection Process
Kitchen Inspection Process
Kitchen
Kitchen Area: Main Level
---
Countertop: Granite
Serviceable, fulfilling its function
Cabinets: Wood
Some wear noted, recondition as desired
Floor Covering: Wood
Wear and damage observed, budget reconditioning
Flooring was not level. Consider for correction.
Sink: Double Bowl Stainless Steel
No leaks were viewed at faucet or visible supply lines or waste drain just beneath the sink.
---
Disposal: Present and appeared functional
Dishwasher: Present and ran through a normal cycle without incident
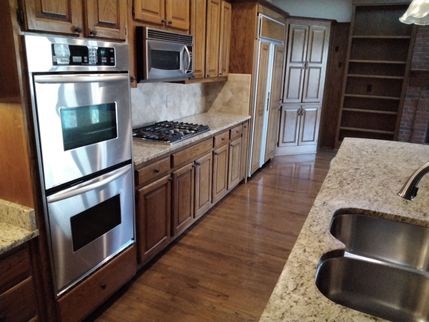
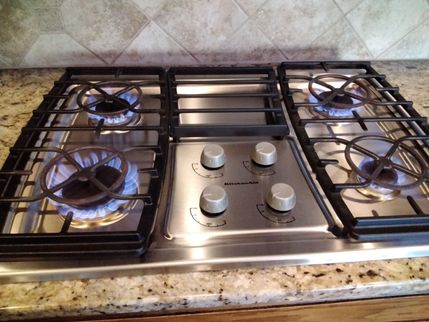
Range: Cooktop Gas and Separate Electric Double Oven
Present and On/Off Tested functional
Microwave: Present and On/Off Tested functional
Kitchen Exhaust: Questionable installation observed, see Summary of report
Refrigerator: Present but not evaluated
Trash Compactor: Not Present
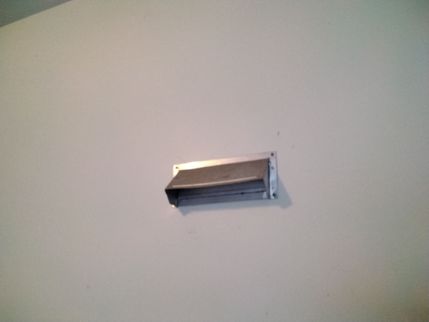
Ducted Exhaust ---
Kitchen exhaust fan did not appear to properly exhaust to the exterior. For safety, the installed type unit should properly exhaust directly to an exterior area. Refer to the installation instructions. Properly correct as needed for function and safety. Correct any affected areas if needed.
Sink Main Level --- --- ---
Waste drain beneath sink was irregular. Proper correction of irregular waste drain is recommended.
Bathroom
Testing Plumbing at Bathroom Areas
Testing Limitations
Bathroom 1
Full Bathroom
Upstairs Master --- ---
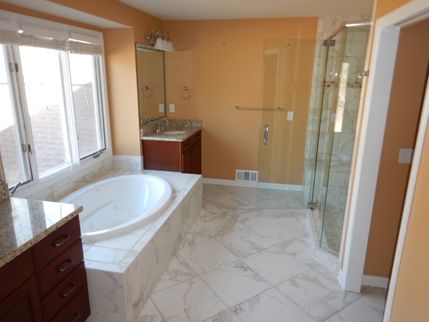
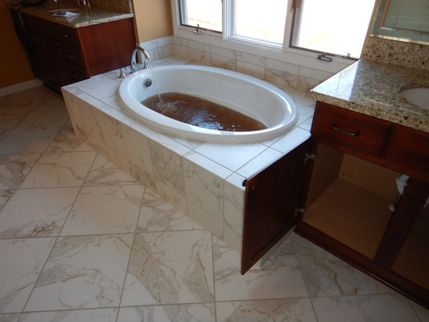
Bathing: Hydro massage tub and separate shower
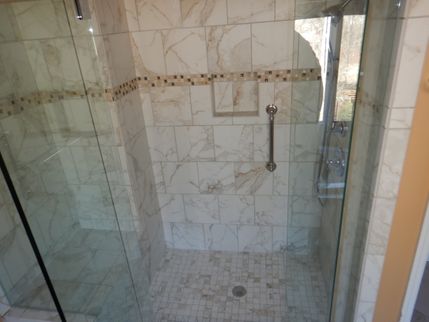
Properly maintain tile work to meet your needs.
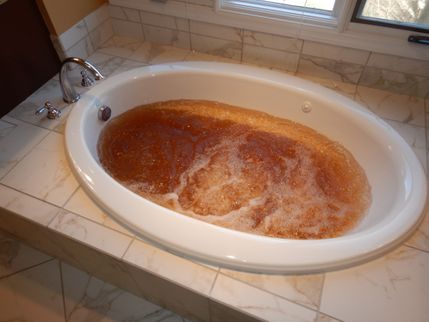
Hydro massage tub was filled and operated appearing functional.
---
Hand Washing: Two basins in vanity ---
No leaks were observed around faucet, visible supply lines or waste drain just beneath the sink.
---
---
Toilet: Water tank type ---
No Leaks were observed around toilet and it appeared secured in place.
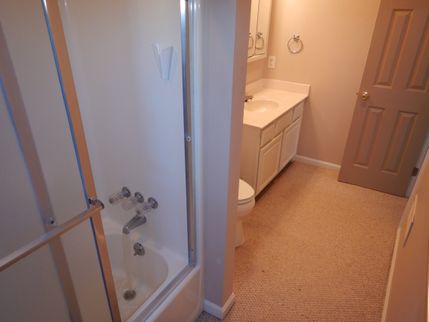
Ventilation: Window present to ventilate bathroom
Multiple fans were present and appeared operative.
Exhaust fans to exterior if needed
Floor Covering: Tile
Serviceable, fulfilling its function
---
Bathing Area: Improve (Hydro Massage Tub Motor Improve Access)
Hydro Massage Tub Master --- --- ---
Hydro massage tub motor access needed correction or improvement. Hydro massage tub motor areas should be readily, tool free accessible for servicing. Access requirements vary by tub manufacturer. Refer to installation instructions and consider an access upgrade for periodic servicing of area.
- No access was observed for hydro massage tub motor
Bathroom 2
Full Bathroom
Upstairs at Hall --- ---
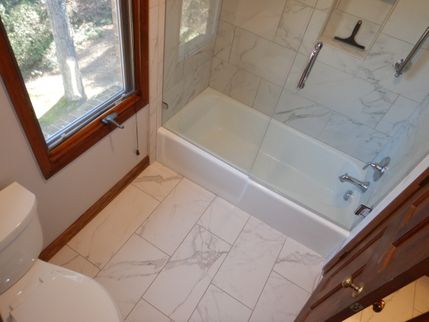
Bathing: Combination tub and shower
No leaks were observed around faucet and the water containment area appeared serviceable.
Properly maintain tile work to meet your needs.
---
Hand Washing: Two basins in vanity ---
No leaks were observed around faucet, visible supply lines or waste drain just beneath the sink.
---
---
Toilet: Water tank type ---
No Leaks were observed around toilet and it appeared secured in place.
Ventilation: Window present to ventilate bathroom
Fan on/off tested operative - Consider exhausting to exterior if needed.
Floor Covering: Tile
Serviceable, fulfilling its function
---
Bathroom 3
Full Bathroom
Main Level at Hall --- ---
Bathing: Combination tub and shower
No leaks were observed around faucet and the water containment area appeared serviceable.
Properly maintain tile work to meet your needs.
---
Hand Washing: Vanity with basin ---
No leaks were observed around faucet, visible supply lines or waste drain just beneath the sink.
---
---
Toilet: Water tank type ---
No Leaks were observed around toilet and it appeared secured in place.
Ventilation: Window present to ventilate bathroom
Fan on/off tested operative - Consider exhausting to exterior if needed.
Floor Covering: Tile
Serviceable, fulfilling its function
---
Bathroom 4
Full Bathroom
Basement --- --- ---
Bathing: Combination tub and shower
No leaks were observed around faucet and the water containment area appeared serviceable.
---
---
Hand Washing: Vanity with basin ---
No leaks were observed around faucet, visible supply lines or waste drain just beneath the sink.
---
---
Toilet: Water tank type ---
No Leaks were observed around toilet and it appeared secured in place.
Ventilation: ---
Fan on/off tested operative - Consider exhausting to exterior if needed.
Floor Covering: Carpet
Carpet not recommended in bathroom, consider upgrade
---
Plumbing
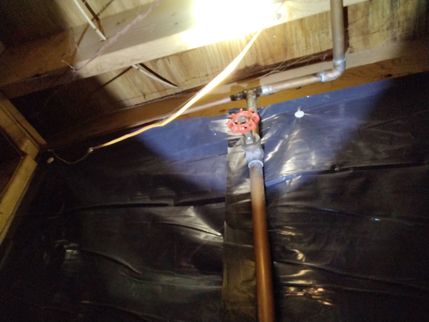
Plumbing Supply Piping - Main Water Shut Off Valve - Apparent Location - Note Such Valves are Not Operated
Water Heater
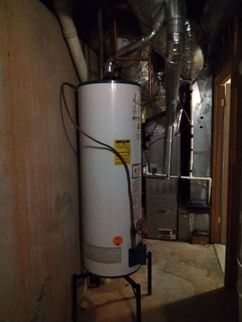
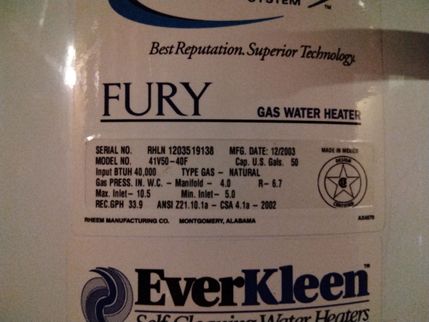
Water Heater
Discharge Piping: Should Self Drain
Leak Mitigation: Installed at Interior
Installation Issue: Questionable Installation
Performance Issue: Water Near Water Heater
Water Heater --- ---
Water heater relief valve should have discharge extension pipe that is installed so that valve and discharge piping drain completely. Installed discharge pipe did not appear to be self draining. Properly correct water heater relief valve discharge pipe as needed for function and safety.
Water Heater --- ---
It is recommended that water heaters installed at or adjacent to interior type areas have contingency measures installed to mitigate expected leakage or rupture of water heater. Such measures would collect and drain unwanted water to exterior to avoid damaging interior finishes. Consider upgrading water heater installation to help reduce unnecessary damage when the water heater fails.
Water Heater --- ---
Water heater did not appear to meet manufacturer installation standards for proper installation when inspected. Refer to installation instructions and have a competent contractor correct as needed for function and safety.
Supply Piping
Supply Piping: Copper, PVC at water main from meter, PVC viewed at foundation likely from water meter
Water Flow at Supply Piping: Adequate
Adequate functional supply water flow was observed during inspection for water outlets operated.
Waste Piping
Waste Piping: Plastic
Functional waste water flow observed during inspection for water outlets operated.
Apparent Plumbing Vent Piping
Plastic - No Adverse
Material: Plastic
No adverse conditions were observed, maintain to meet your needs.
Laundry Connections
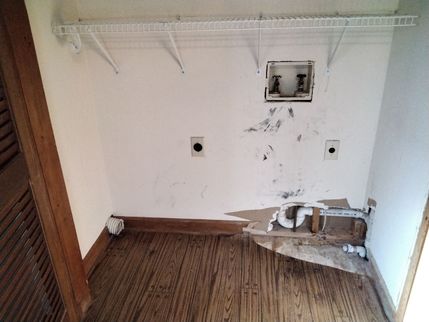
Laundry: Connections Available
Clothes washer and dryer connections were available. Laundry appliances were not present during inspection. Laundry faucets are not operated when the basin beneath the faucets is inadequate to contain the faucet flow without a hose being connected to the faucets. Verify your clothes dryer exhaust is functional, safe and properly installed to meet the requirements of clothes dryer manufacturer when installed.
Clothes Dryer: Plastic Exhaust
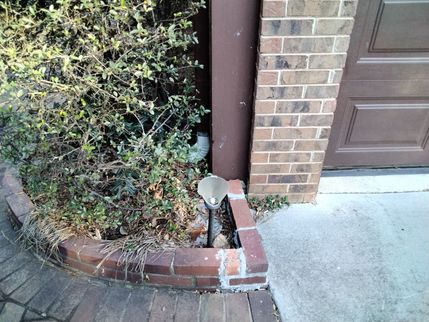
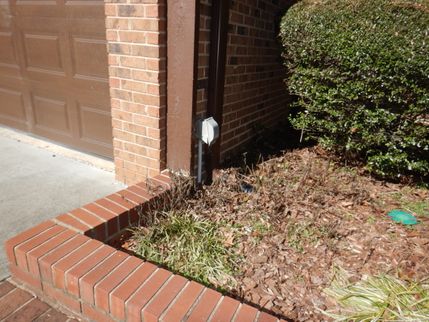
Plastic clothes dryer exhaust was observed.
This type of exhaust is combustible and poses a risk of fire when used with a clothes dryer. Properly install sheet metal exhaust system for clothes dryer that exhausts directly to an exterior area for safety and that is compatible with your clothes dryer.
Laundry Sink
Other Sink Area
Exterior Hose Faucets
Performance: Inoperative
Plumbing Equipment Observed Present But Not Tested or Evaluated
Thermal Expansion: About Thermal Expansion, Tank Present
Regarding Plumbing System Thermal Expansion:
Thermal expansion occurs when a tanked water heater operates without any plumbing valves open for a period of time. If the property water meter has a check or backflow preventer valve installed it will prevent the expanding contained water from flowing backwards through the water meter. This expansion causes the water heater pressure relief valve to open briefly releasing a small amount of water if an expansion control device is not present or not working properly. If the pressure relief valve on the water heater opens and does not seal closed properly then active leaks and subsequent damage may occur.
A plumbing thermal expansion tank was observed near the water heater. Maintain this area as you would any other portion of the plumbing system correcting when needed.
Pressure Reducer: About Pressure Reducing Valves
Regarding Plumbing System Pressure Reducing Valves:
The pressure reducer or pressure regulator in a plumbing system is designed to reduce the water pressure to a reasonable level in an effort to help prevent damage to the plumbing system. For most areas if the utility water pressure is greater than 80 PSI (pounds per square inch) a pressure reducer is needed. For some areas with extremely high utility pressure multiple pressure reducers may be needed installed in series. Pressure reducers are typically factory set for 50 PSI and property water pressure is expected to be between 30 PSI and 80 PSI. Inspector notes presence of pressure reducer when observed. Pressure readings for plumbing system are not part of the inspection performed.
Pressure Reducer Location: Unfinished Basement
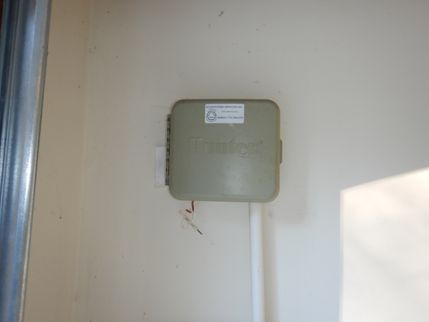
Other Equipment Observed but Not Tested or Evaluated: Irrigation Sprinkler System
Central Heating/Cooling
Central Heating /Cooling
Split System
Split System served: System served upstairs area ---
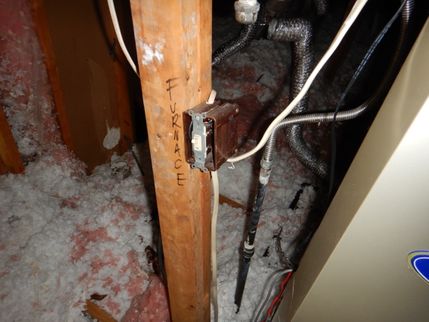
Brand Furnace: Carrier / Location: Attic / Fuel: Gas
Size: 66,000 BTU / Year of Manufacture: 2007
Gas furnaces typically have a service life of 16-22 years when properly maintained
Filter Type: Disposable filter at furnace / Thermostat Type: Digital
Cooling Brand: Carrier / Location: Exterior / Fuel: Electric
Size: 3 ton / Year of Manufacture: 2007
Central cooling units typically have a service life of 12-18 years when properly maintained
Condensate disposal method: Gravity drain piping - service annually
---
Heating Function: Functional
Heating System Functional
Inspector adjusted thermostat. Heating system engaged and was found to be functional.
Cooling Function: Below 60 Degrees
Cooling System Not Operated Cool Day
Outdoor temperature was below 60 degrees f. The central cooling system was not operated in cooling mode due to low exterior ambient temperatures. To test the cooling unit without causing possible damage to the compressor the ambient outdoor temperature should be above 60 degrees.
Central Heating /Cooling cont
Split System
Split System served: System served main level and basement area ---
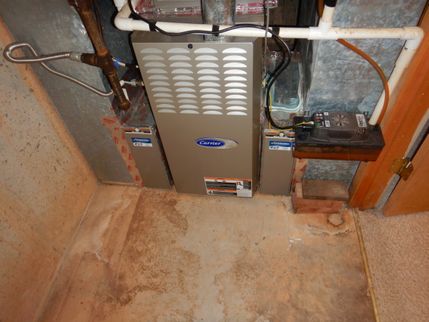
Brand Furnace: Carrier / Location: Basement / Fuel: Gas
Size: 88,000 BTU / Year of Manufacture: 2007
Gas furnaces typically have a service life of 16-22 years when properly maintained
Filter Type: Disposable filter at furnace / Thermostat Type: Digital
Cooling Brand: Carrier / Location: Exterior / Fuel: Electric
Size: 4 ton / Year of Manufacture: 2007
Central cooling units typically have a service life of 12-18 years when properly maintained
Condensate disposal method: Condensate pump was present
---
Heating Function: Functional
Heating System Functional
Inspector adjusted thermostat. Heating system engaged and was found to be functional.
Cooling Function: Below 60 Degrees
Cooling System Not Operated Cool Day
Outdoor temperature was below 60 degrees f. The central cooling system was not operated in cooling mode due to low exterior ambient temperatures. To test the cooling unit without causing possible damage to the compressor the ambient outdoor temperature should be above 60 degrees.
Condensate: Leak Pan Not Present
Cooling system evaporator coils installed at, adjacent to, or above a finished living space should have a properly installed condensate overflow leak pan to help minimize damage to finished areas when the system malfunctions. A properly installed float switch should be present at the overflow pan to switch off the condensing unit when the condensate drain becomes clogged or a separate drain should be present for the overflow pan that drains directly to an exterior area. Consider having a qualified competent heat/cool contractor properly correct area to control unnecessary preventable damage.
Distribution Ductwork
Ductwork Information: About your ductwork
Regarding calculating the load of a central system:
Several factors are considered when performing a load evaluation for central heating and cooling systems to determine the appropriate size system for the area served. Factors such as installed ductwork, insulation, ceiling height, basement area served, if present, shade, climate zone along with size, number and placement of windows have to be taken into account before sizing a system. The inspector does not calculate the load of a central heating and cooling system during the performed inspection. The inspector also does not confirm that the installed ductwork is appropriately sized to serve the the installed central heating and cooling equipment. Properly maintain the ductwork system to meet your comfort needs and to allow system to operate properly.
Ductwork: Single Unit Serving Multiple Floors
Ductwork System served main level and basement area ---
A single central heat/cool system was installed serving multiple floor levels. When one central system serves multiple floor levels expect some temperature disparity between floor levels. Seasonal adjustment of vent diffusers may help. A heating contractor may also be hired to modify the system. Monitor your comfort level and correct as desired to meet your needs.
Gas Appliance Flue
Flue
Furnace
Furnace System served upstairs area ---
Flue Type: Metal Flue, exhaust discharged through roof
Flue appeared serviceable for visible areas.
Shared
Shared Flue System served main level and basement area ---
Flue Type: Metal Flue, shared by water heater and furnace
Flue appeared serviceable for visible areas.
Gas
Gas Fuel Piping
Natural gas piping observed at inspected property.
Some of the installed gas piping appeared buried at the inspected property.
Properly maintain gas piping as needed for function and safety.
Space Heating
Vented Fireplace or Fireplace with a Flue Present
What is a Vented Fireplace or a Fireplace with a Flue?
Regarding Vented Fireplaces or Fireplaces with a Flue
This type of fireplace will exhaust directly to an exterior area in an effort to reduce or eliminate smoke, fumes and carbon monoxide build up in the interior living space areas. You should become familiar with care and maintenance procedures for any installed fireplace as some procedures will be specific to what type of fireplace is installed. If you choose not to learn about the care and maintenance requirements for the installed fireplace, you should have a competent qualified chimney specialist check and inspected the fireplace before initial use and then as directed by the chimney specialist thereafter. Properly maintain any fireplace as needed for proper function and safety.
Type: Prefabricated or Manufactured Fireplace
________________________________________________________________________________________________________________________________________________________________
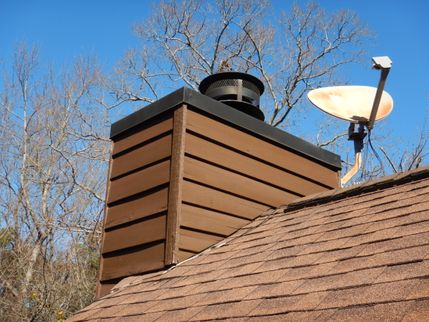
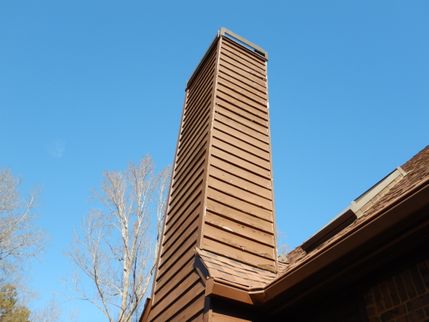
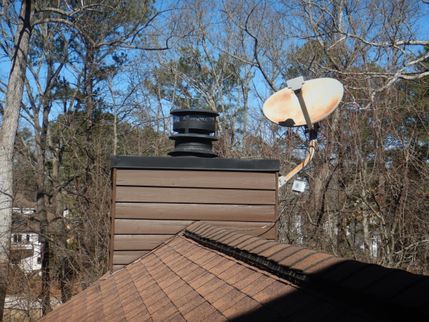
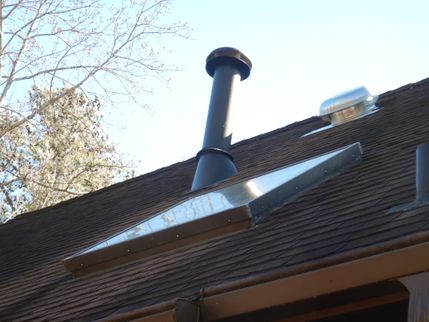
Chimney Type: Metal Fabricated Type
Access: Chimney Top Not Accessed
Top of chimney was not accessed by inspector.
Chimney Condition: Metal Chimney Maintain Older
Metal Chimney Maintain: ---
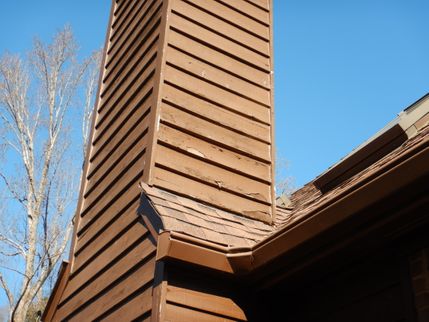
Properly maintain older metal fabricated chimney to meet your needs for fire safety. Properly maintain chimney chase to prevent nuisance storm water leaks.
________________________________________________________________________________________________________________________________________________________________
Vented Fireplace or Fireplace with a Flue Present
Location: Keeping Room
Type: Prefabricated or Manufactured Fireplace
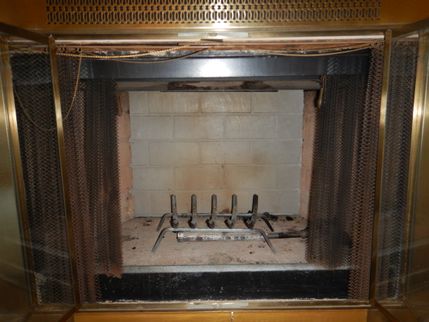
Gas Log Set Heater: Present
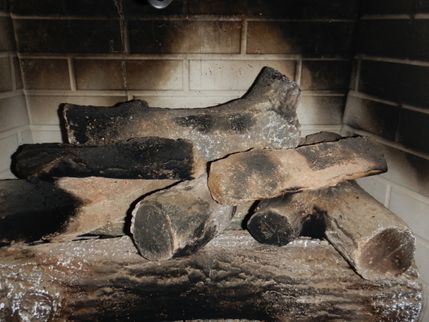
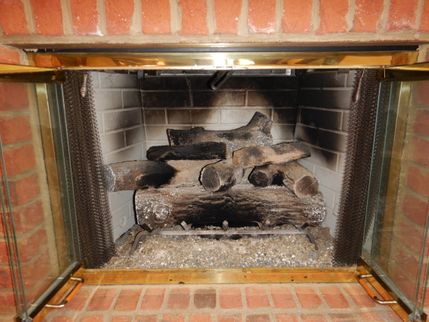
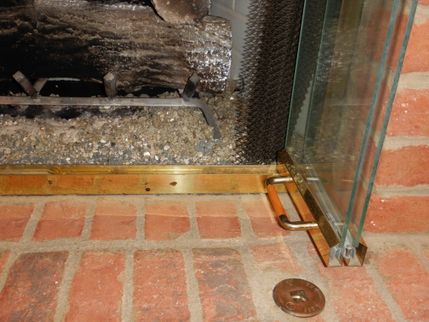
Gas Log Set Heater Condition: Faux Logs Out of Position, Faux Logs Sooted, No Pilot Light Assembly
Gas Log Set Heater Keeping Room
Faux logs appeared out of position.
Refer to installation instructions properly correcting before use.
Gas Log Set Heater Keeping Room
Faux logs observed sooted.
Often this is due to the faux logs being out of position but this can also be related to other gas log issues. Properly service gas log heater before use correcting as needed for function and safety.
________________________________________________________________________________________________________________________________________________________________
Damper: Should be Blocked Open
Fireplace Keeping Room
Installed gas logs appear to be vented type. Vented gas logs require the damper to be permanently blocked open. Refer to installation instructions and operation manual correcting as needed for function and safety.
________________________________________________________________________________________________________________________________________________________________
Chimney Type: Metal Fabricated Type
Access: Chimney Tops Not Accessed, Chimney Top Not Accessed
Tops of chimneys were not accessed by inspector.
Chimney Condition: Metal Chimney Maintain Older
Metal Chimney Maintain: ---
Properly maintain older metal fabricated chimney to meet your needs for fire safety. Properly maintain chimney chase to prevent nuisance storm water leaks.
________________________________________________________________________________________________________________________________________________________________
Electrical
Electrical System Inspection
Electrical System Inspection
What is an electrical system?
The electrical system consists of an electrical service, distribution equipment and branch wiring. The electric metering equipment is usually at the electrical service. Distribution equipment is most often one or more installed breaker panels and the branch wiring runs to all equipment, receptacles, lighting outlets and devices such as the light switches. The inspection report focuses on wiring operating between 100-250 Volts. Most low voltage wiring is excluded from the performed inspection. Low voltage items such as a heating and cooling thermostat are operated in order to determine the function of such equipment.
There are now a wide variety of lighting bulbs or lamps that will fit into lighting fixtures. Some choices may not be appropriate for some lighting fixtures. It is beyond the scope of this inspection to verify each lamp or bulb is appropriate for the installed lighting fixture. The inspector recommends that you review the bulb or lamp installations for each fixture correcting as needed for safety and function. Common errors include 100 watt bulbs installed in fixtures rated for 60 watt max bulbs and interior rated bulbs installed at exterior or damp locations. Other types of errors also exist.
The following opinion was based on an inspection of the readily accessible and visible portions of the electrical system. The Inspector is responsible for checking a representative number of installed lighting fixtures, switches, and receptacles. Electrical installation conditions and functional issues requiring correction should be performed by a competent licensed electrical contractor. Most, if not all, electrical corrections should be considered a safety concern.
System Amps / Volts
System Amperage: 200 Amps
System Voltage: 120/240 Volts
Electrical Service
Main Electrical Distribution Panel
Service Entrance Conductors: Aluminum, Stranded
Electrical Panel Type: Breaker Panel
Routine Correction Needed
Electrical Panel LOCATION
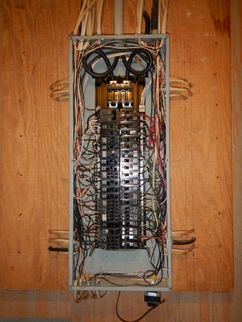
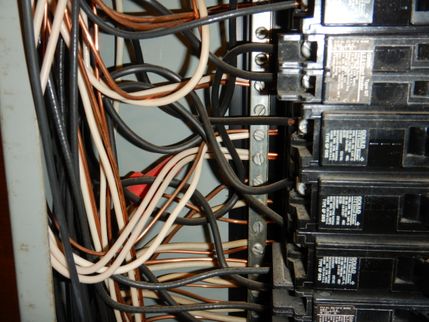
Routine corrections were needed at electrical distribution panel. These corrections should be performed now or may be scheduled with other electrical work if having that work done in the near future.
- Neutrals observed double lugged for some neutral wiring
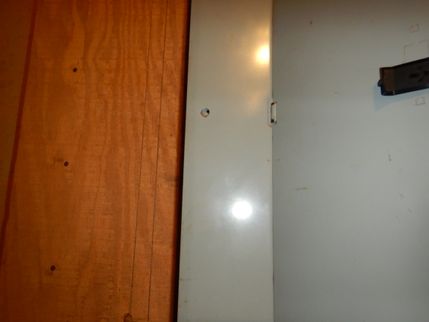
- Install proper screws at electrical panel cover where missing.
Location Issue: Main Disconnect Not Near Service
Electrical Panel ---
The main electrical disconnect was not located near the electrical service. This modern requirement is to assist firefighters and other personnel to more quickly disconnect the electrical power to the building when needed. Evaluate your risk exposure considering an upgrade for this issue.
Sub Electrical Distribution Panel
Access: Working Access
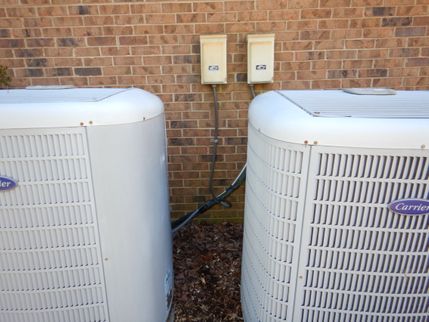
Electrical Panel Exterior near Cooling unit
Observed electrical equipment panel should have unobstructed dedicated safe service access area of no less than 30" in width and 36" depth as measured out from the inspected electrical panel. This clear area is needed for safe access to this type of equipment. Consider relocating equipment or obstruction as needed to provide minimum safe working access to the electrical panel.
- Upgrade recommended for both electrical panels at right exterior near cooling units.
Branch Wiring
Material: Copper
Wiring Issues: Wiring Corrections Routine
Branch Wiring
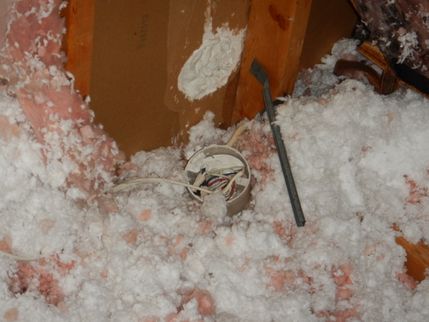
Routine corrections were needed to improve the safety of the electrical branch wiring. These corrections are usually non-recurring once properly completed. A competent electrical contractor should check all areas. Where applicable, terminate all exposed wire ends, enclose all open wire splices, secure loose wiring as needed and remove visible abandoned wiring and/or otherwise make wiring safe as needed.
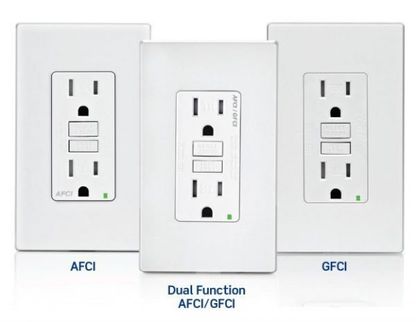
AFCI - Arc Fault Circuit Interrupter
AFCI Residential
What is Arc Fault Circuit Interrupter (AFCI) Protection?
AFCI protection is designed to help reduce the chance of fire when a specific type of malfunction occurs at installed electrical outlets. This protection detects unintended electrical arcs and disconnects the power before the arc starts a fire.
Most, but not all, homes will have a need for additional AFCI protection based on varied municipal enforcement and the numerous changes for which areas require AFCI protection. Evaluate your risk exposure. Consider adding AFCI protection where needed for improved safety, particularly where construction was completed 2002 or later.
Modern Locations Where AFCI Protection is Known to Improve Safety for 15 and 20 Amp Electrical Circuits:
For all 15 and 20 ampere single phase residential electrical circuits serving outlets and devices in Kitchens, Family Rooms, Dining Rooms, Living Rooms, Parlors, Libraries, Dens, Bedrooms, Sunrooms, Recreation Rooms, Closets, Hallways, Laundry Areas, or similar rooms or areas.
Testing AFCI Function
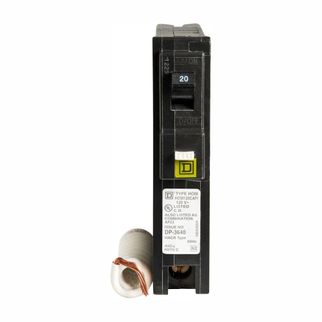
The inspector uses push button at AFCI breakers, where installed, to confirm AFCI protection trips. Once tripped, the inspector checks indexed electrical circuits to determine where AFCI protection is present or missing.
Obvious locations lacking AFCI protection are listed in the body of the report.
Obvious broken, non working and improperly wired AFCI receptacles or breakers are listed in the summary of the report. Evaluate your risk exposure.
No AFCI Built Before 2002
Areas That Did Not Appear AFCI Protected
No AFCI protection was observed at inspected property. AFCI protection is not expected for homes built before 2002. If installation of AFCI protection is desired, consult a competent electrical contractor.
GFCI - Ground Fault Circuit Interrupter
GFCI Residential
What is Ground Fault Circuit Interrupter (GFCI) Protection?
GFCI protection is designed to help reduce the risk of being shocked when using electricity in certain areas.
Most, but not all, buildings will have a need for additional GFCI protection based on varied municipal enforcement and the numerous changes for which areas require this type of protection. Evaluate your risk exposure. Consider adding GFCI protection for 15 and 20 ampere electrical circuits where needed for improved safety.
Modern Locations Where GFCI Protection is Known to Improve Safety for 15 and 20 Amp Electrical Circuits:
- all electrical receptacles at Bathrooms, Crawl Spaces, Exterior Areas, Garages, Unfinished Basements
- all electrical receptacles serving Kitchen Counter Surfaces
- all electrical circuits for Dishwashers
- all electrical circuits for Hydro Massage Tubs
- all 120 V electrical receptacles at Laundry Areas
- all electrical receptacles near Showers or plumbing Sinks (within 6 feet/arms reach)
- all 3 wire electrical receptacles installed on 2 wire circuits (such as at older homes)
- all electrical receptacles at accessory buildings (OUTBUILDINGS) that have a floor located at or below grade level not intended as habitable rooms
Testing GFCI Function
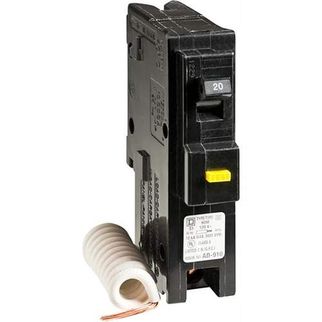
The inspector uses an electrical tester at receptacles that simulates a remote ground fault current to confirm which areas lack proper GFCI protection at electrical receptacles.
Obvious locations lacking GFCI protection are listed in the body of the report.
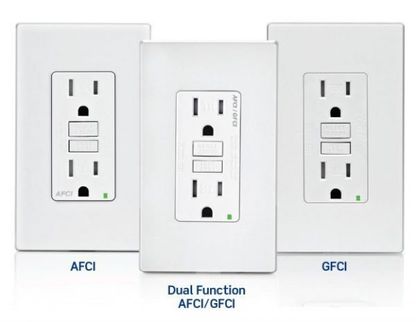
Obvious broken, non working and improperly wired GFCI receptacles or breakers are listed in the summary of the report.
GFCI Some
Some GFCI protection was present. Multiple areas would benefit from adding further GFCI protection. Consider modernizing electrical installation adding this shock protection, where missing, for all electrical areas where GFCI protection is known to improve safety.
GFCI - Ground Fault Circuit Interrupter, continued
GFCI REDUNDANT, GFCI Failed Button
GFCI electrical receptacle at master bathroom was redundant to GFCI electrical breaker at unfinished basement. Redundant GFCI protection was observed during inspection. While this is not a defect in itself, the occupant should know that redundant protection is present and where redundant devices are to avoid extended loss of use of electrical receptacle or needless electrical service calls.
GFCI receptacle at rear exterior failed to properly trip when tested using the push button on the receptacle. Properly repair or replace GFCI receptacle as needed for safety.
Electrical Receptacle Outlets
Receptacle Appeared Missing: Cooling Unit
Electrical Receptacle Outlet ---
An electrical receptacle was not observed near the cooling condensing unit at exterior. Equipment requiring periodic servicing should have a permanent electrical receptacle installed close by. Consider properly adding an electrical receptacle at exterior ground level within 25 feet of cooling condensing unit to service this equipment.
Cover Plates: Exterior
Electrical Receptacle Outlet ---
Install proper exterior receptacle covers where needed for safety.
Receptacle Loose
Electrical Receptacle Outlets ---
One or more electrical receptacles were observed loose. Properly secure any loose electrical receptacle where needed for safety.
One Not Working
Three Wire 240Volt Electrical Receptacle Outlets Commonly Found in Older Buildings
Three wire electrical circuit was observed for clothes dryer.
Three Wire 240V Receptacles Observed
Some older 240V 3 wire electrical receptacle circuits were observed. Typically, these circuits would serve electric clothes dryers or electric kitchen ranges but may also serve other areas. Evaluate your risk exposure and consider upgrade replacement of any 240V 3 wire receptacle circuits where present with a modern 240V 4 wire receptacle circuits for improved safety. Properly maintain older 240V 3 wire receptacle circuits to meet your needs and for safety, if not upgrading older circuits now.
Electrical Lighting Outlets and Ceiling Fans
Photo Cell
Photo cell was installed at some exterior light fixtures. Fixtures with photo cells are designed to operate after dark. Verify such lighting fixtures operate properly or correct as needed for function and safety.
Multiple Not Working Properly
Multiple lighting was inoperative or not fully functional when inspected. Make all lighting/fans functional and safe as needed.
Switches
Switch Location Informational Note
Regarding Lighting Switch Locations:
While exact placement of lighting switches is considered a design issue, installing lighting switches at appropriate locations is useful to improve safety. Generally, a light switch would be located within arms length of the entry point of a room so that the lighting for the room you are entering may be switched on from an area near the doorway. Installing a switch at an inconvenient location, such as on the hinge side of a door, would not be desirable. Where the stairway between floor levels has six risers or more, a wall switch would be located at each floor level and at each landing level that includes an entryway to control the lighting for the stairway. Evaluate your need in regard to lighting switch locations. Consider updating switch locations for improved safety if desired.
Switch Missing Multiple Doorways, No Switch Entry
Some rooms with multiple doorways did not have lighting switches at each doorway.
At front entrance from exterior there was not a light switch near doorway to turn on interior lighting.
Switches Erroneous
Inspector was unable to determine function of all switches present. Switches may operate flood lights, receptacles or other item. They may also be an unused extra switch.
Dimmer on Fan Motor
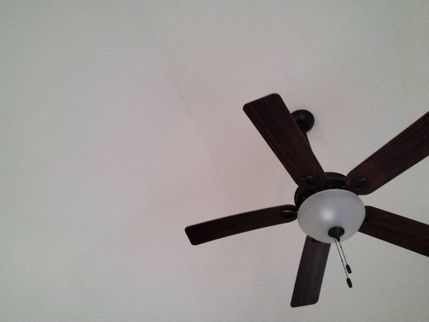
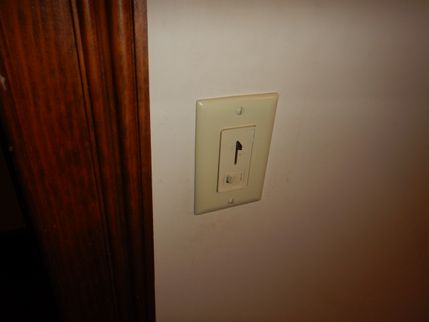
A lighting dimmer wall switch appeared used with a ceiling fan motor. Ceiling fan motor hummed when dimmer was operated. When a wall switch is installed for a ceiling fan to control the fan speed, it should be a motor control speed switch, not a lighting dimmer. Verify switch type for ceiling fan properly correcting if needed for safety and function.
- Main level right room. Fan motor appeared controlled by lighting dimmer.
Smoke Alarms
Modernize, Test After Installation, Tested Function
Consider Upgrade Modernizing Smoke Alarm Installation:
Consider modernizing smoke alarm installation to improve safety as changes have occurred as to where smoke alarms should be installed. Modern smoke alarm systems typically are hardwired to the electrical system and will have battery backup so that they will function when the power is off to the building. Modern smoke alarm systems typically have all smoke alarms interconnected so that when one alarm sounds then all smoke alarms will sound simultaneously. This is useful for heavy sleepers and in larger homes.
Modern smoke alarm systems typically have smoke alarms installed at the following locations:
- Outside sleeping areas
- Inside sleeping areas
- At least one per floor level including basements
- Near stairs
- In garages
- In unfinished basements
- (some installations will require additional smoke alarms)
It is important to note that a single smoke alarm can satisfy multiple areas if carefully placed.
It is common to have a single smoke alarm near the top of the stairs and just outside multiple sleeping areas.
Evaluate your risk exposure. Upgrade smoke alarms to meet your needs.
Read and follow the smoke alarm manufacturer installation and operating instructions.
Contact your local Fire Marshal if need be.
Regarding Testing Smoke Alarms:
After installing smoke alarms, test weekly and replace batteries when needed. Properly replace smoke alarms when not functioning correctly and at least every ten years. Smoke alarms should be at least the photoelectric type and dual sensor photoelectric and ionization smoke alarms are available, and preferred. Refer to installation and care instructions for proper locations and periodic maintenance.
Smoke alarm at hall was tested using the test button on the smoke alarm. Smoke alarm horn sounded when the test button was pressed.
Attic Ladder
Attic Ladder Installation / Condition
Location of Attic Ladder: Upper Floor
Overall Condition: Attic Ladder Correct Before Use, Consider Upgrade
If pull down attic ladder stairway is used frequently you may consider upgrading to one with locking aluminum adjustable steps for safety. Werner brand makes this type of pull down attic ladder stairway and these are sold at big box stores and available online. Pull down attic ladder stairway should be properly installed for safety.
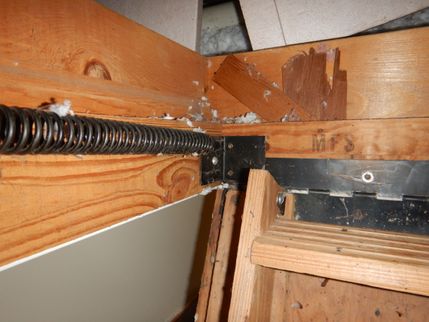
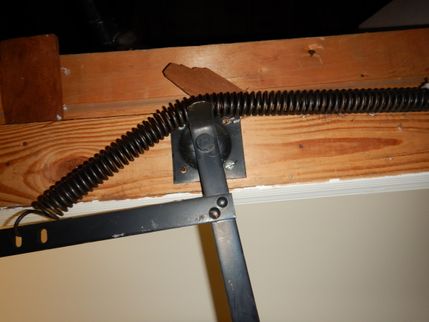
Box Frame Connection To Structure: Nails Missing All Brackets
Attic ladder was observed ready for corrections now and before use to improve the function and safety aspects of the attic ladder. Refer to the full report for additional information and photos regarding obvious corrections recommended now for the attic ladder area. A competent qualified contractor capable of reading and following the manufacturer installation instructions should check all attic ladder areas. Make attic ladder functional, safe and structurally sound where needed.
Structure
Attic Access
Attic Access: Pull down attic ladder stairway, properly maintain unit as needed for safety, Door to Side attic area
Attic Access: Floored
Attic area viewed from areas where secured, floored, continuous, walkway was present. Some areas of attic may not have been viewed.
Roof Framing
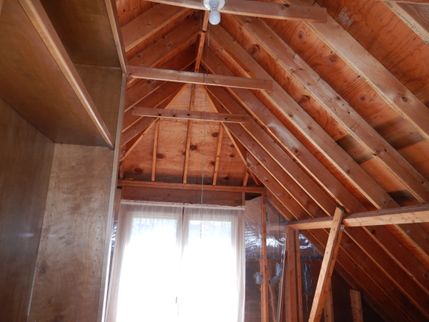
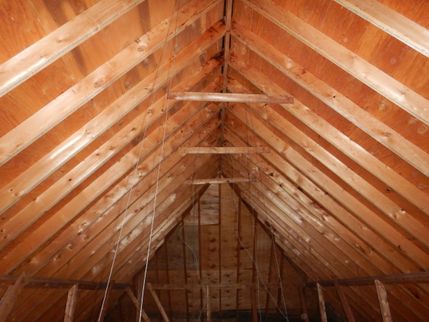
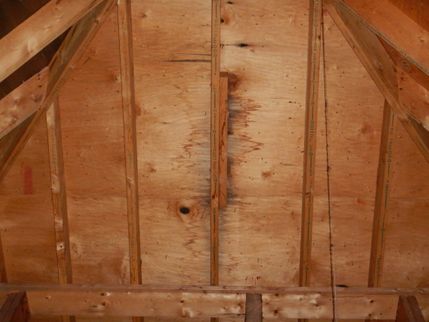
Framing: Rafters
Sheathing: Plywood
Roof Framing: Older Typical, Roof Decking Check When Replacing Roof Covering
Framing, where visible, was observed typical for age of structure and may not meet current building standards. Monitor area periodically and make corrections if condition changes.
Ceiling Framing
Framing Access: Finished Restricted, Insulated
Finished areas restricted view of structural components. Some areas were not observed by inspector.
Visibility was limited due to installed insulation in this area.
Wall Framing
Framing Access: Finished Restricted
Finished areas restricted view of structural components. Some areas were not observed by inspector.
Foundation Access
Basement: Semifinished
Basement Semifinished
Some areas were finished. The components behind the finished areas were not observed.
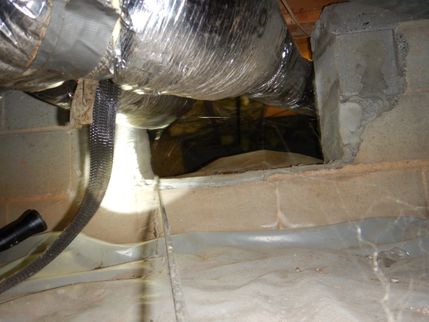
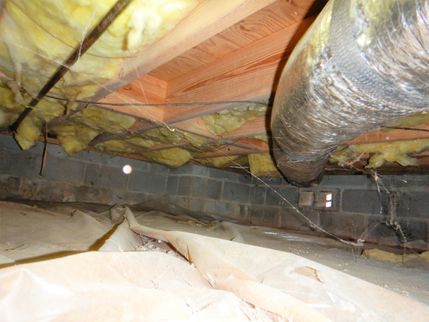
Crawl Space: Ductwork, Insulation, Limited Access
Visibility or access limited at crawl space due to installed ductwork.
Visibility was limited due to installed insulation in this area.
The inspector enters readily accessible crawl space areas where the overall height is at least 24" and there is an unobstructed crawl path height of at least 16". The inspected property did not meet these criteria. Areas of crawl space with limited access were not accessed by inspector.
Foundation Description
Access:
Basement walked
Crawl space entered through hinged door
Construction Type:
Basement - Semi Finished
Crawl Space
Foundation:
Poured in Place Concrete
Concrete Block
Columns or Piers:
Concrete Block Load Bearing Wall
Floor Structure:
Floor Joists - Solid Wood
Beam - Built Up Wood
Subfloor - Wood
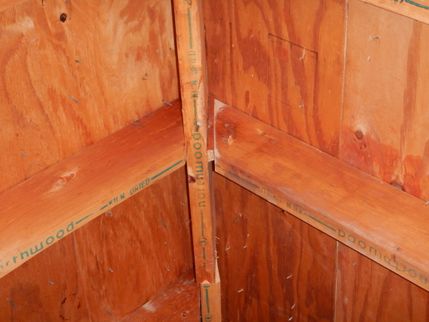
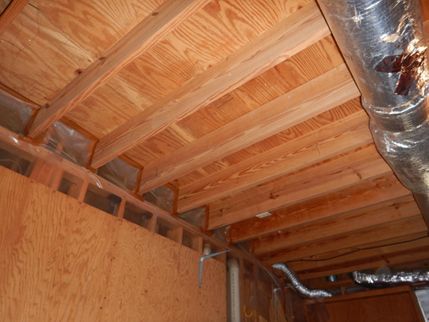
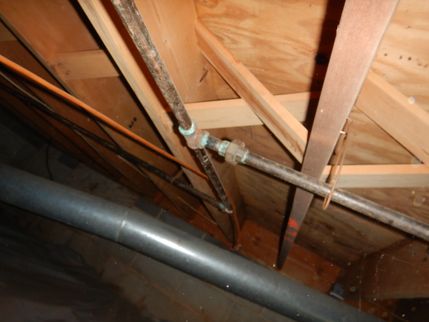
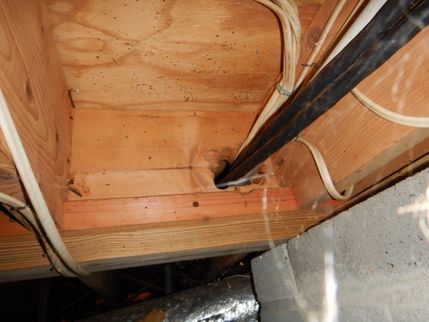
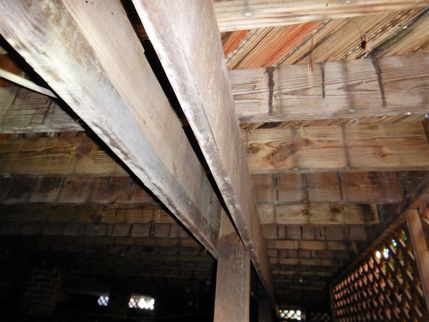
Representative floor framing Photos provided below
Floor System
Floor Framing: Older
Floor framing was older.
Framing observed was typical for age of structure and may not meet current building standards. Monitor area periodically and make corrections if condition changes.
Insulation
Above Ceiling Insulation
Recommended Insulation
Recommended attic insulation depth above living spaces for this area of the country is R-38 to R-60 to help lower utility costs. This recommendation comes from the US Department of Energy. Evaluate your comfort level and utility costs correcting insulation depth if needed.
Insulation Type: Blown In
Observed Insulation Approximate Depth: R - 30, R - 19
Wall Insulation
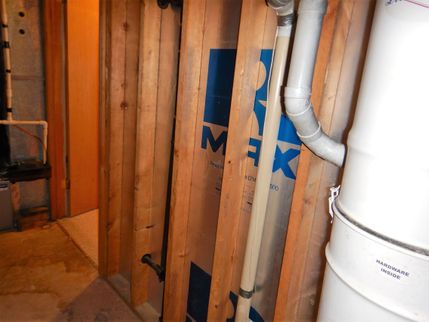
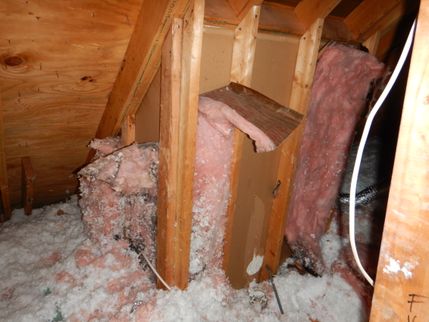
Insulation: Missing Basement Common Wall, Missing Attic Common Wall
Wall insulation was observed missing at some common walls between finished and unfinished basement. Proper correction is recommended.
Underfloor Insulation
Ventilation
Attic Ventilation
Attic Ventilation Exhaust Vents: Ridge Roof Vent, Gable End Vent
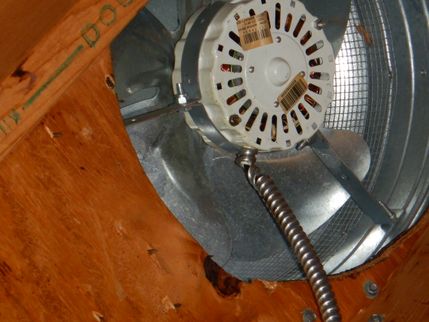
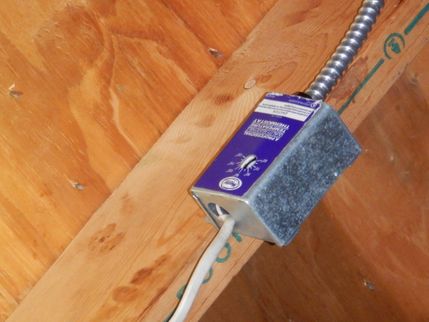
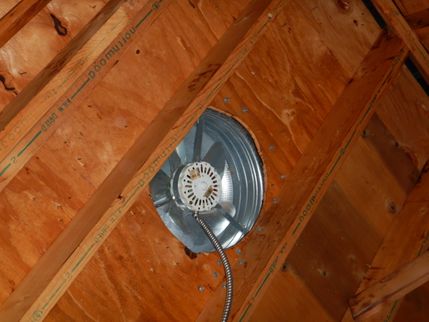
Attic Ventilation Exhaust Vents: Attic Fan, Attic Fan Present with ridge roof vent
Attic Ventilation Intake Vents: Soffit Vents Where Installed
Foundation Ventilation at Underfloor Crawl Space
Info Crawl Space Ventilation
Inspector informational note regarding crawl space ventilation.
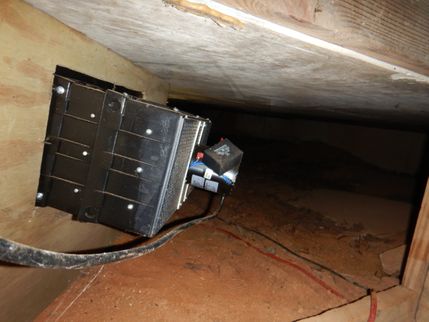
Crawl spaces either should be properly ventilated or properly encapsulated. Encapsulated crawl spaces must have a conditioned air space. When ventilating a crawlspace it is important to have proper intake and exhaust venting to provide adequate cross ventilation. Monitor crawl space air for excess moisture and condensation properly correcting if necessary to meet your needs.
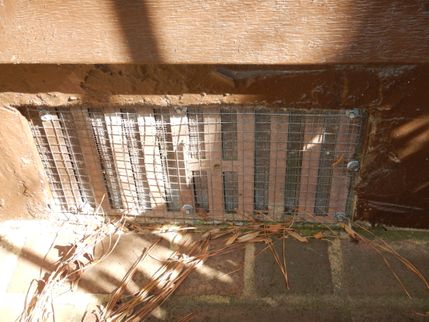
Foundation Vents Should Be Open
Regarding foundation vents.
Foundation vents at ventilated crawl spaces should be open when the outdoor temperature is above freezing. If you feel you must close the foundation vents, they should only be closed for very low temperatures and then promptly reopened when the outdoor temperature rises above freezing. Our moderate climate for this area is known for outdoor temperatures typically being in the 40s to 60s f during the day in the winter. Leaving the foundation vents closed for weeks or months, in some instances, may damage the floor framing due to excess humidity and fungal growth.
Foundation Vents Closed Outdoor Temperature Above Freezing
One or more foundation vents were observed closed when inspected. Outdoor temperature was above 32 degrees f and foundation vents were expected to be open.
Moisture
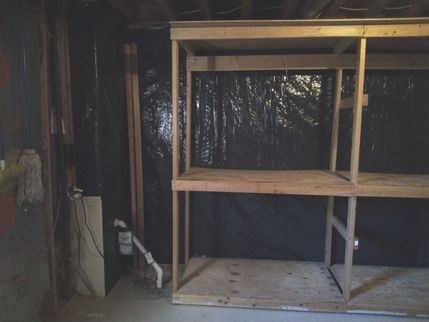
Moisture Indications at Basement
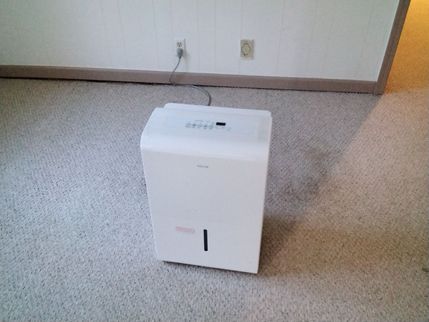
Basement: Dehumidifier Present
Dewatering
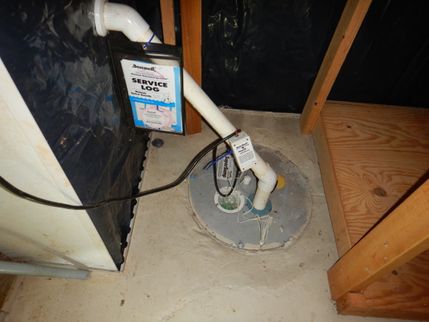
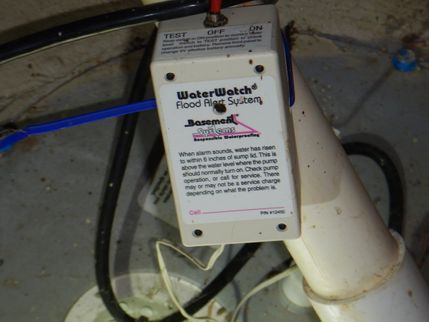
Dewatering System: Appeared Present
Sump Pump: Not Accessible
Sump pump was present but not tested as the pump was not readily accessible. You may wish to verify unit is functional prior to settlement. Monitor system servicing as needed.
Vapor Retarder at Underfloor Crawl Space
Vapor Retarder: Maintain
Plastic sheeting, vapor retarder was present covering soil areas inside the underfloor crawl space. A vapor retarder is an important measure to reduce moisture inside underfloor crawl spaces. Properly maintain vapor retarder at crawl space area to help control moisture.
Roof
Roof Covering
Method of Roof Inspection: Viewed from ladder at eave, Viewed from window
Roof Style: Multi Plane
Approximate Age of Roof: Roofing Age Varied
Roofing Material: Composition Shingle, Composition Three Tab Shingle, Metal
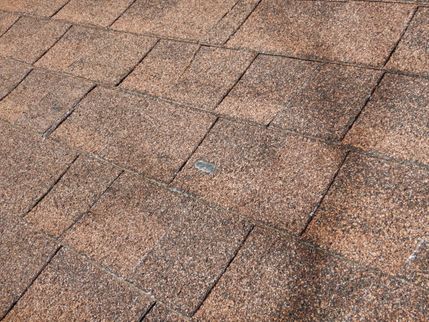
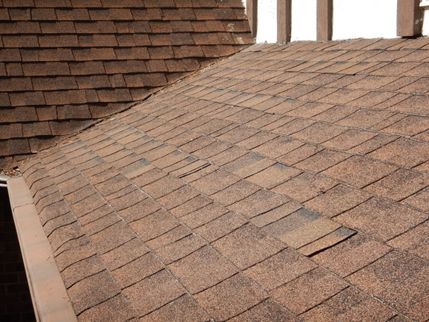
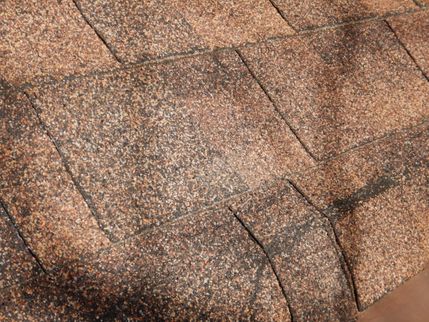
Observation: Roofing Corrections Needed
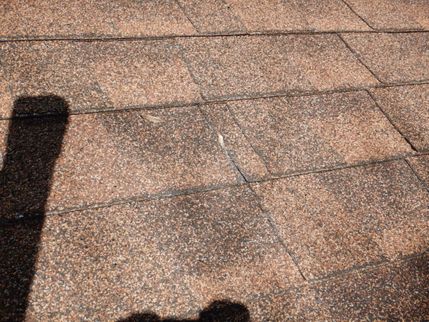
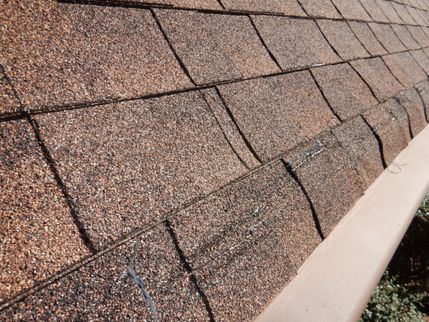
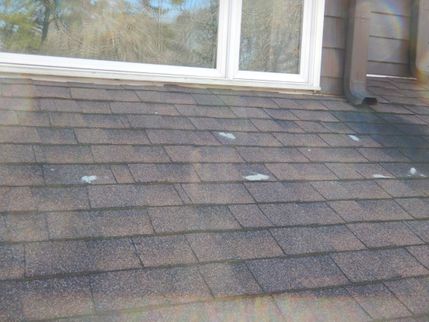
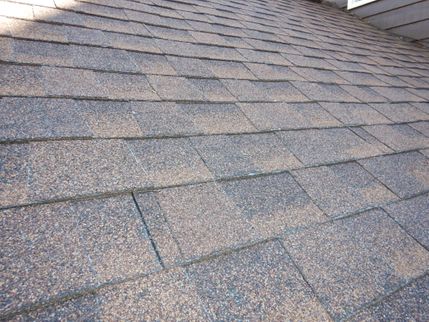
Roofing was ready for corrections now. A competent roofing contractor should check entire roof system and associated flashings. Repair or replace roof covering system as needed.
- Roofing Age Varied
- Many Shingles Observed Worn
- Some Shingles Observed Damaged
- Temporary Patched Areas Observed
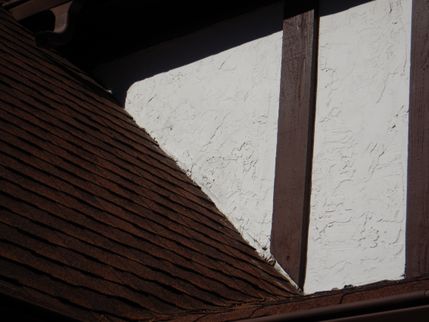
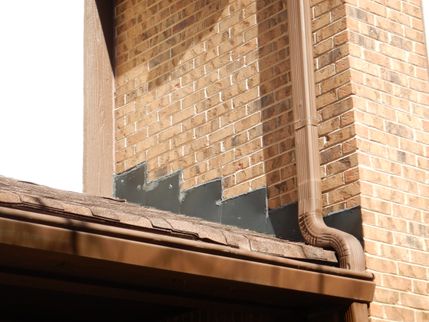
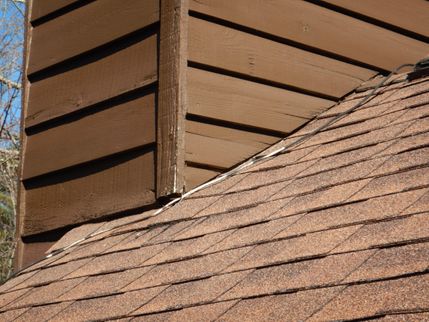
- Flashing at Roofing to Siding Intersection was Ready for Upgrade
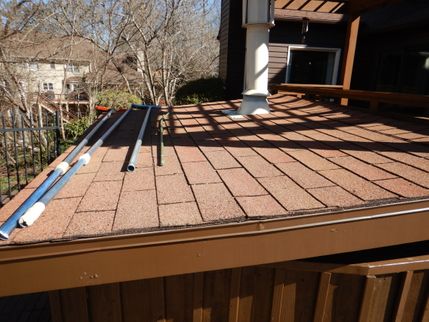
- Roof Slope at Swimming Pool Equipment Shed Did Not Have Sufficient Slope for Installed Shingles
Consider replacement of older roofing.
Weigh your options for repairing roofing now knowing that you should replace it in the near future with the option of proper complete replacement now. Considering that a properly replaced roofing system may last up to three decades it may make better sense to replace the roofing correctly now rather than to repair an older roof system that will have to be replaced soon anyway.
Gutters and Downspouts
Skylights
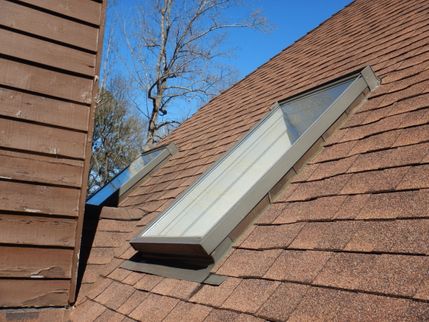
Multiple Skylights Observed
Maintain Instructions not reviewed, Older
Properly maintain skylight installation to meet your needs and prevent unwanted water entry. Review of skylight installation instructions is not part of this inspection.
Exterior Surfaces
Siding
Siding: Wood
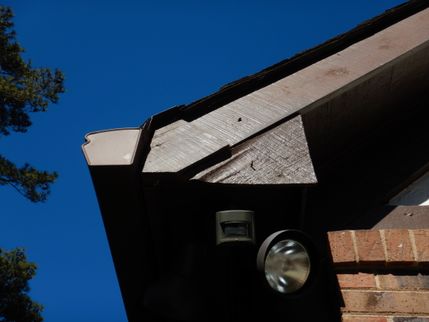
Eaves: Painted Wood
Trim: Wood
Siding: Deferred Maintenance, Paint Failing, Paint Failing Extra Info, Physical Damage, Rot, Temporary Repairs, Refurbish, Replace/Repair
Siding - ---
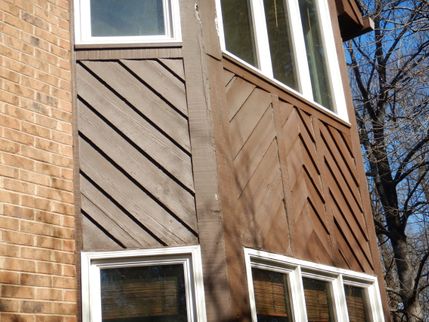
The inspected item suffered from deferred maintenance and was ready for reconditioning.
Siding - ---
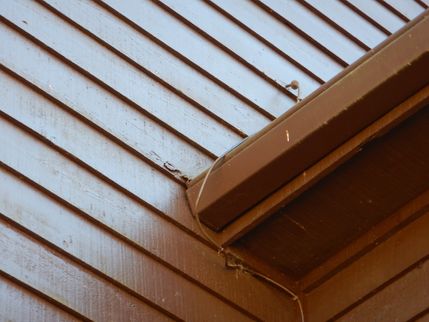
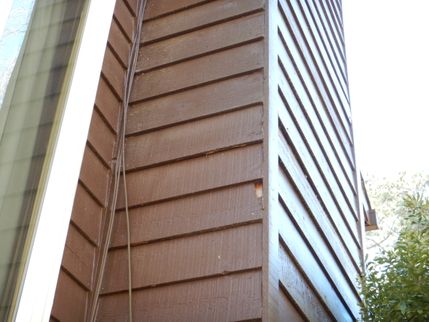
One or more layers of paint did not appear to be properly bonded to painted surface. This can be caused by age, poor preparation, excessive thickness or moisture. Properly correct as needed before repainting.
Siding - ---
For areas where paint was failing proper correction should include removal of failing paint to virgin material, cleaning surface, properly priming then painting area. For some areas of failing paint it may be more cost effective to replace material rather than performing exhaustive reconditioning.
Siding - ---
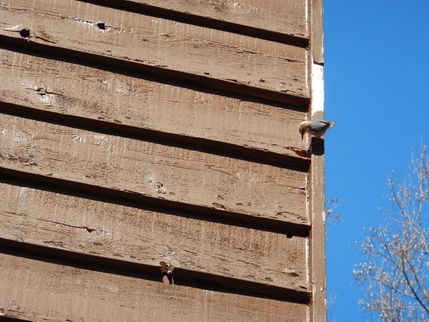
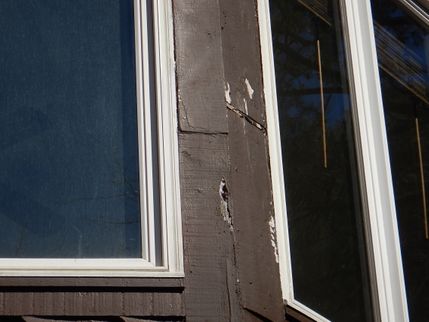
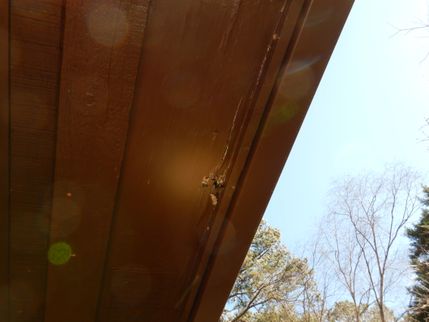
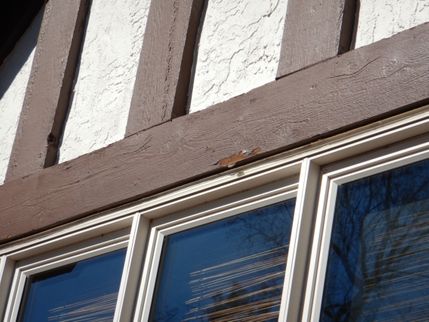
Physical damage was noted and should be properly repaired.
Siding - ---
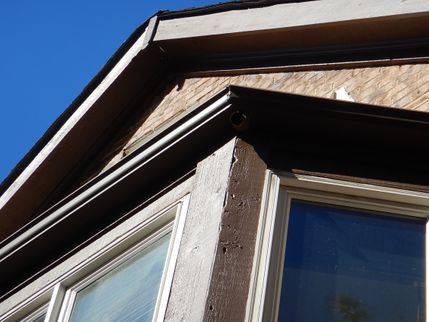
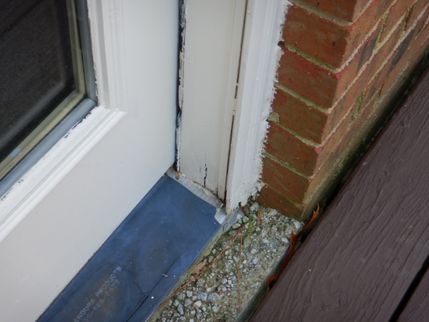
Rotting and damage was observed. Check all exterior areas subject to decay properly correcting damage and affected adjacent areas as needed.
Siding - ---
Temporary repairs, where present, should be considered for permanent corrections to reduce periodic maintenance.
Siding - ---
Refurbish area before painting. A quality paint or stain job will include washing/cleaning all areas to be painted, repair/replacement of damaged siding and trim, seal all gaps, prime all unpainted areas and sufficient paint coverage to achieve desired color without bleed through.
Siding - ---
Properly replace or repair exterior siding and trim as needed. Properly correct any adjacent affected areas damaged by deferred maintenance.
Brick
Siding - Stucco
Stucco Where Installed
Deck Areas / Wooden Porches
Deck or Wooden Porch Areas Overall Condition Statement
Correct Deck and Fall Areas Before Use
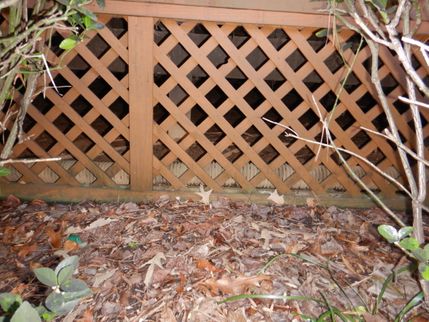
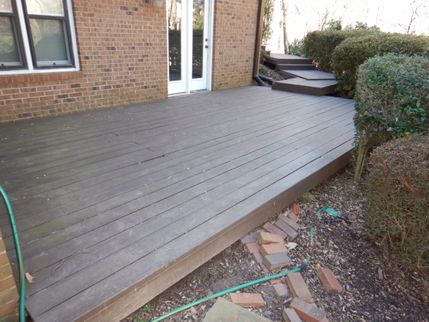
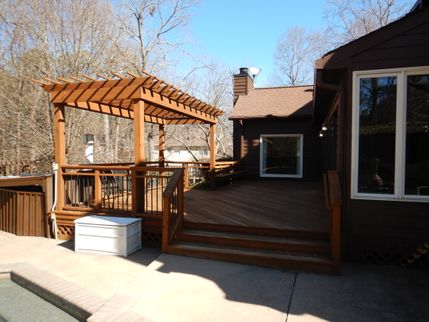
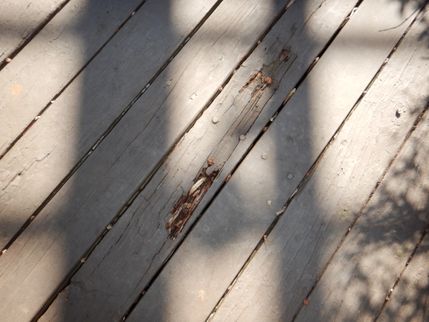
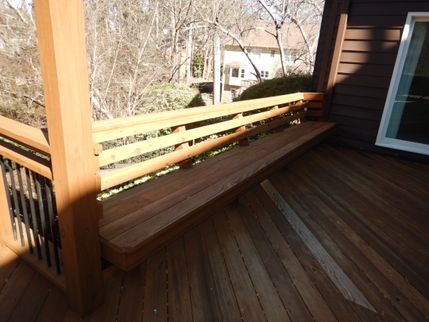
Deck areas were observed ready for corrections now and before use to improve the structure of the deck and to improve the safety aspects for the fall prevention measures installed at deck areas. Refer to the full report for additional information and photos regarding obvious corrections recommended now for any deck areas. A competent deck contractor should check all deck areas. Make deck areas functional, safe and structurally sound where needed.
Inspecting Decks or Wooden Porches
Inspecting Decks and Wooden Porches
Inspecting decks which are also known as wooden porches.
Decks and their attached steps are inspected for structural integrity, fall prevention and possible entrapment openings. Concealed areas such as deck footers are not included in the inspection. Most inspected decks will be ready for some correction or upgrade due to age, wear or improper construction. For any areas ready for upgrade, you should evaluate your risk exposure properly correcting as needed for improved structural integrity and improved safety.
Any deck needing correction should be further reviewed and corrections performed by a Competent Qualified Deck Contractor as the deck inspection performed in this report is not meant to discover every possible correction that a deck might need.
Each deck should be properly stained to prolong deck life. A solid deck stain is preferred as it will also protect the deck from sun light damage.
Two useful sources for deck information may be found at the following websites:
https://knoxcounty.org/codes/pdfs/construction_info/DeckInformation.pdf
Deck or Wooden Porch Location, Attributes and Restrictions
Deck Location: Multiple Present
Deck Stairs: Stairs Were Present
Deck or Wooden Porch Structure
Flashing: Undetermined
Flashing was not undetermined. Proper flashing installation after construction completion cannot be fully confirmed as most areas will be concealed. Flashing separating the deck from the building helps prevent water penetrations, rot and wood boring insects from entering the building. Monitor area correcting if needed as adding flashing after construction completion may not be cost effective.
Girder or Beam: Undersized, Not Properly Supported
Observed girder or beam appeared undersized for the span between columns. Properly correct girder or beam as needed for structural integrity.
Girder or beam was not properly supported. Properly support girders or beams where needed.
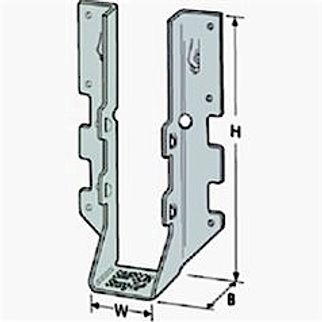
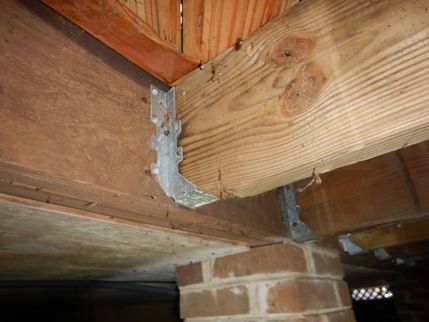
Joist Hangers: Not Installed Correctly
Deck or Wooden Porch Railings and Stairs
Diagrams: Correction Needed Railing & Stair Diagrams
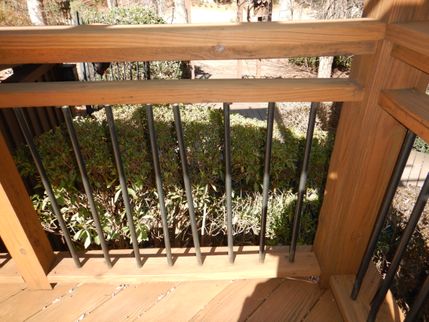
Guardrail: ≥4", Low
One or more openings at railings, such as at balusters, did not reject a 4" sphere at guardrails. Evaluate your risk exposure properly correcting as needed for improved safety and function.
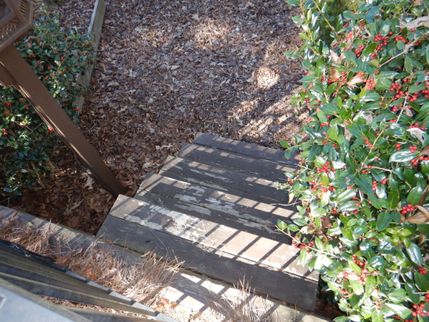
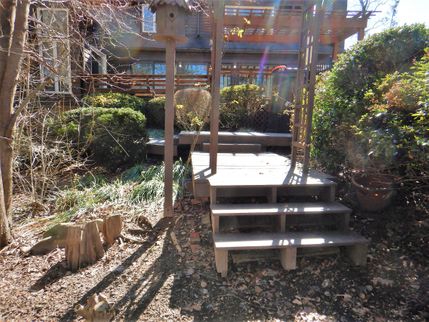
Stairs: Uneven, Staggered, Stairs Repair/Replace
---
Uneven steps were observed. Differing riser heights are a common cause of falls. For safety, the height between the tallest and the shortest riser on a set of stairs should be no more than 3/8". Proper correction is recommended.
Some steps were observed staggered apart rather than being clustered together. These steps do not conform to modern standards for safe stairs. Use extreme caution when walking on these stairs now and consider upgrade to conforming stairs for safety and to reduce liability exposure.
---
Evaluate your risk exposure. Consider proper repair or replacement of steps where needed now for safety and function.
Lots and Grounds
Porch
Brick
Roof Structure: Present
Area had a roof structure.
Porch: Recondition
Porch was ready for reconditioning. Deferred maintenance was observed. Properly correct or upgrade area to meet your needs.
Landing
Site
Site: Adjust Grade Basement
Some exterior grade work may improve storm water runoff away from basement type foundation. Slope grade minimum ten feet away from and around the structure so that water does not collect at foundation. Be careful not to raise grade at the structure above the foundation water proofing.
Driveway
Concrete
Driveway: Serviceable Cracked
Driveway was cracked but serviceable, fulfilling its function.
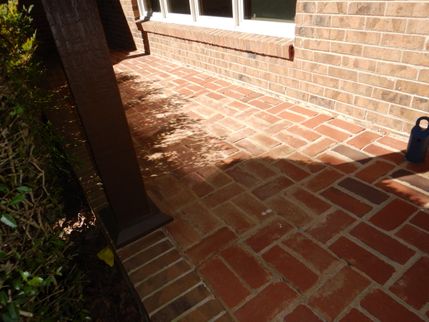
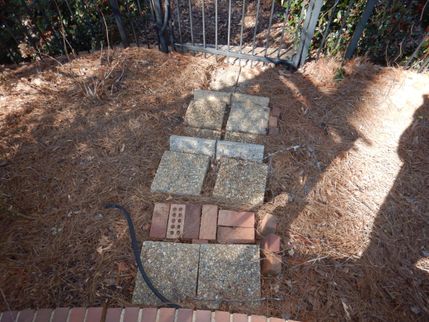
Walkway
Brick, Stone
Walkway: Serviceable
Walkway was serviceable, fulfilling its function.
Stairs and Railings at Exterior
Brick
Diagrams: Correction Needed Railing & Stair Diagrams
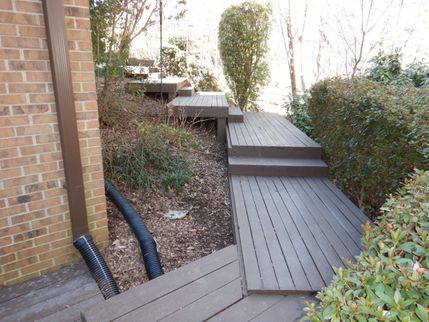
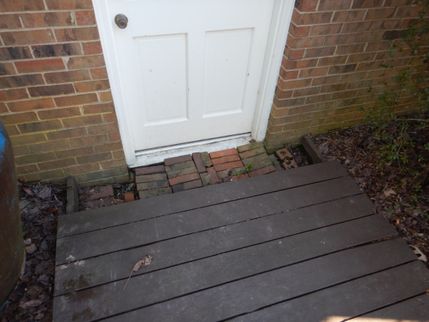
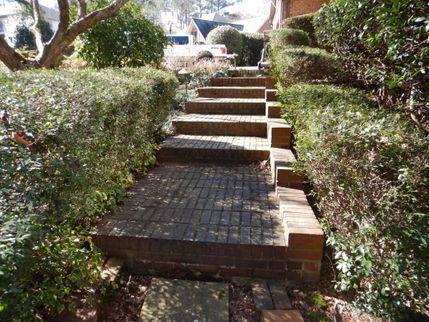
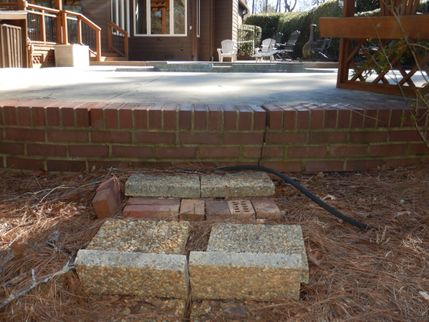
Stairs: Staggered, Stairs Repair/Replace
Some steps were observed staggered apart rather than being clustered together. These steps do not conform to modern standards for safe stairs. Use extreme caution when walking on these stairs now and consider upgrade to conforming stairs for safety and to reduce liability exposure.
---
Evaluate your risk exposure. Consider proper repair or replacement of steps where needed now for safety and function.
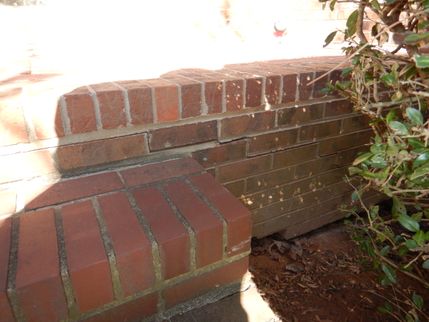
Retaining Wall
Brick, Wood
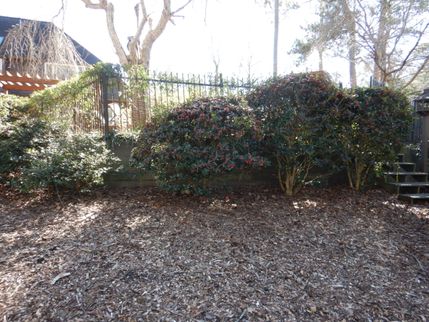
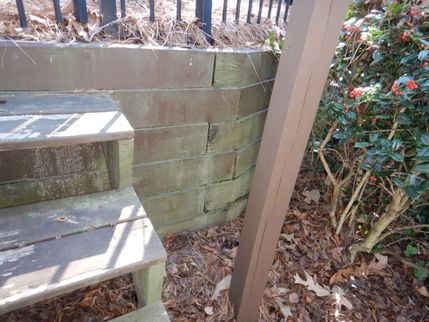
Retaining Wall
Multiple retaining walls were present.
Retaining walls did not appear to protect foundation.
---
Properly maintain any retaining wall as maintenance is typically less expensive than replacement.


.jpg)
.jpg)
.png)
