

How to Read This Report
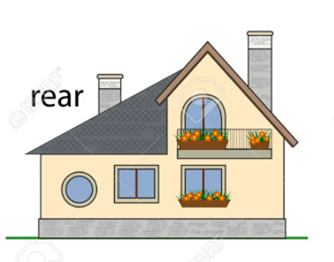
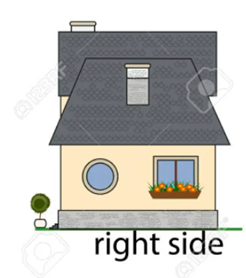
This digital report or a printed version of this report should only be viewed in full color where the photos are discernible and on a device where the report page width is no less than 8.5" wide. Please note, Right and Left of the building are determined as facing the front of building shown on the report cover. The client has the duty and obligation to read the entire report. Feel free to reach out to the inspector should you have any questions or concerns.
This report is designed to inform the client of obvious major structural deficiencies, inoperative conditions and the presence of noticeable, detrimental moisture issues for areas inspected. Additionally, the inspection report may advise regarding notable safety concerns and appropriate upgrades recommended by the inspector that you should consider and act on when appropriate. Please note, undesirable conditions pertaining to this inspection may be present and unreported for concealed areas and areas with limited or blocked access.
Photos
Photos included in this report are intended to help describe a reported item or area only. The photos, while representative, may not encompass the full scope of work required to correct the item or area listed. Repairs should be based on actual condition of property and not solely on the photos included in this report. Note, when viewing photos in the online report, clicking on a photo will zoom in and enlarge the photo. Clicking on a photo a second time will enlarge and zoom in on the photo one more time.
Repairs
Repairs or corrections needed at the inspected property should be completed by competent qualified professions familiar with the type of work being performed. Obtain competitive bids as needed. Obtain further evaluation when needed.
Getting the Information to You
This report is designed to deliver important and technical information in a way that is easy to access and understand. The best way to get the layers of information that are presented in this report is to read your report online in the HTML format, which will allow you to expand your learning about the inspected property. You will notice some words or series of words highlighted in blue and underlined – clicking on these will provide you with a link to additional information, if desired. Other text colors, if present, have no real meaning. Please read all written text.
This report can also be printed on paper or to a PDF document.
Chapters and Sections
This report is divided into chapters that parcel the home into logical inspection components. Each chapter is broken into sections that relate to a specific system or component of the home. You can navigate between chapters with the click of a button on the left side margin when viewing the report online.
Observation Labels
Narrative observation labels are defined here. Some of the following observation labels may not appear in all reports. Hazardous, Key Concerns and Further Evaluation observation label types, if used, will appear in the report and in the summary. All other observation labels, when used, appear only in the report and will not appear in the summary. All narrative observation label types are labeled, and numbered to help differentiate each reported narrative observation. When narrative observation labels are given a color, the specific color used has no meaning. Some observation labels are given a specific icon to group the observation types. The specific icon used also has no meaning.
Observation labels and colors used for reporting are:
- Key Concerns:Observations listed as key concerns will typically include inoperative equipment, common and significant corrections needed for plumbing, electrical, heating/cooling, structure, interior and exterior areas including the roof covering. When used, this observation will appear in the report and in the summary.
- Further Evaluation:Observations listed as further evaluation need a more extensive or technically exhaustive evaluation. For areas where corrections may not be straight forward or where a proper plan should be developed to implement corrections, then further evaluation is recommended. To obtain further evaluation is to hire a specialist that is highly experienced in the repair or correction of a specific item or area. Some observations listed under other labels that also require further evaluation will appear under the other label only. When used, this observation will appear in the report and in the summary.
- Routine Correction Needed:Observations listed as routine correction are not unusual for the type and age property inspected. These routine items are typically not recurring and once properly corrected should not require repetitive correction. When used, this observation will appear only in the report.
- Monitor:Observations listed as monitor are typically items or areas that need subsequent observations and should be monitored over time to obtain historical data. These items may or may not require correction in the future based upon their performance over time. If you are unable to do the monitoring, the inspector recommends you appropriately schedule monitoring by a qualified competent contractor. Some observations listed under other labels that also may require monitoring will appear under the other label only. When used, this observation will appear only in the report.
- Improve:Observations listed as improve are items or areas that were ready for improvement or upgrade. This label is used for predictable expected opportunities to better the property condition or installation deficiencies that may or may not affect equipment function. Some observations listed under other labels that also may be considered improvements will appear under the other label only. When used, this observation will appear only in the report.
- New Construction Builder Punch List Item:Builder punch list items are routine and incomplete items and areas observed at a new construction property that likely would not be listed in the summary of the report if it were not a new construction property. Builder punch list items appear in the summary of the report to help the client remind the builder of an incomplete or routine item or area that should be properly addressed.
- Note:Notes are general remarks or comments elaborating on descriptions of systems, limitations, restrictions, or other similar conditions present during the inspection. Notes do not appear in the summary.
- Inspector Informational Note:Inspector informational note regarding inspection process.
- Description:Descriptive information for various aspects of the property, equipment, items, or areas noted during the inspection. Descriptions do not appear in the summary.
Summary Page
For convenience, the report contains a summary. The inspector uses the Summary to list non Periodic Maintenance issues that, in his opinion, he would expect to be completed before marketing the home for sale. Be advised, the summary contains only text from the observations listed as Key Concerns, Further Evaluation Needed, Hazardous and when applicable, New Construction Builder Punch List Items. The summary does not show any photos or photo captions that may be listed with an observation. The summary provides the least information for the observations listed.
The report body contains the most information and includes full descriptions, digital photographs, captions, and when applicable, diagrams, videos and hot links to additional information. Refer to the report body when making actual corrections, upgrade or repairs. Please understand that you have a duty and obligation to read the full report.
Summary
Key Concerns
- P-1 PLUMBING:
Water Heater ──── ──── Water Valve Appeared Closed
The water heater was inspected and found in need of correction. The water supply appeared to be off to the water heater when it was inspected and the water heater was not observed in proper operation. Properly put the water heater and plumbing system back in service correcting as needed for function and safety. All faucets and appliances using hot water should be reevaluated after proper corrections to water heater have been completed. Verify Hot/Cold orientation is correct at plumbing outlets. Correct if needed.
- Two water valves at water heater appeared closed.
- CS-1 CENTRAL SYSTEM:
Cooling System System served upstairs area ──── Electrical Breaker Appeared Off
The central cooling system was inspected and found inoperative when using the normal operating controls. The electrical breaker appeared to be off to the cooling system when it was inspected and the unit was not observed in operation. Properly put the cooling system back in service correcting as needed for function and safety.
- Electrical breakers were off to both cooling units.
- CS-2 CENTRAL SYSTEM:
Cooling System System served main level ──── Electrical Breaker Appeared Off
The central cooling system was inspected and found inoperative when using the normal operating controls. The electrical breaker appeared to be off to the cooling system when it was inspected and the unit was not observed in operation. Properly put the cooling system back in service correcting as needed for function and safety.
- Electrical breakers were off to both cooling units.
- E-1 ELECTRICAL:
Sub Breaker Panel Garage ────
Corrections were needed at electrical distribution panel. Make proper corrections as needed for safety and function now. Refer to the full report for additional information and photos regarding obvious corrections recommended for this electrical panel.
- AL-1 ATTIC LADDER:
Attic ladder was observed ready for corrections now and before use to improve the function and safety aspects of the attic ladder. Refer to the full report for additional information and photos regarding obvious corrections recommended now for the attic ladder area. A competent qualified contractor capable of reading and following the manufacturer installation instructions should check all attic ladder areas. Make attic ladder functional, safe and structurally sound where needed.
- S-2 STRUCTURE:
Damaged Engineered Roof Truss was observed unrepaired. Obtain further evaluation to verify all areas where damage is present. Contact truss manufacturer or other State Licensed Professional Engineer to design appropriate corrections. A competent qualified contractor should execute engineering design where needed. Retain stamped engineering design drawing for your permanent records.
- Damaged, unrepaired roof framing truss observed above floored attic area near attic ladder.
- R1-1 ROOF:
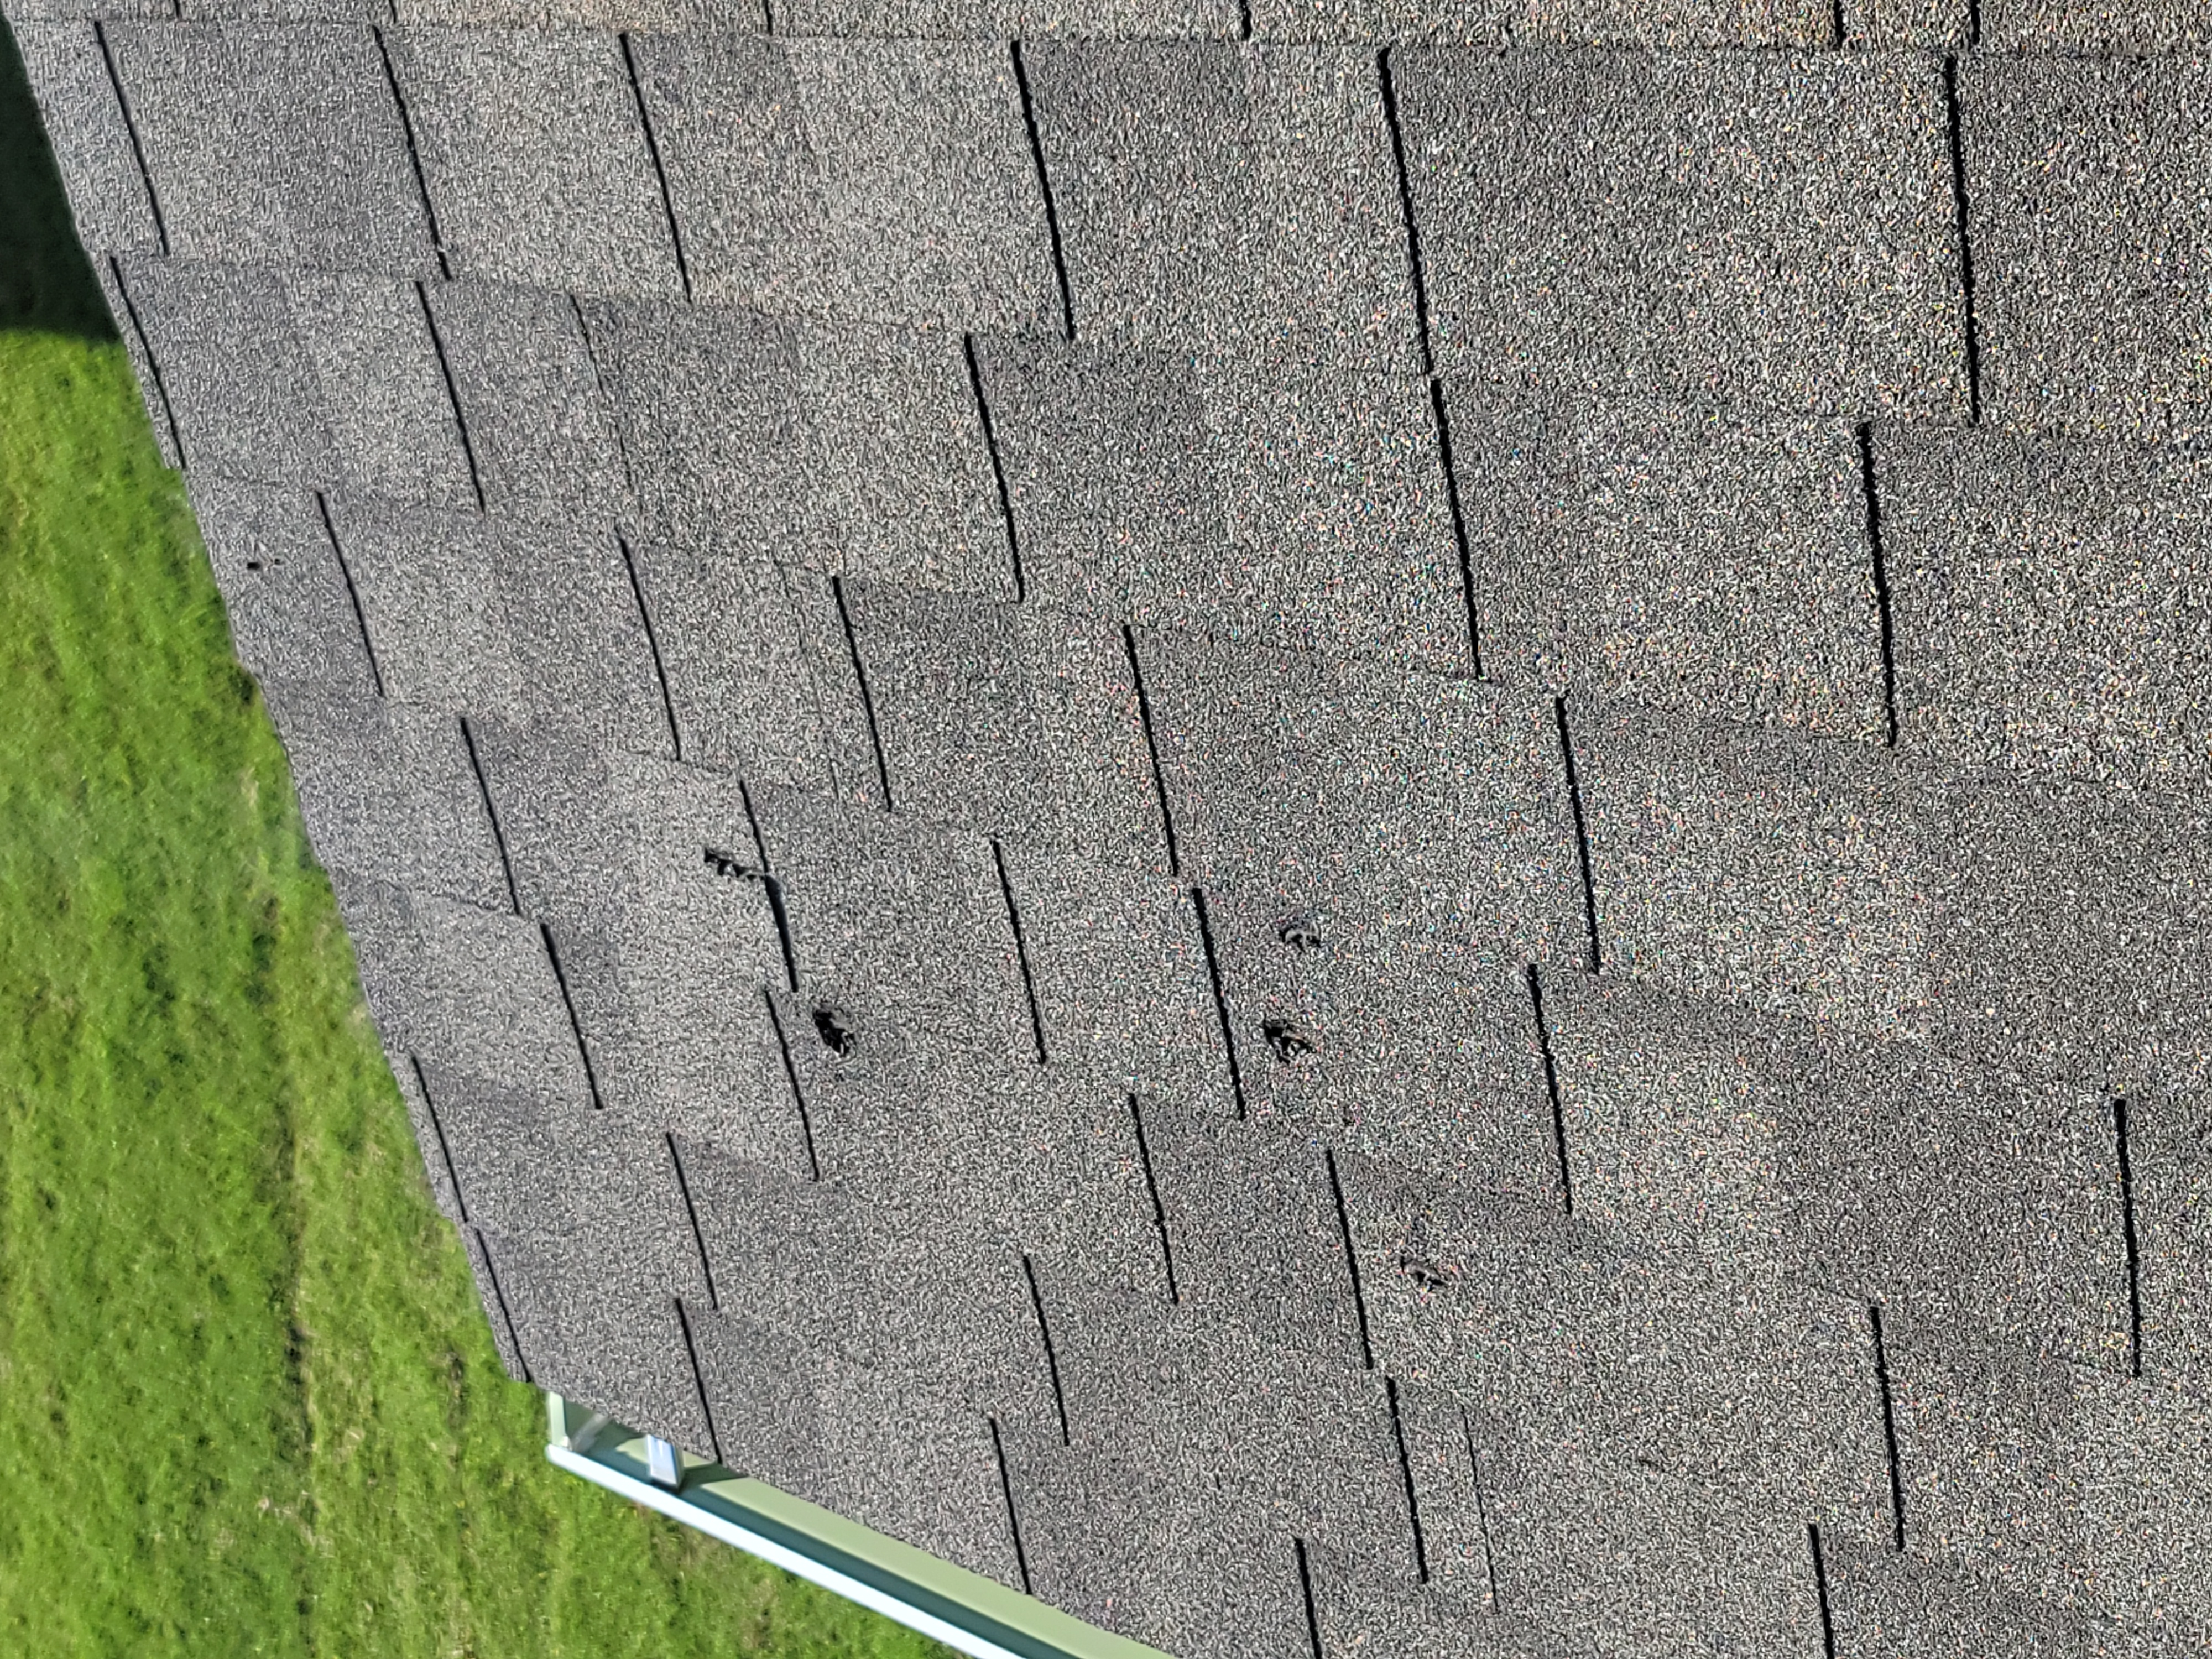
Roofing covering was ready for corrections now.
A competent roofing contractor should check entire roof system and associated flashings. Properly repair or replace roof covering system as needed.
Roof Covering was Ready for Correction
- Some shingles observed damaged.
- Some shingles did not lay flat. Correct shingles and/or roof decking as needed.
- New construction roof covering should be in new, undamaged condition and free of debris.
- R1-2 ROOF:
Coordinate roof covering corrections needed now in conjunction with roof framing corrections needed now.
- Roof decking and subsequent shingles were not laying flat at right rear roof area.
Further Evaluations
- S-1 STRUCTURE:
Damaged Engineered Roof Truss appeared to have some repair. Verify a Stamped Engineered drawing was prepared detailing how any such damage should be properly repaired. Verify any truss repairs made were completed according to Stamped Engineered repair drawings. Retain a copy of the Stamped Engineered repair drawings of any repairs made for your permanent records. Contact truss manufacturer or other State Licensed Professional Engineer for further evaluation if any truss repairs were not engineered or if engineered repair documentation is unavailable.
- Truss observed damaged at right rear attic area. Verify repair was properly engineered or properly correct as needed now.
- S-3 STRUCTURE:
Roof Framing
Coordinate roof framing corrections needed now in conjunction with roof covering corrections needed now.
- Roof decking and subsequent shingles were not laying flat at right rear roof area. Damaged truss was visible at area.
- S-4 STRUCTURE:
Review of roof truss installation instructions is recommended.
Truss designs are prepared by State Licensed Professional Engineers that specialize in structural framing. Truss manufacturers require that their installation instructions be followed for warranty purpose and to help prevent unnecessary settlement of the structure. Conditions were observed that warrant a proper review of the truss installation instructions that were prepared by the truss manufacturer. Make proper corrections, repairs or upgrades as needed. Contact a State Licensed Professional Engineer for further review if truss installation instructions are unavailable.
New Construction Builder Punch List Items
- I-1 INTERIOR:
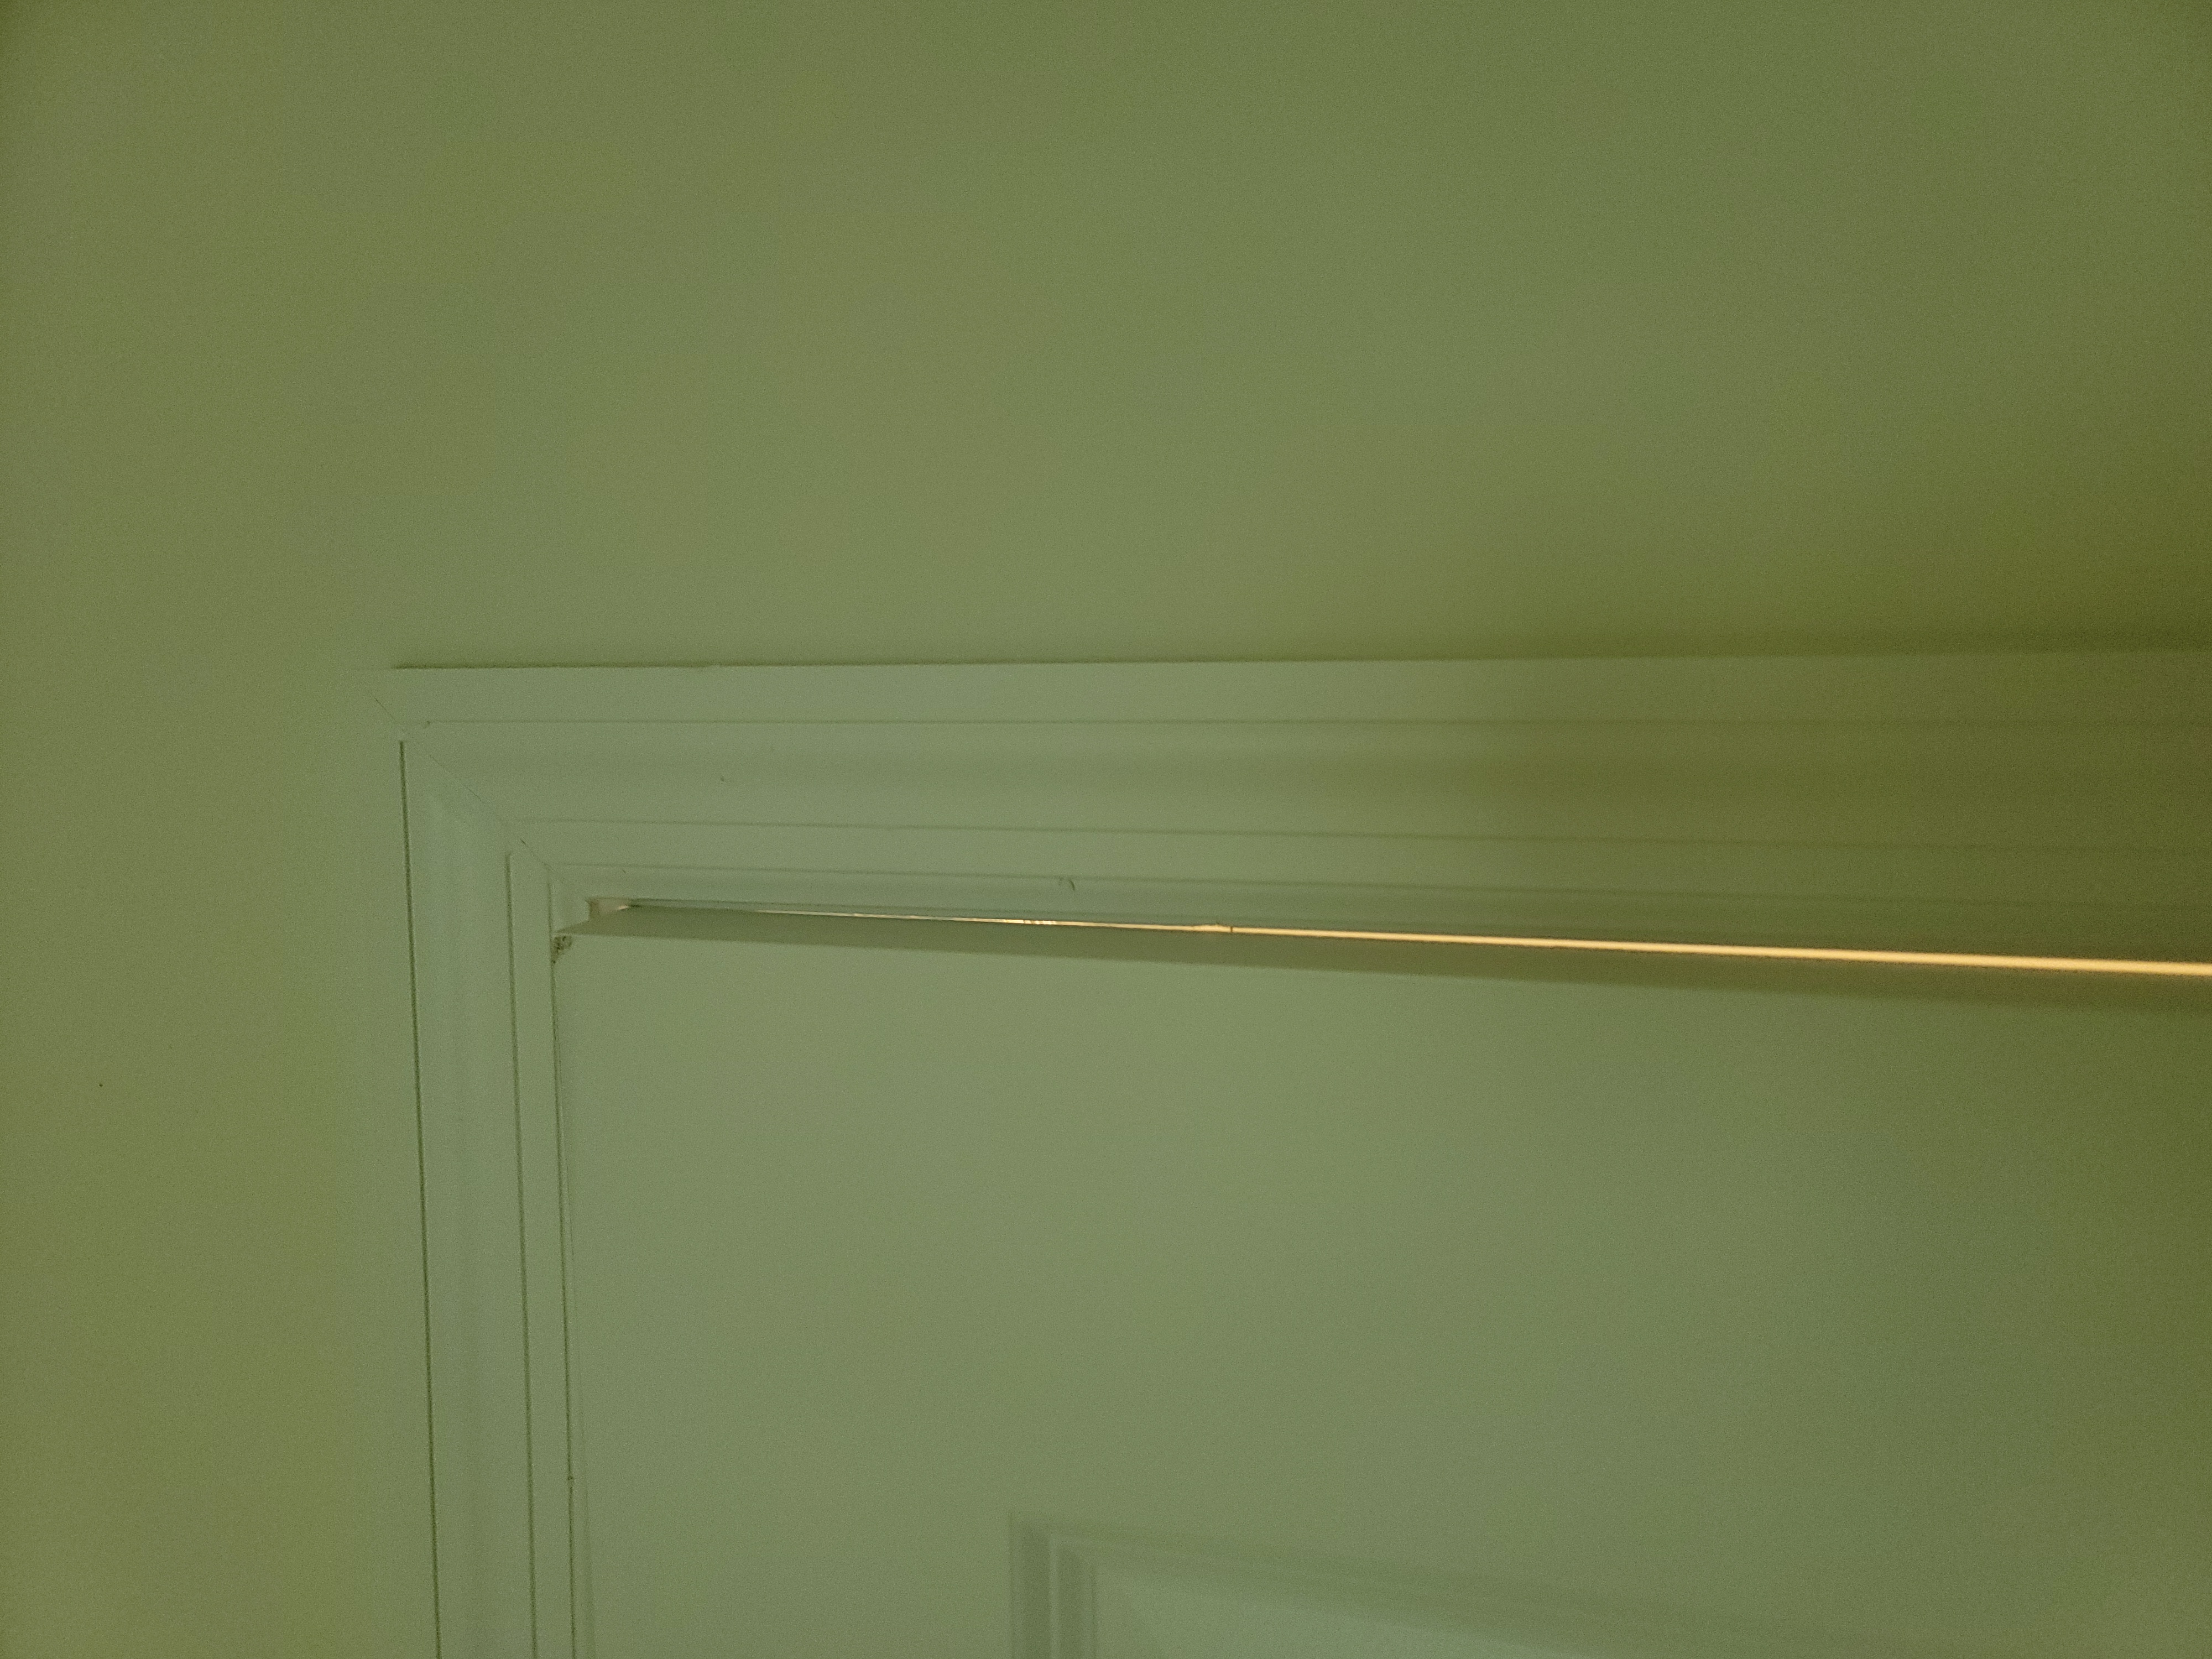
Properly correct interior doors to your standard and to meet your needs.
- Bedroom door at upstairs left struck door frame when closing.
- 1/2 bathroom door struck door frame when closing.
- I-2 INTERIOR:
New construction cleaning - Final clean up typically includes washing windows inside and out, cleaning all interior surfaces including inside of cabinets, removal of any construction debris and complete any exterior clean up or landscape adjustments. Properly correct as needed, where needed.
- I-3 INTERIOR:
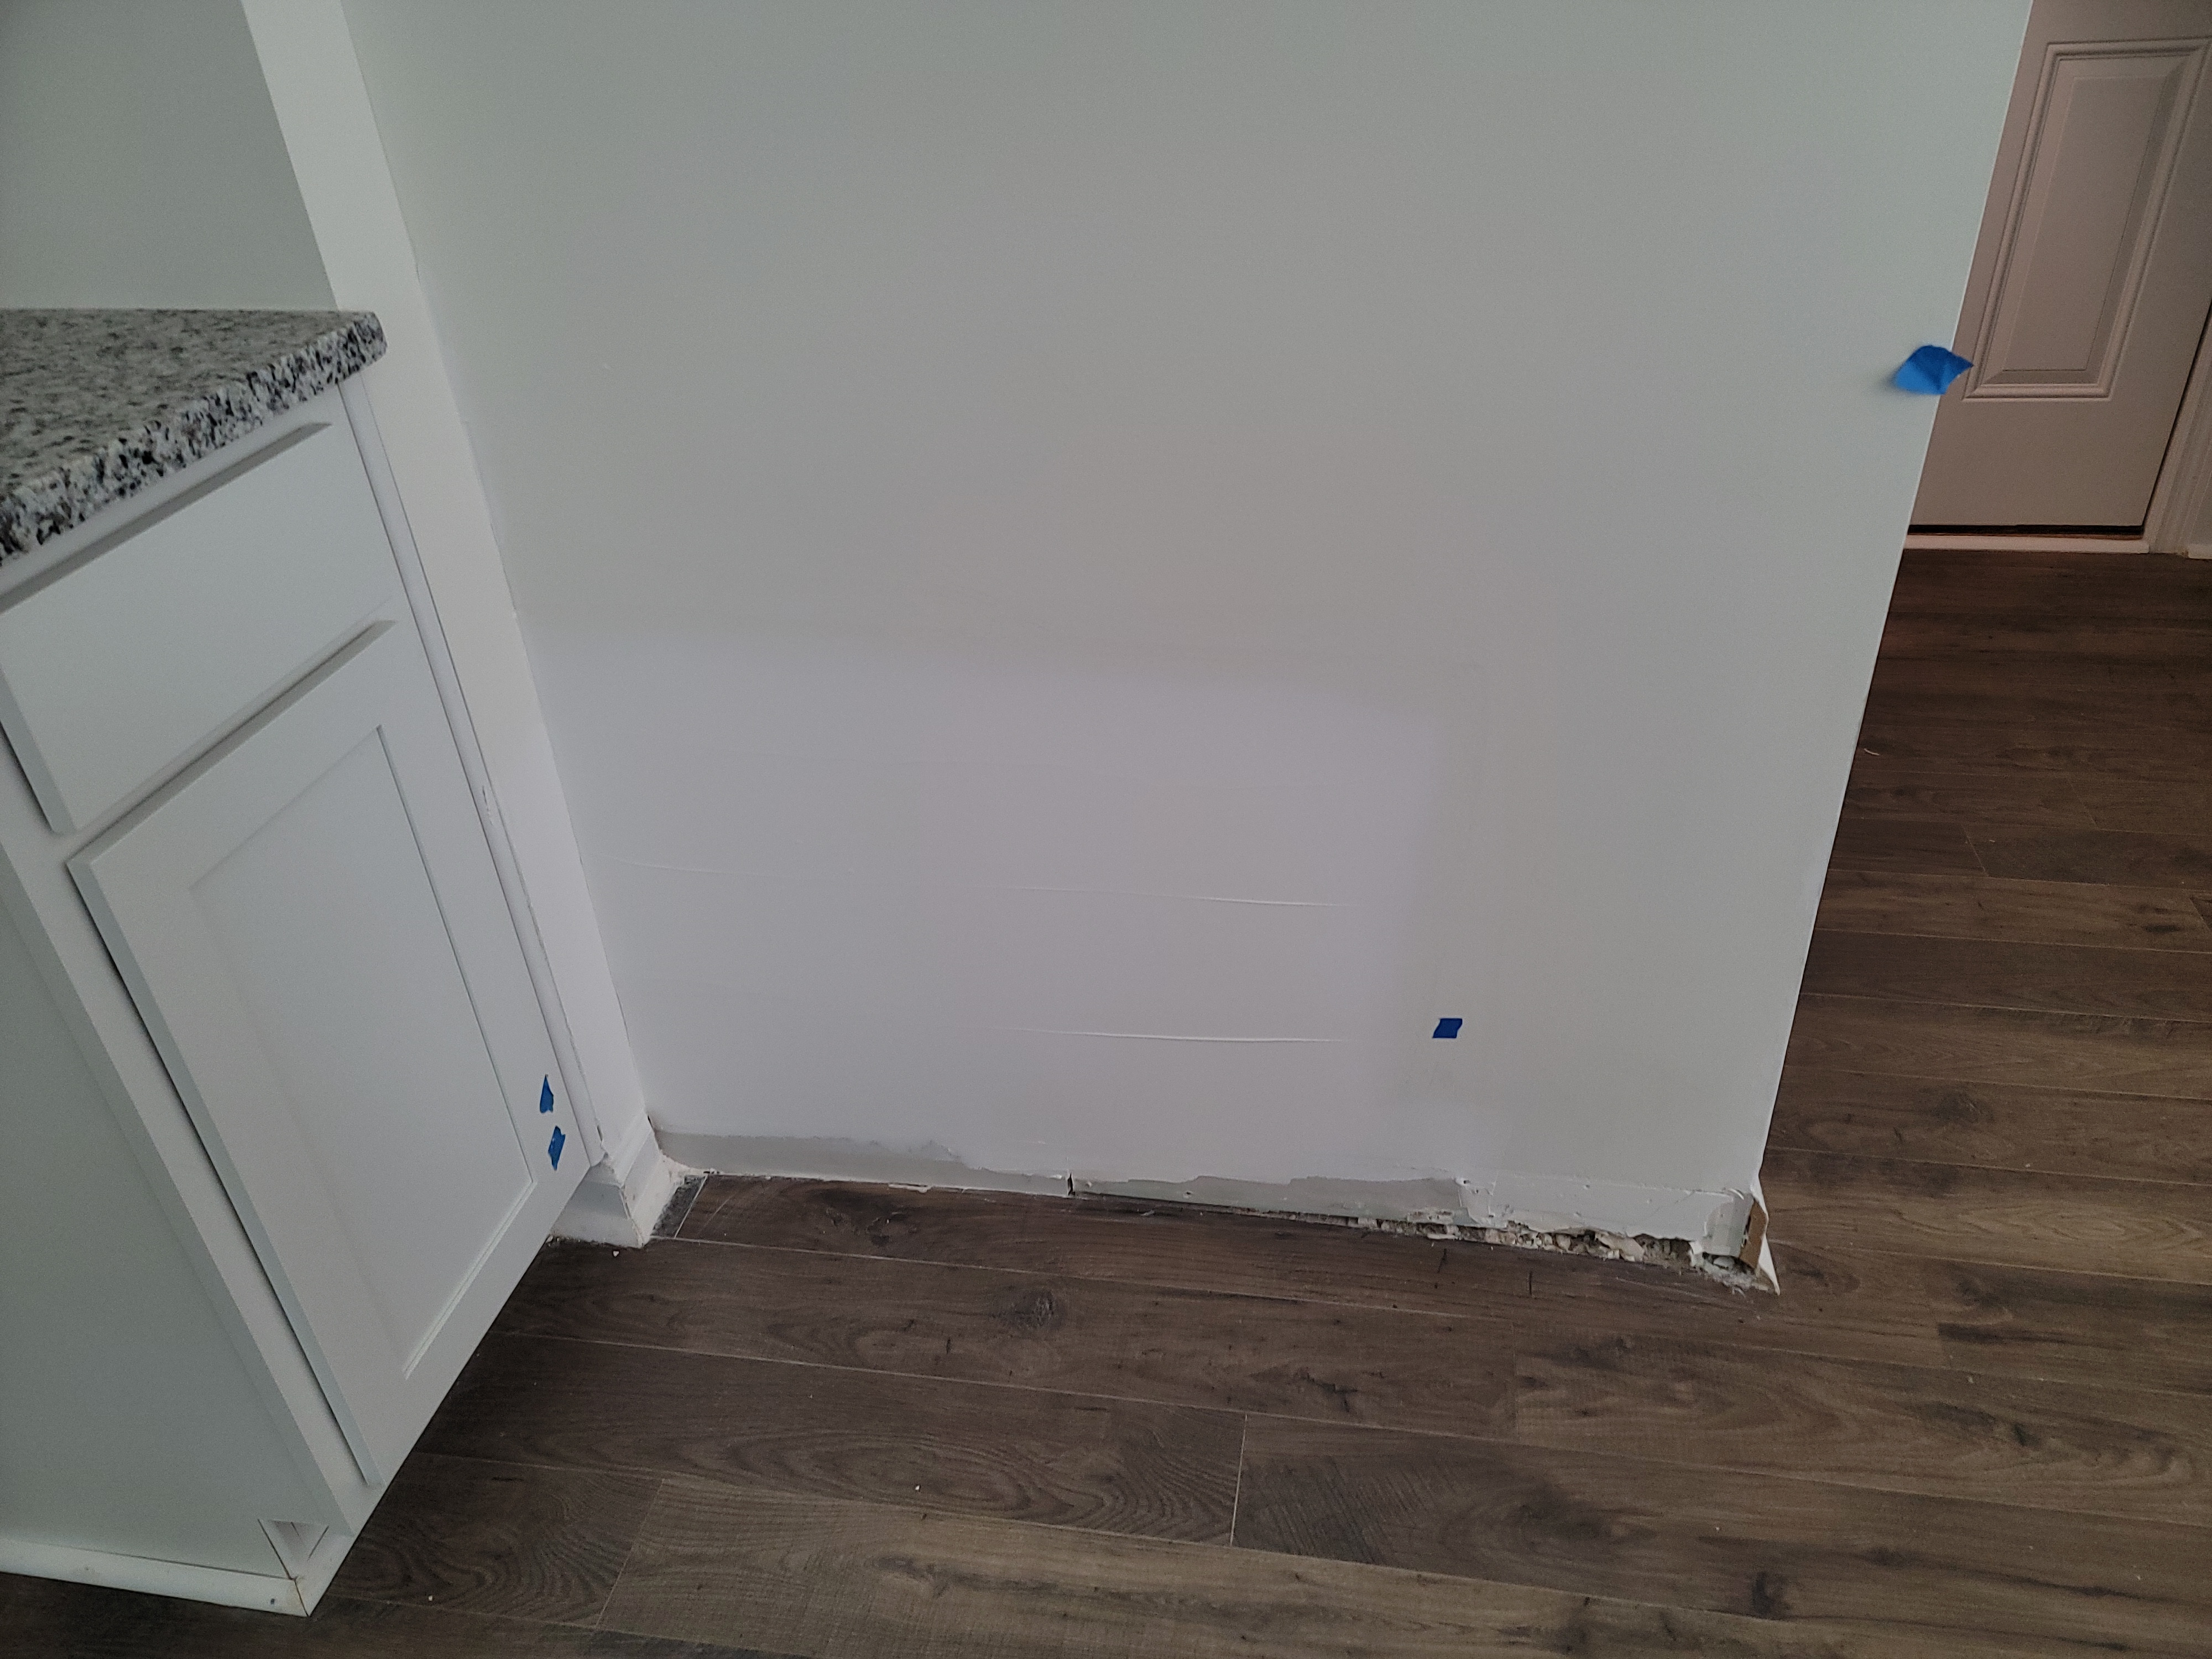
New construction finishes - Complete interior final patching, adjustments and painting to meet your standards, if needed.
- Representative photos provided
- G3-1 GARAGE:
Hinged Door at Garage
Door locking could be improved. Dead bolt lock was functional but difficult to lock. Properly correct door locks to meet your needs.
- CS-4 CENTRAL SYSTEM:
Filter drawer at furnace serving main level did not close properly as it struck furnace. Properly correct filter drawer where needed for proper correction and to close properly.
- E-2 ELECTRICAL:
Electrical Receptacle Outlets ────
One or more electrical receptacles were observed loose. Properly correct any loose electrical receptacles where needed for safety.
- Receptacle was loose serving kitchen counter.
- ST2-1 SIDING and TRIM:
Trim - ────
Unpainted, exposed exterior area observed. All exterior surfaces should be protected from weather with paint or similar coating process or surfaces should be designed to withstand weather elements such as vinyl or glass. Properly correct where needed.
- Trim beneath patio door at rear exterior was not yet painted or stained.
- ST2-2 SIDING and TRIM:
New construction finishes - Complete exterior final patch and painting to meet your standards if needed.
The Full Report
About the Inspection Process
Home Inspection: Scope and Purpose of a Home Inspection
The Scope and Purpose of a Home Inspection
Purchasing property involves risk
The purpose of a home inspection is to help reduce the risk associated with the purchase of a structure by providing a professional opinion about the overall condition of the structure. A home inspection is a limited visual inspection and it cannot eliminate this risk. Some homes present more risks than others. We cannot control this, but we try to help educate you about what we don’t know during the inspection process. This is more difficult to convey in a report and one of many reasons why we recommend that you attend the inspection.
A home inspection is not an insurance policy
This report does not substitute for or serve as a warranty or guarantee of any kind. Home warranties can be purchased separately from insuring firms that provide this service.
A home inspection is visual and not destructive.
The descriptions and observations in this report are based on a visual inspection of the structure. We inspect the aspects of the structure that can be viewed without dismantling, damaging or disfiguring the structure and without moving furniture and interior furnishings. Areas that are concealed, hidden or inaccessible to view are not covered by this inspection. Some systems cannot be tested during this inspection as testing risks damaging the building. For example, overflow drains on bathtubs are generally not tested because if they were found to be leaking they could damage the finishes below. Our procedures involve non-invasive investigation and non-destructive testing which will limit the scope of the inspection.
This is not an inspection for code compliance
This inspection and report are not intended for city / local code compliance. During the construction process structures are inspected for code compliance by municipal inspectors. Framing is open at this time and conditions can be fully viewed. Framing is not open during inspections of finished homes, and this limits the inspection. All houses fall out of code compliance shortly after they are built, as the codes continually change. National codes are augmented at least every three years for all of the varying disciplines. Municipalities can choose to adopt and phase in sections of the codes on their own timetables. There are generally no requirements to bring older homes into compliance unless substantial renovation is being done.
This is just our opinion
Construction techniques and standards vary. There is no one way to build a house or install a system in a house. The observations in this report are the opinions of the home inspector. Other inspectors and contractors are likely to have some differing opinions. You are welcome to seek opinions from other professionals.
The scope of this inspection
This inspection will include the following systems: exterior, roof, structure, drainage, foundation, attic, interior, plumbing, electrical and heating. The evaluation will be based on limited observations that are primarily visual and non-invasive. This inspection and report are not intended to be technically exhaustive.
Your expectations
The overall goal of a home inspection is to help ensure that your expectations are appropriate with the house you are proposing to buy. To this end we assist with discovery by showing and documenting observations during the home inspection. This should not be mistaken for a technically exhaustive inspection designed to uncover every defect with a building. Such inspections are available but they are generally cost-prohibitive to most home buyers.
Home Inspection Agreement
Inspection Agreement
Major Structural and Electromechanical Inspection
HomePro Inspection, Inc. agrees to conduct an inspection for the purpose of informing the CLIENT of major deficiencies in the condition of the property in accordance with the Standards as set forth by the American Society of Home Inspectors (ASHI) and the State of Tennessee. The inspection and written report are performed and prepared for the sole, confidential and exclusive use and possession of the CLIENT; the report is nontransferable.
The written report will include the following only:
- general exterior, including roof, siding, windows, chimney, drainage and grading
- structural condition of foundation & frame
- electrical, plumbing, hot water heater, heating and air conditioning
- general interior, including ceilings, walls, floors, windows, insulation and ventilation
Maintenance and other items may be discussed but they are not a part of the inspection. The report is not a compliance inspection or certification for past or present governmental codes or regulations of any kind and is only based on the inspector’s opinions.
It is understood and agreed that the inspection will be of readily accessible areas of the building and is limited to visual observations of apparent conditions existing at the time of the inspection only. Latent and concealed defects and deficiencies are excluded from the inspection; equipment, items and systems will not be moved or dismantled. When the inspection is for only one or a limited number of systems or components, the inspection is limited to only those systems or components that were inspected. Detached structures are not included. HomePro Inspection, Inc. will be under no obligation under any circumstances for any further follow-up inspection.
ENVIRONMENTAL HAZARDS including Asbestos, Mold, Fungus, Lead, Radon, Cockroaches, Rodents, Pesticides, Treated Lumber, Mercury, Carbon Monoxide, Urea Formaldehyde, Toxic Wastes, Polluted Water, Contaminants and all Pollutants and Hazardous Materials or other similar environmental hazards are not part of this Home Inspection. In addition, no inspection for household insects or unwanted animals will be done.
This report does not address Subterranean Systems or system components for Sewage Disposal, Water Supply, or Fuel Storage or Delivery. Auxiliary systems such as Alarm, Security, Intercom, other low voltage wiring, Generator, Private Water, Sprinkler, Elevator, Central Vacuum, Refrigerators, Laundry Equipment, Solar, Swimming Pools, Hot Tubs, Saunas, Space Heaters, Window Air Conditioners and or any system not considered a part of the major building systems are not a part of the inspection process.
The parties agree that the HomePro Inspection, Inc., and its employees and agents, assume no liability or responsibility for the cost of repairing or replacing any unreported defects or deficiencies, either current or arising in the future, or for any property damage, consequential damage or bodily injury of any nature. THE INSPECTION AND REPORT ARE NOT INTENDED AS A GUARANTEE OR WARRANTY, EXPRESSED OR IMPLIED INCLUDING REGARDING THE ADEQUACY, OR PERFORMANCE OF ANY INSPECTED STRUCTURE, ITEM OR SYSTEM. THE HOMEPRO INSPECTION, INC. IS NOT AN INSURER OF ANY INSPECTED CONDITIONS.
It is understood and agreed that should HomePro Inspection, Inc. and/or its agents or employees be found liable for any loss or damages resulting from a failure to perform any of its obligations, including but not limited to negligence, breach of contract or otherwise, then the liability of HomePro Inspection, Inc. and/or its agents or employees, shall be limited to a sum equal to the amount of the fee paid by the CLIENT for the Inspection and Report.
The parties agree that the faxed or digital copy of the agreement is to be relied upon in lieu of the original.
Acceptance and understanding of this agreement are hereby acknowledged:
p20(5)p20(2).png) |
General Comments
Building Characteristics, Conditions and Limitations
Type of Building : Single Family Home
Site Built
Approximate Square Footage: 3110
Approximate Year of Original Construction: 2022
Weather during the inspection: Clear
Approximate Low Temperature During Inspection: 60[F]
Approximate High Temperature During Inspection: 70[F]
Ground/Soil surface conditions: Dry
INTERIOR
Access
Empty of Furnishings
Home was empty of furnishings when inspected.
Walls
Wall Materials: Drywall
Some wear noted. Recondition as desired.
Ceilings
Ceiling Materials: Drywall
Serviceable, fulfilling its function.
Flooring
Floor Covering Materials: Carpet, Engineered Flooring, Sheet Vinyl
Serviceable, fulfilling its function.
Doors at Interior
Doors Correct as Needed
Properly correct interior doors to your standard and to meet your needs.
- Bedroom door at upstairs left struck door frame when closing.
- 1/2 bathroom door struck door frame when closing.

Doors to Exterior
Doors to Exterior: Serviceable, fulfilling its function
Glazing/Glass
Insulated glass was present.
Windows
Vinyl framed windows were present.
Serviceable
A representative number of accessible windows were operated and were found generally serviceable within the parameters of their given service life.
Stairs/Railings Interior
Stairs Serviceable, fulfilling its function: For stairs to second floor
________________________________________________________________________________________________________________________________________________________________
Railing Serviceable, fulfilling its function: Railing for stairs to second floor
Interior Other
New Construction: Cleaning, Interior Finishes
New construction cleaning - Final clean up typically includes washing windows inside and out, cleaning all interior surfaces including inside of cabinets, removal of any construction debris and complete any exterior clean up or landscape adjustments. Properly correct as needed, where needed.

New construction finishes - Complete interior final patching, adjustments and painting to meet your standards, if needed.
- Representative photos provided

GARAGE
HINGED DOOR at GARAGE to LIVING SPACE
Door Condition: Locking
________________________________________________________________________________________________________________________________________________________________
Hinged Door at Garage
Door locking could be improved. Dead bolt lock was functional but difficult to lock. Properly correct door locks to meet your needs.
GARAGE AREA
GARAGE TYPE: Attached
Photos
Representative Photos
 |  |
Garage Floor Location: At Ground
Garage Separation from Living Space: Drywall Present Ceiling/Wall
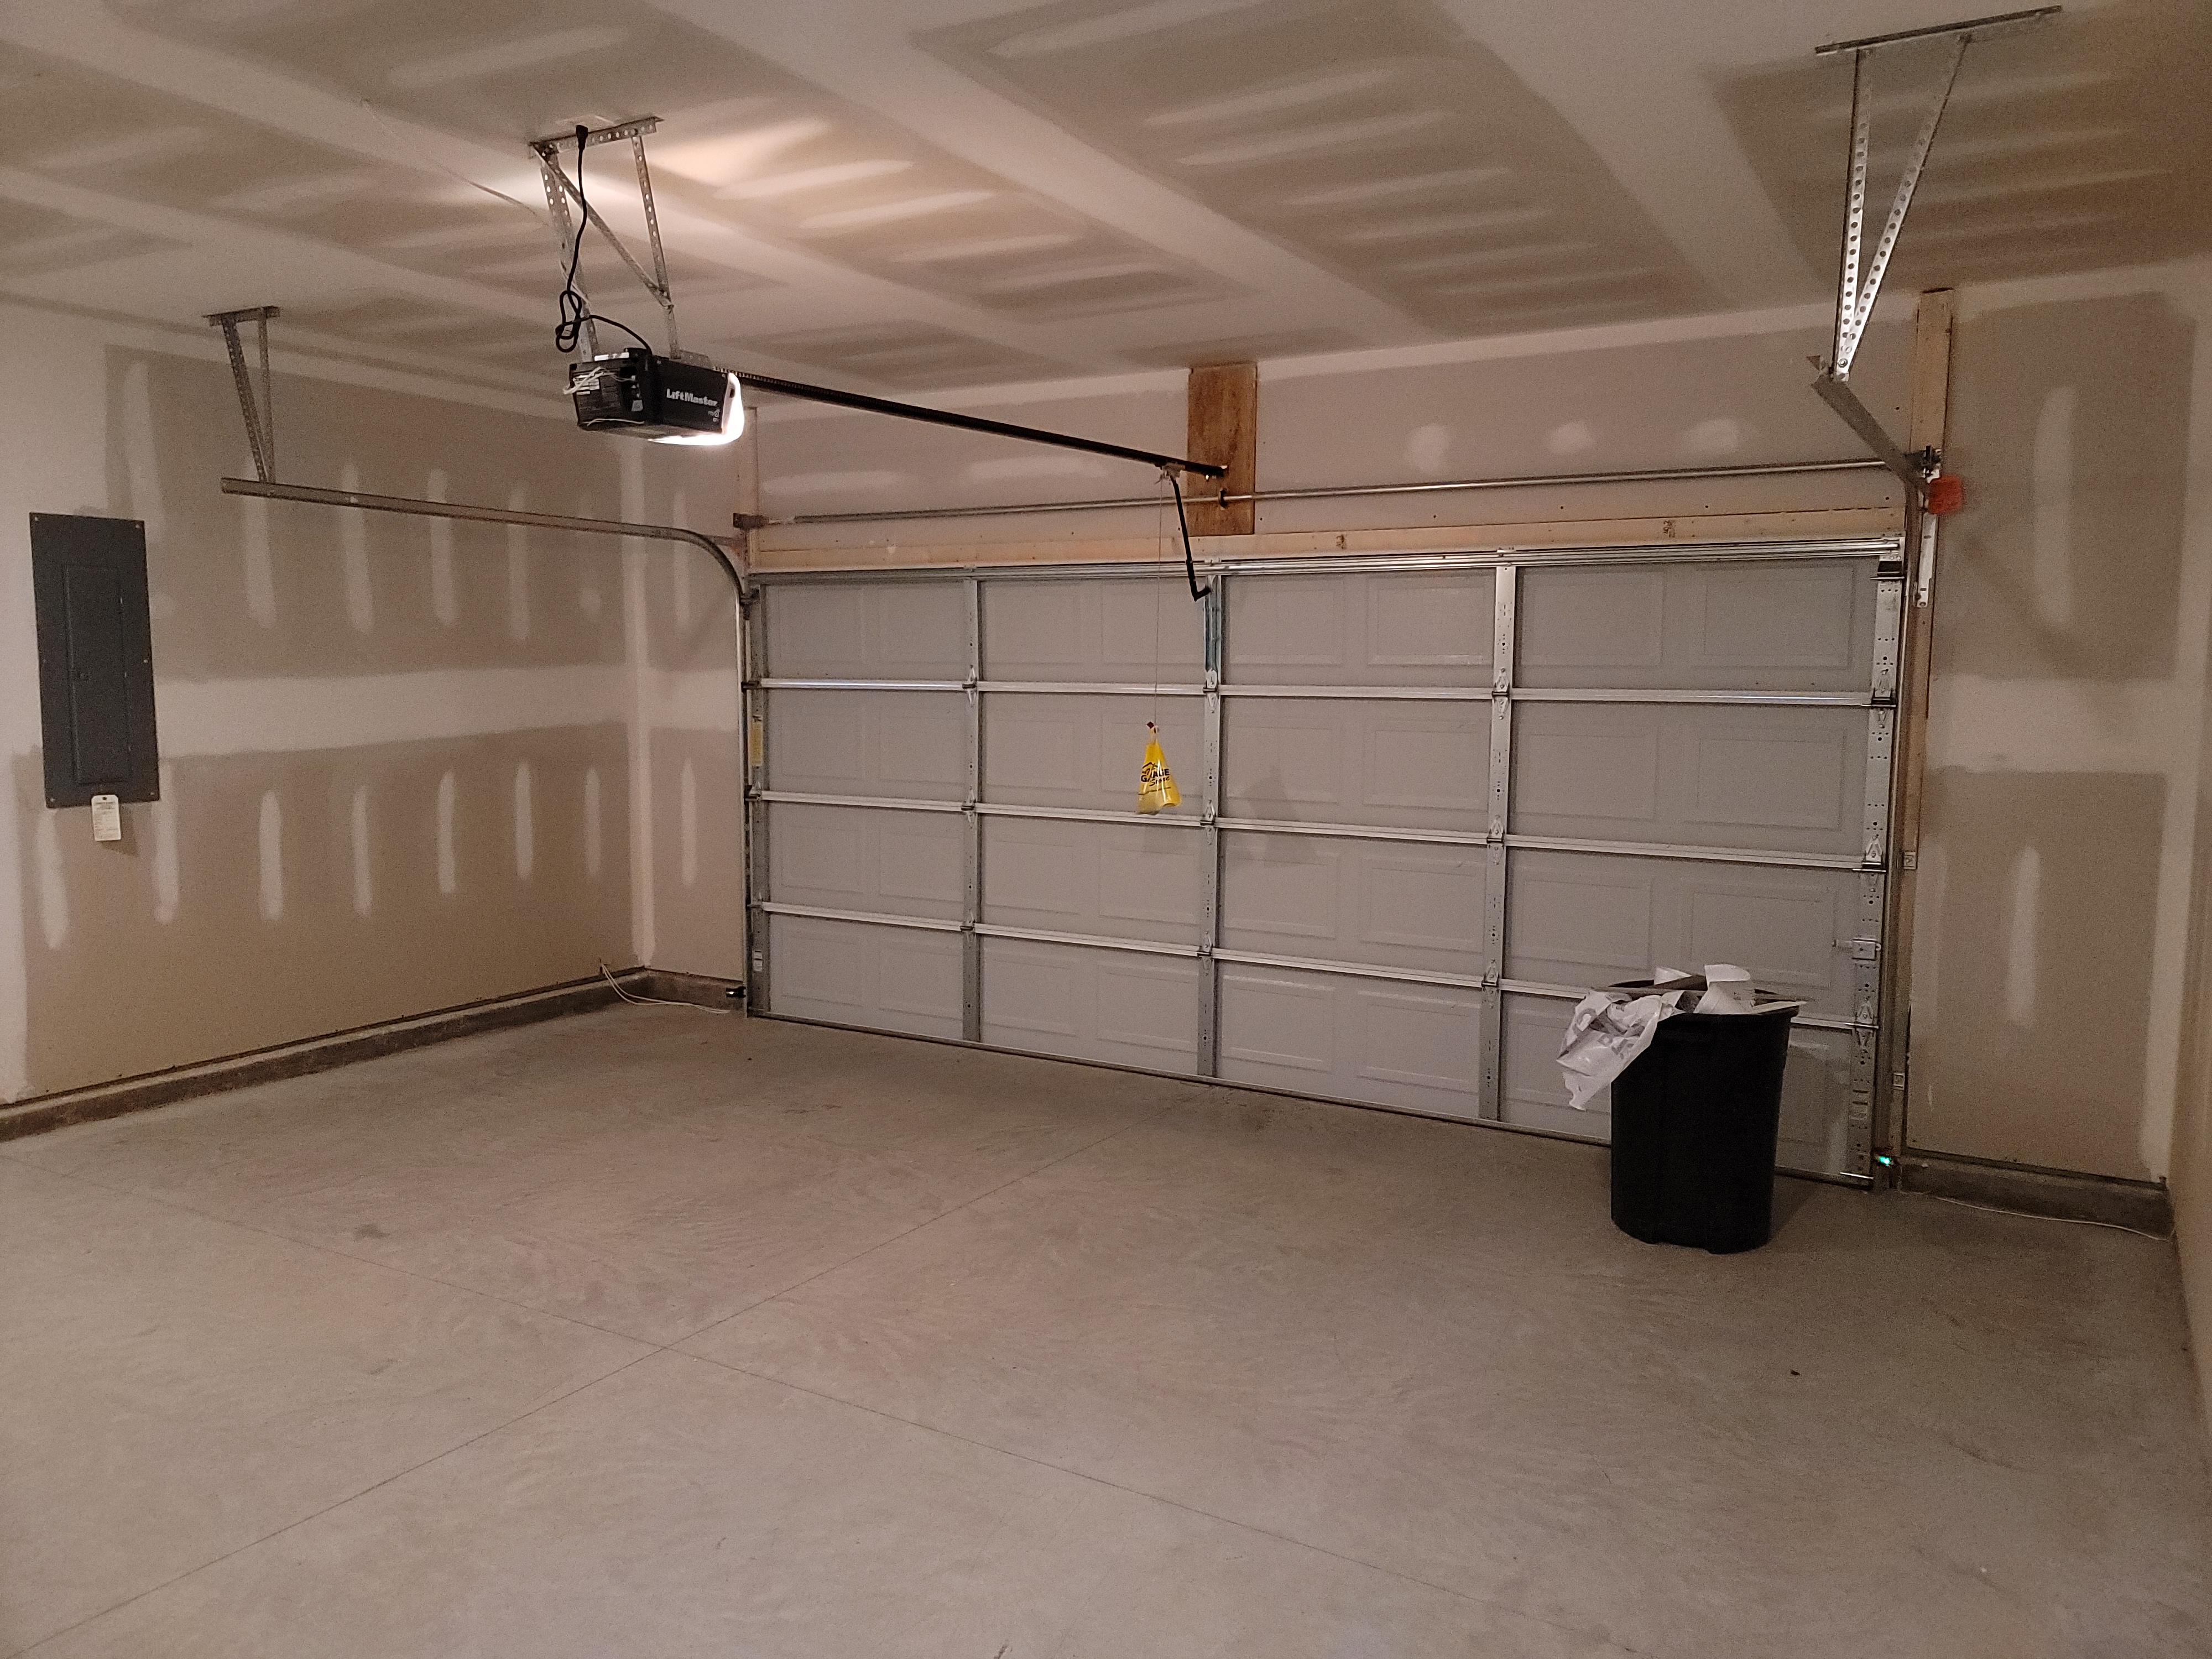
Drywall was observed installed on ceiling framing and the wall framing that separated the garage and living space.
Should a fire occur at an attached garage area, properly installed drywall on framing, where needed, can offer some assistance to slow the spread of fire and smoke from the garage area to living areas. Properly maintain this area as needed.
________________________________________________________________________________________________________________________________________________________________
GARAGE OVERHEAD DOOR: One Installed
Overhead Door Material: Metal
Overhead Door Insulation: Not Insulated, Heated Area Over Garage
Heated space was observed above garage area. Garage overhead door was not insulated. Garage overhead doors are typically the largest opening in a building. Installing insulated garage doors may lower utility costs as well help make the garage and the heated living space above the garage area less drafty. Consider this area for appropriate improvement or upgrade.
 |
Overhead Door Operation: Tested Using Operator
________________________________________________________________________________________________________________________________________________________________
GARAGE OVERHEAD DOOR OPERATOR: Testing Garage Overhead Door Operators
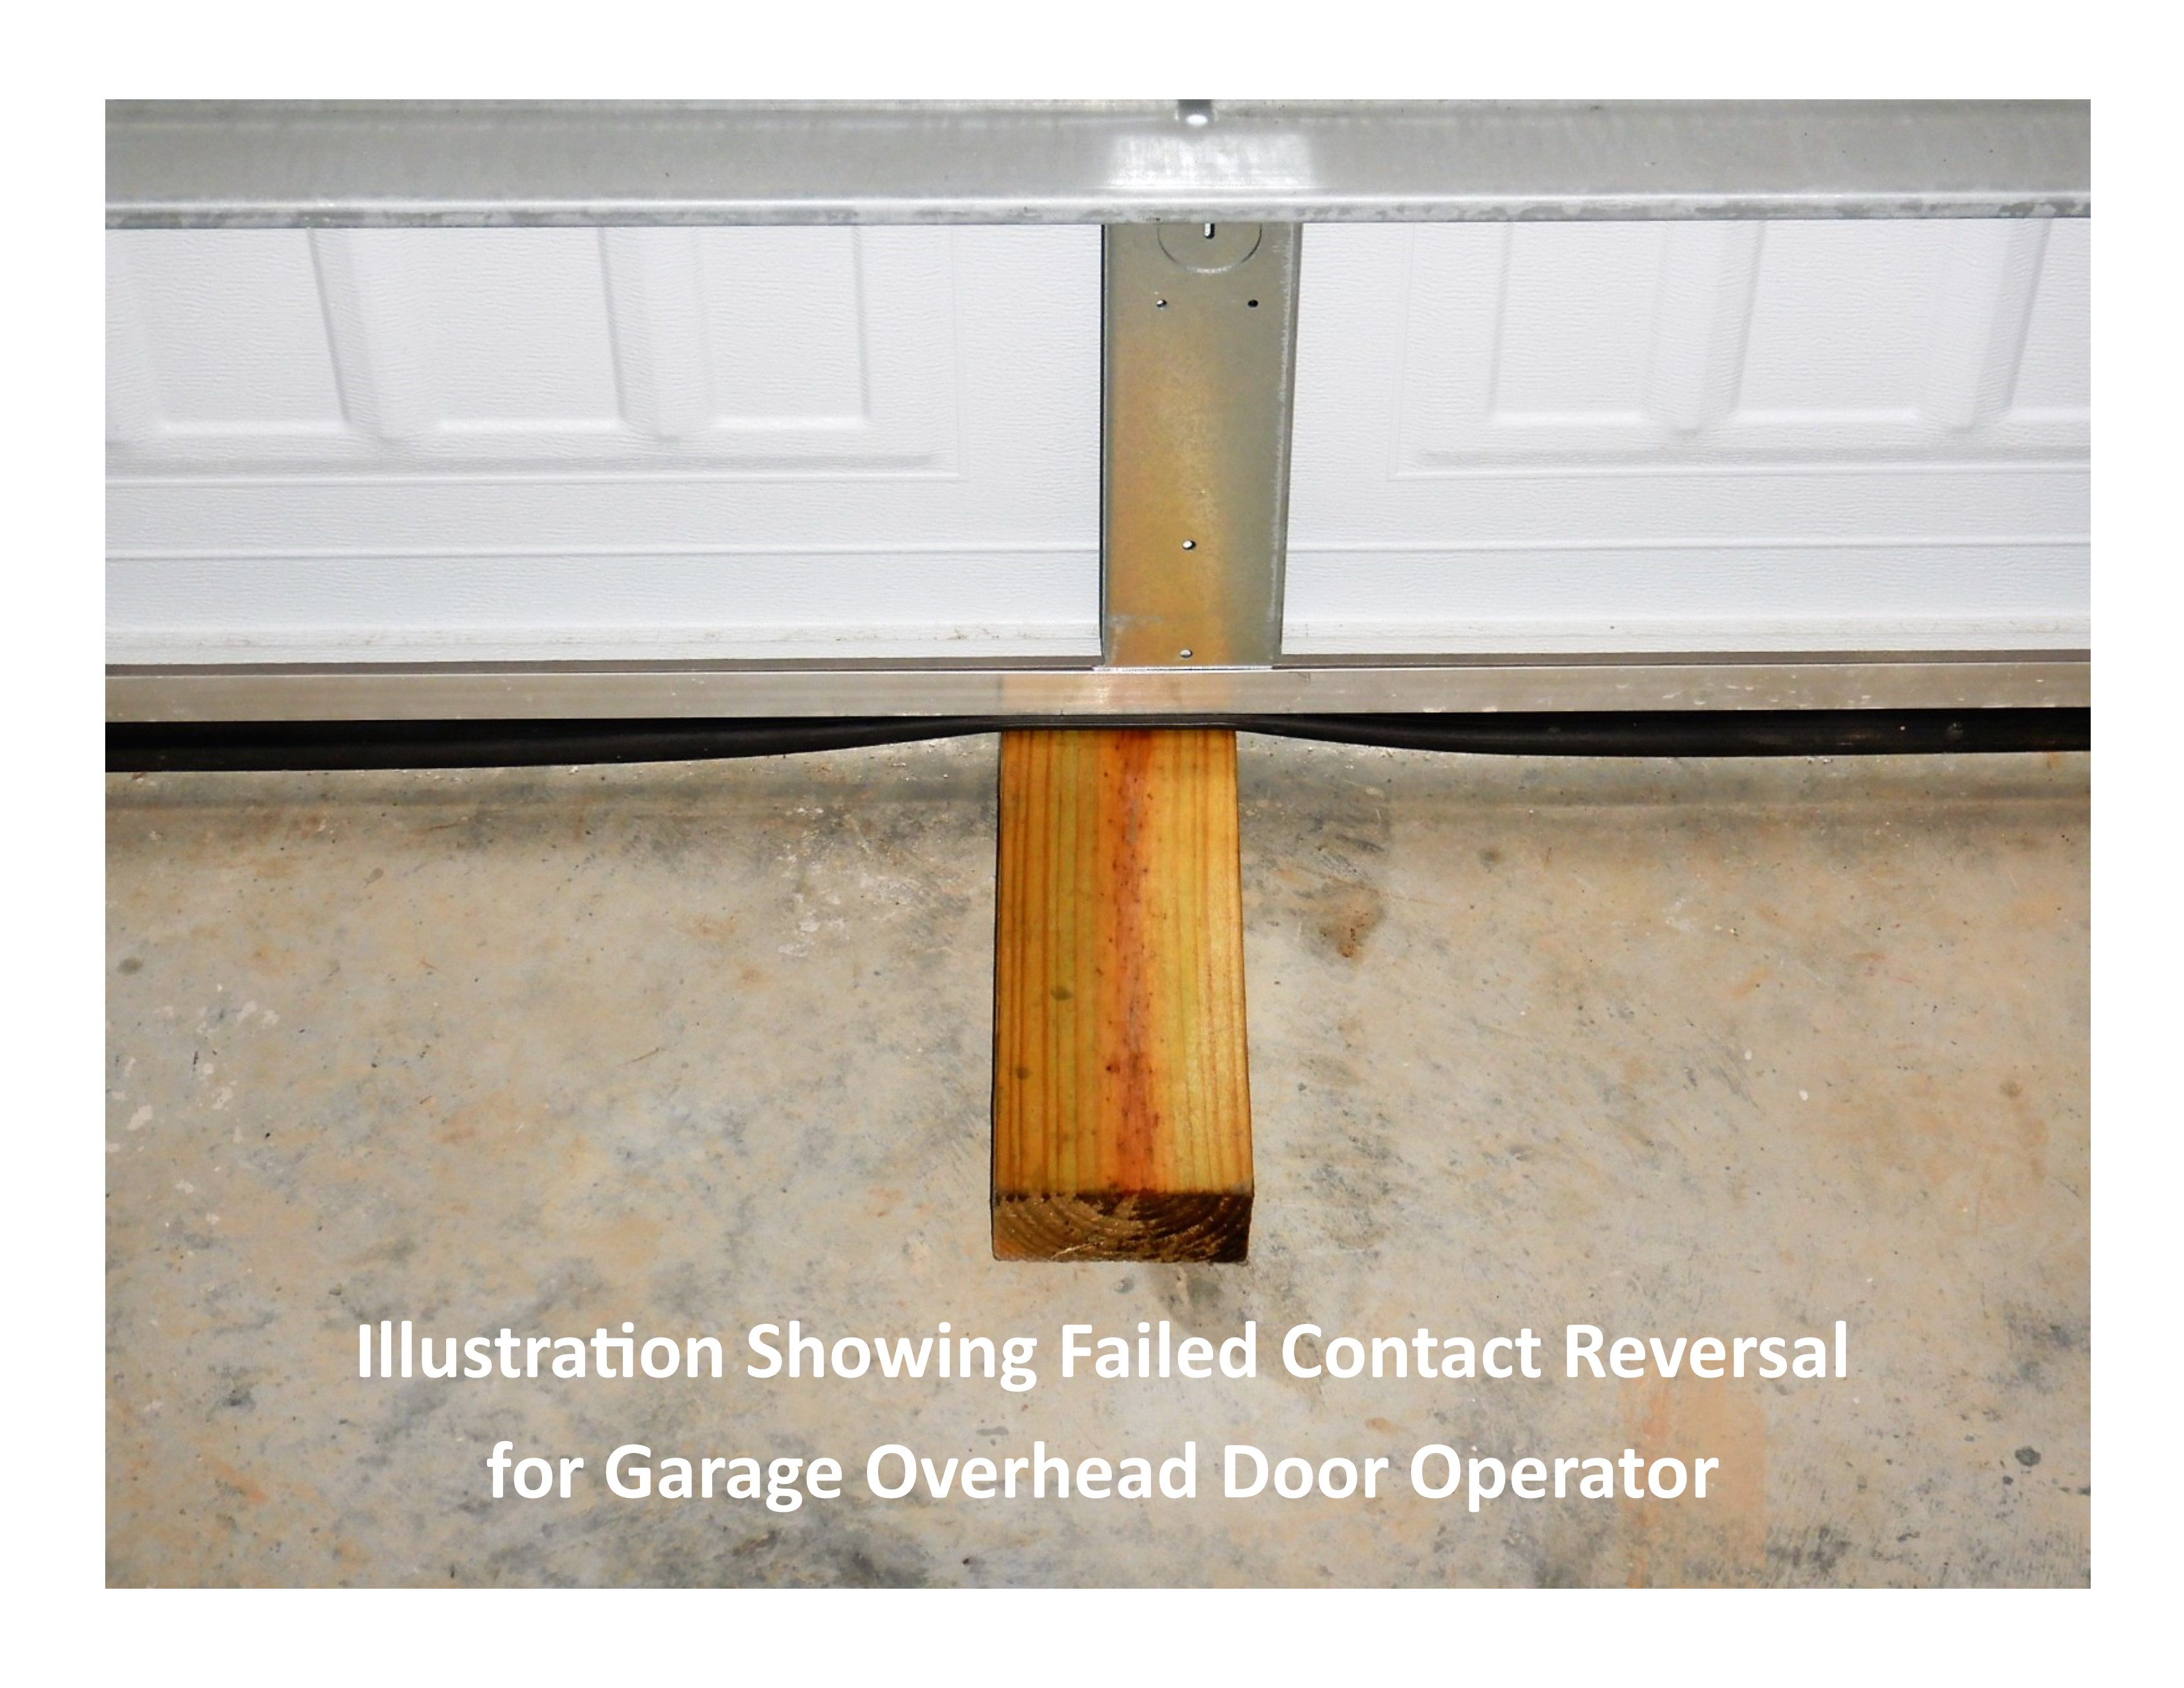
Testing Garage Overhead Door Operators
Garage overhead door operators require periodic maintenance to maintain safe operation. Electric overhead operators are checked for function and safety during the inspection. Modern garage overhead door operators have two safety reversal means, Contact Reversal and Non Contact Reversal. Contact Reversal is when the garage overhead door hits an obstruction and the operator should reverse for safety. Non Contact Reversal is when the electronic eye detects an obstruction without the garage overhead door hitting an object and the operator should reverse for safety.
The Contact Reversal of the garage door operator is tested using a 1.5 inch obstruction on the floor at the center point of the door. If the Contact Reversal requires correction this is typically accomplished by a simple adjustment on the operator but other corrections could also be necessary. See operator owners manual for additional details.
The Non Contact Reversal is tested by obstructing the electronic eyes, if installed properly, while the electric operator is closing the garage overhead door. The installed height of the electronic eyes varies slightly by manufacture but most typically advise installing the electronic eyes no more than six inches above the floor. If the electronic eyes require adjustment this is typically accomplished by remounting or correcting the aim of the eyes but other corrections could also be necessary. See overhead door operator owners manual for additional details. If the electronic eyes are out of alignment the operator will not close the garage overhead door without pushing and holding the wired push button until the garage overhead door is fully closed.
 |  |
Overhead Door Operator: One Installed
Garage Overhead Door Operator Function: Operator Functional
Attached Garage Overhead Door Operator
Contact Reversal Means for overhead door operator tested functional.
Non Contact Reversal Means for overhead door operator tested functional.
Test overhead door operator reversal means as needed to maintain safe operation.
 |
KITCHEN
Inspection Process
Kitchen Inspection Process
Kitchen Inspection Process
Kitchen inspection was of the readily accessible and visible portions of the kitchen. The kitchen inspection includes the countertops and a representative number of cabinets. Kitchen faucets, when functional, are run for longer than one minute checking for observable leaks and hot/cold orientation.
The following builtin kitchen appliances, where installed, were inspected and on/off operated testing the main function of each appliance using the normal operating controls:
- Cooktop / Oven / Range (cook surface with integral oven)
- Microwave
- Garbage Disposal
- Trash Compactor
Installed dishwashers are run through a normal cycle. Obvious functional issues and leaks observed around the dishwasher are reported, if present.
Ventilation equipment, such as range hoods, are inspected, on/off operated and are reported as ductless, ducted or recirculating. It is beyond the scope of this inspection to determine the effectiveness of the kitchen exhaust fan, such as to verify air flow quantity or discharge location.
Appliance inspection does not cover clocks, timers, self cleaning function, calibration, automatic functions or optional equipment on appliances. Refrigerators are considered personal property and are not evaluated. Refrigerator presence or absence is noted.
Equipment that appears to be shut down, inoperable or intentionally taken out of service is noted but will not be operated by the inspector. Shut down equipment may be unplugged, breaker off, water off, gas off or otherwise taken out of service.
Installation conditions and functional issues for this area requiring correction should be performed by a competent qualified contractor.
Kitchen
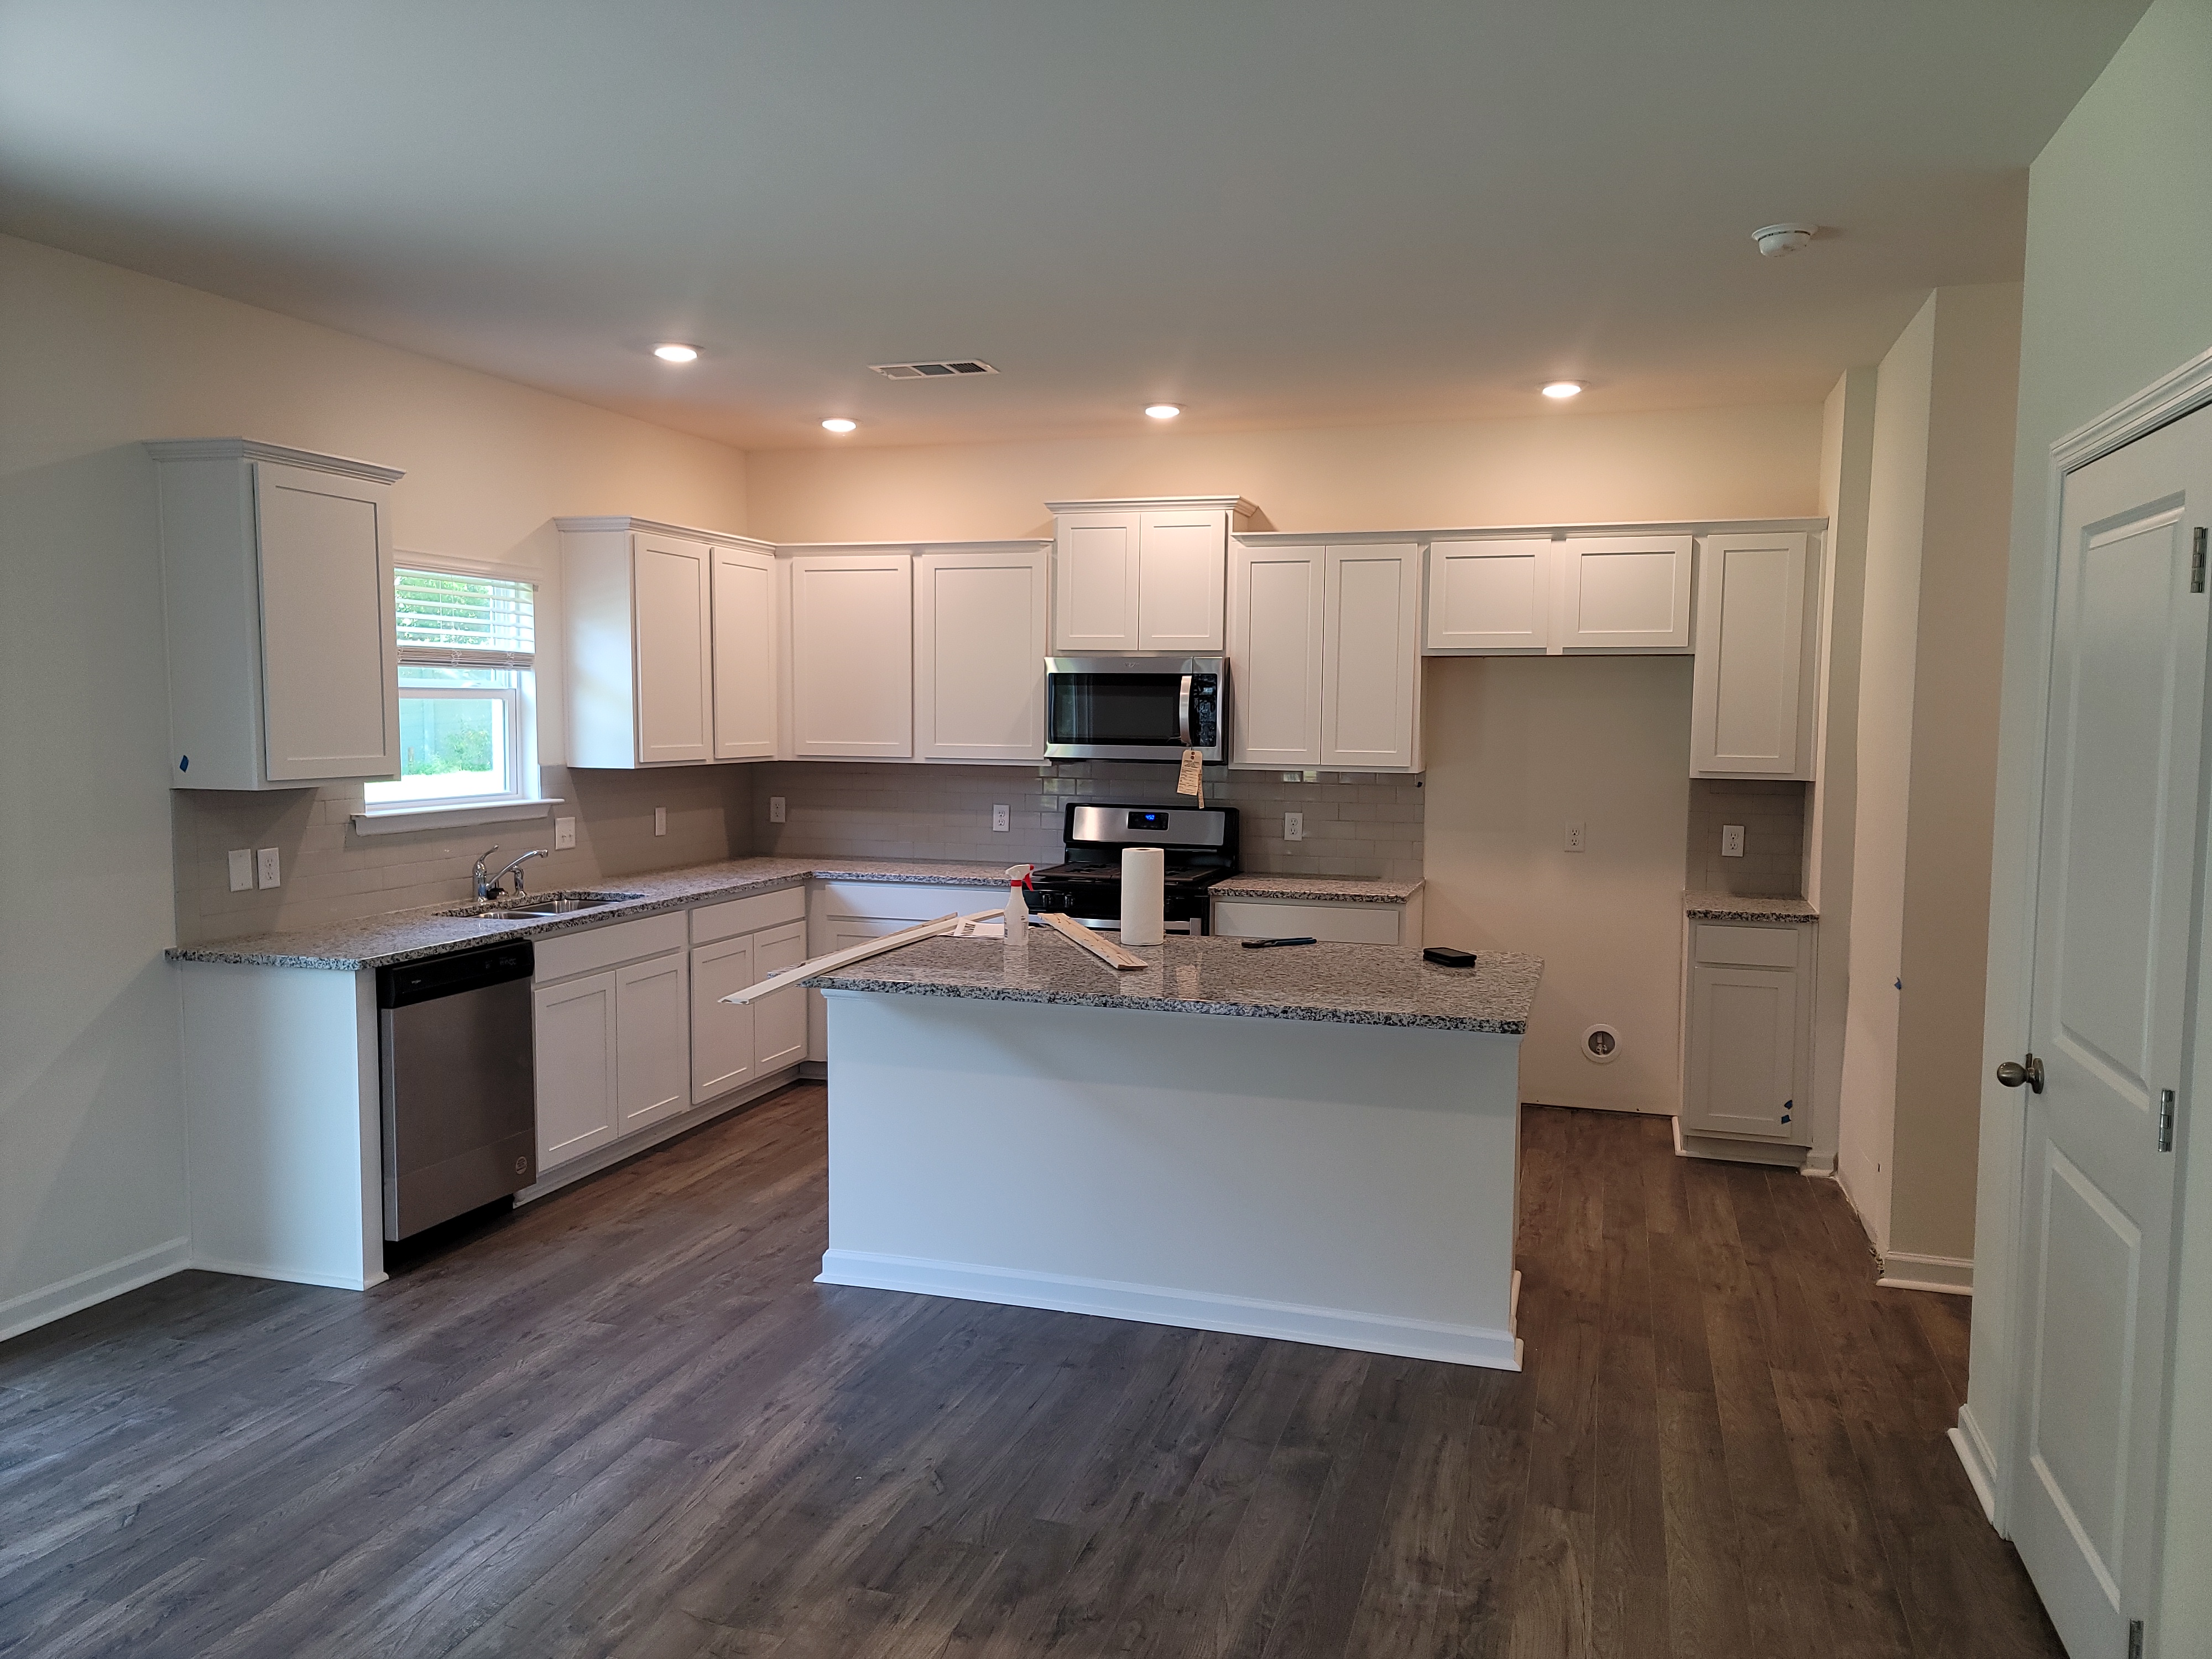
Kitchen Area: Main Level
Kitchen ────
Countertop: Granite
Serviceable fulfilling its function
Cabinets: Wood and wood composition painted
Serviceable fulfilling its function
Floor Covering: Engineered Flooring
Serviceable fulfilling its function
────
Sink: Double Bowl Stainless Steel
────
────
Disposal: Present and appeared functional
Dishwasher: Present
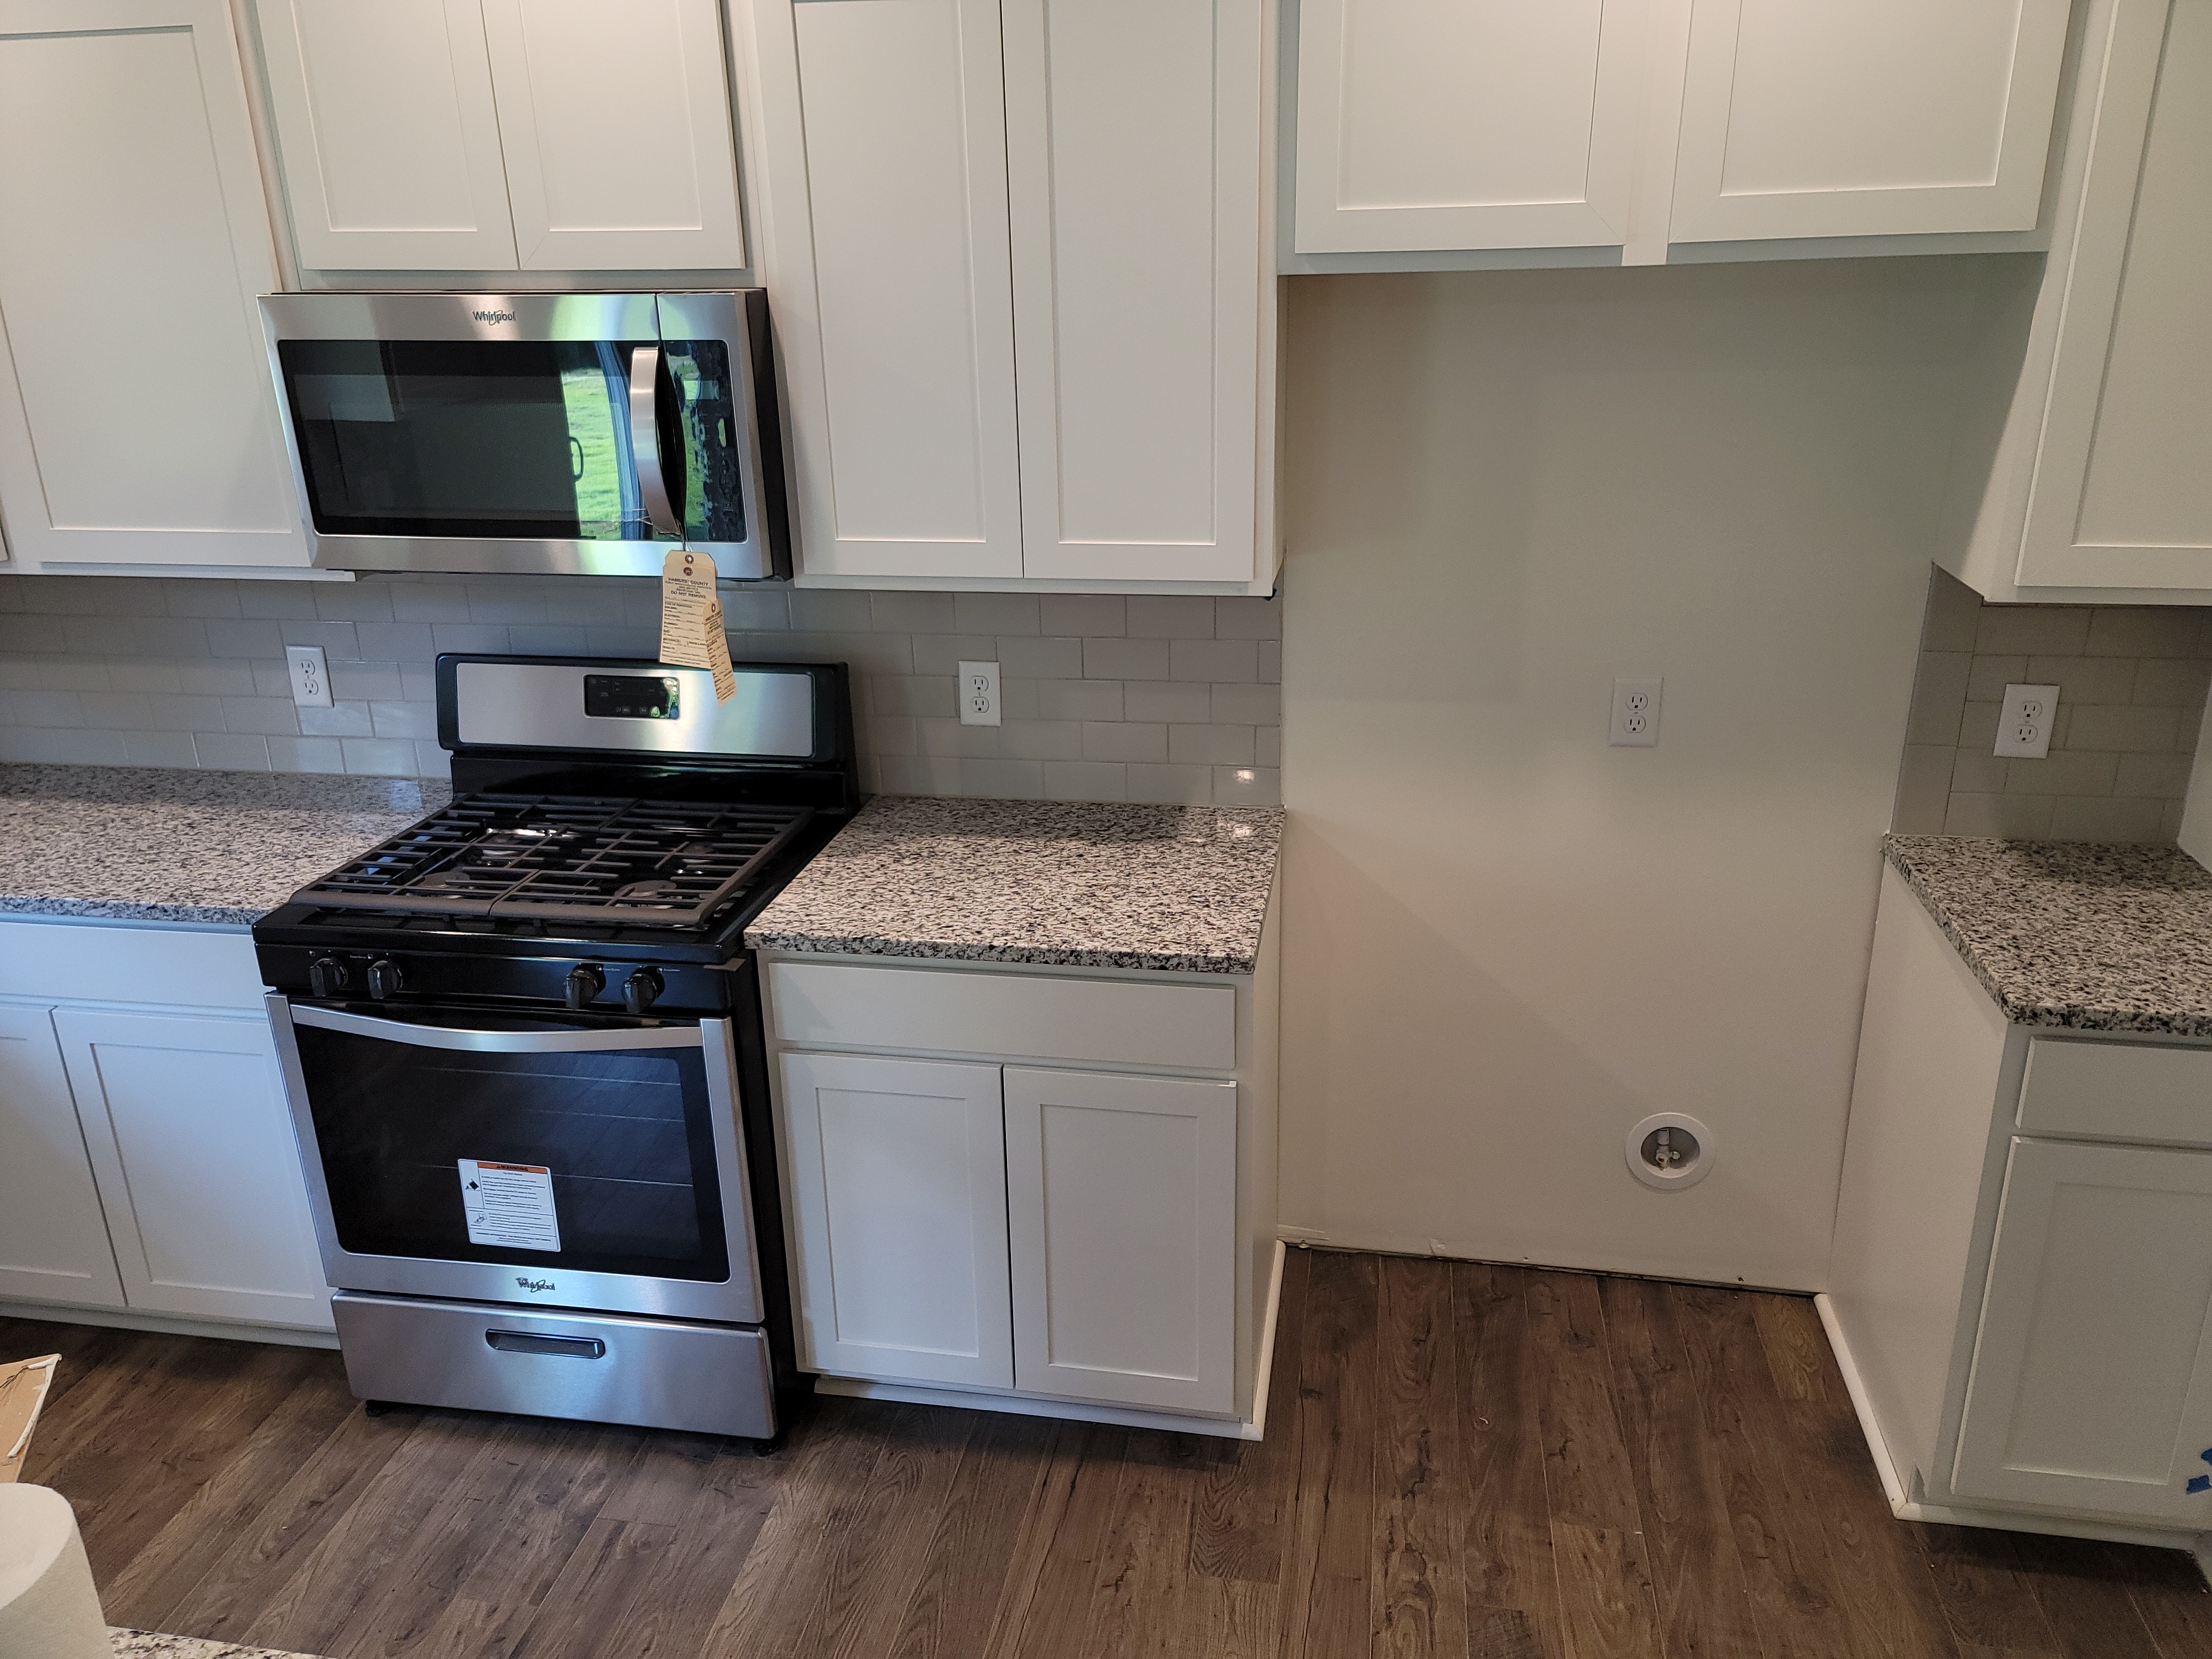
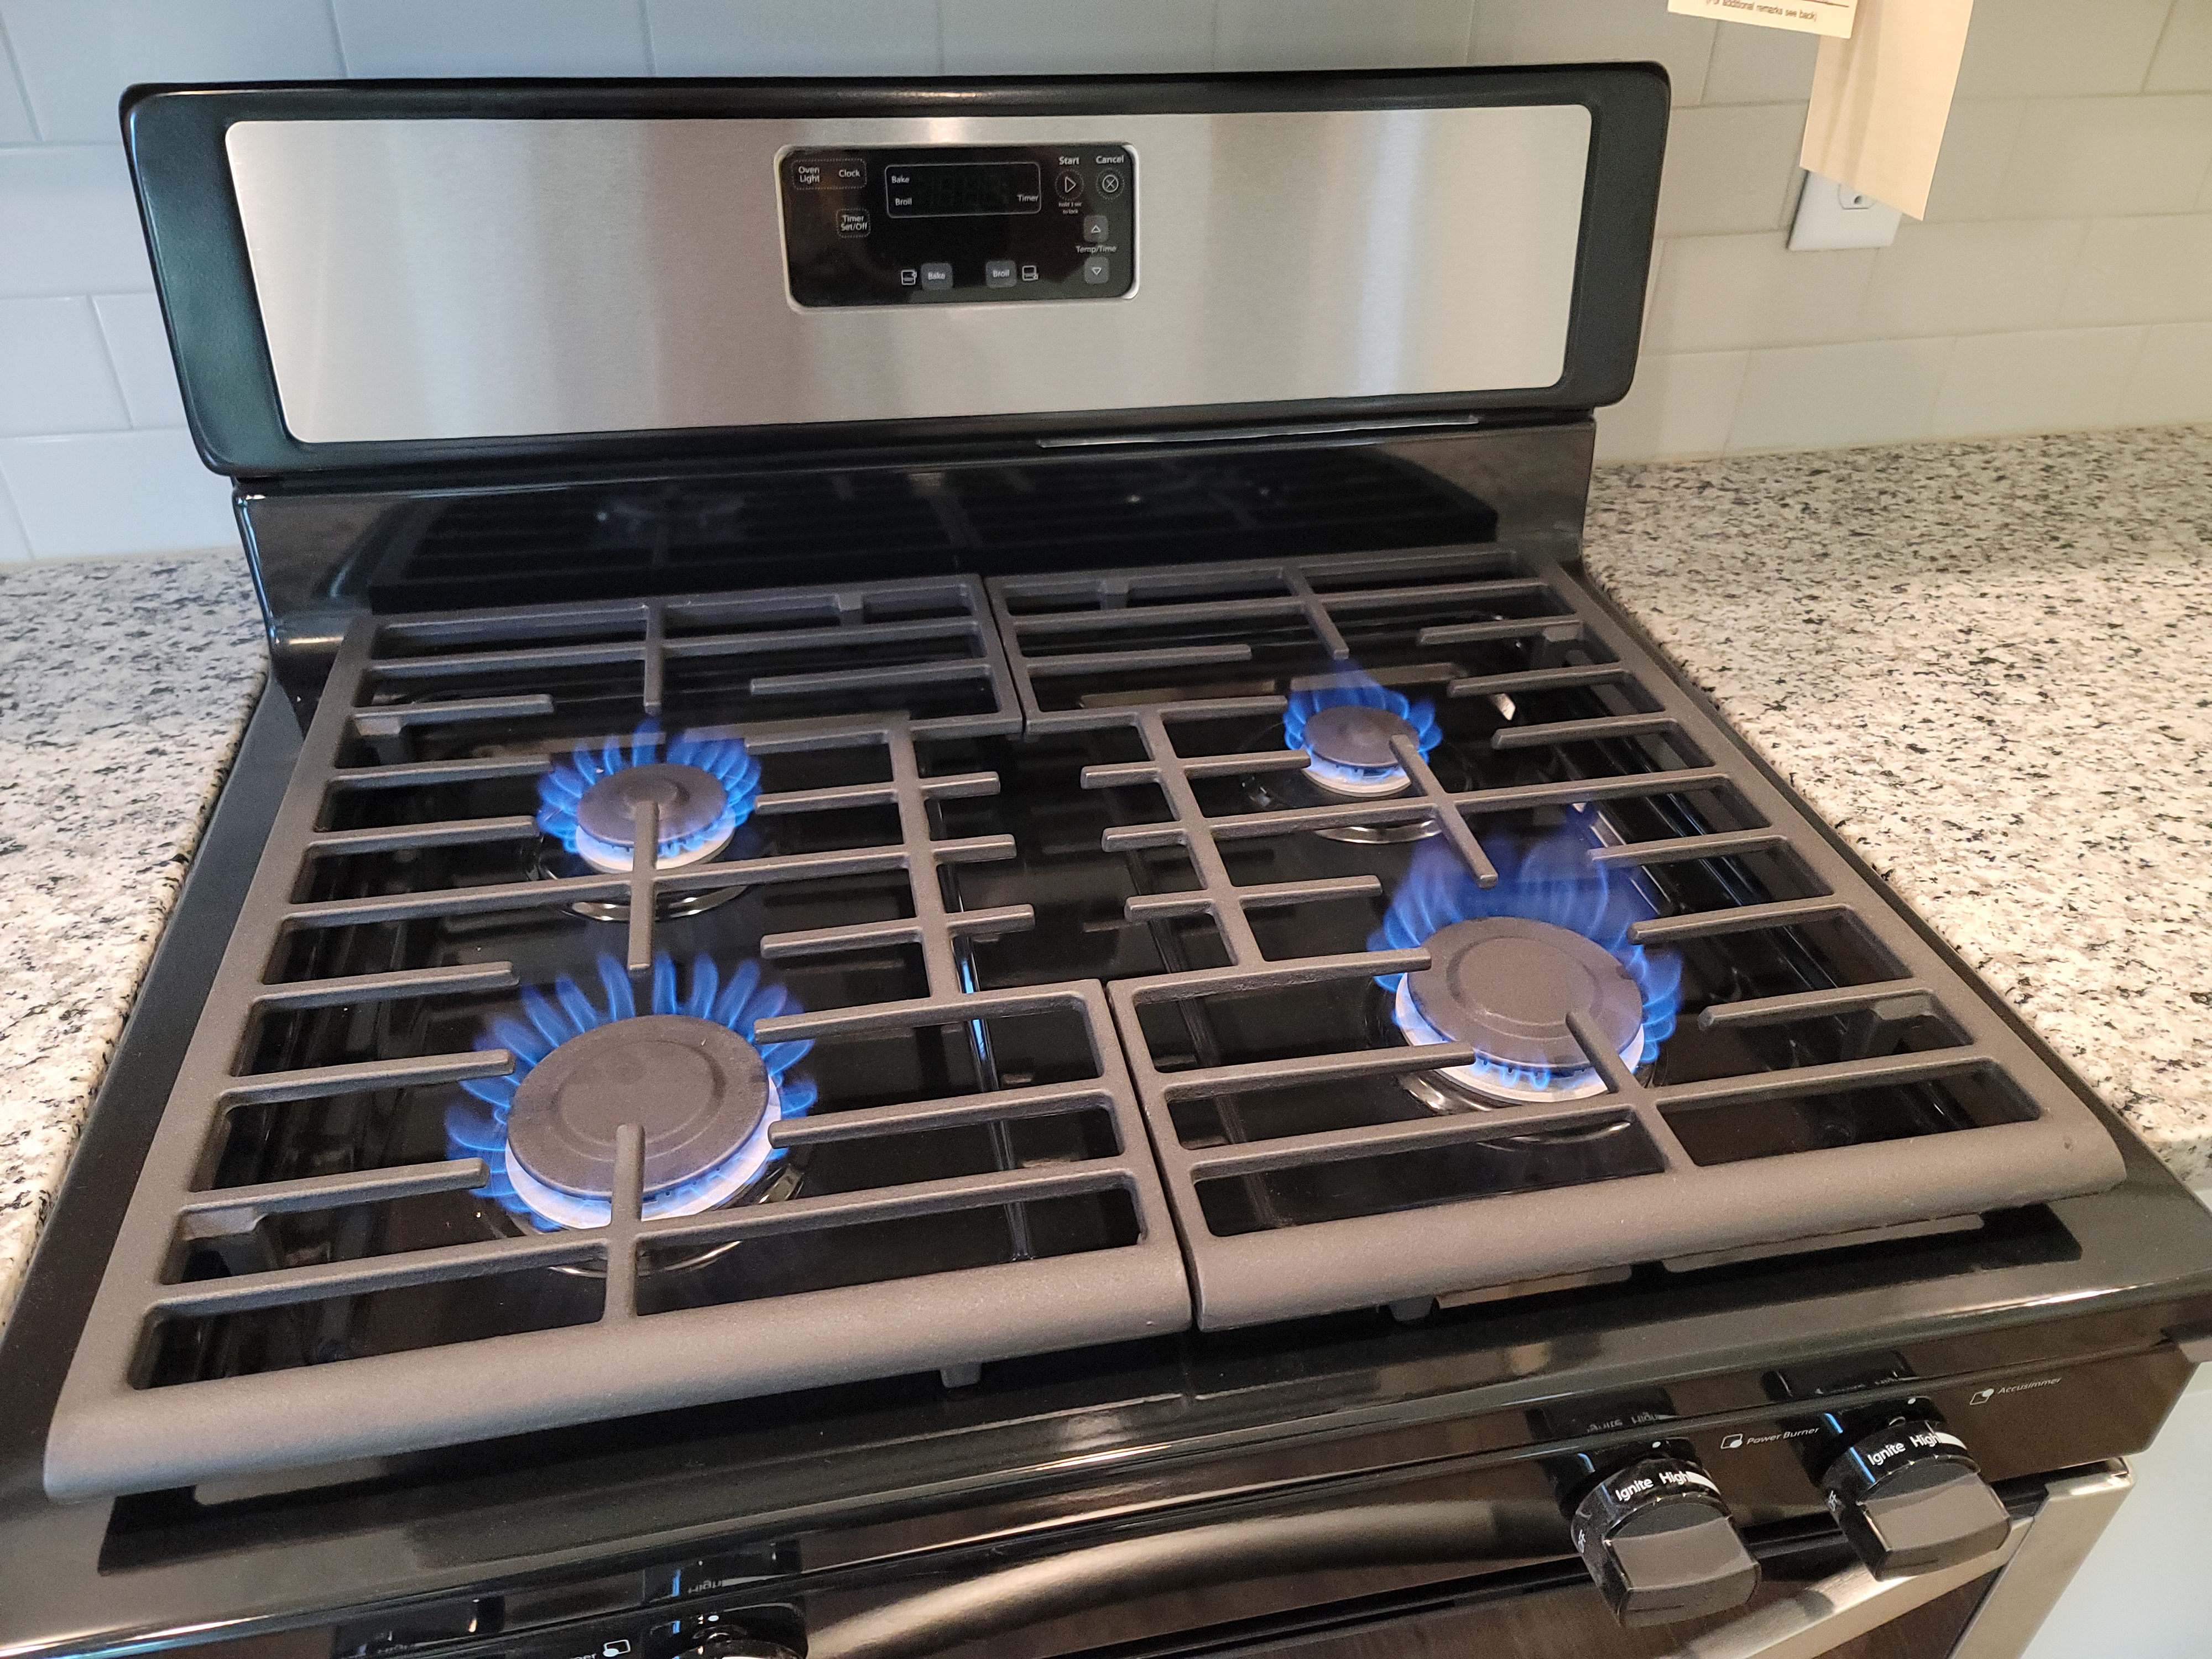
Range: Range (Gas Top/Oven)
Present and On/Off Tested functional
Microwave: Present and On/Off Tested functional
Kitchen Exhaust: Ductless in microwave appeared functional
Refrigerator: Not Present
Trash Compactor: Not Present
 |  |
 |
LAUNDRY
Laundry Connections
Laundry: Connections Available
Clothes washer and dryer connections were available. ────
Laundry appliances were not present during inspection. Laundry faucets are not operated when the basin beneath the faucets is inadequate to contain the faucet flow without a hose being connected to the faucets. Verify your clothes dryer exhaust is functional, safe and properly installed to meet the requirements of clothes dryer manufacturer when installed.
 |
Clothes Washer: Remove Drain Plug
Removal of temporary plug needed at laundry waste drain before installing clothes washer.
.jpg) |
BATHROOM
Inspection Process
Testing Limitations
Bathroom Inspection Process
The following opinion was based on an inspection of the readily accessible and visible portions of bathroom areas.
Hand washing faucets, when functional, are run for longer than one minute checking for observable leaks at the faucet and beneath the sink as well as checking Hot/Cold orientation.
Bathing area faucets, when functional, are run for longer than five minutes checking for observable leaks and Hot/Cold orientation.
Toilets, when functional, are flushed no less than two times. Inspector checks for leaks around toilet, checks that toilet fills and shuts off, and checks to see if toilet appears securely mounted.
Effectiveness and discharge locations for mechanical bathroom exhaust vents are not confirmed during inspection.
Installation conditions and functional issues for this area requiring correction should be performed by a competent, qualified contractor.
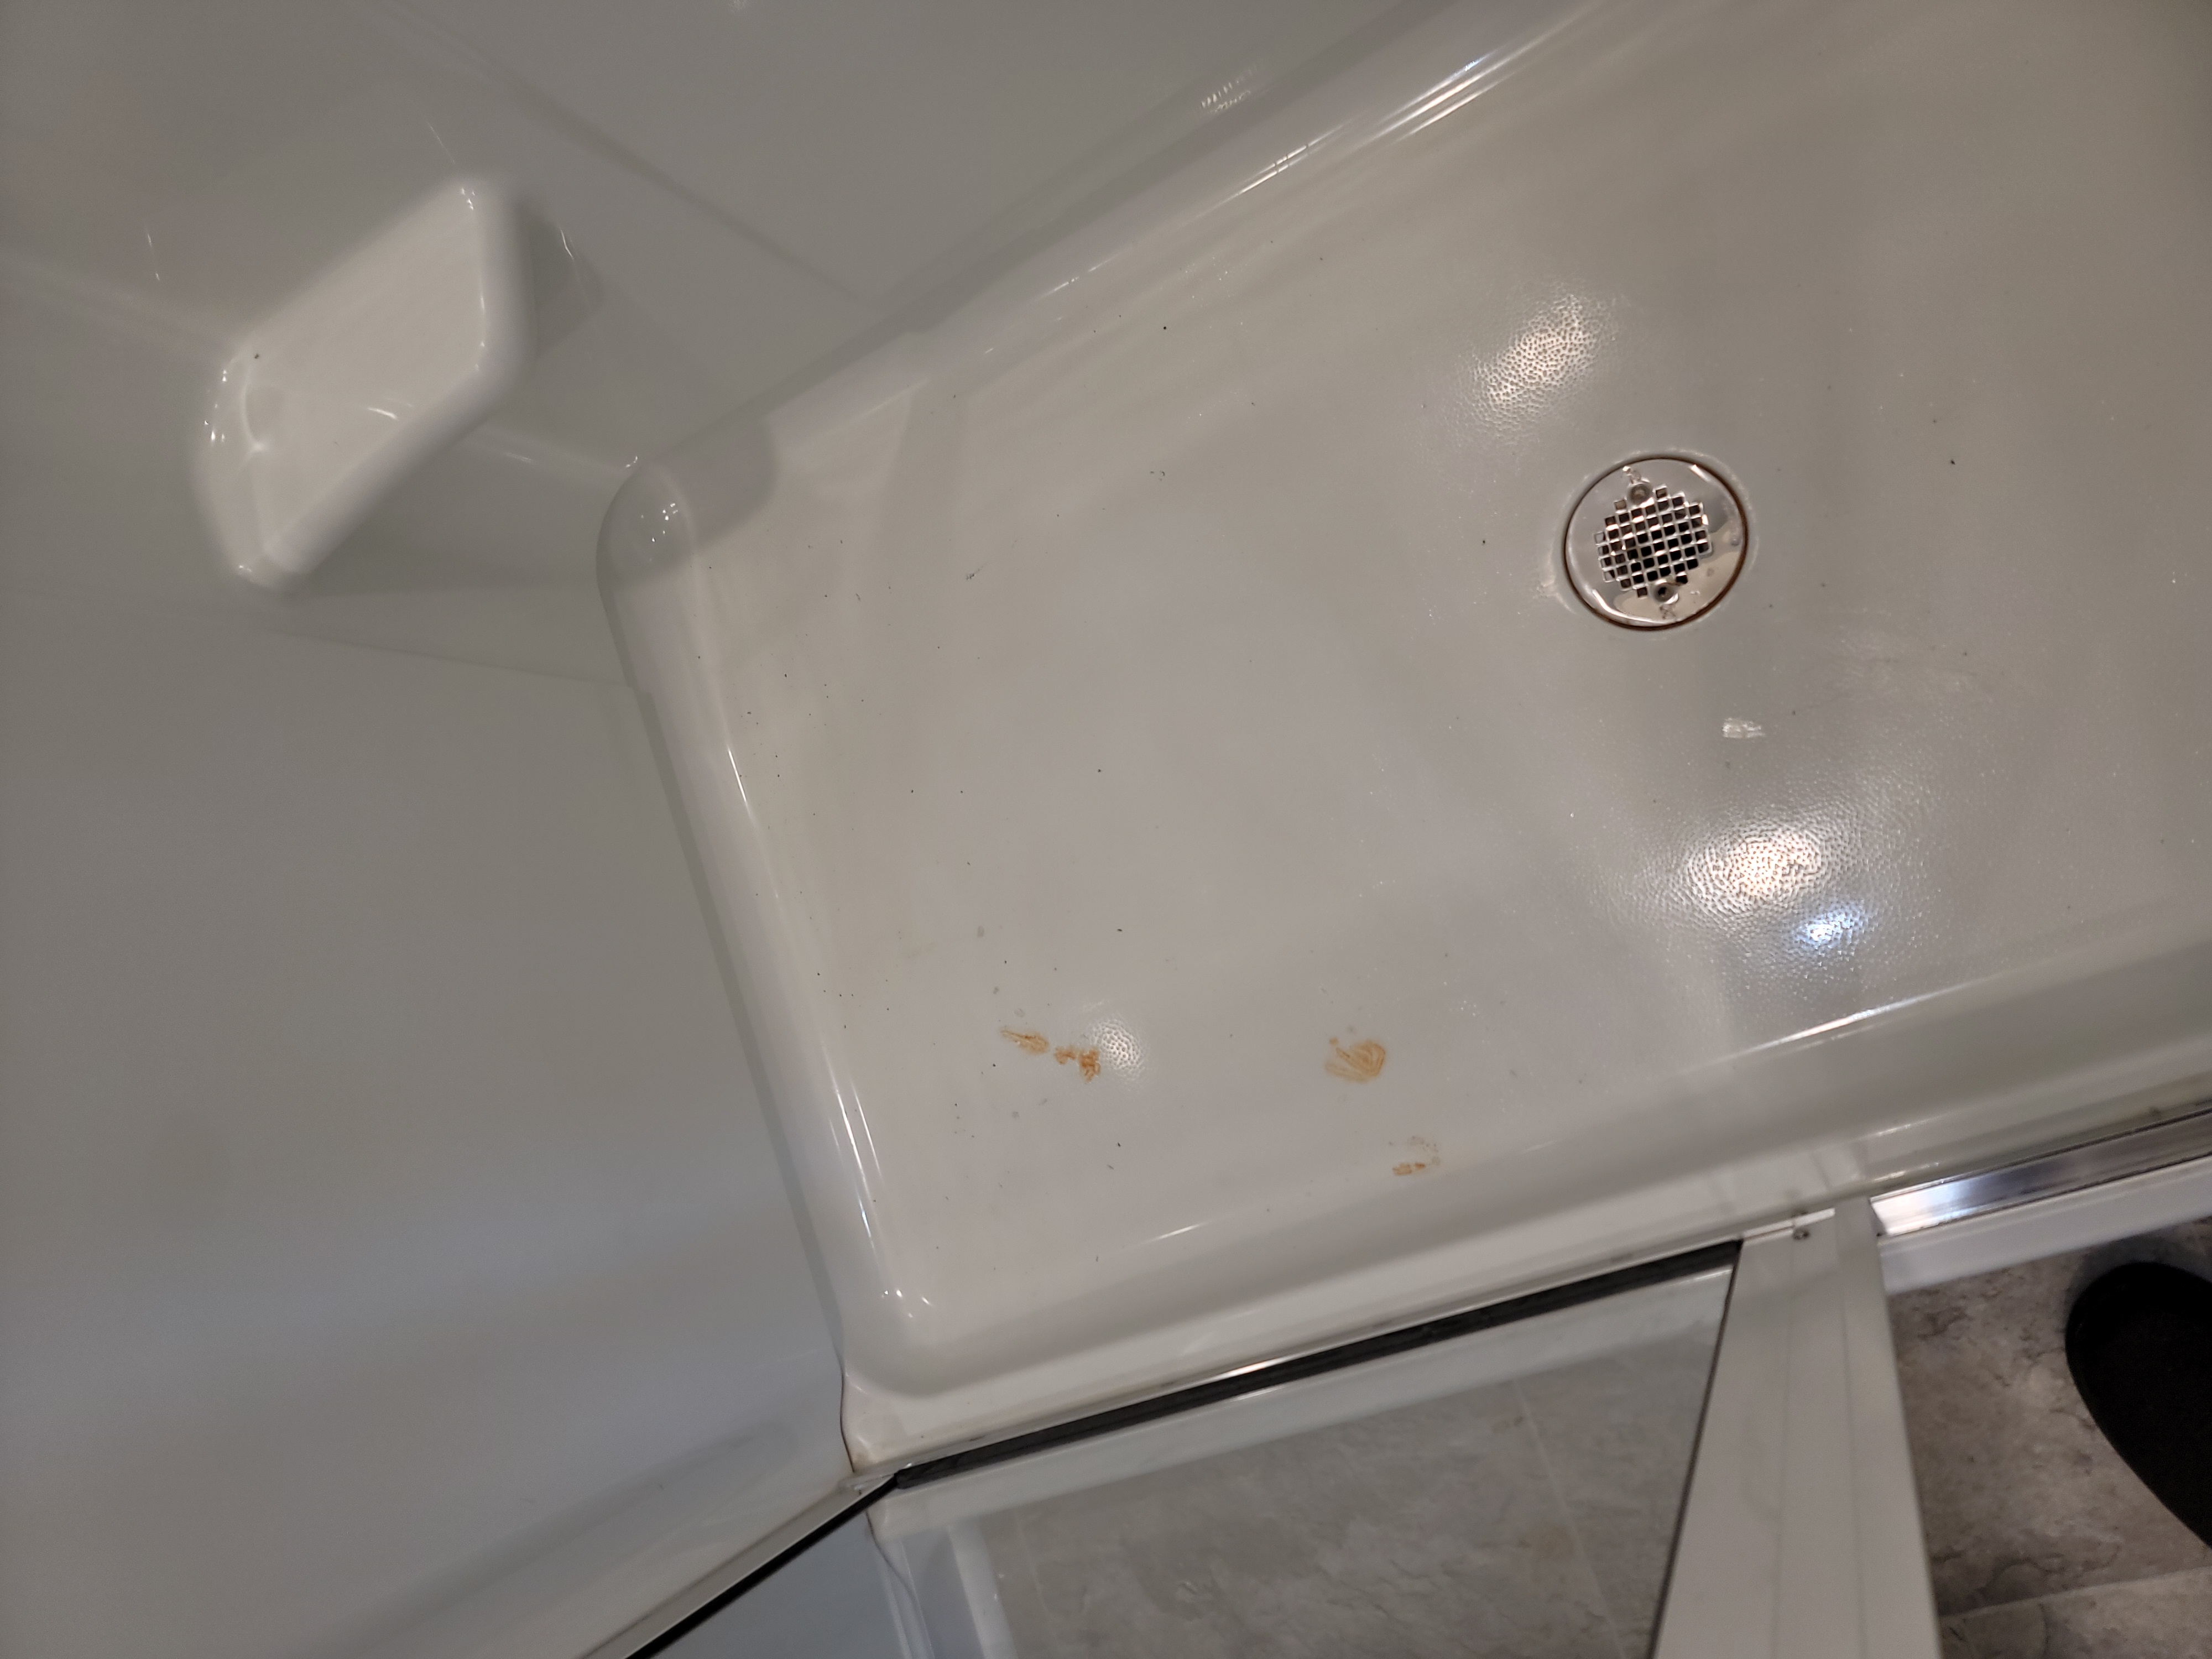
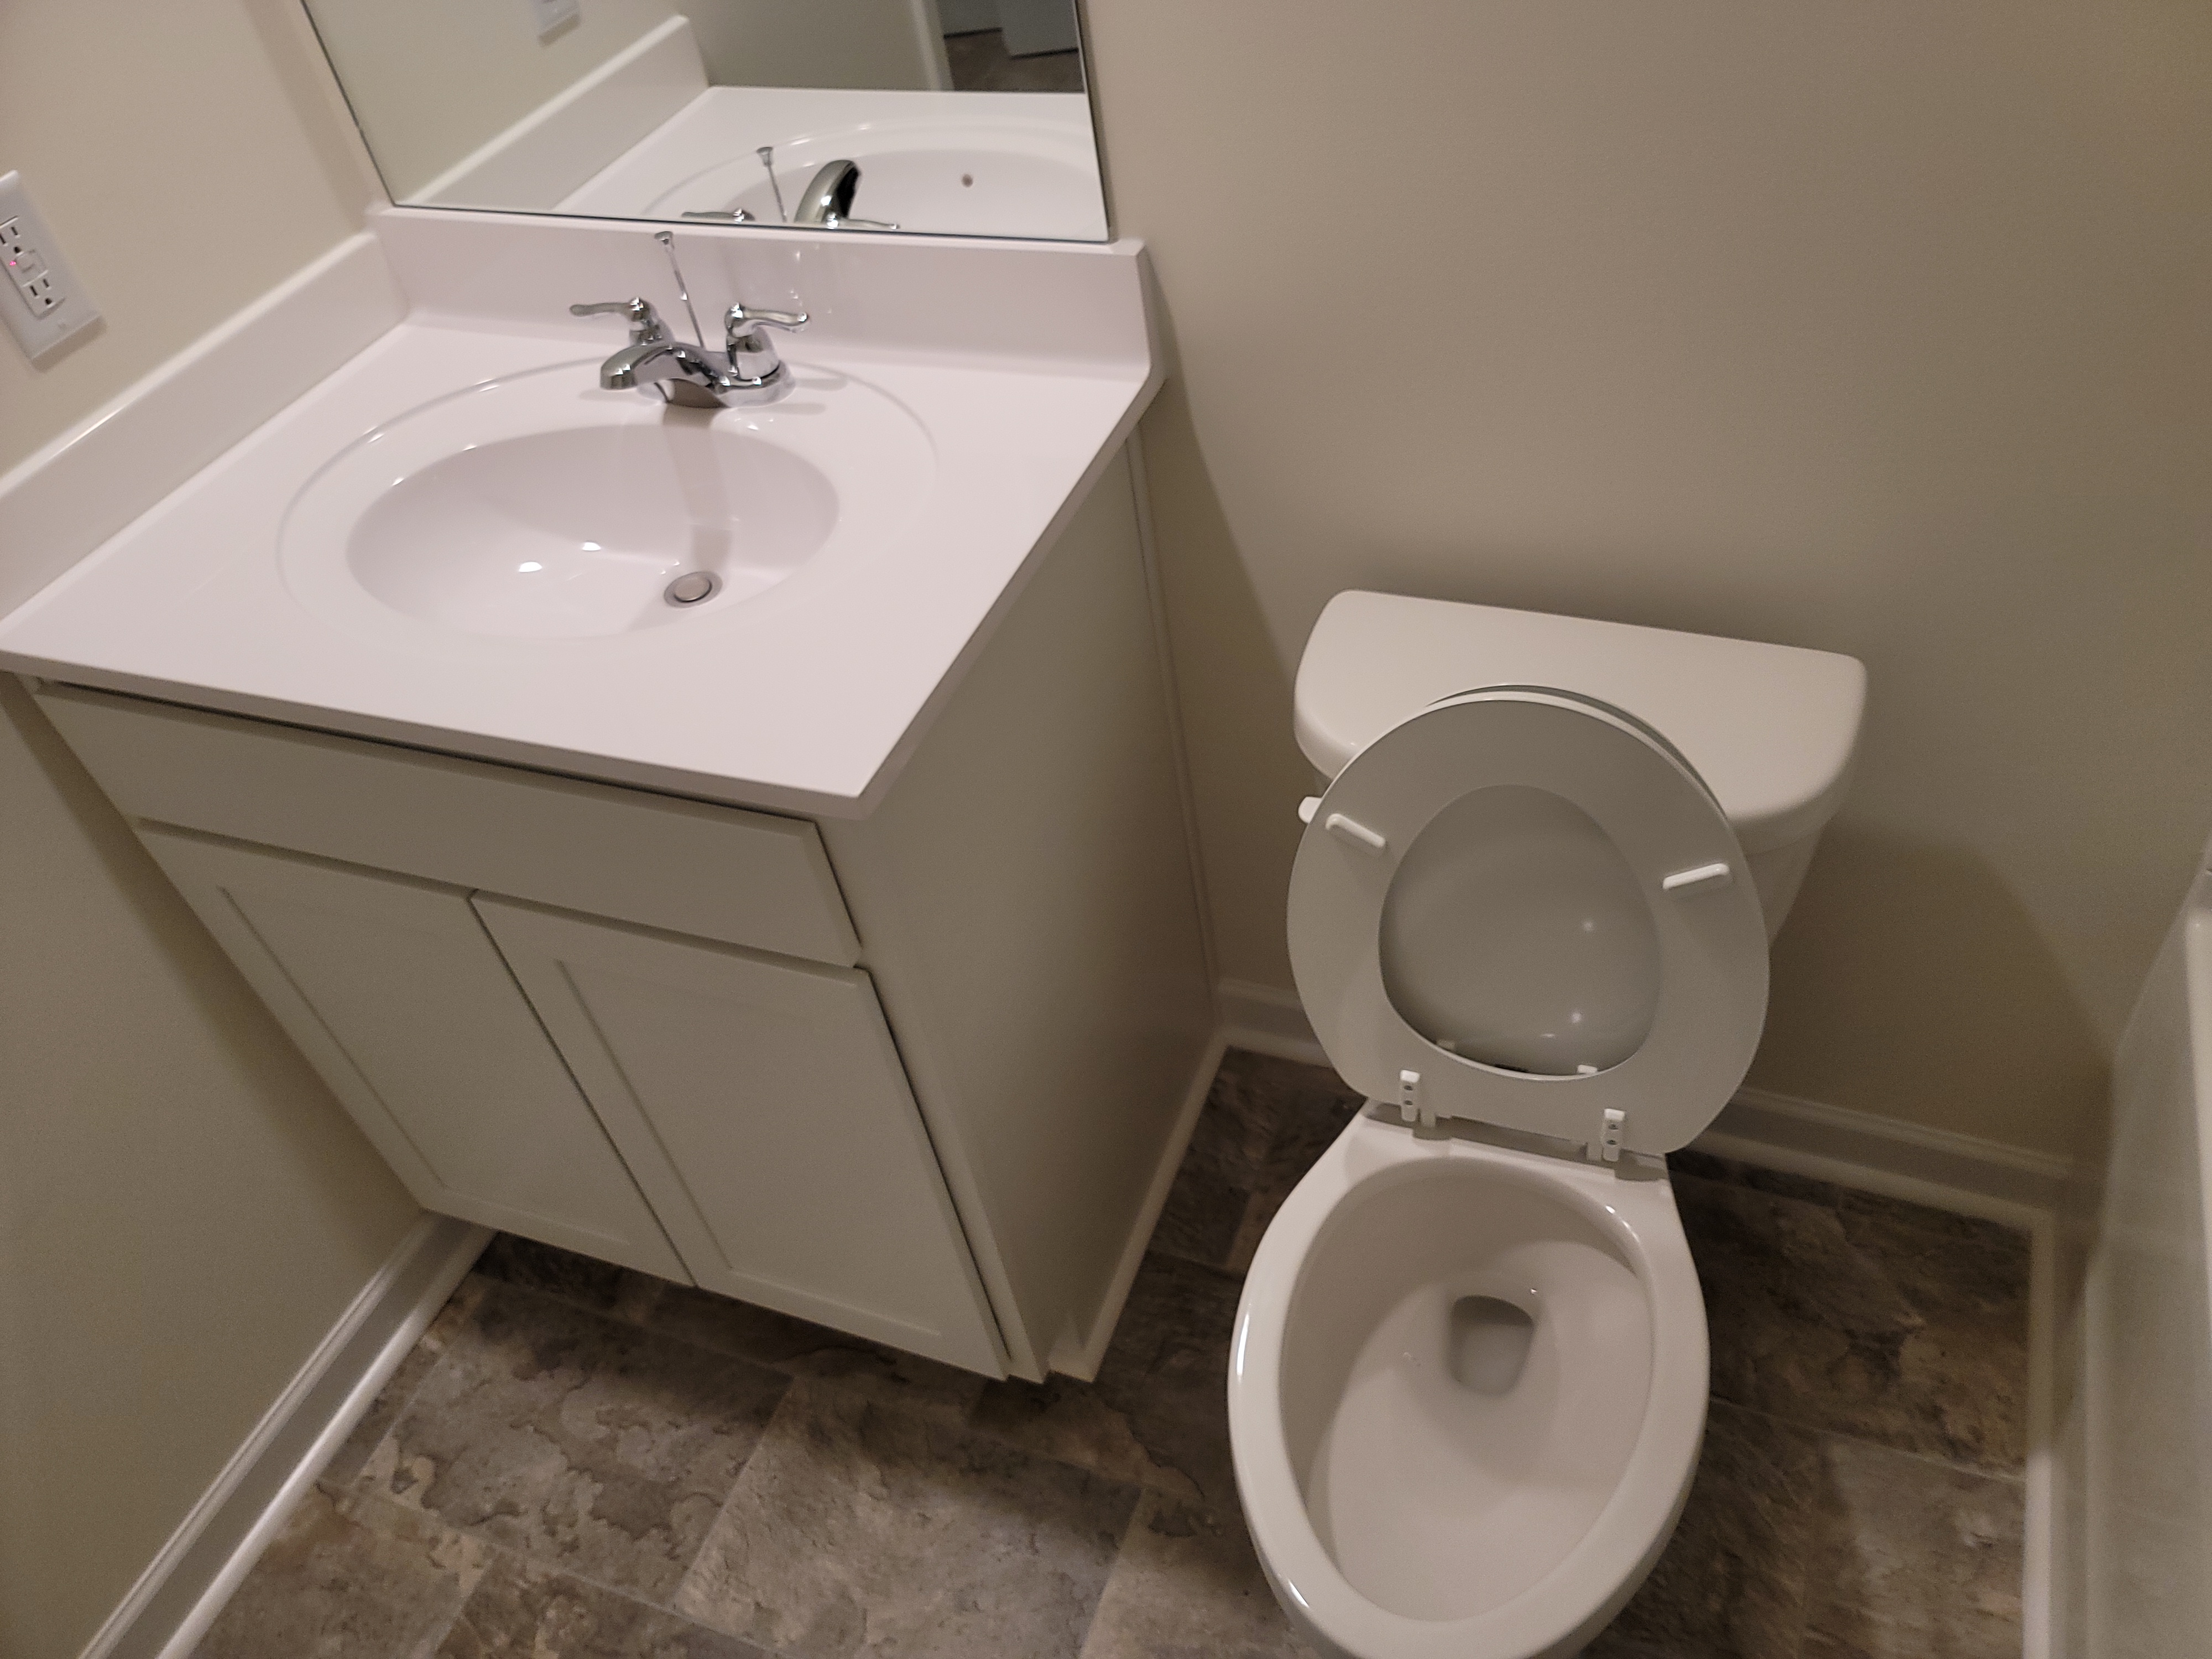
Bathroom 1
Full Bathroom
Location Full Bathroom Upstairs Right Master ────
Bathing Area: Shower
────
────
────
Hand Washing: Vanity with basin ────
────
────
────
Toilet: Water tank type ────
No Leaks were observed around toilet and it appeared secured in place.
Ventilation: ────
Fan on/off tested. The sound heard appeared to be appropriate for the fan.
Floor Covering: Sheet Vinyl
Serviceable. Fulfilling its function.
────
 |  |
 |
Bathroom 2
Full Bathroom
Location Full Bathroom Upstairs Left at Hall ────
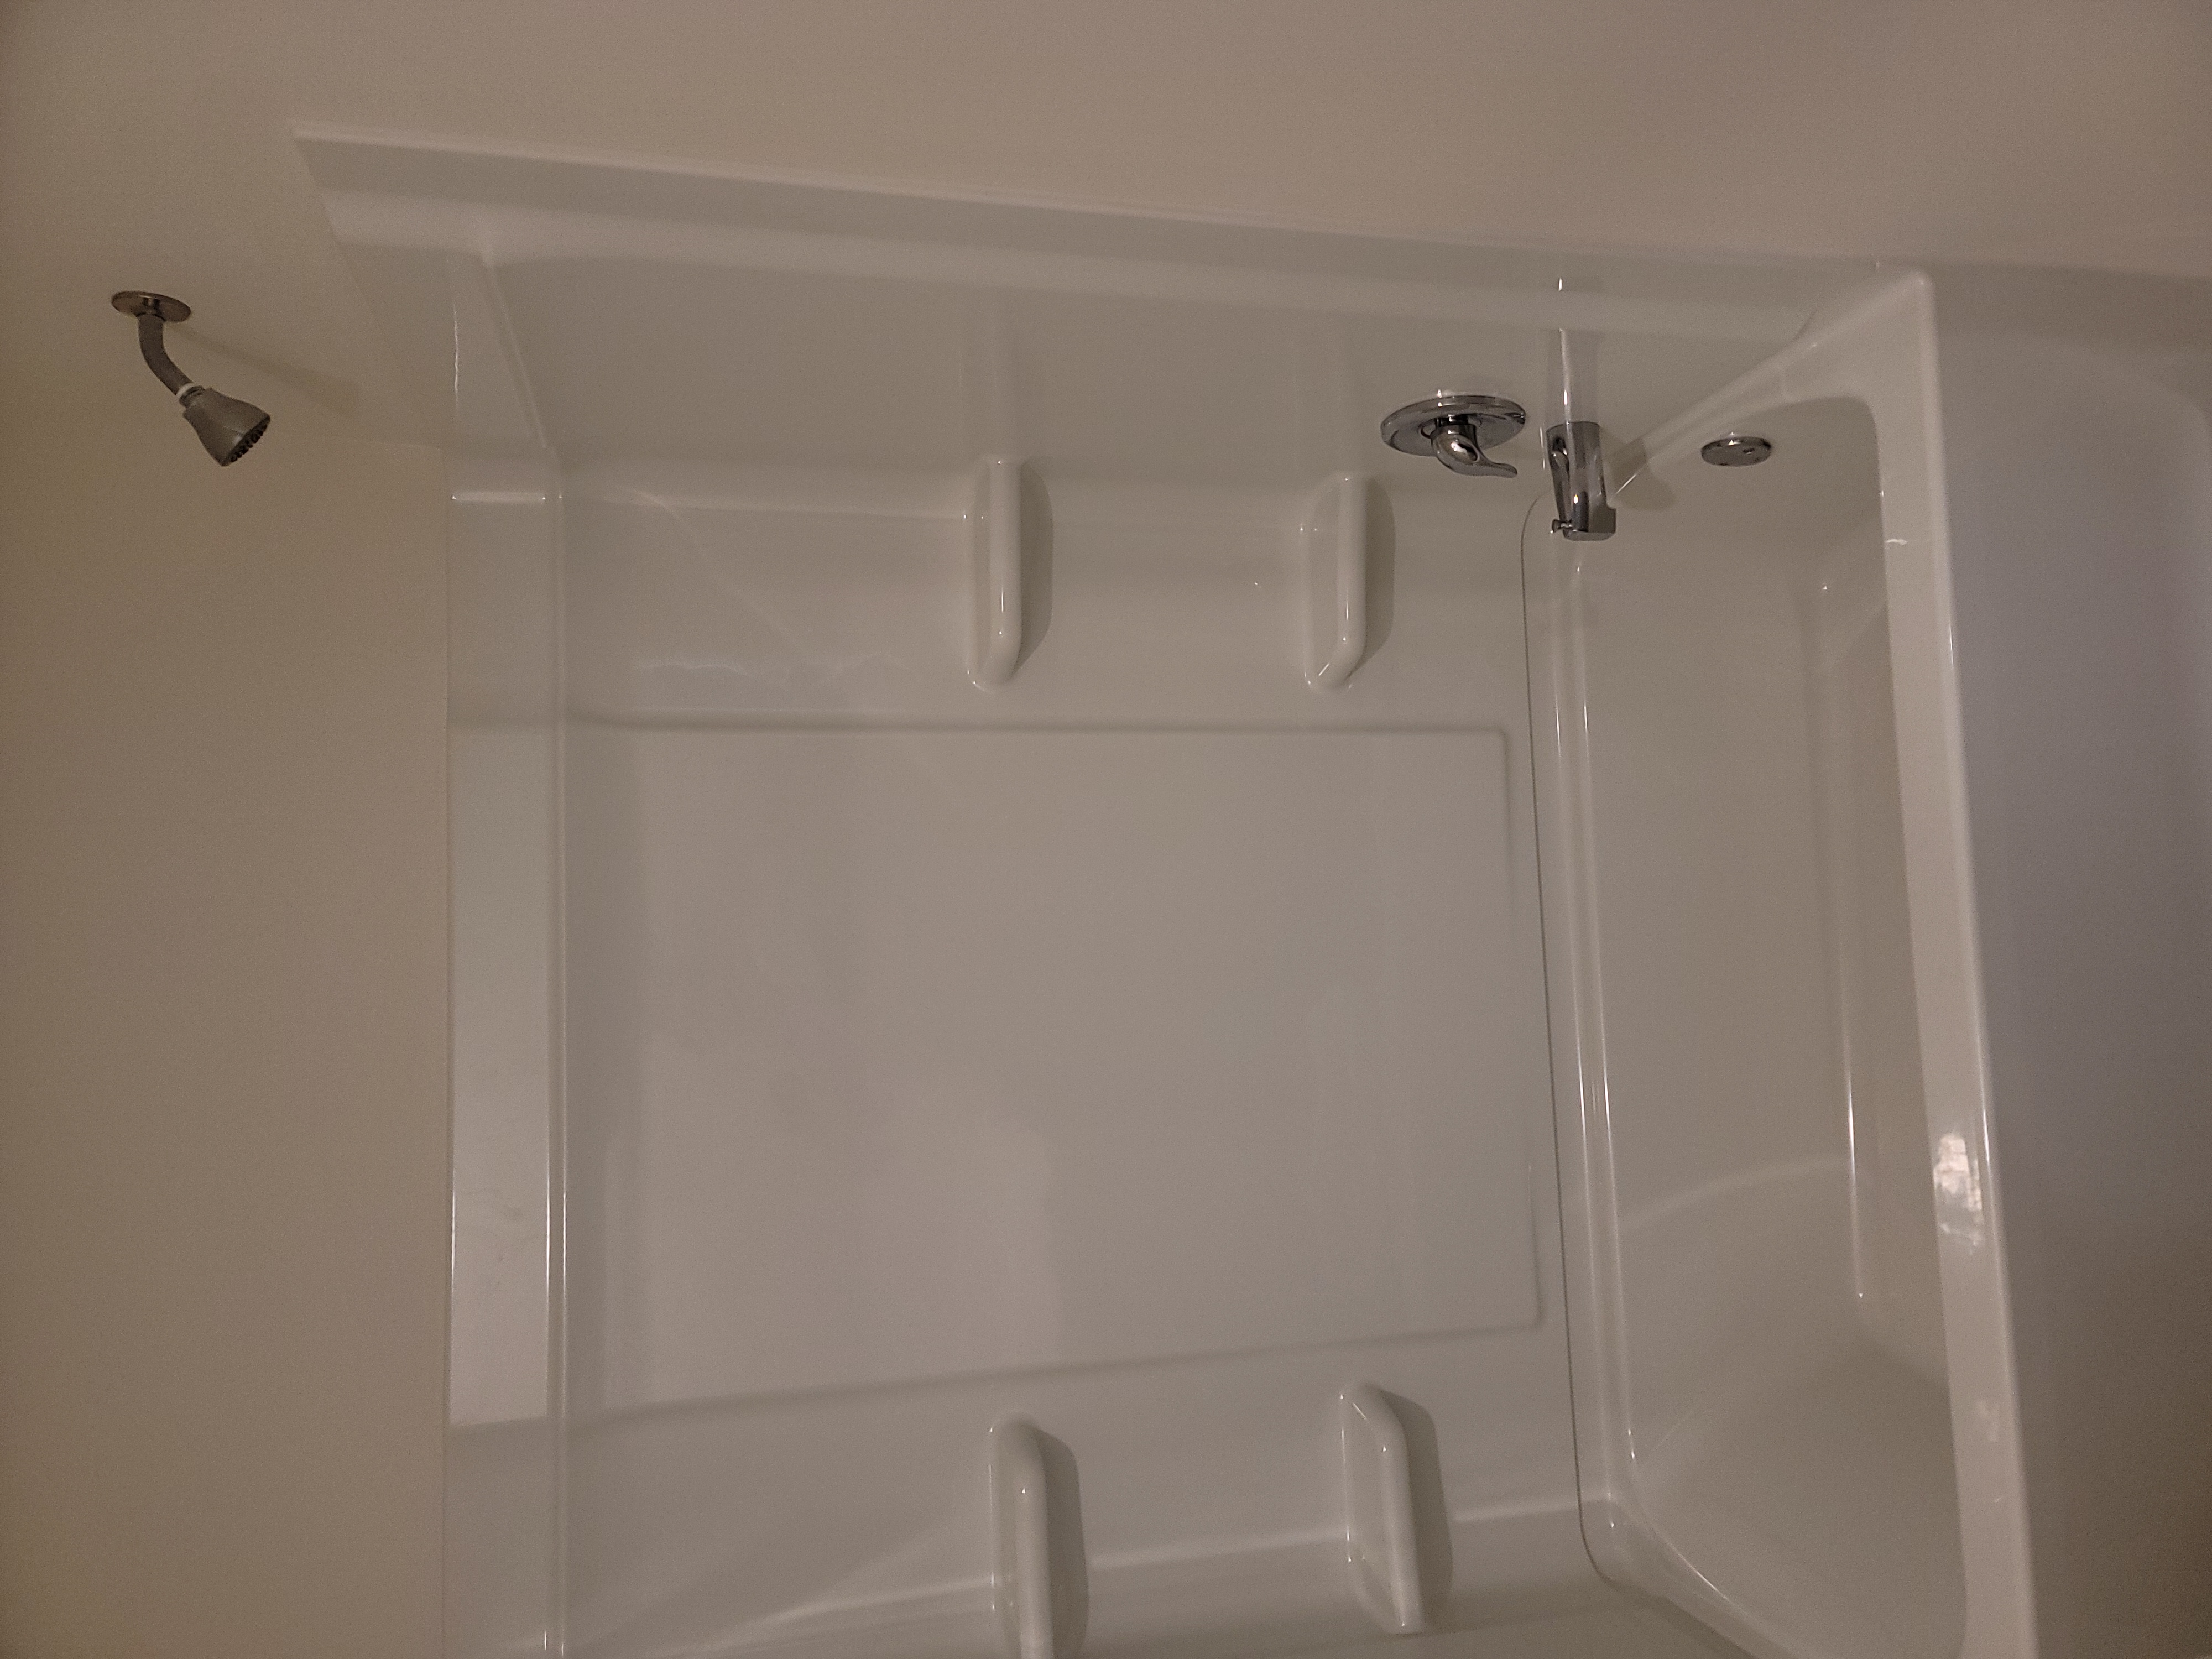
Bathing Area: Combination tub and shower
────
────
────
Hand Washing: Two basins in vanity ────
────
────
────
Toilet: Water tank type ────
No Leaks were observed around toilet and it appeared secured in place.
Ventilation: ────
Fan on/off tested. The sound heard appeared to be appropriate for the fan.
Floor Covering: Sheet Vinyl
Serviceable. Fulfilling its function.
────
 |  |
Bathroom 3
Full Bathroom
Location Full Bathroom Upstairs Right Rear ────
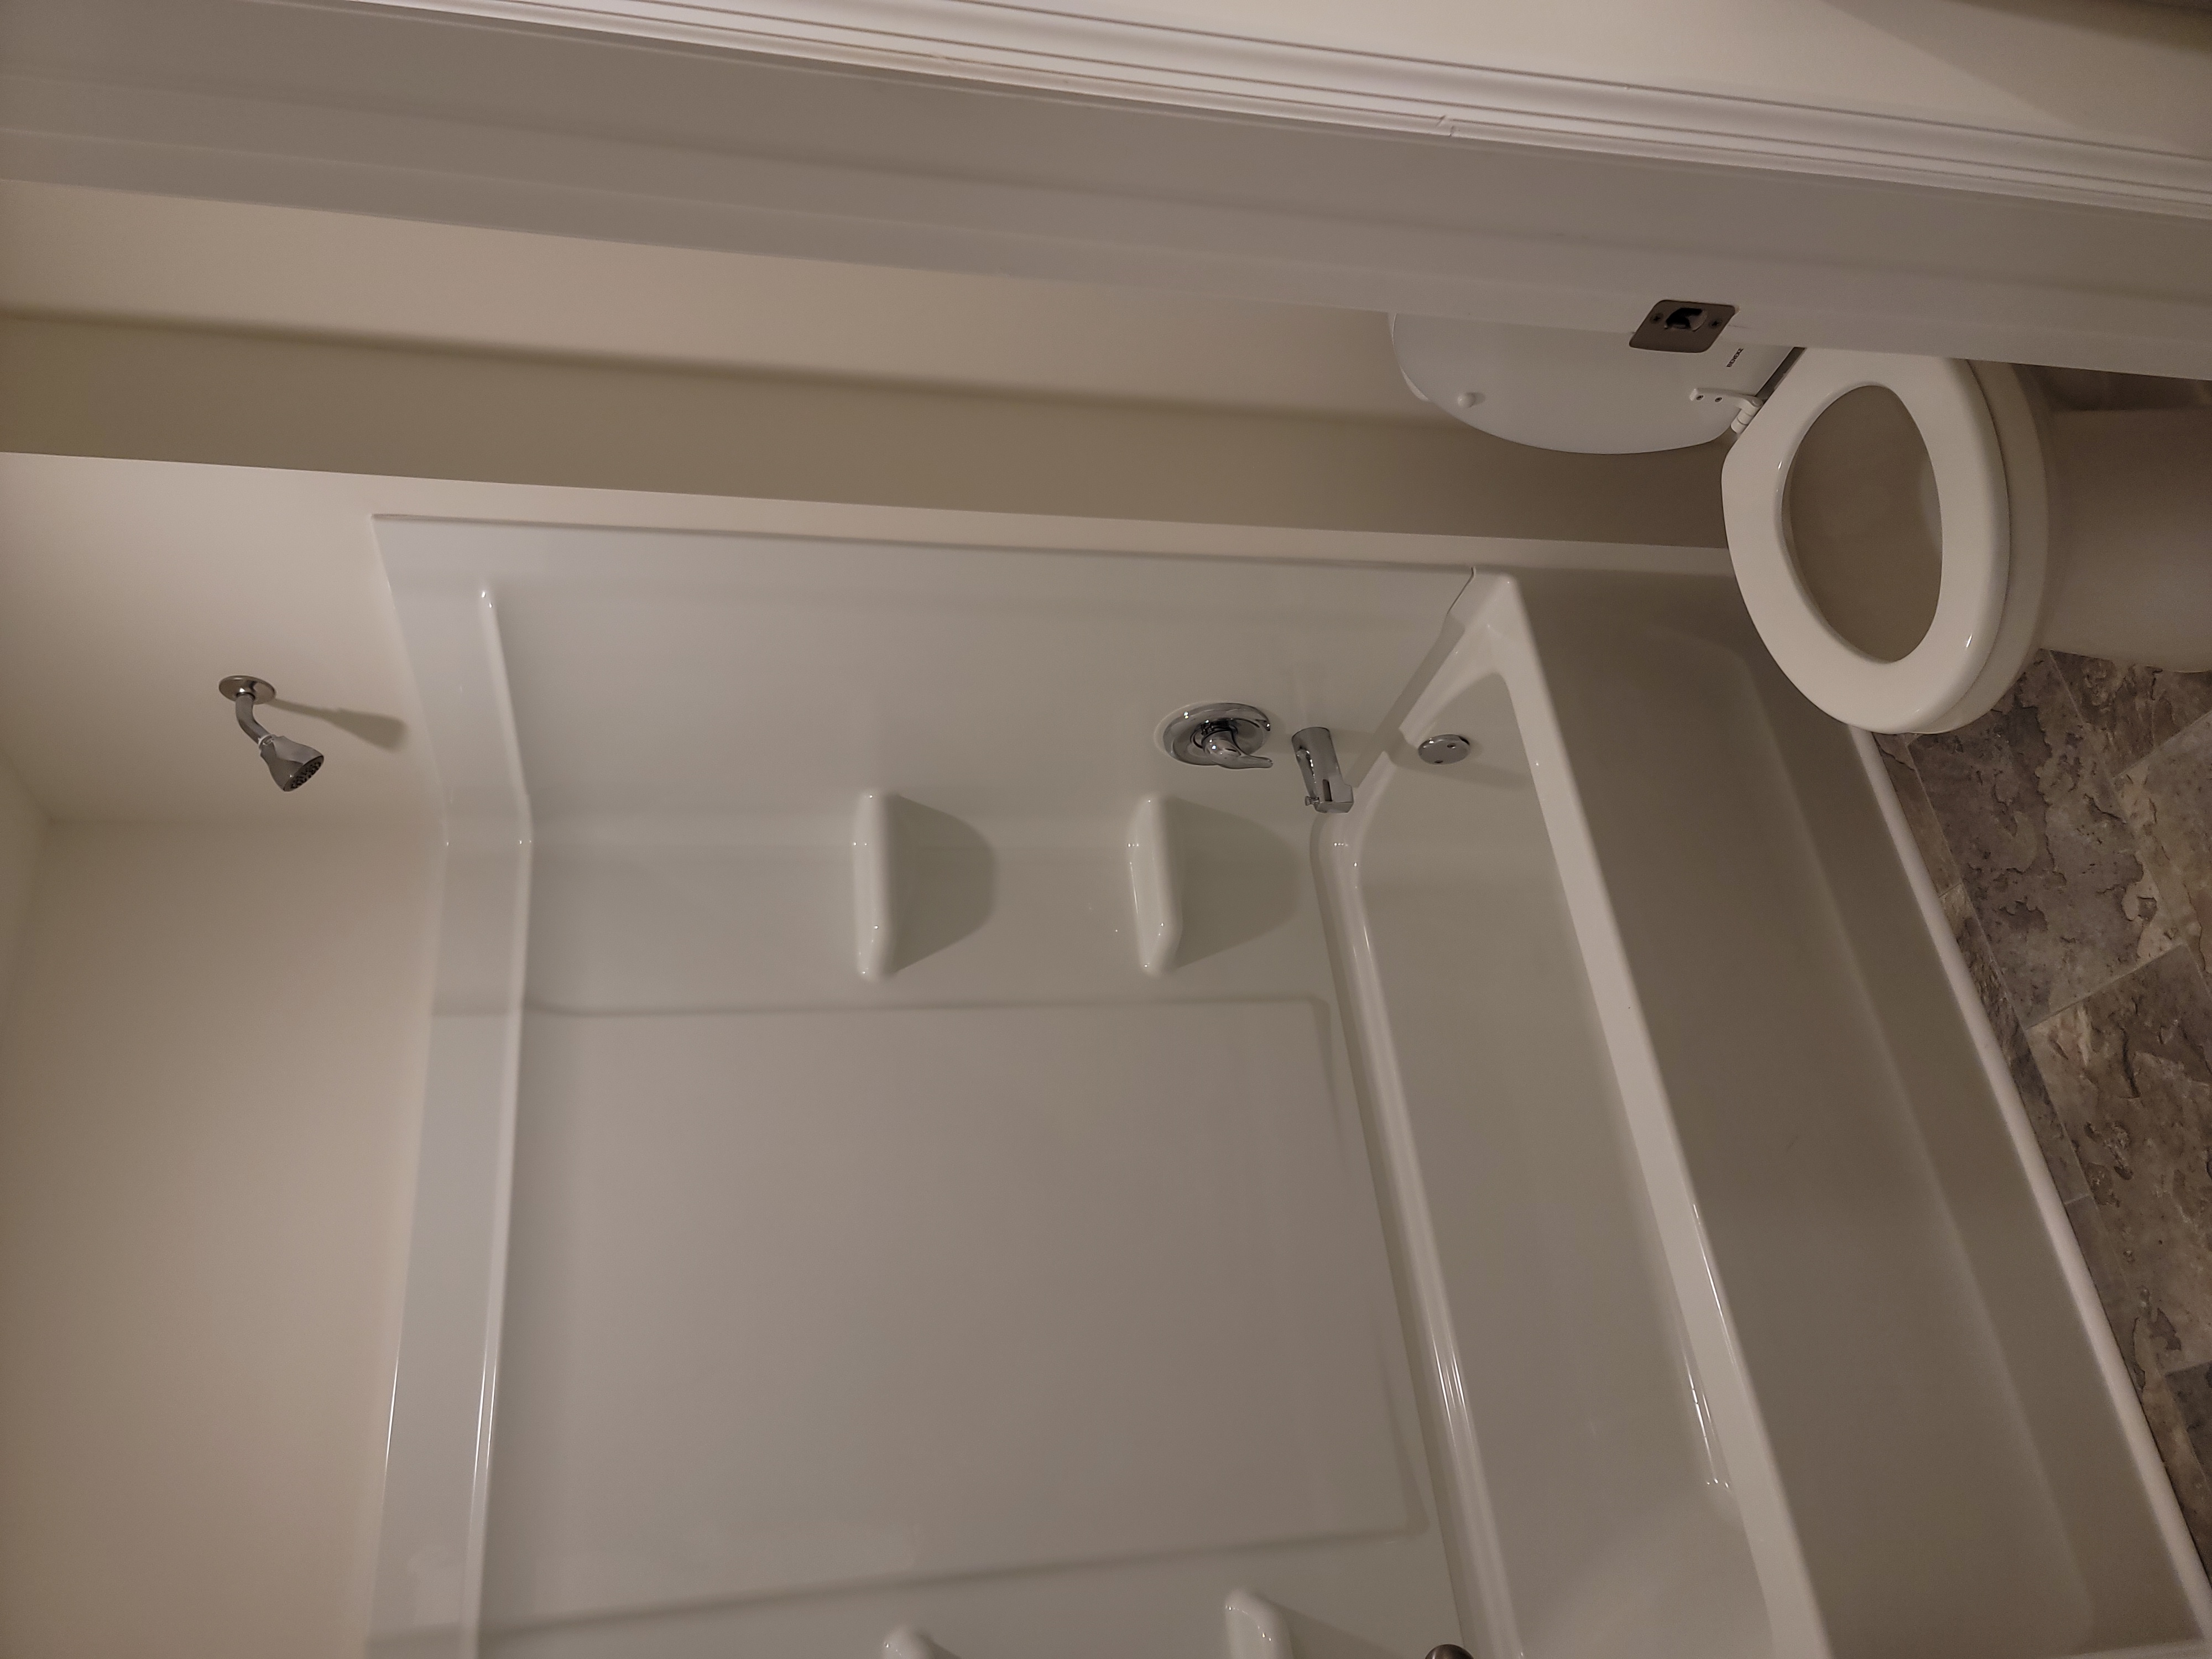
Bathing Area: Combination tub and shower
────
────
────
Hand Washing: Vanity with basin ────
────
────
────
Toilet: Water tank type ────
No Leaks were observed around toilet and it appeared secured in place.
Ventilation: ────
Fan on/off tested. The sound heard appeared to be appropriate for the fan.
Floor Covering: Sheet Vinyl
Serviceable. Fulfilling its function.
────
 |  |
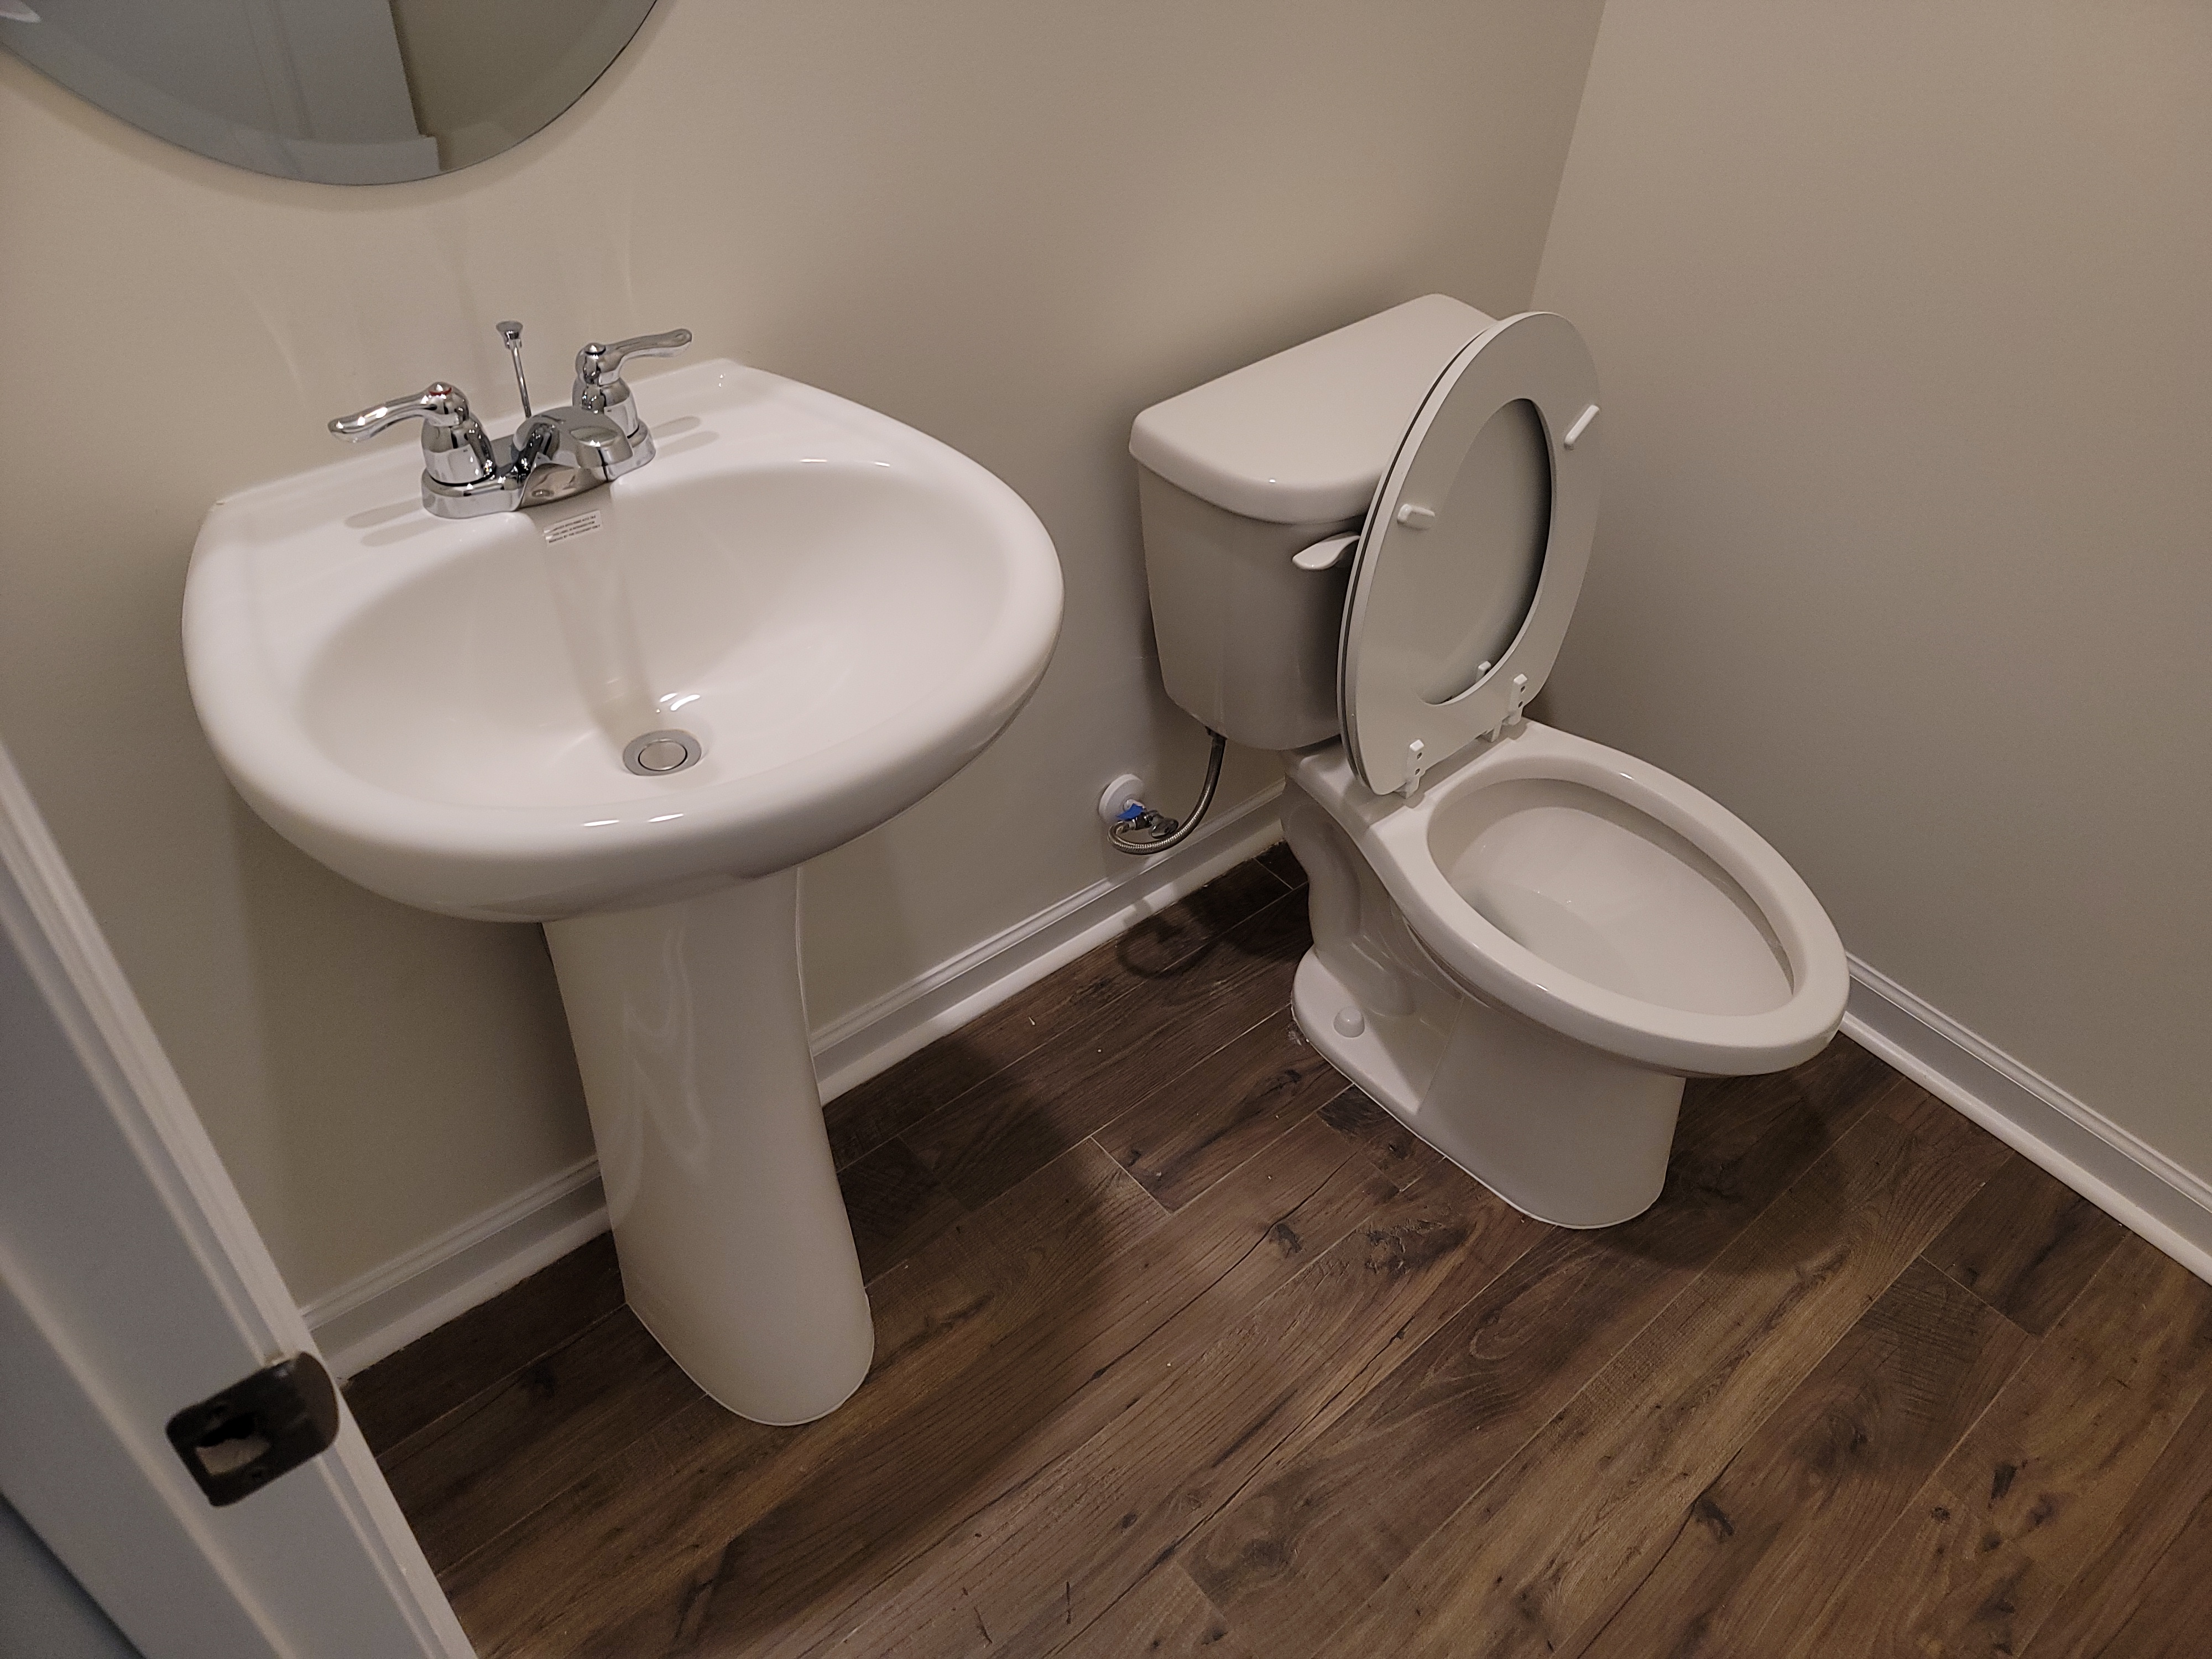
Bathroom 4
Half Bathroom
Location 1/2 Bathroom Main Level Right ──── ────
Hand Washing: Pedestal type ────
────
────
────
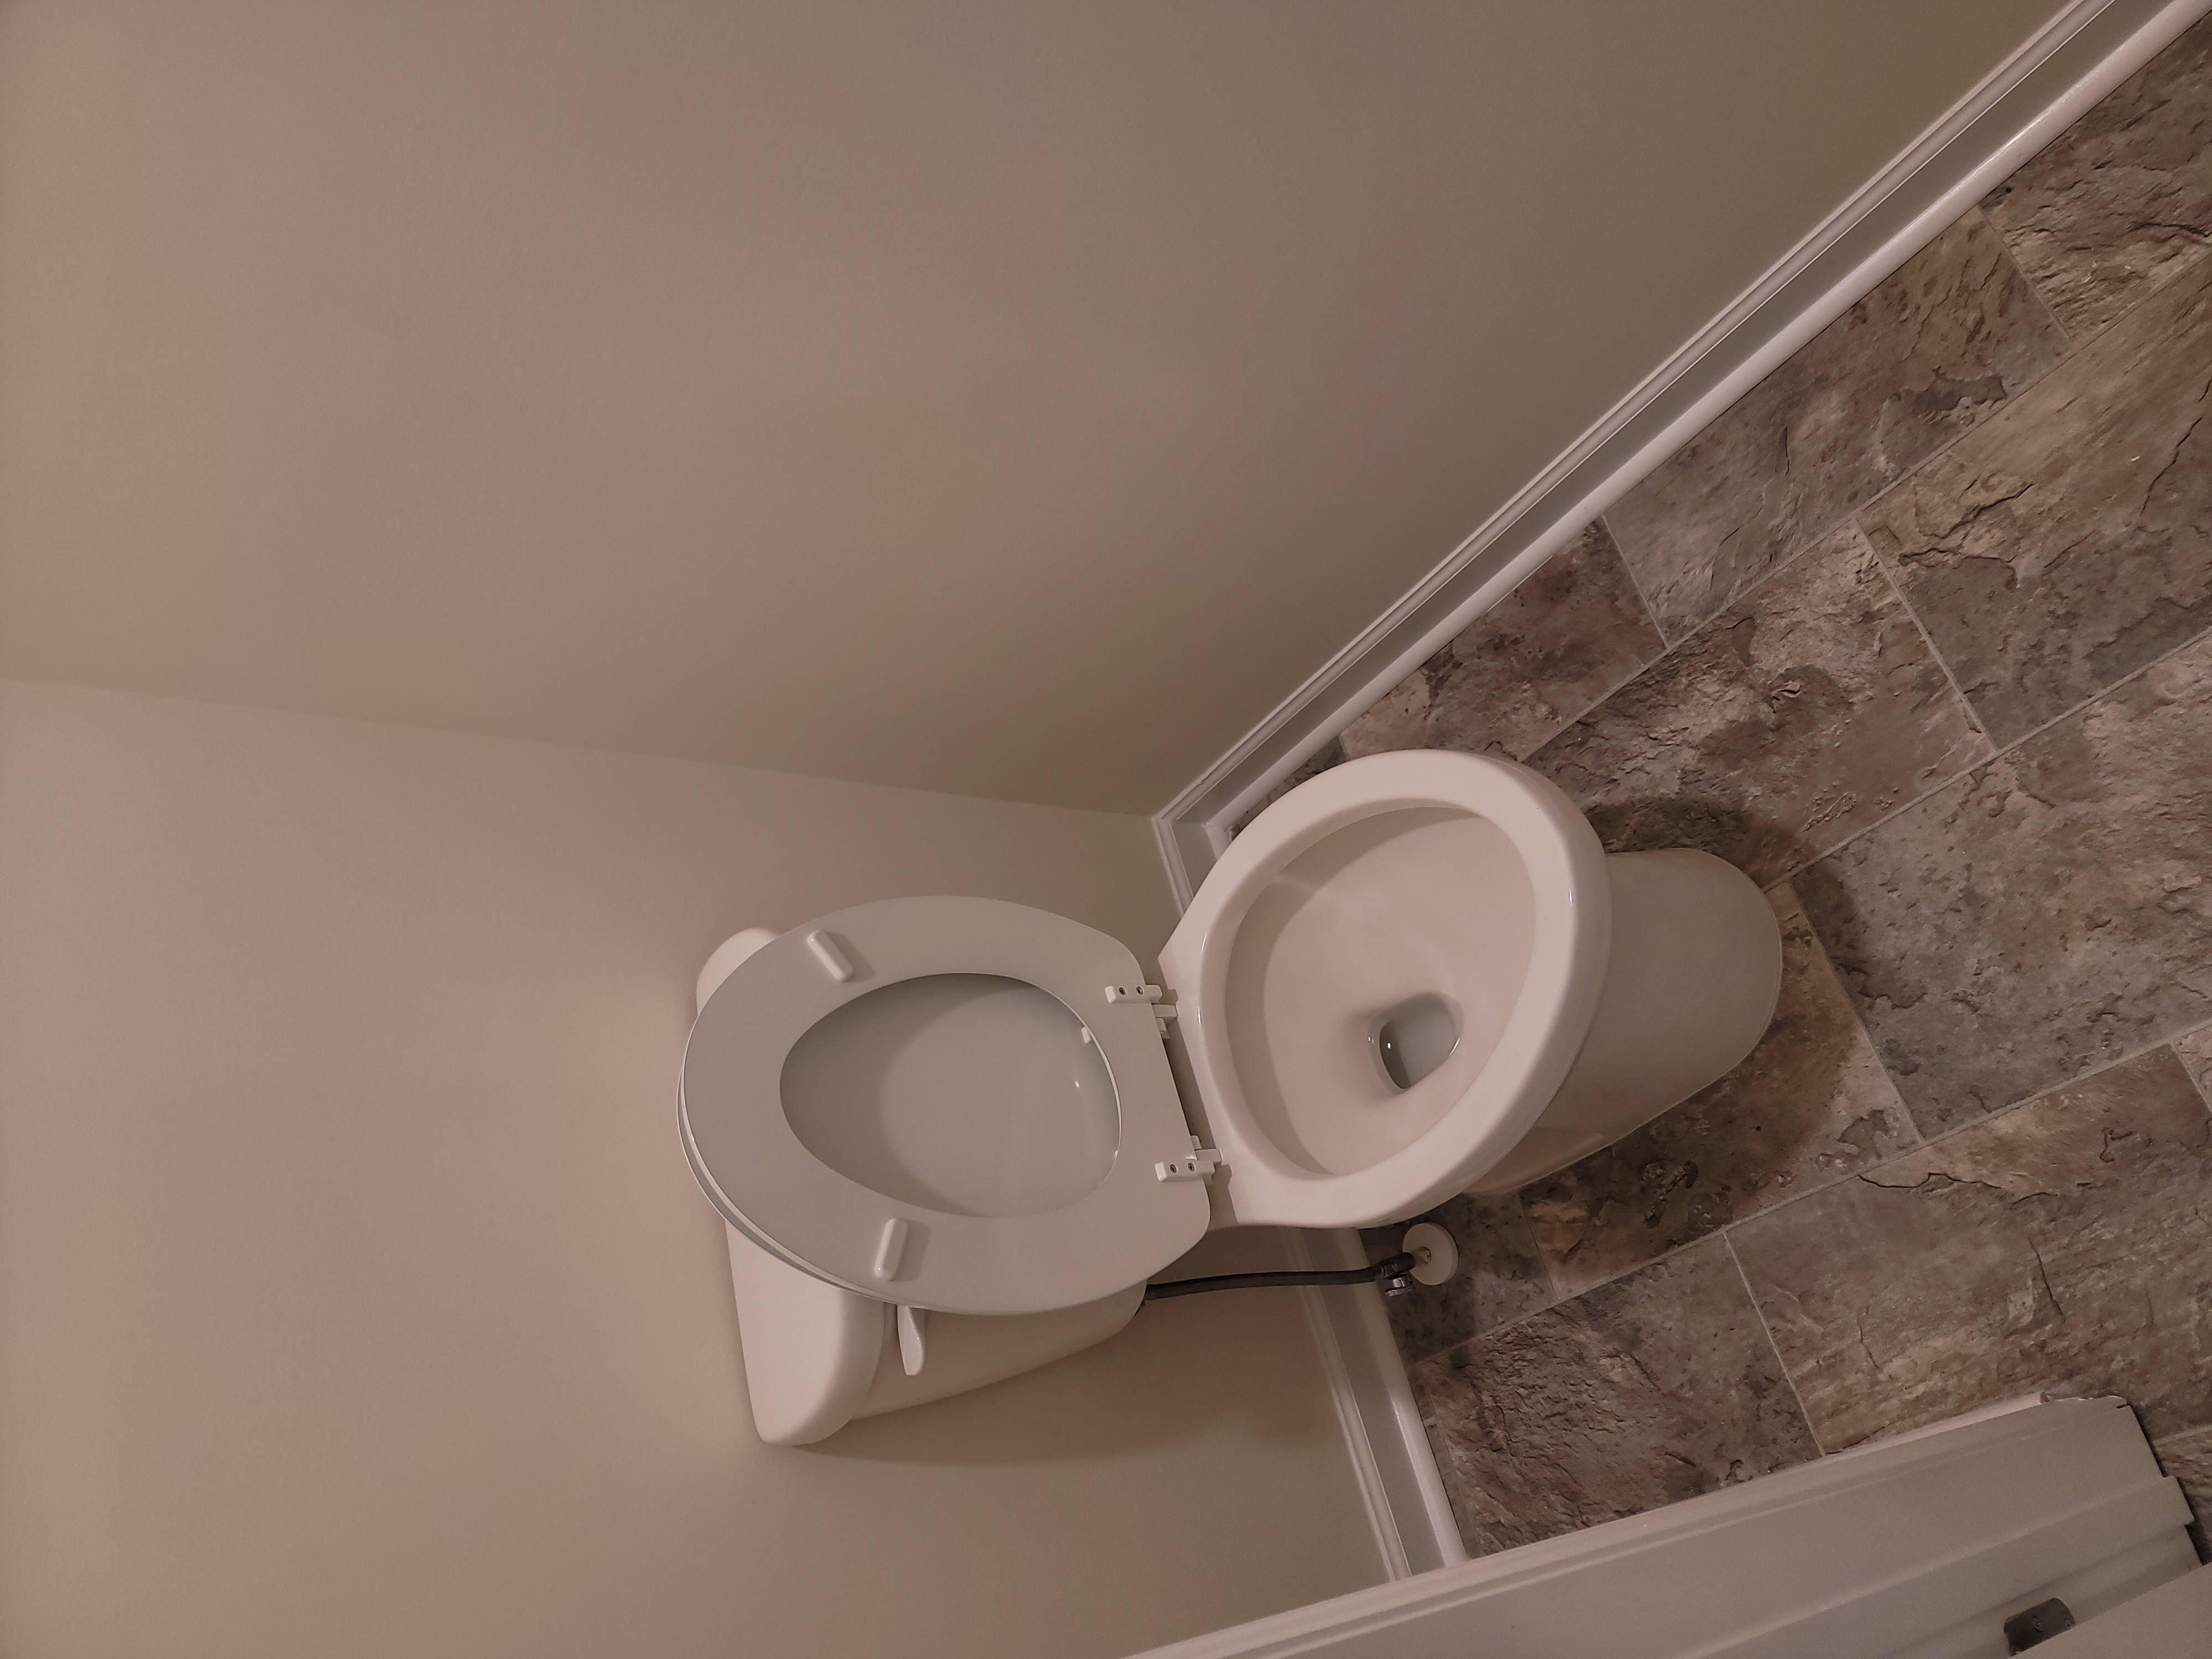
Toilet: Water tank type ────
No Leaks were observed around toilet and it appeared secured in place.
Ventilation: ────
Fan on/off tested. The sound heard appeared to be appropriate for the fan.
Floor Covering: Engineered Flooring
Serviceable. Fulfilling its function.
────
 |
PLUMBING
Supply Piping
Supply Piping: Mostly PEX with Some CPVC
Water Flow at Supply Piping: Not Determined
Multiple plumbing areas were inoperative when inspected. Functional water flow was not determined.
- Water supply was shut down at water heater.
Waste Piping
Waste Piping: Plastic
Apparent Vent Piping
Plastic
Exterior Hose Faucets
Two
Performance: Functional Multiple
Both Hose Faucets at Exterior
Exterior hose faucets were turned on and off briefly and appeared to function normally.
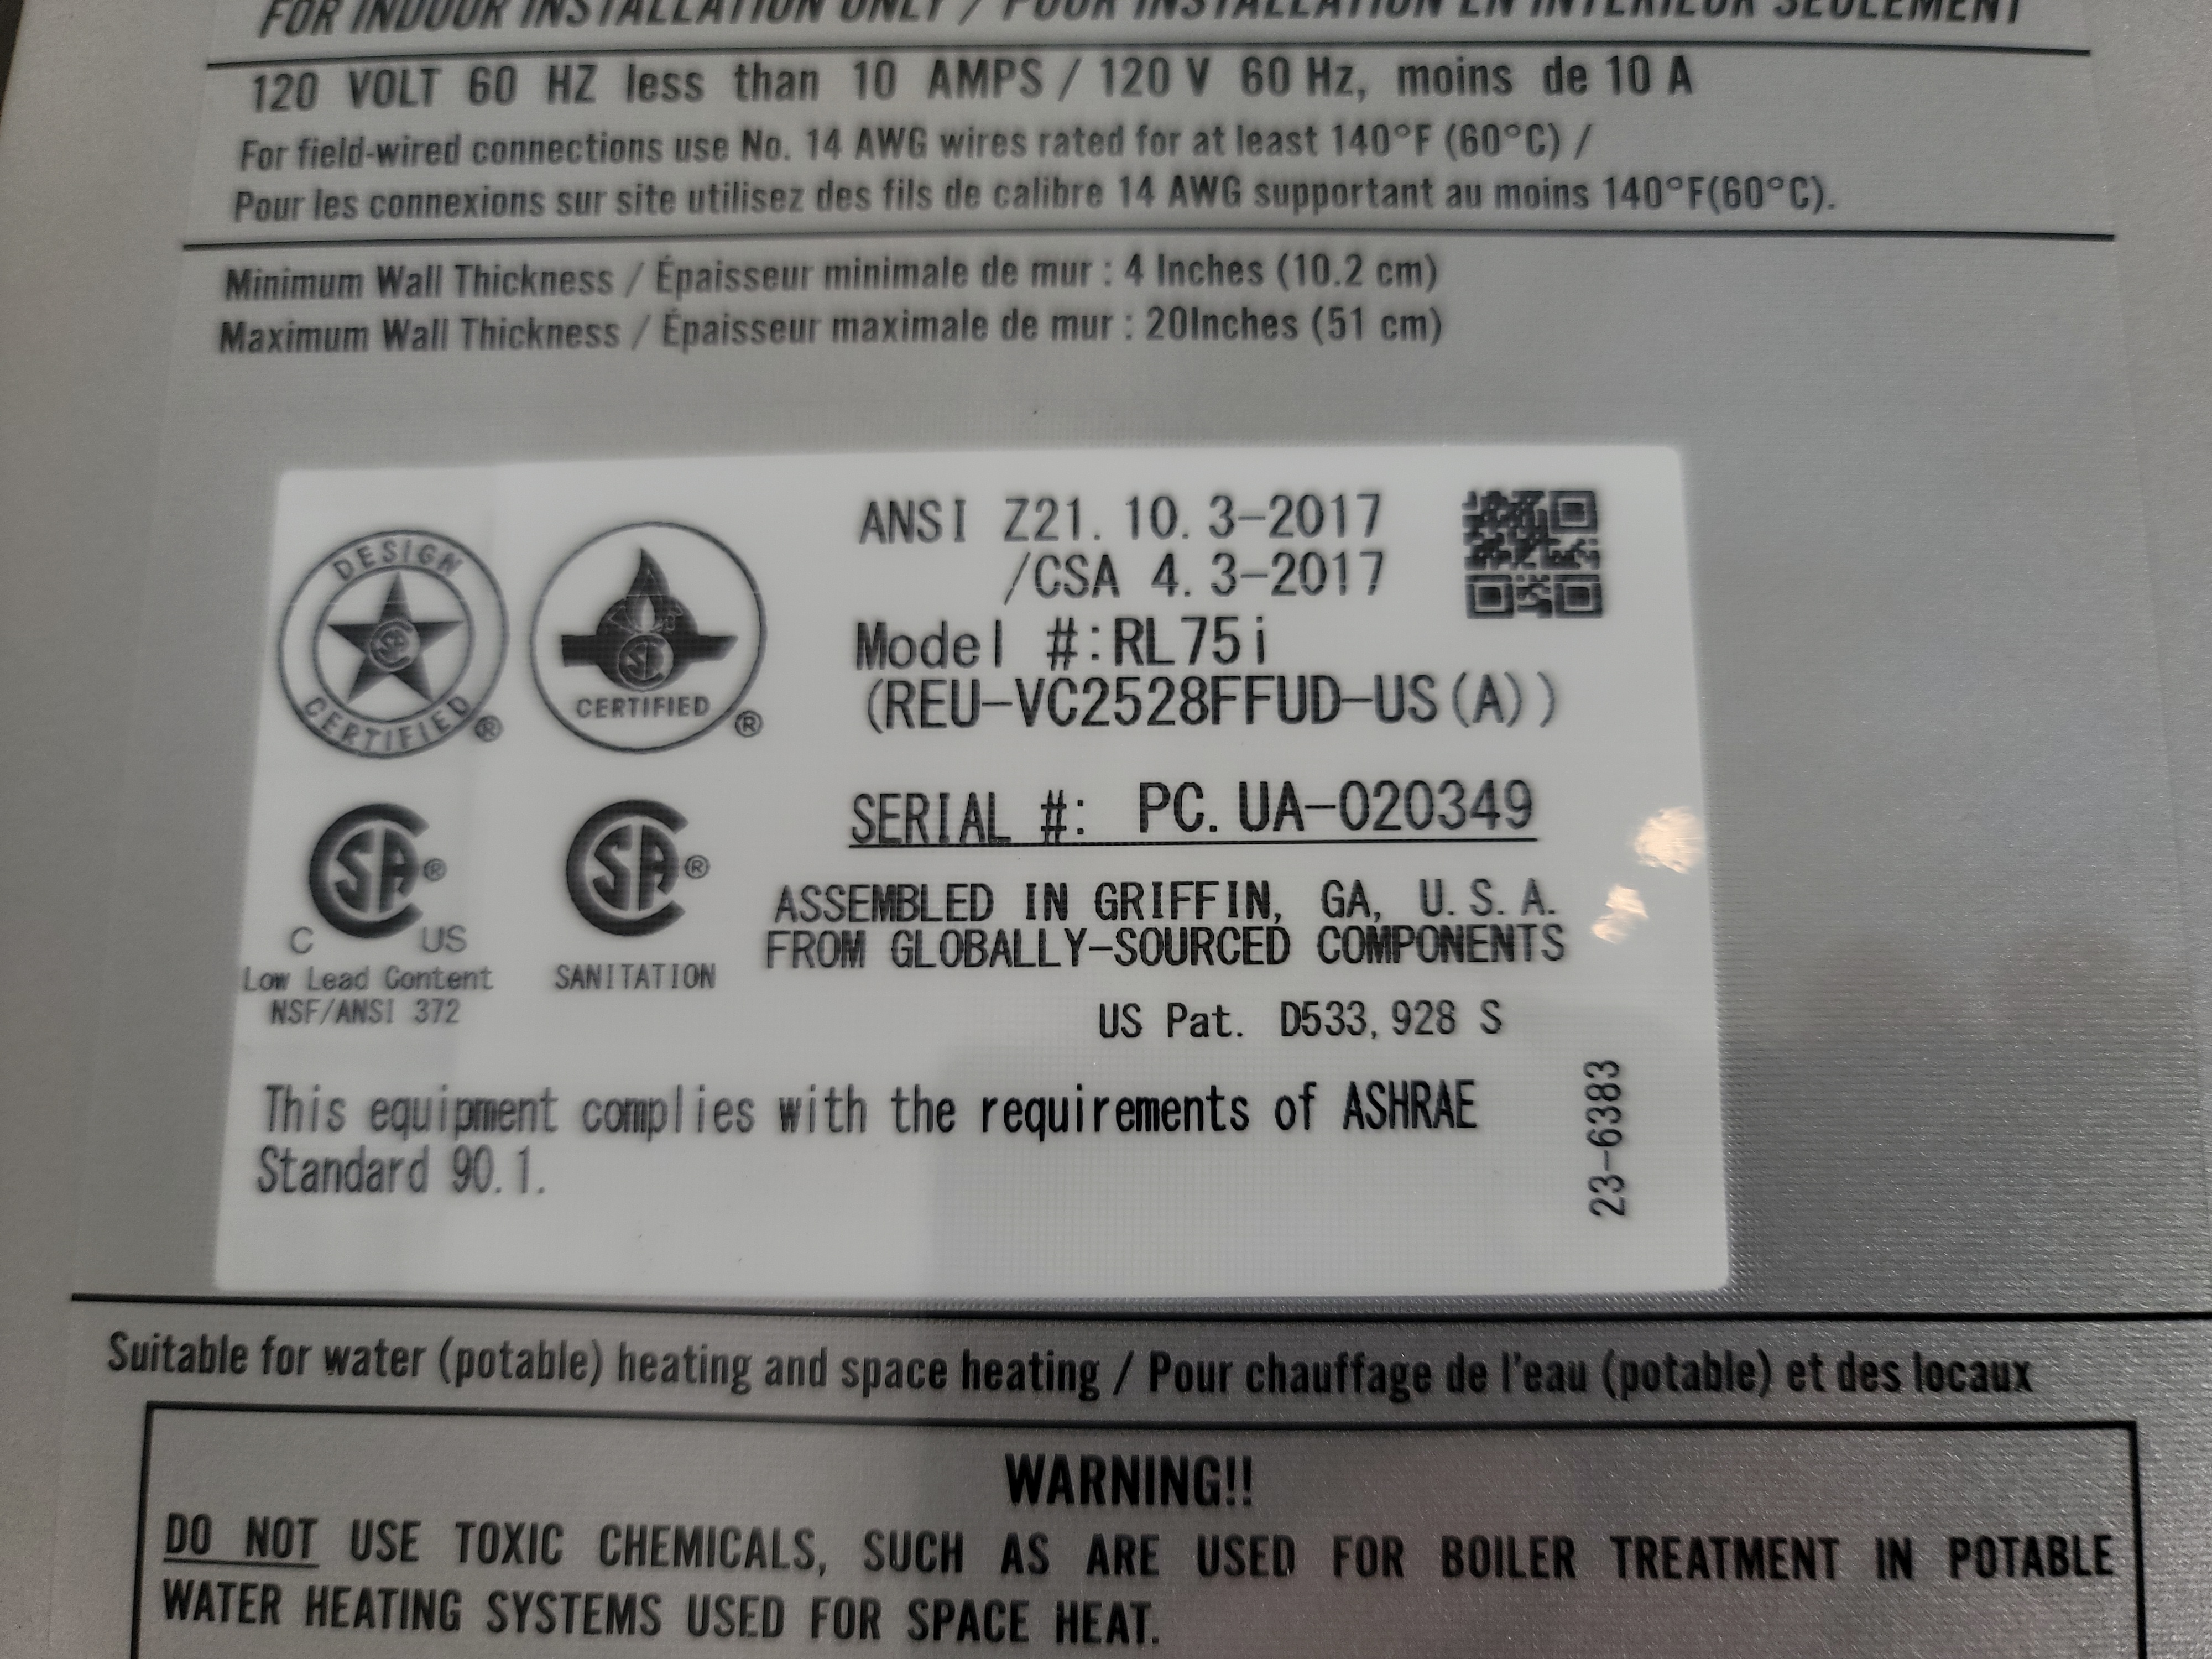
Water Heater
Demand Water Heater
Water Heater
Size: Demand type water heater / Location: Garage ────
Age: New ──── / Fuel: Natural Gas
Water Heater was not functional during inspection, verify Hot/Cold orientation at plumbing outlets, correct if needed.
Typical service life of a water heater is 8-12 years.
────
 |  |
Maintaining Your Demand Water Heater
Demand water heaters require periodic flushing to maintain proper operation. Similar to a coffee maker, demand water heaters are flushed with a diluted vinegar solution to help reduce mineral deposits that can affect demand water heater performance. Refer to the use and care manual for the installed demand water heater performing periodic maintenance when needed.
Demand Water Heater Adequacy
Demand water heaters use flow rates and temperature rise to determine the number of fixtures that can be served by a particular model of a demand water heater. The inspection performed does not determine if any installed water heater is adequate to serve all of the installed plumbing fixtures. Should the installed system prove inadequate, properly correct the water heating system to meet your needs.
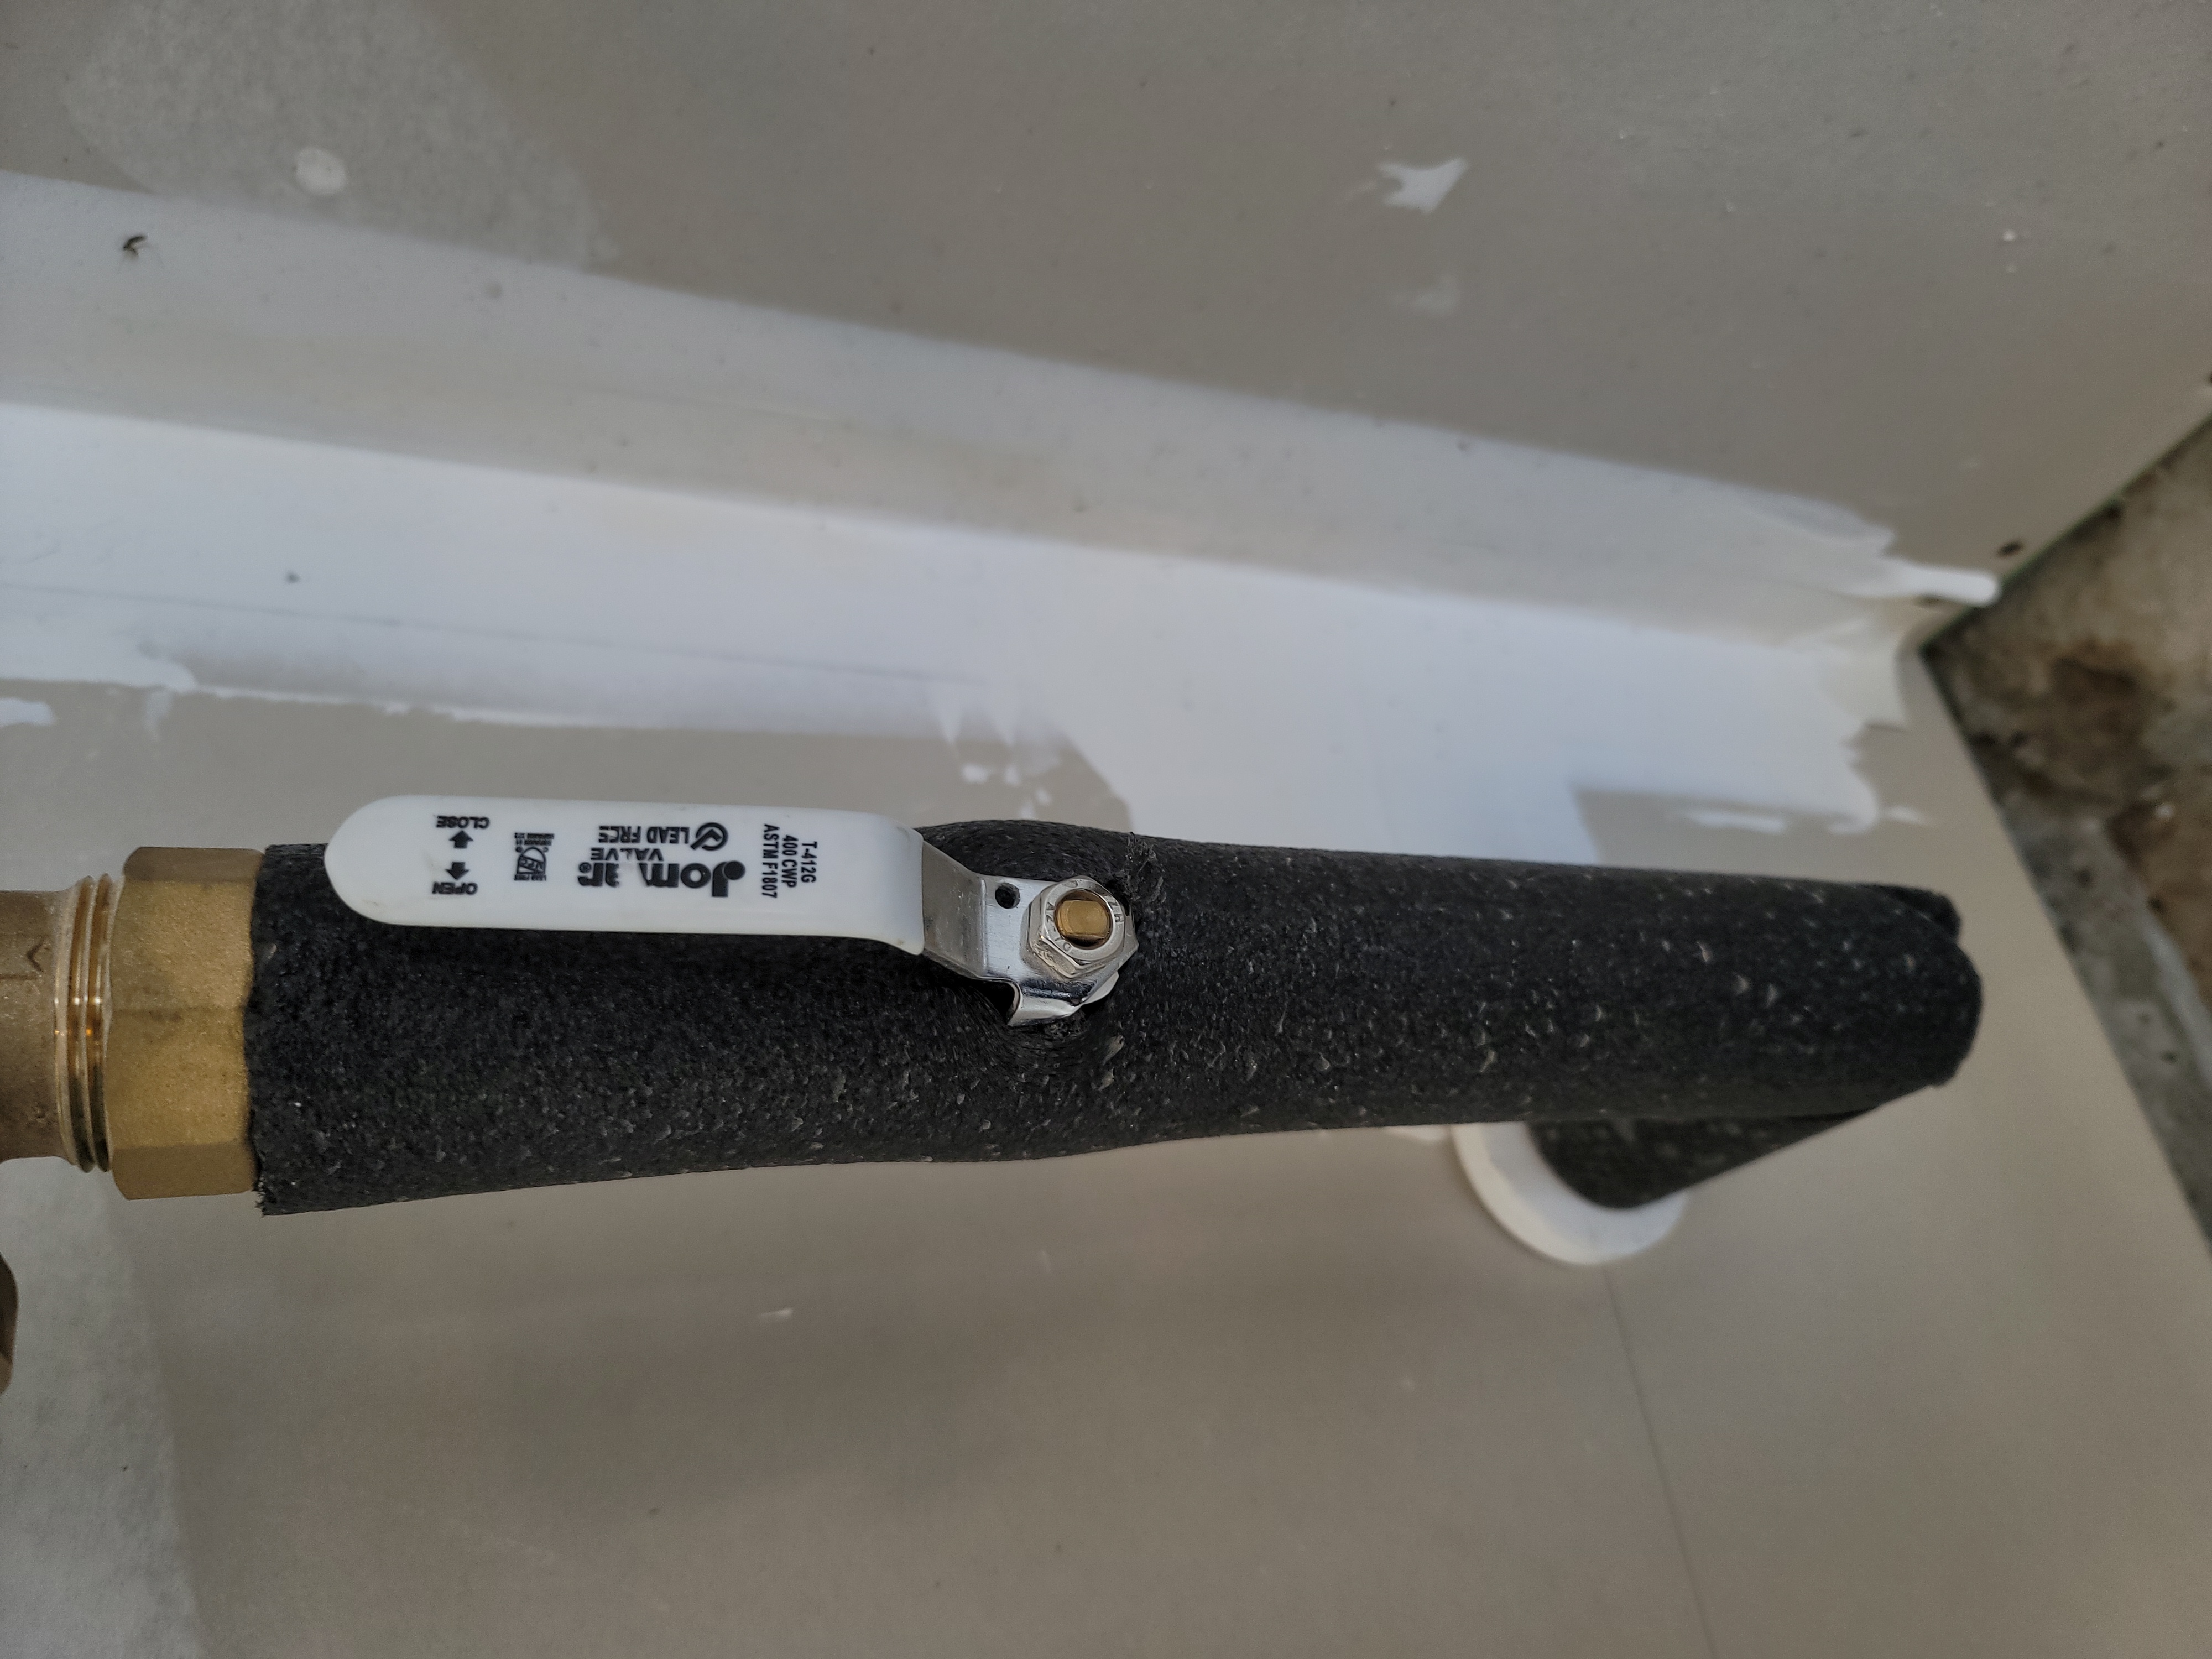
Water Heater ──── ──── Water Valve Appeared Closed
The water heater was inspected and found in need of correction. The water supply appeared to be off to the water heater when it was inspected and the water heater was not observed in proper operation. Properly put the water heater and plumbing system back in service correcting as needed for function and safety. All faucets and appliances using hot water should be reevaluated after proper corrections to water heater have been completed. Verify Hot/Cold orientation is correct at plumbing outlets. Correct if needed.
- Two water valves at water heater appeared closed.
.jpg) |
Equipment Observed
Plumbing Equipment Observed Present But Not Tested or Evaluated: ________________________________________________________________________________________________________________________________________________________________
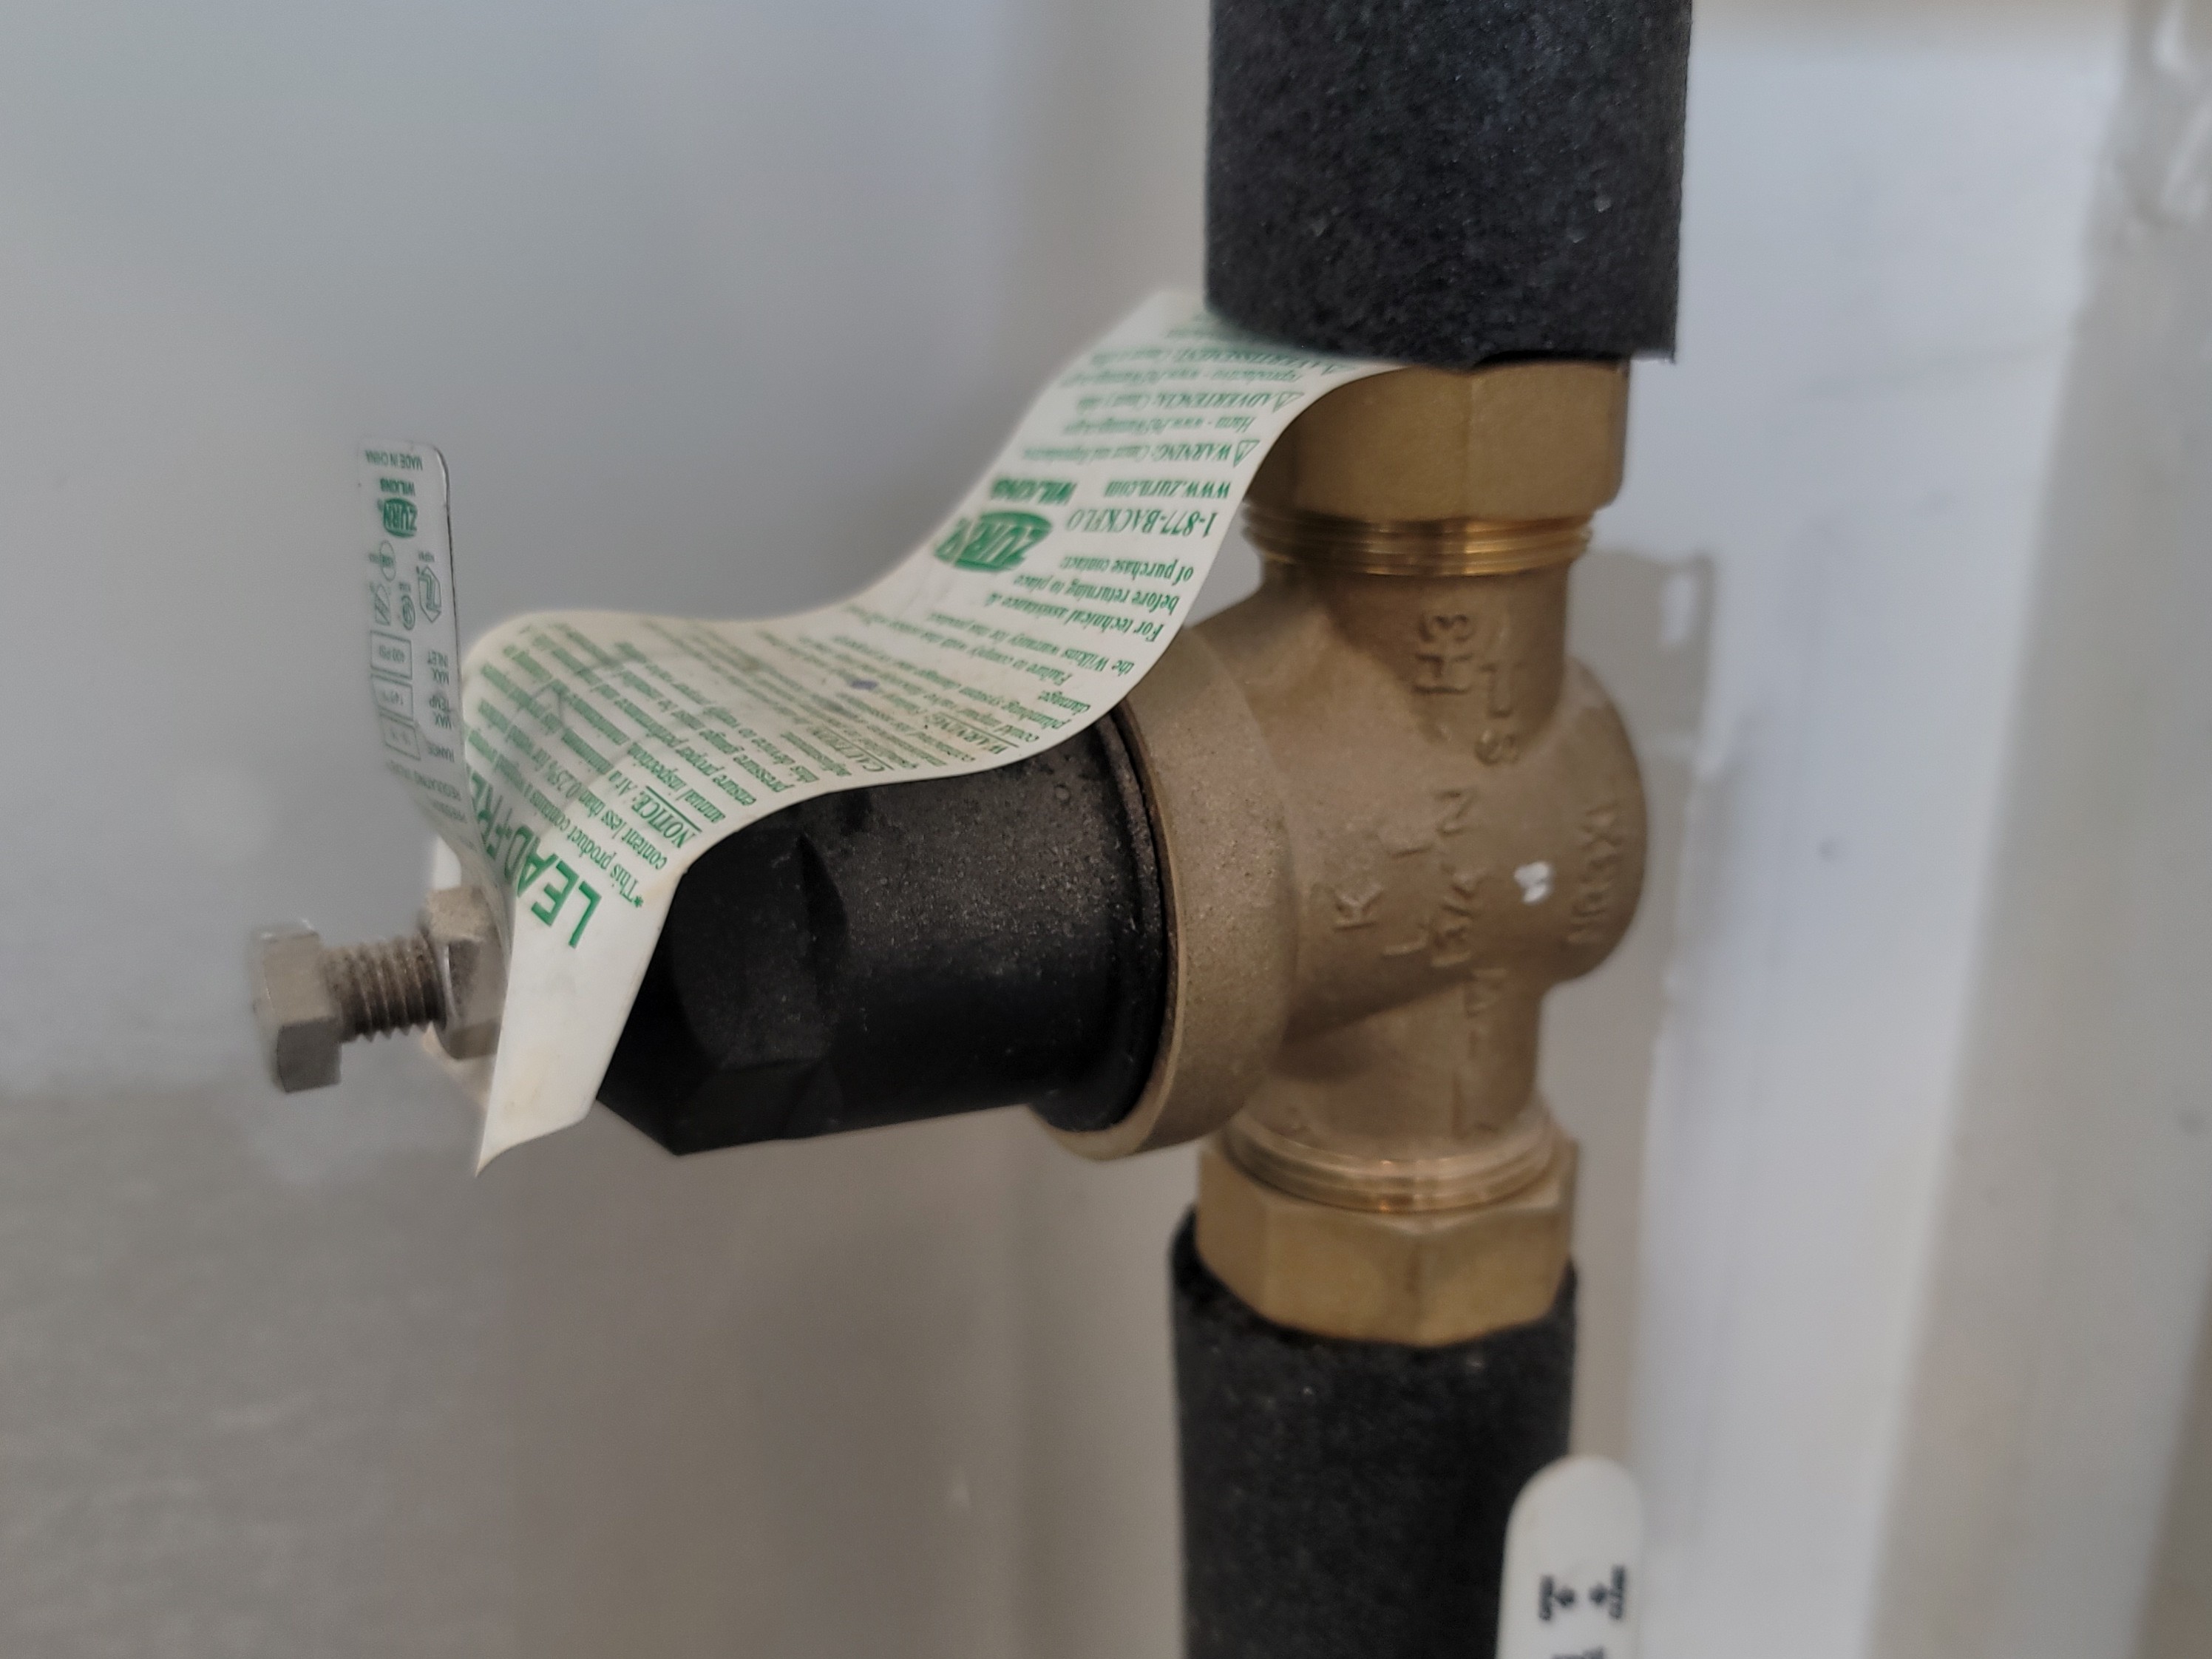
Pressure Reducer: About Pressure Reducing Valves
Regarding Plumbing System Pressure Reducing Valves:
The pressure reducer or pressure regulator in a plumbing system is designed to reduce the water pressure to a reasonable level in an effort to help prevent damage to the plumbing system. For most areas if the utility water pressure is greater than 80 PSI (pounds per square inch) a pressure reducer is needed. For some areas with extremely high utility pressure multiple pressure reducers may be needed installed in series. Pressure reducers are typically factory set for 50 PSI and property water pressure is expected to be between 30 PSI and 80 PSI. Inspector notes presence of pressure reducer when observed. Pressure readings for plumbing system are not part of the inspection performed.
Pressure Reducer Location: Garage, Photo
Photo showing plumbing system pressure reducer
 |
________________________________________________________________________________________________________________________________________________________________
Plumbing Supply Piping - MAIN WATER SHUT OFF VALVE - Apparent Location - Note Such Valves are Not Operated: ________________________________________________________________________________________________________________________________________________________________
Property Owner - Plumbing Supply Piping - Shut Off Valve Location: Garage
Plumbing Supply Piping
Main Water Shut Off Valve -
Apparent Location
 |
CENTRAL SYSTEM
Central Heat/Cool
Split System
Central Heating/Cooling
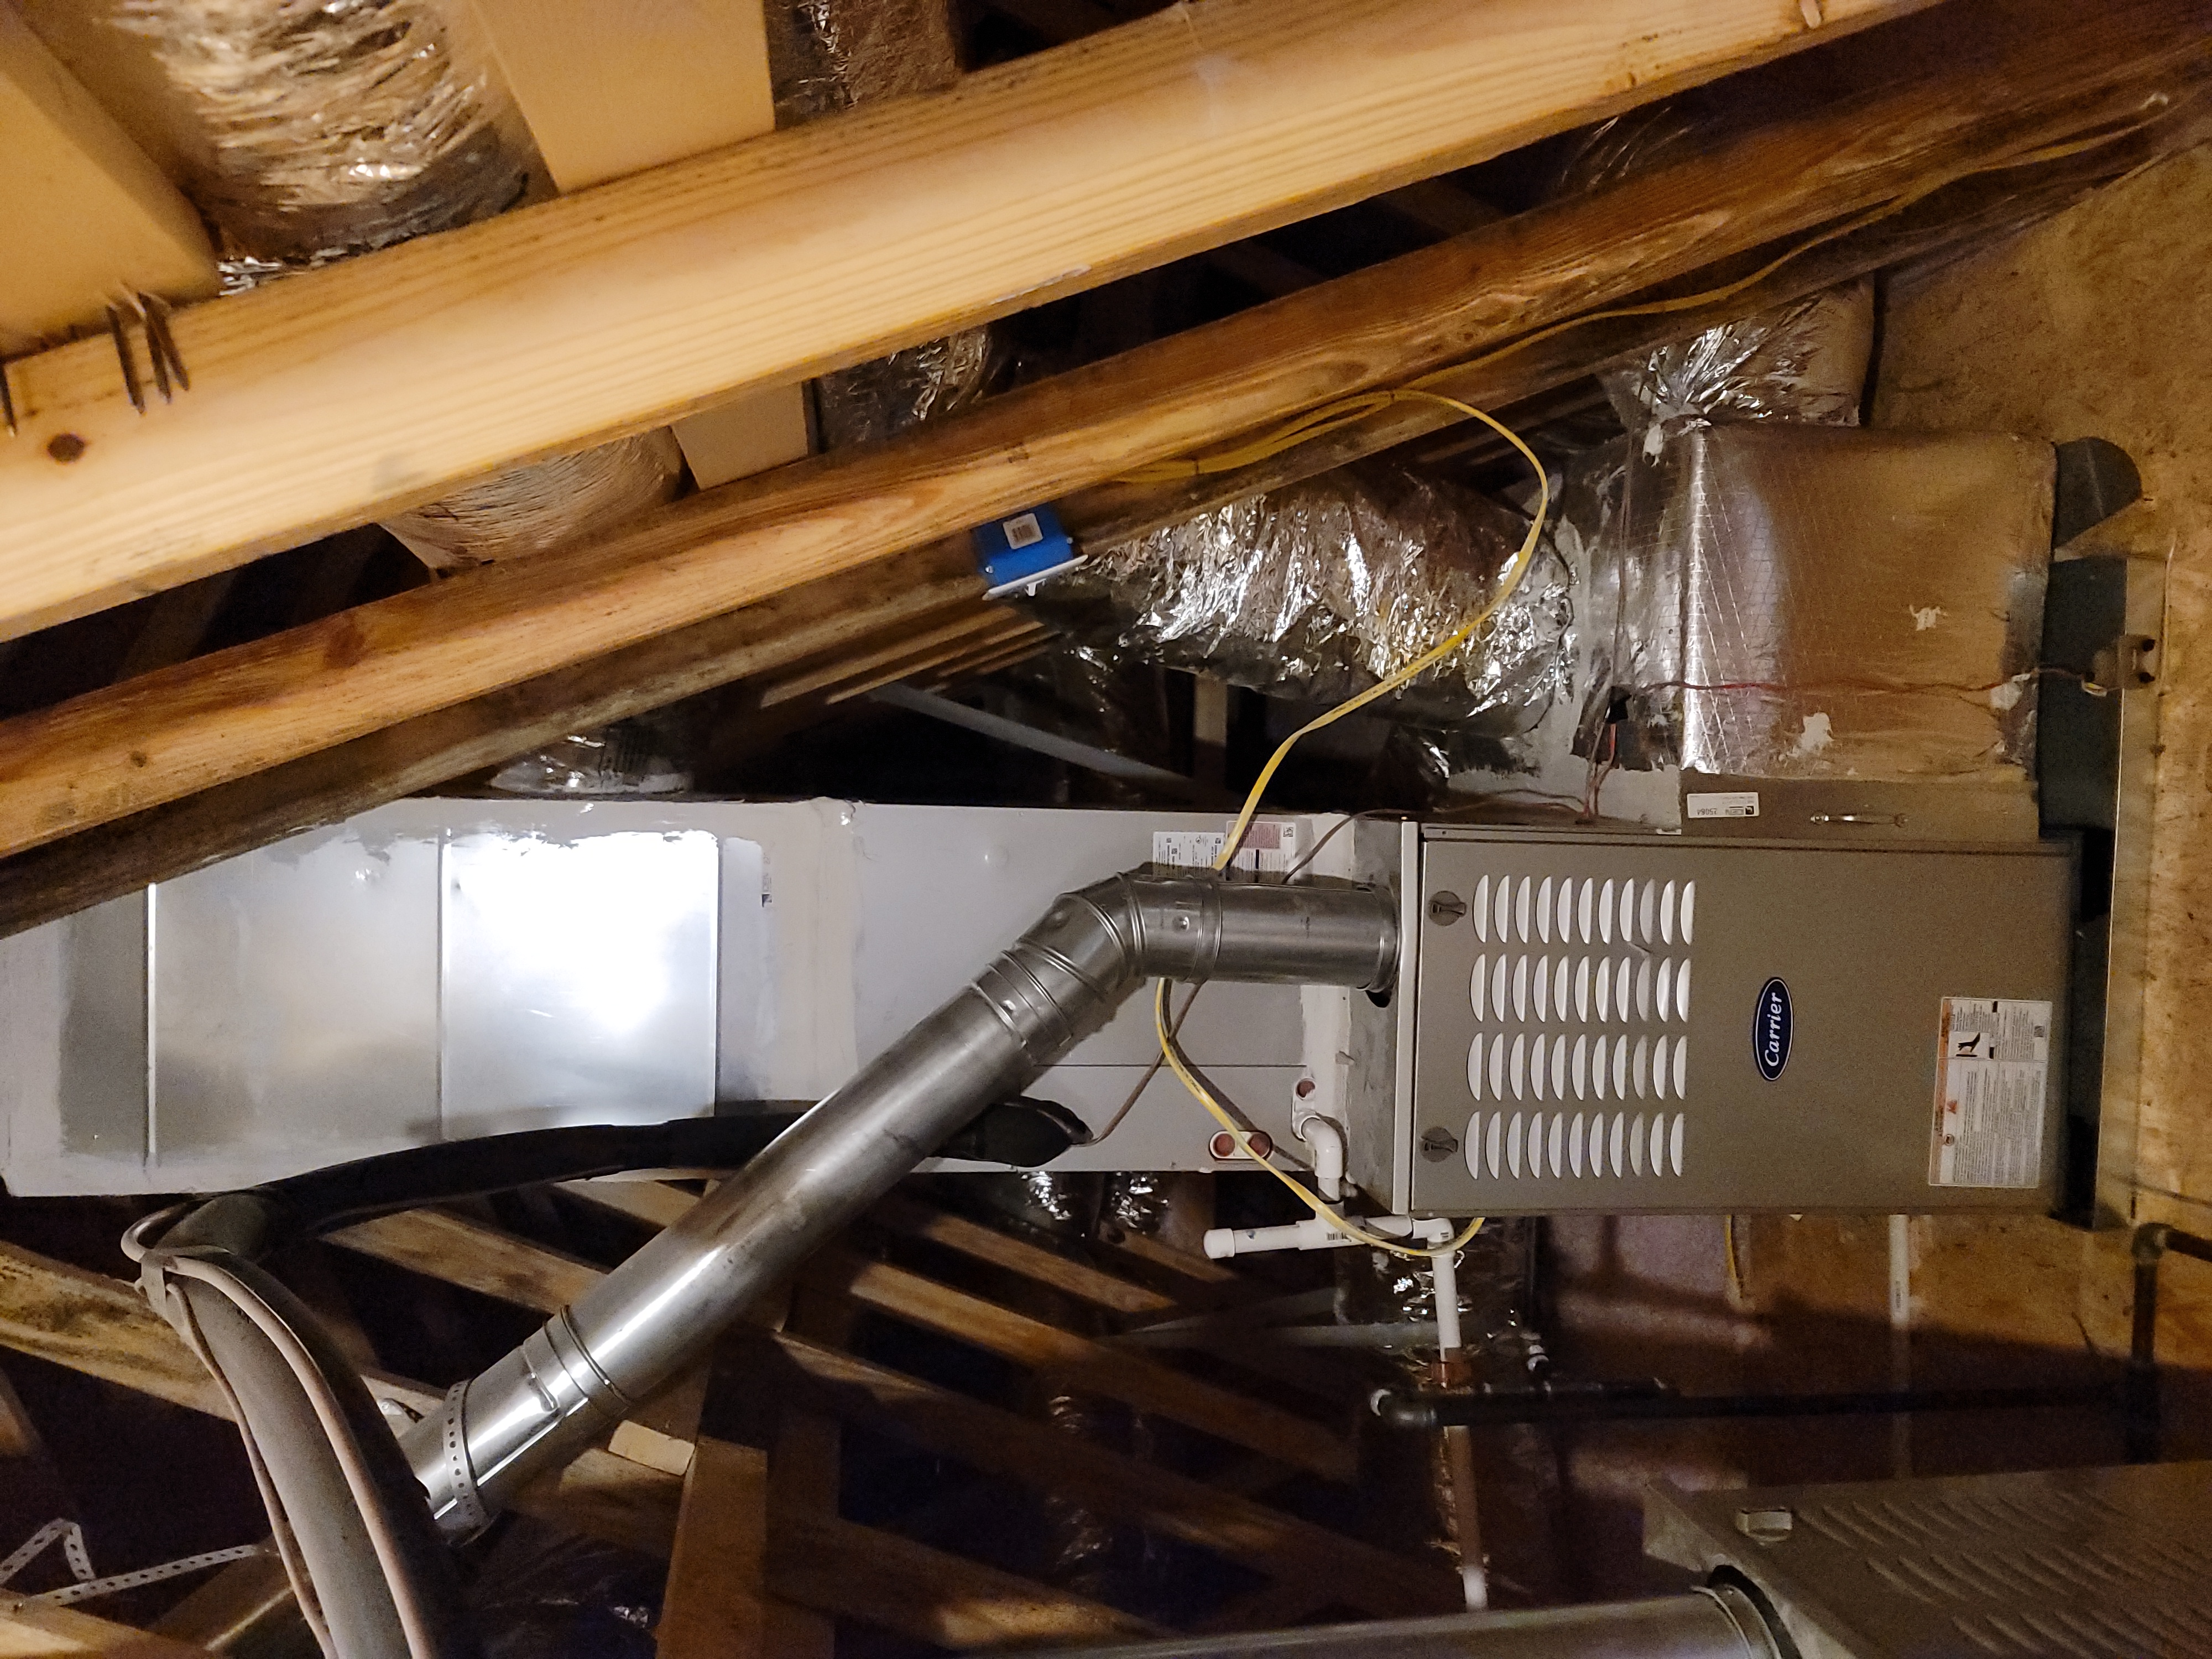
Split System served: System served upstairs area ────
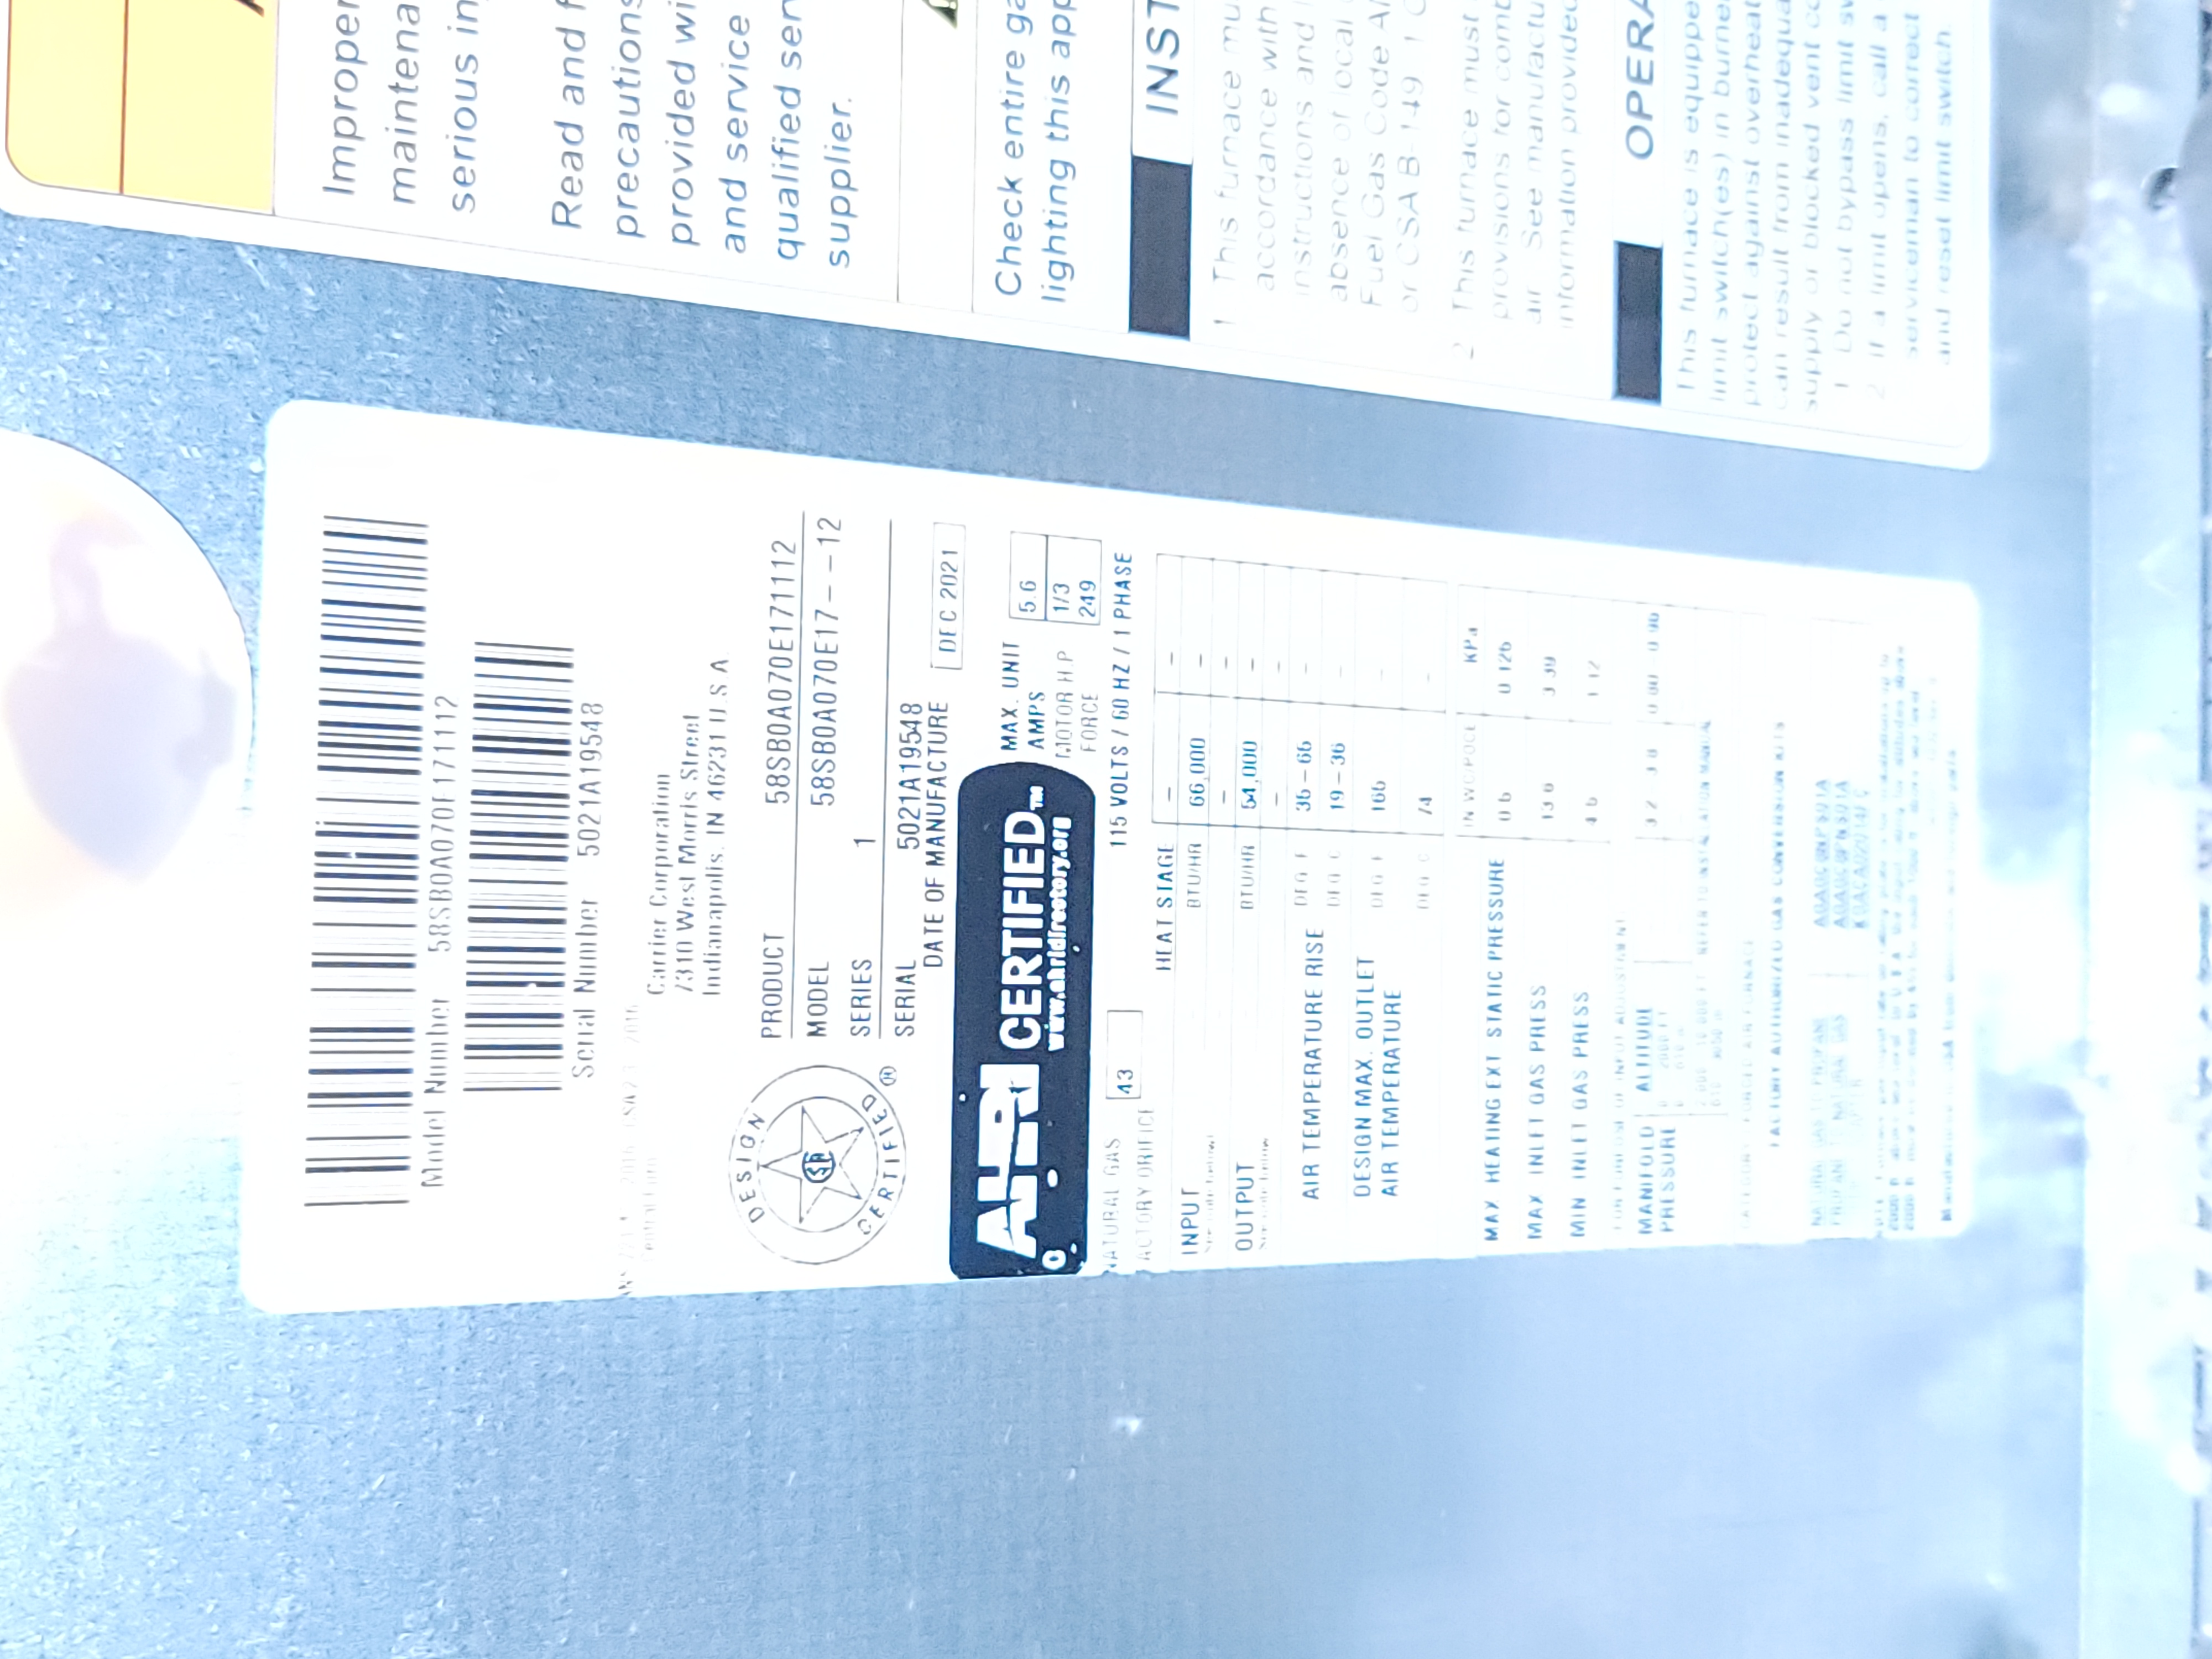
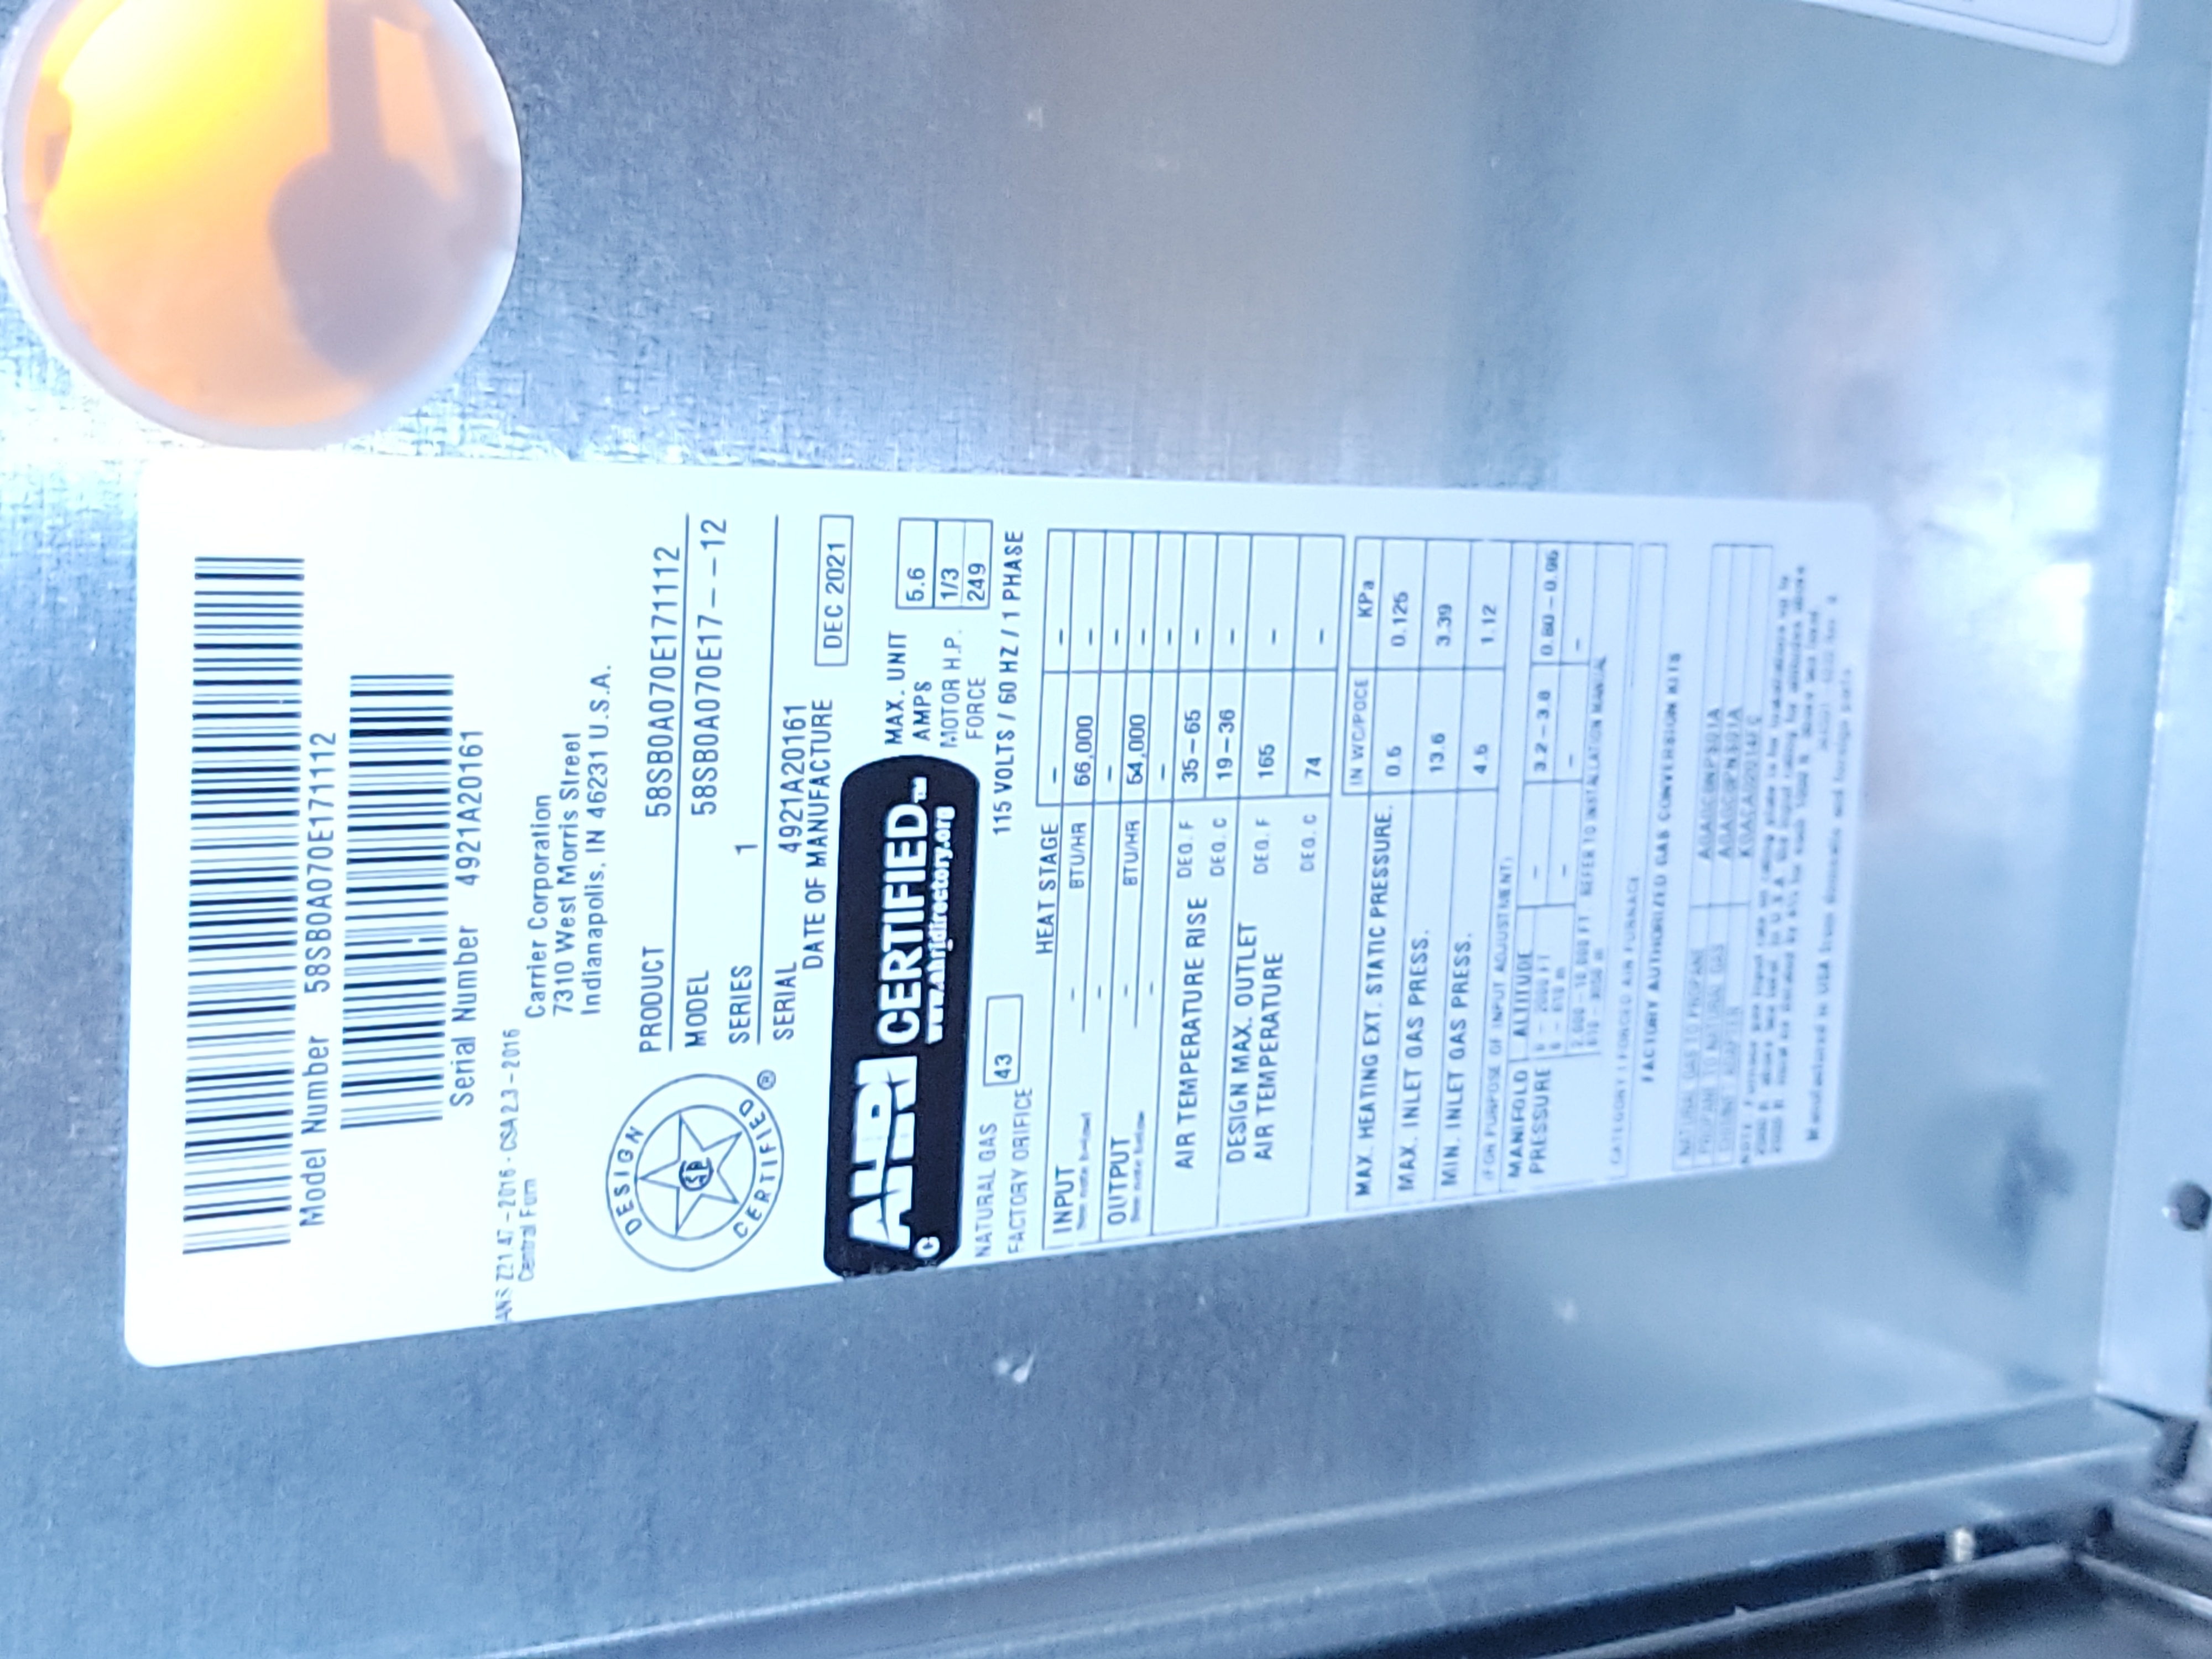
Brand Furnace: Carrier / Location: Attic / Fuel: Natural Gas
Size: 66K BTU / Year of Manufacture: 2021
Gas furnaces typically have a service life of 16-22 years when properly maintained
Filter Type: Disposable filter at furnace / Thermostat Type: Digital
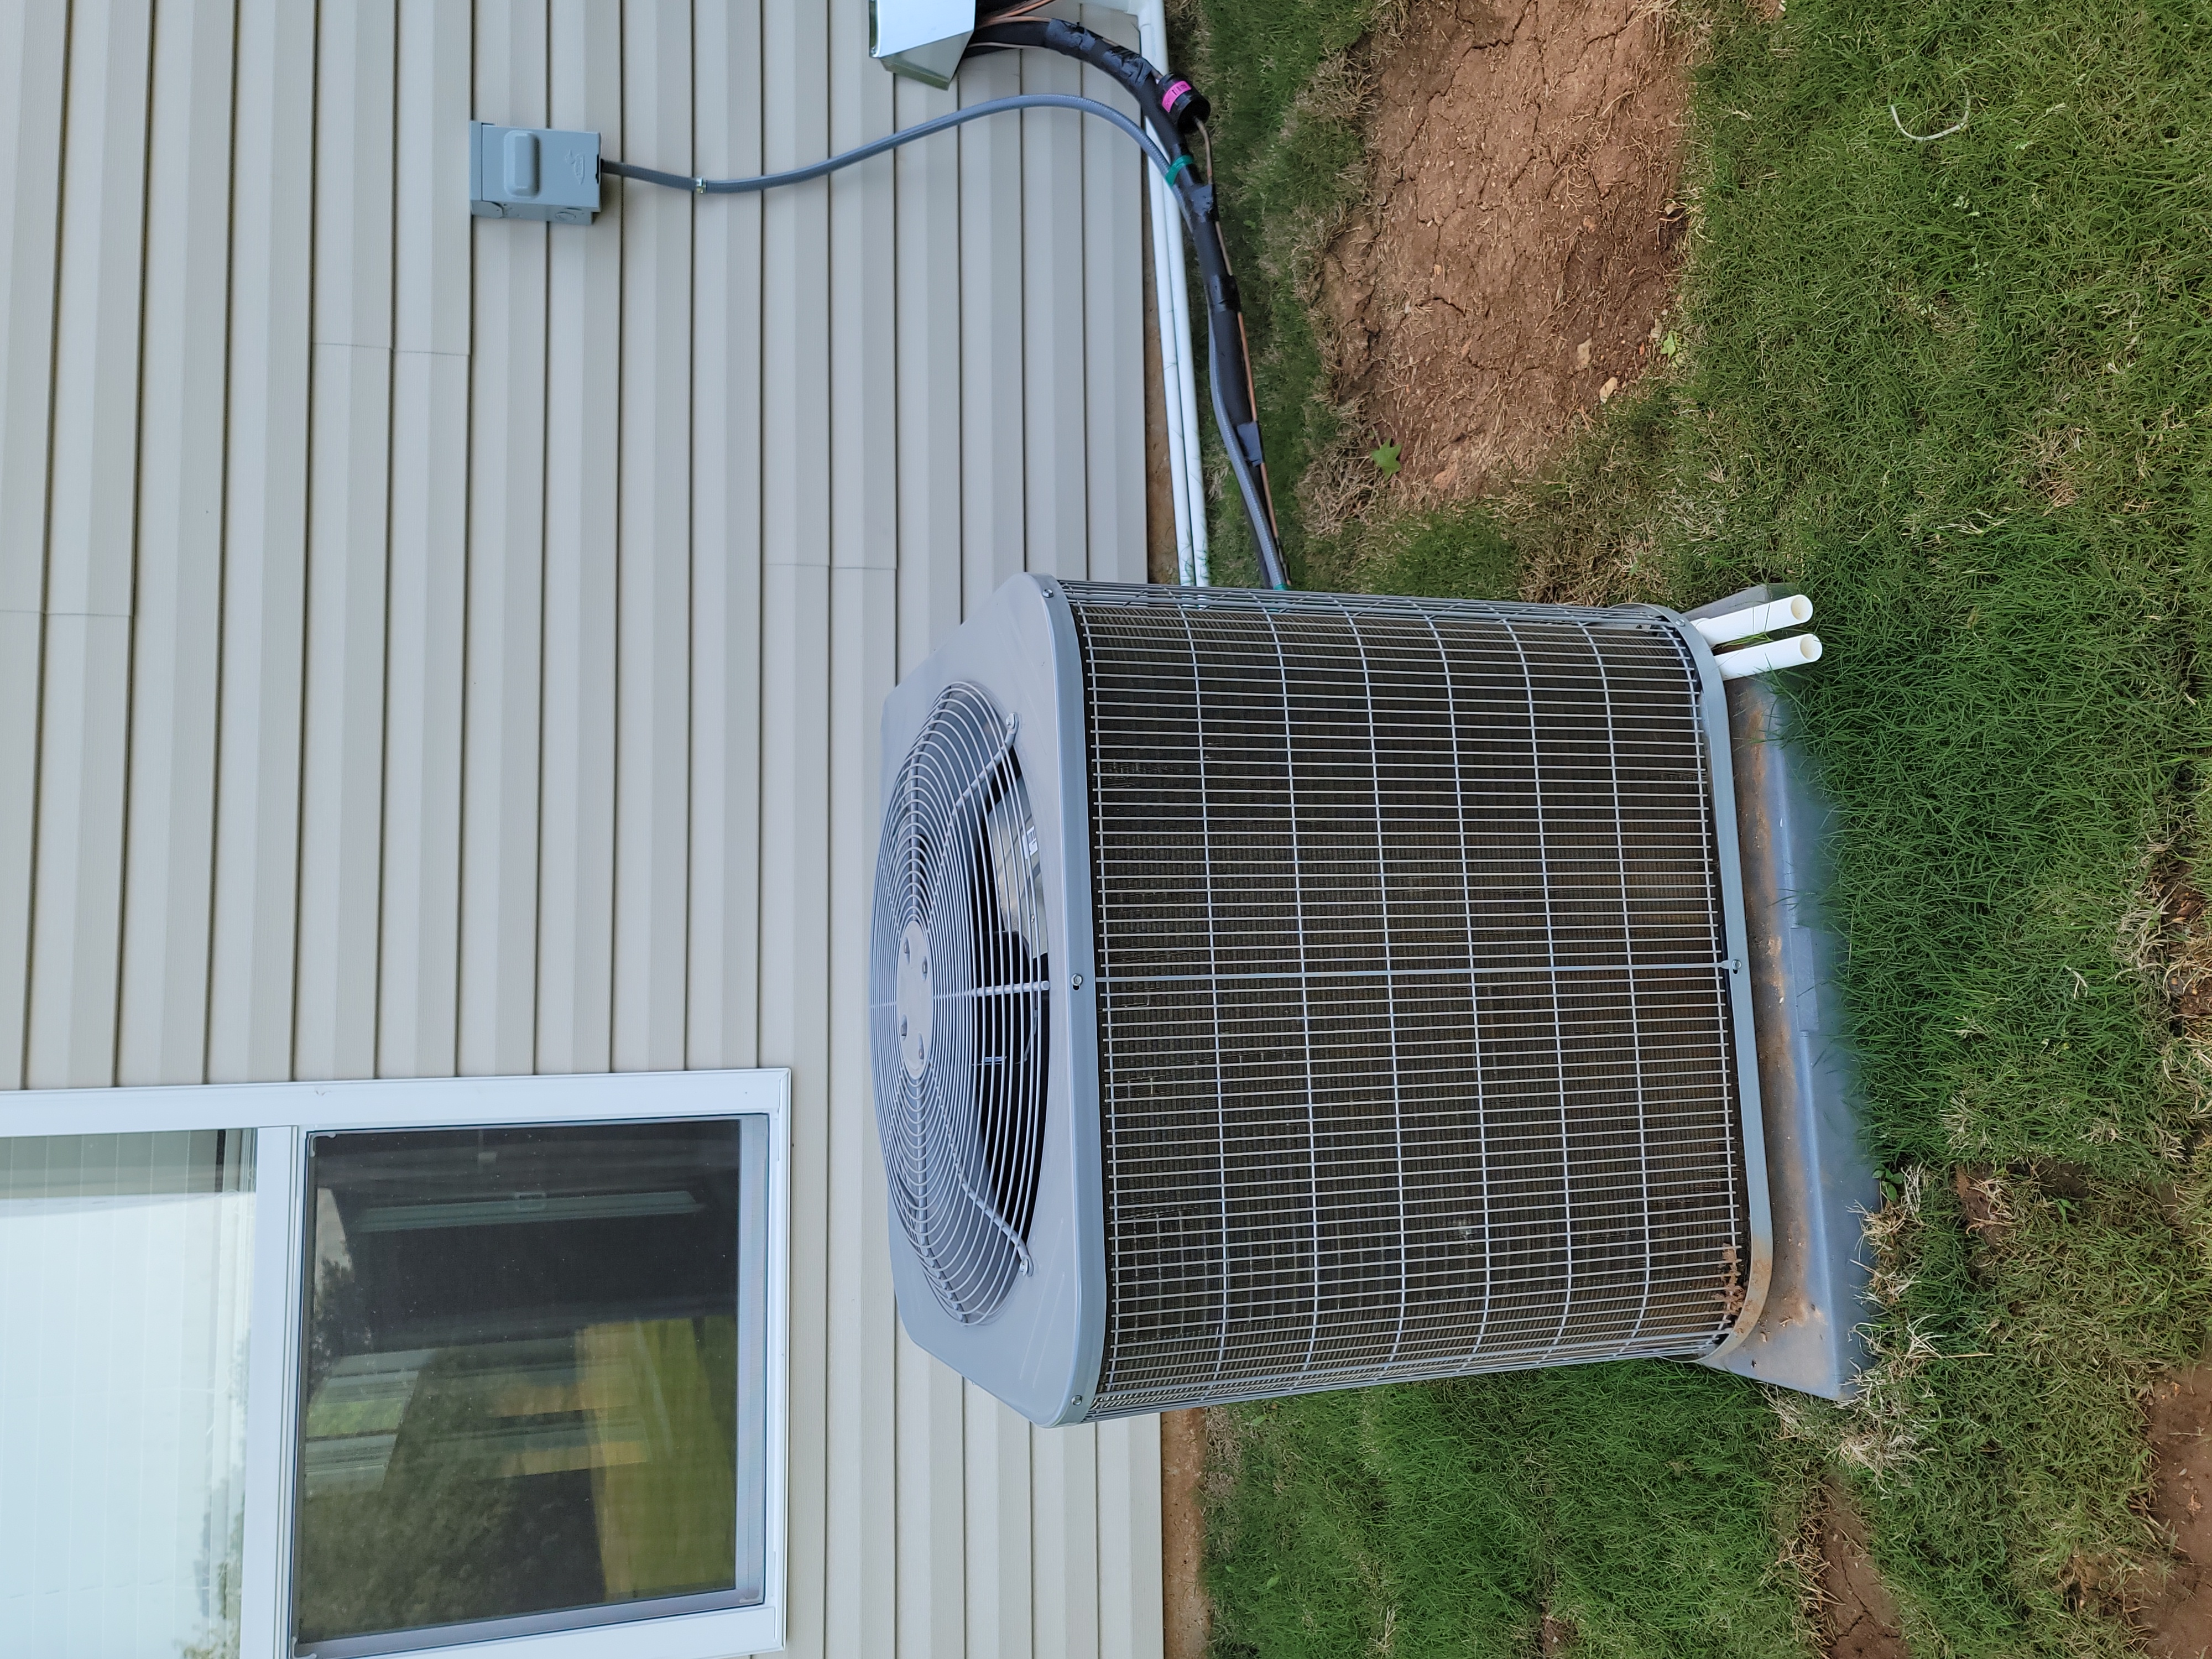
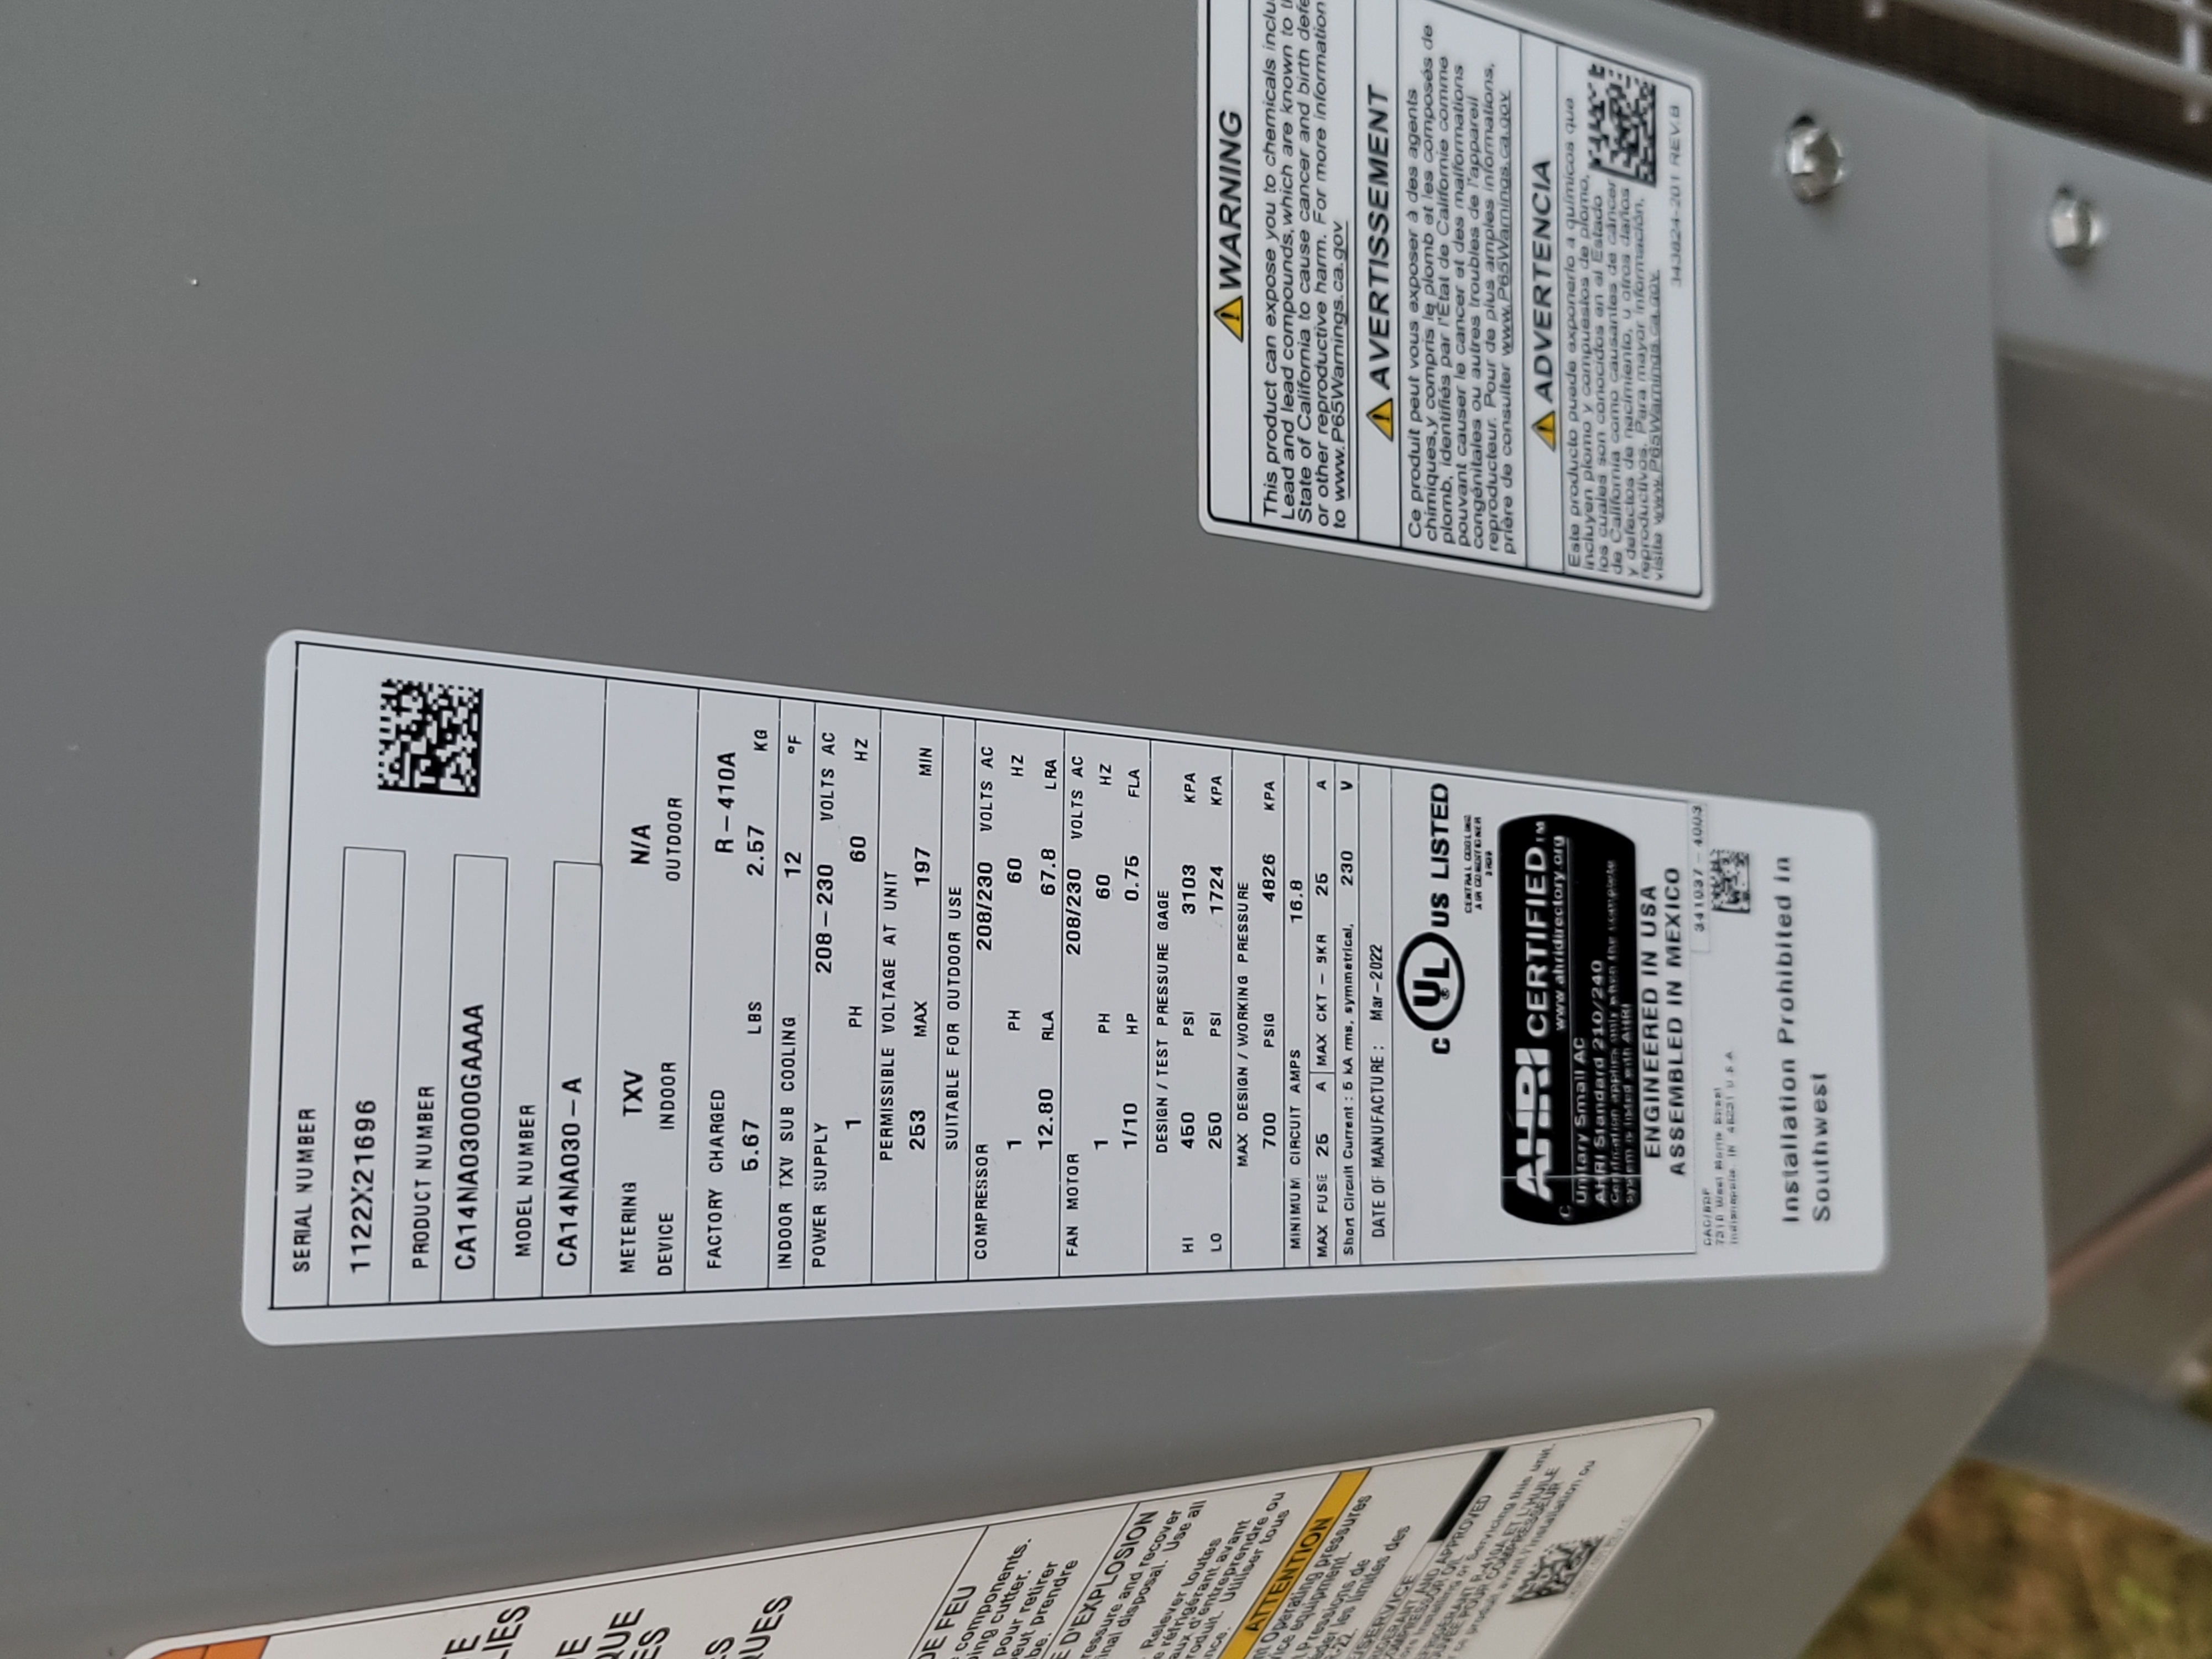
Cooling Brand: Carrier / Location: Exterior / Fuel: Electric
Size: 2.5 ton / Year of Manufacture: 2022
Central cooling units typically have a service life of 12-18 years when properly maintained
Condensate disposal method: Gravity drain piping - service annually
────
 |  |
 |
________________________________________________________________________________________________________________________________________________________________
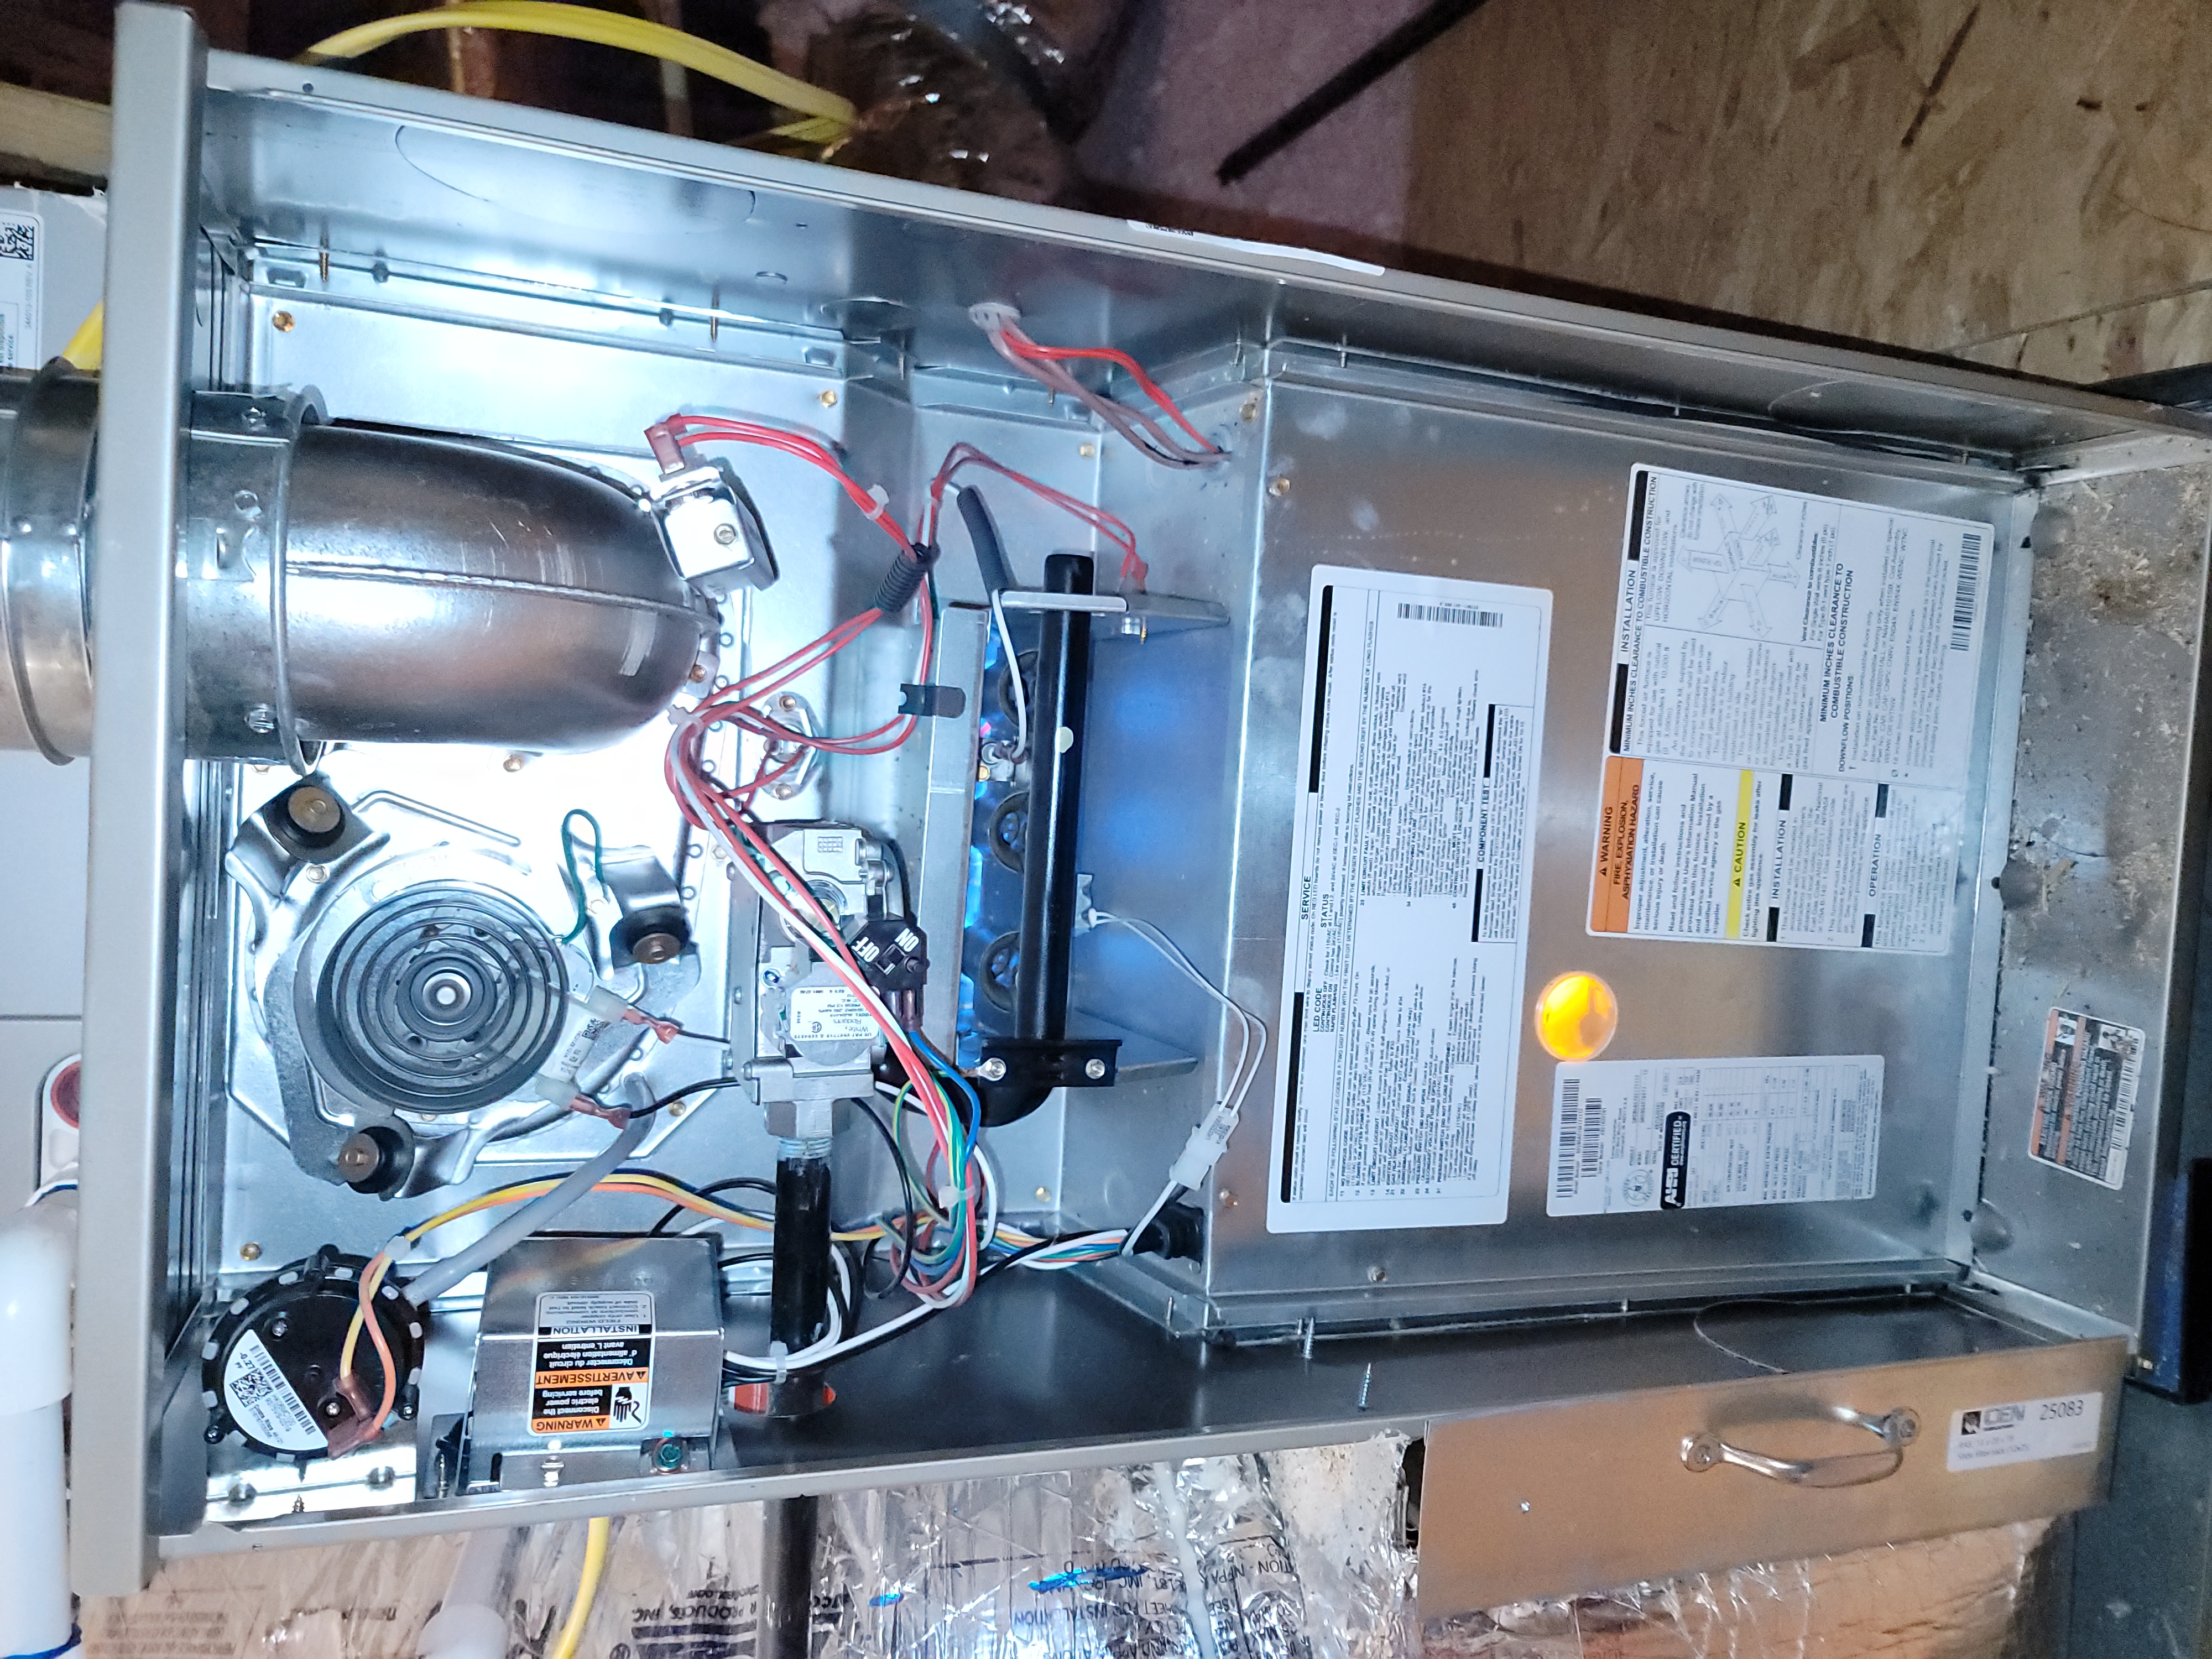
Heating Function: Functional
Heating System Functional
Inspector adjusted thermostat. Heating system engaged and was found to be functional.
Cooling System System served upstairs area ──── Electrical Breaker Appeared Off
The central cooling system was inspected and found inoperative when using the normal operating controls. The electrical breaker appeared to be off to the cooling system when it was inspected and the unit was not observed in operation. Properly put the cooling system back in service correcting as needed for function and safety.
- Electrical breakers were off to both cooling units.
.jpg)
 |
Central Heat/Cool
Split System
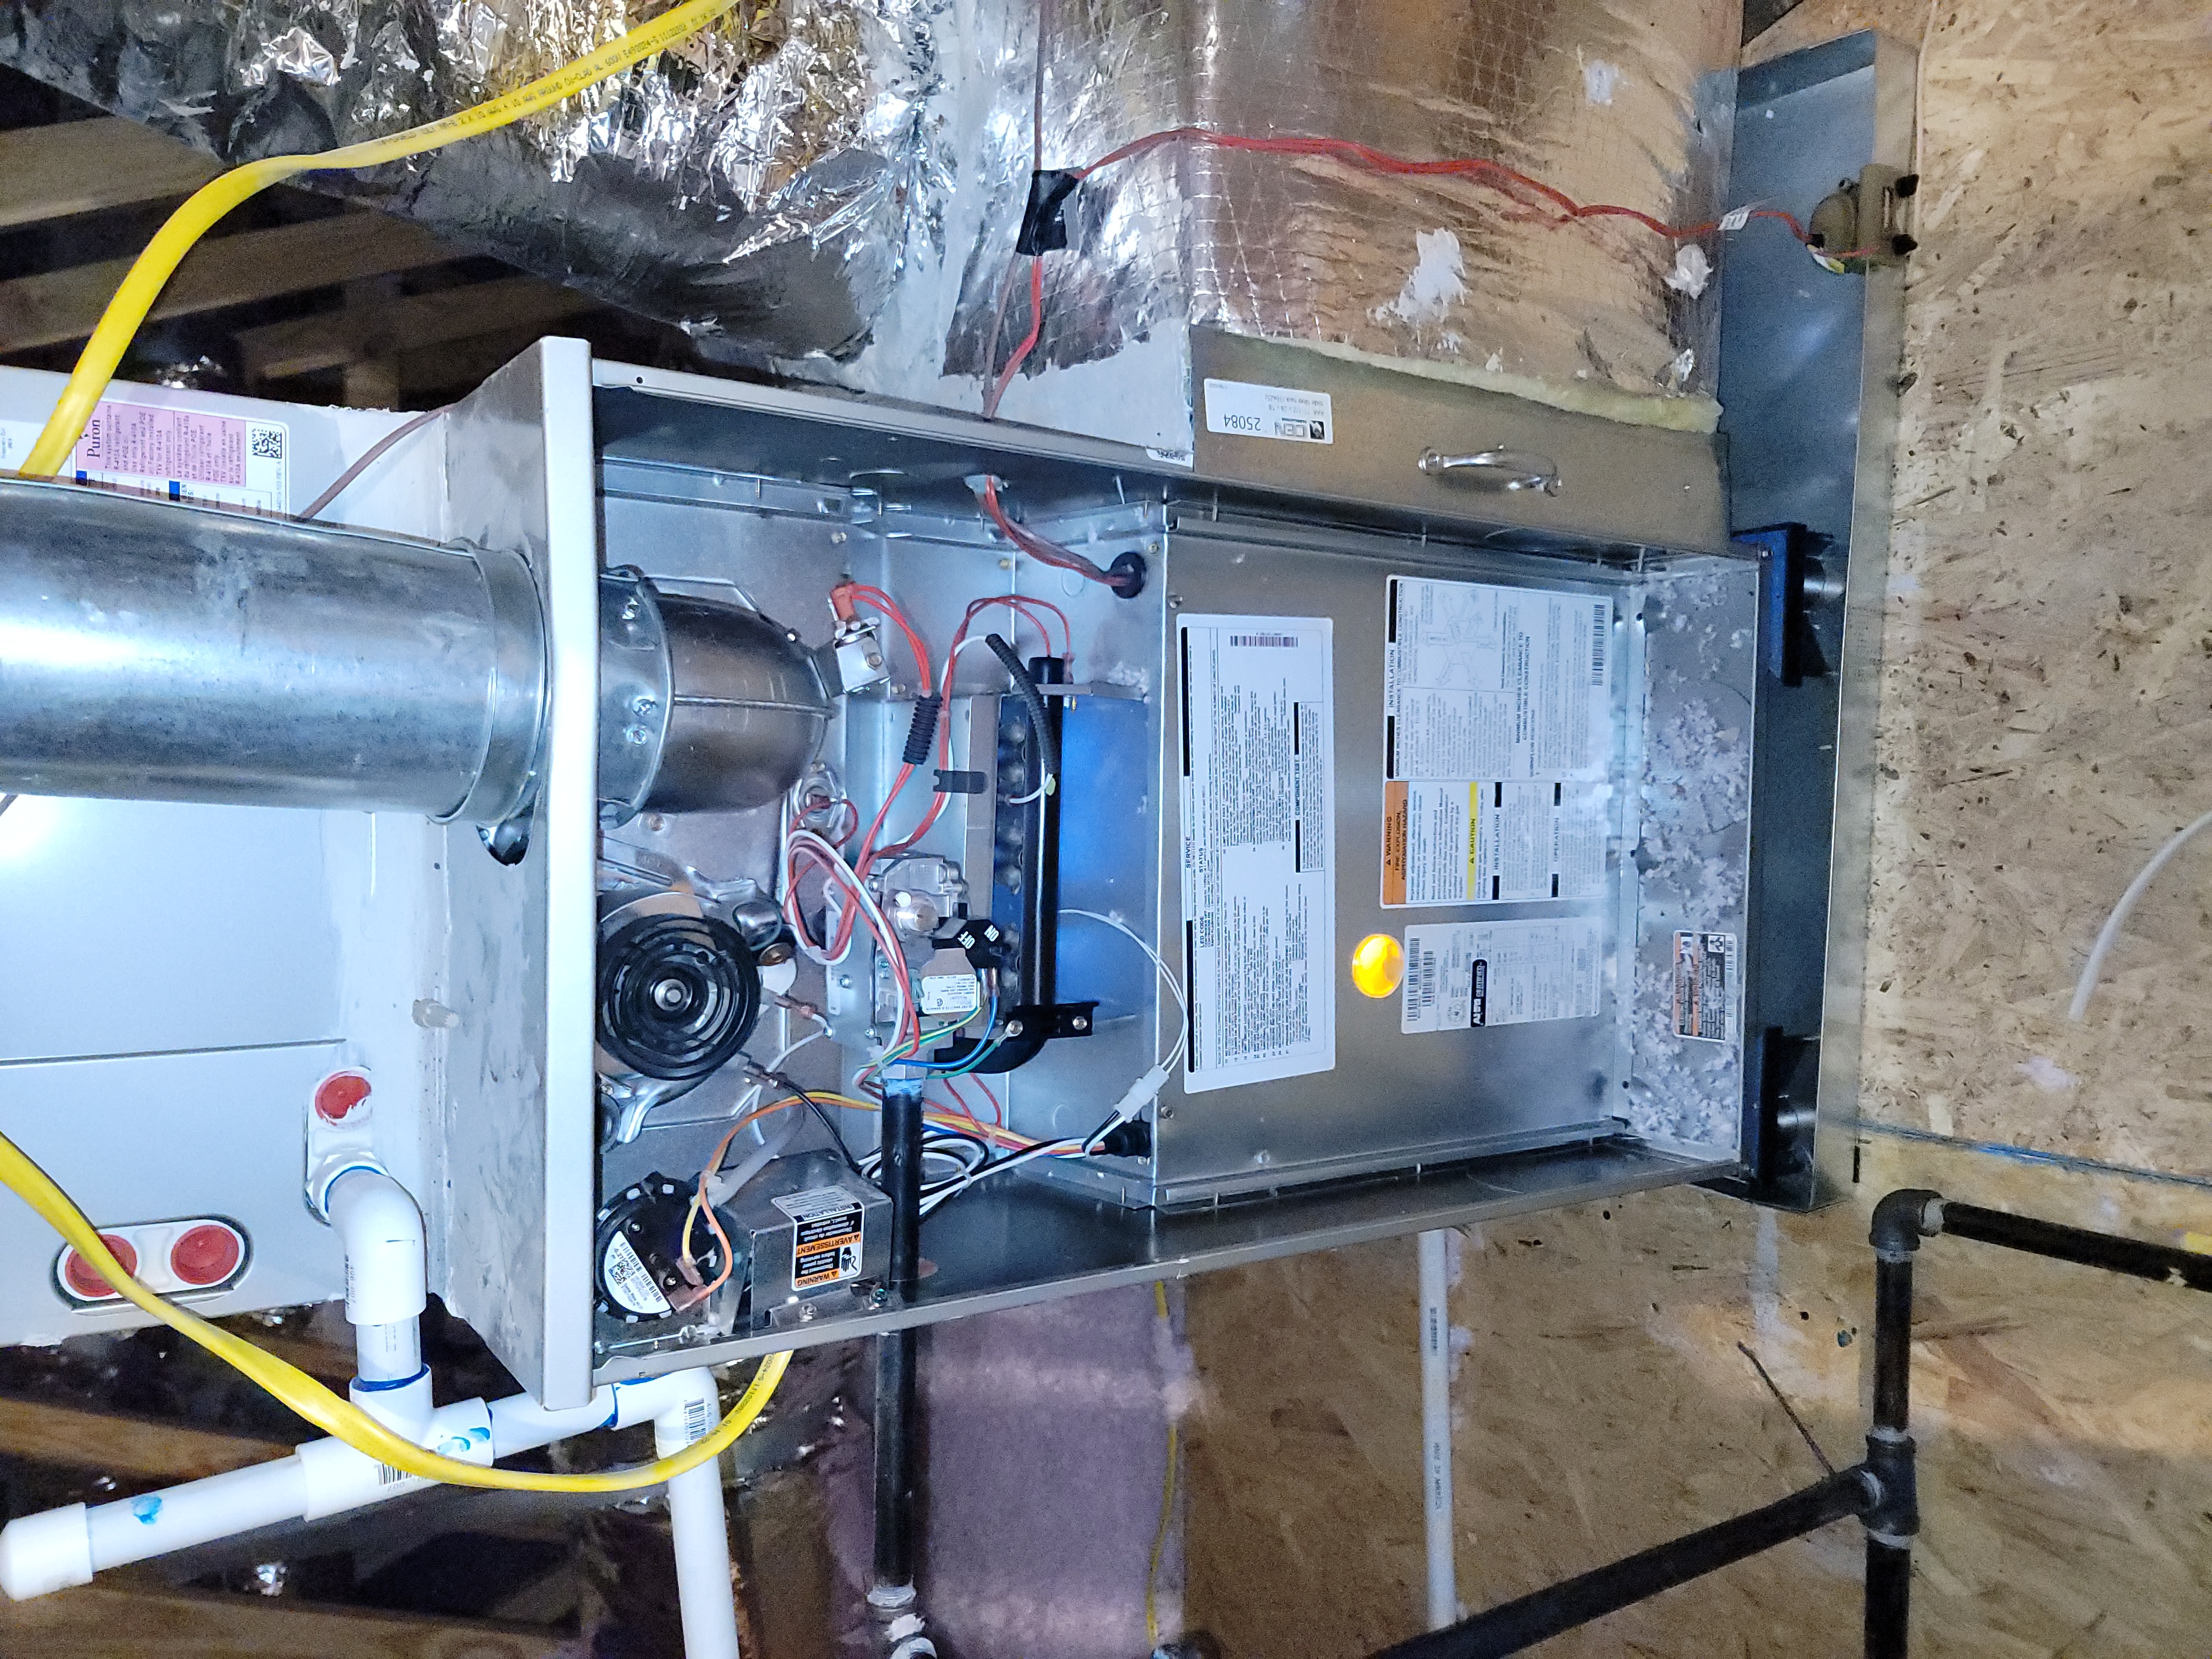
Central Heating/Cooling
Split System served: System served main level ────
Brand Furnace: Carrier / Location: Attic / Fuel: Natural Gas
Size: 66K BTU / Year of Manufacture: 2021
Gas furnaces typically have a service life of 16-22 years when properly maintained
Filter Type: Disposable / Thermostat Type: Digital
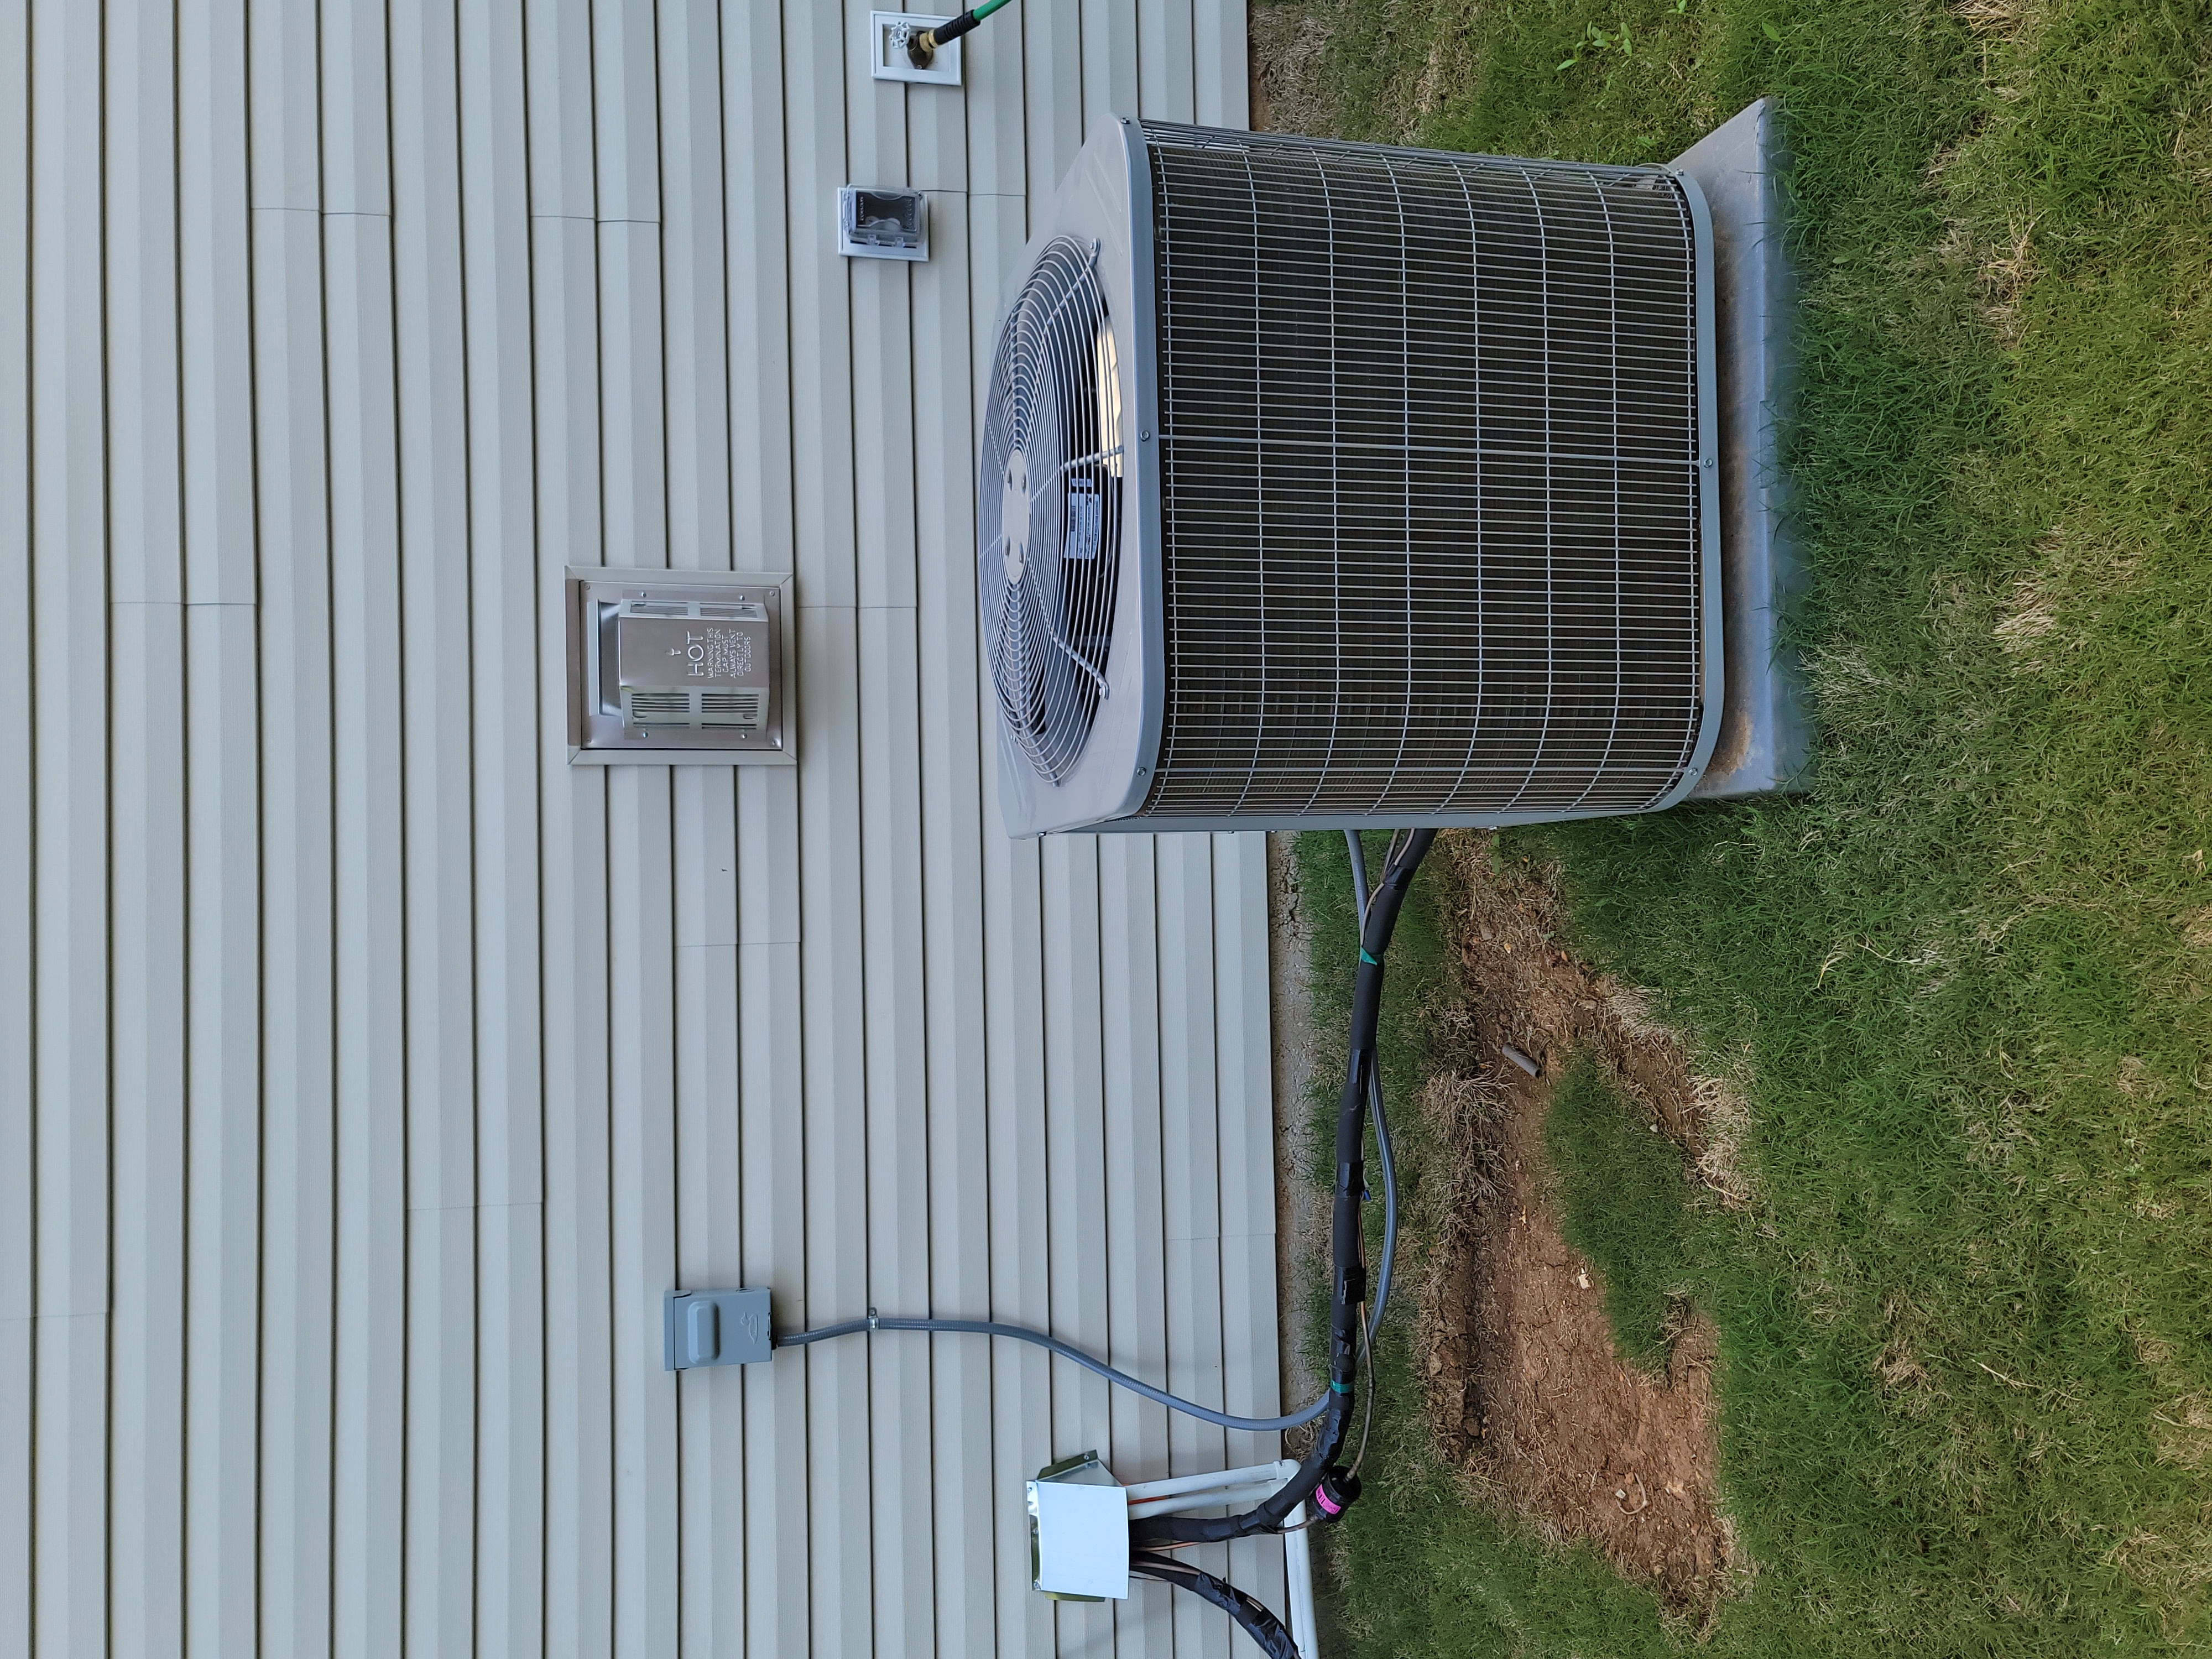
Cooling Brand: Carrier / Location: Exterior / Fuel: Electric
Size: 2.5 ton / Year of Manufacture: 2022
Central cooling units typically have a service life of 12-18 years when properly maintained
Condensate disposal method: Gravity drain piping - service annually
────
 |  |
 |
________________________________________________________________________________________________________________________________________________________________
Heating Function: Functional
Heating System Functional
Inspector adjusted thermostat. Heating system engaged and was found to be functional.
Cooling System System served main level ──── Electrical Breaker Appeared Off
The central cooling system was inspected and found inoperative when using the normal operating controls. The electrical breaker appeared to be off to the cooling system when it was inspected and the unit was not observed in operation. Properly put the cooling system back in service correcting as needed for function and safety.
- Electrical breakers were off to both cooling units.
.jpg)
|
Heat/Cool Other
Filter drawer at furnace serving main level did not close properly as it struck furnace. Properly correct filter drawer where needed for proper correction and to close properly.
.jpg)
.jpg)
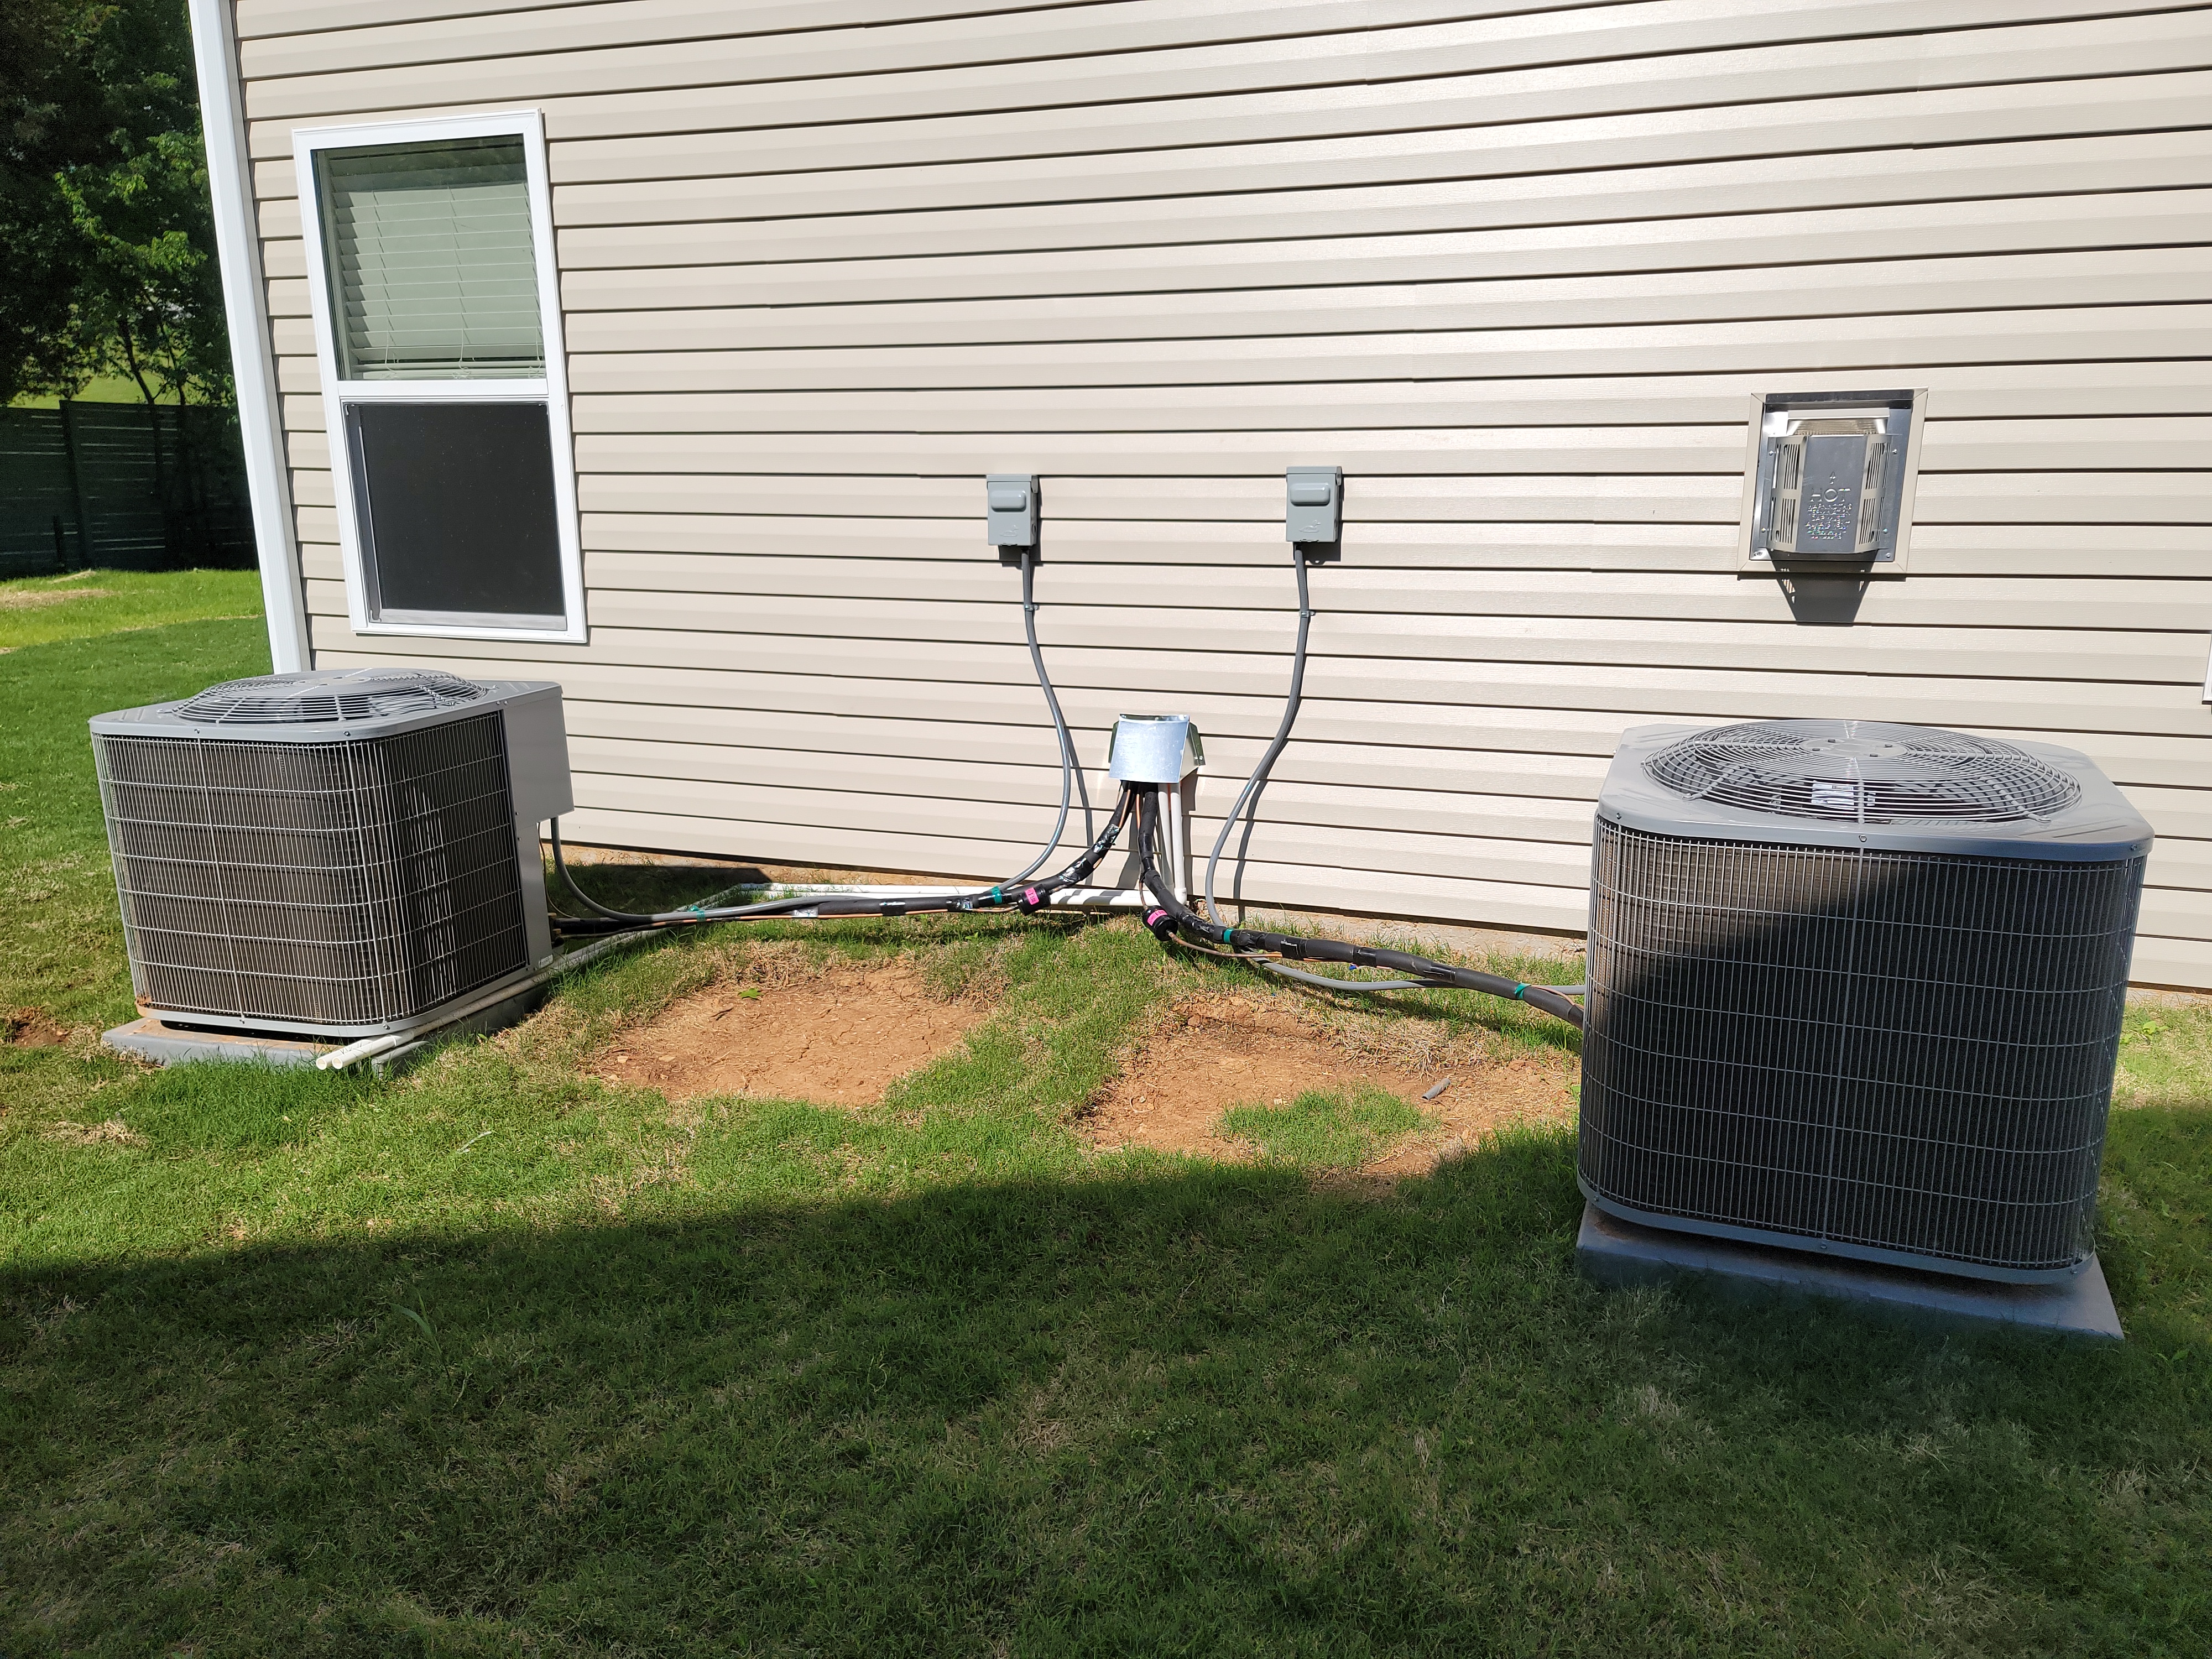
Both cooling units were inoperative when inspected. Each was same size and age. Inspector was unable to determine which unit served the upstairs area and which served the main level.
 |  |
 |  |
 |
Central Ductwork
Distribution Ductwork
Ductwork Information: About your central heating and cooling ductwork
Regarding calculating the load of a central system:
Several factors are considered when performing a load evaluation for central heating and cooling systems to determine the appropriate size system for the area served. Factors such as installed ductwork, insulation, ceiling height, basement area served, if present, shade, climate zone along with size, number and placement of windows have to be taken into account before sizing a system. The inspector does not calculate the load of a central heating and cooling system during the performed inspection. The inspector also does not confirm that the installed ductwork is appropriately sized to serve the the installed central heating and cooling equipment. Properly maintain the ductwork system to meet your comfort needs and to allow system to operate properly.
Gas
Gas Fuel Piping
Natural gas piping observed at inspected property.
Properly maintain gas piping as needed for function and safety.
Representative Photo
Representative Photo
 |
Gas Appliance Flue
Flue
Furnace
Furnace System served upstairs area ────
Flue Type: Metal Flue, exhaust discharged through roof
Properly maintain flue for safety and function.
Flue cont
Furnace
Furnace System served main level ────
Flue Type: Metal Flue, exhaust discharged through roof
Properly maintain flue for safety and function.
Flue cont
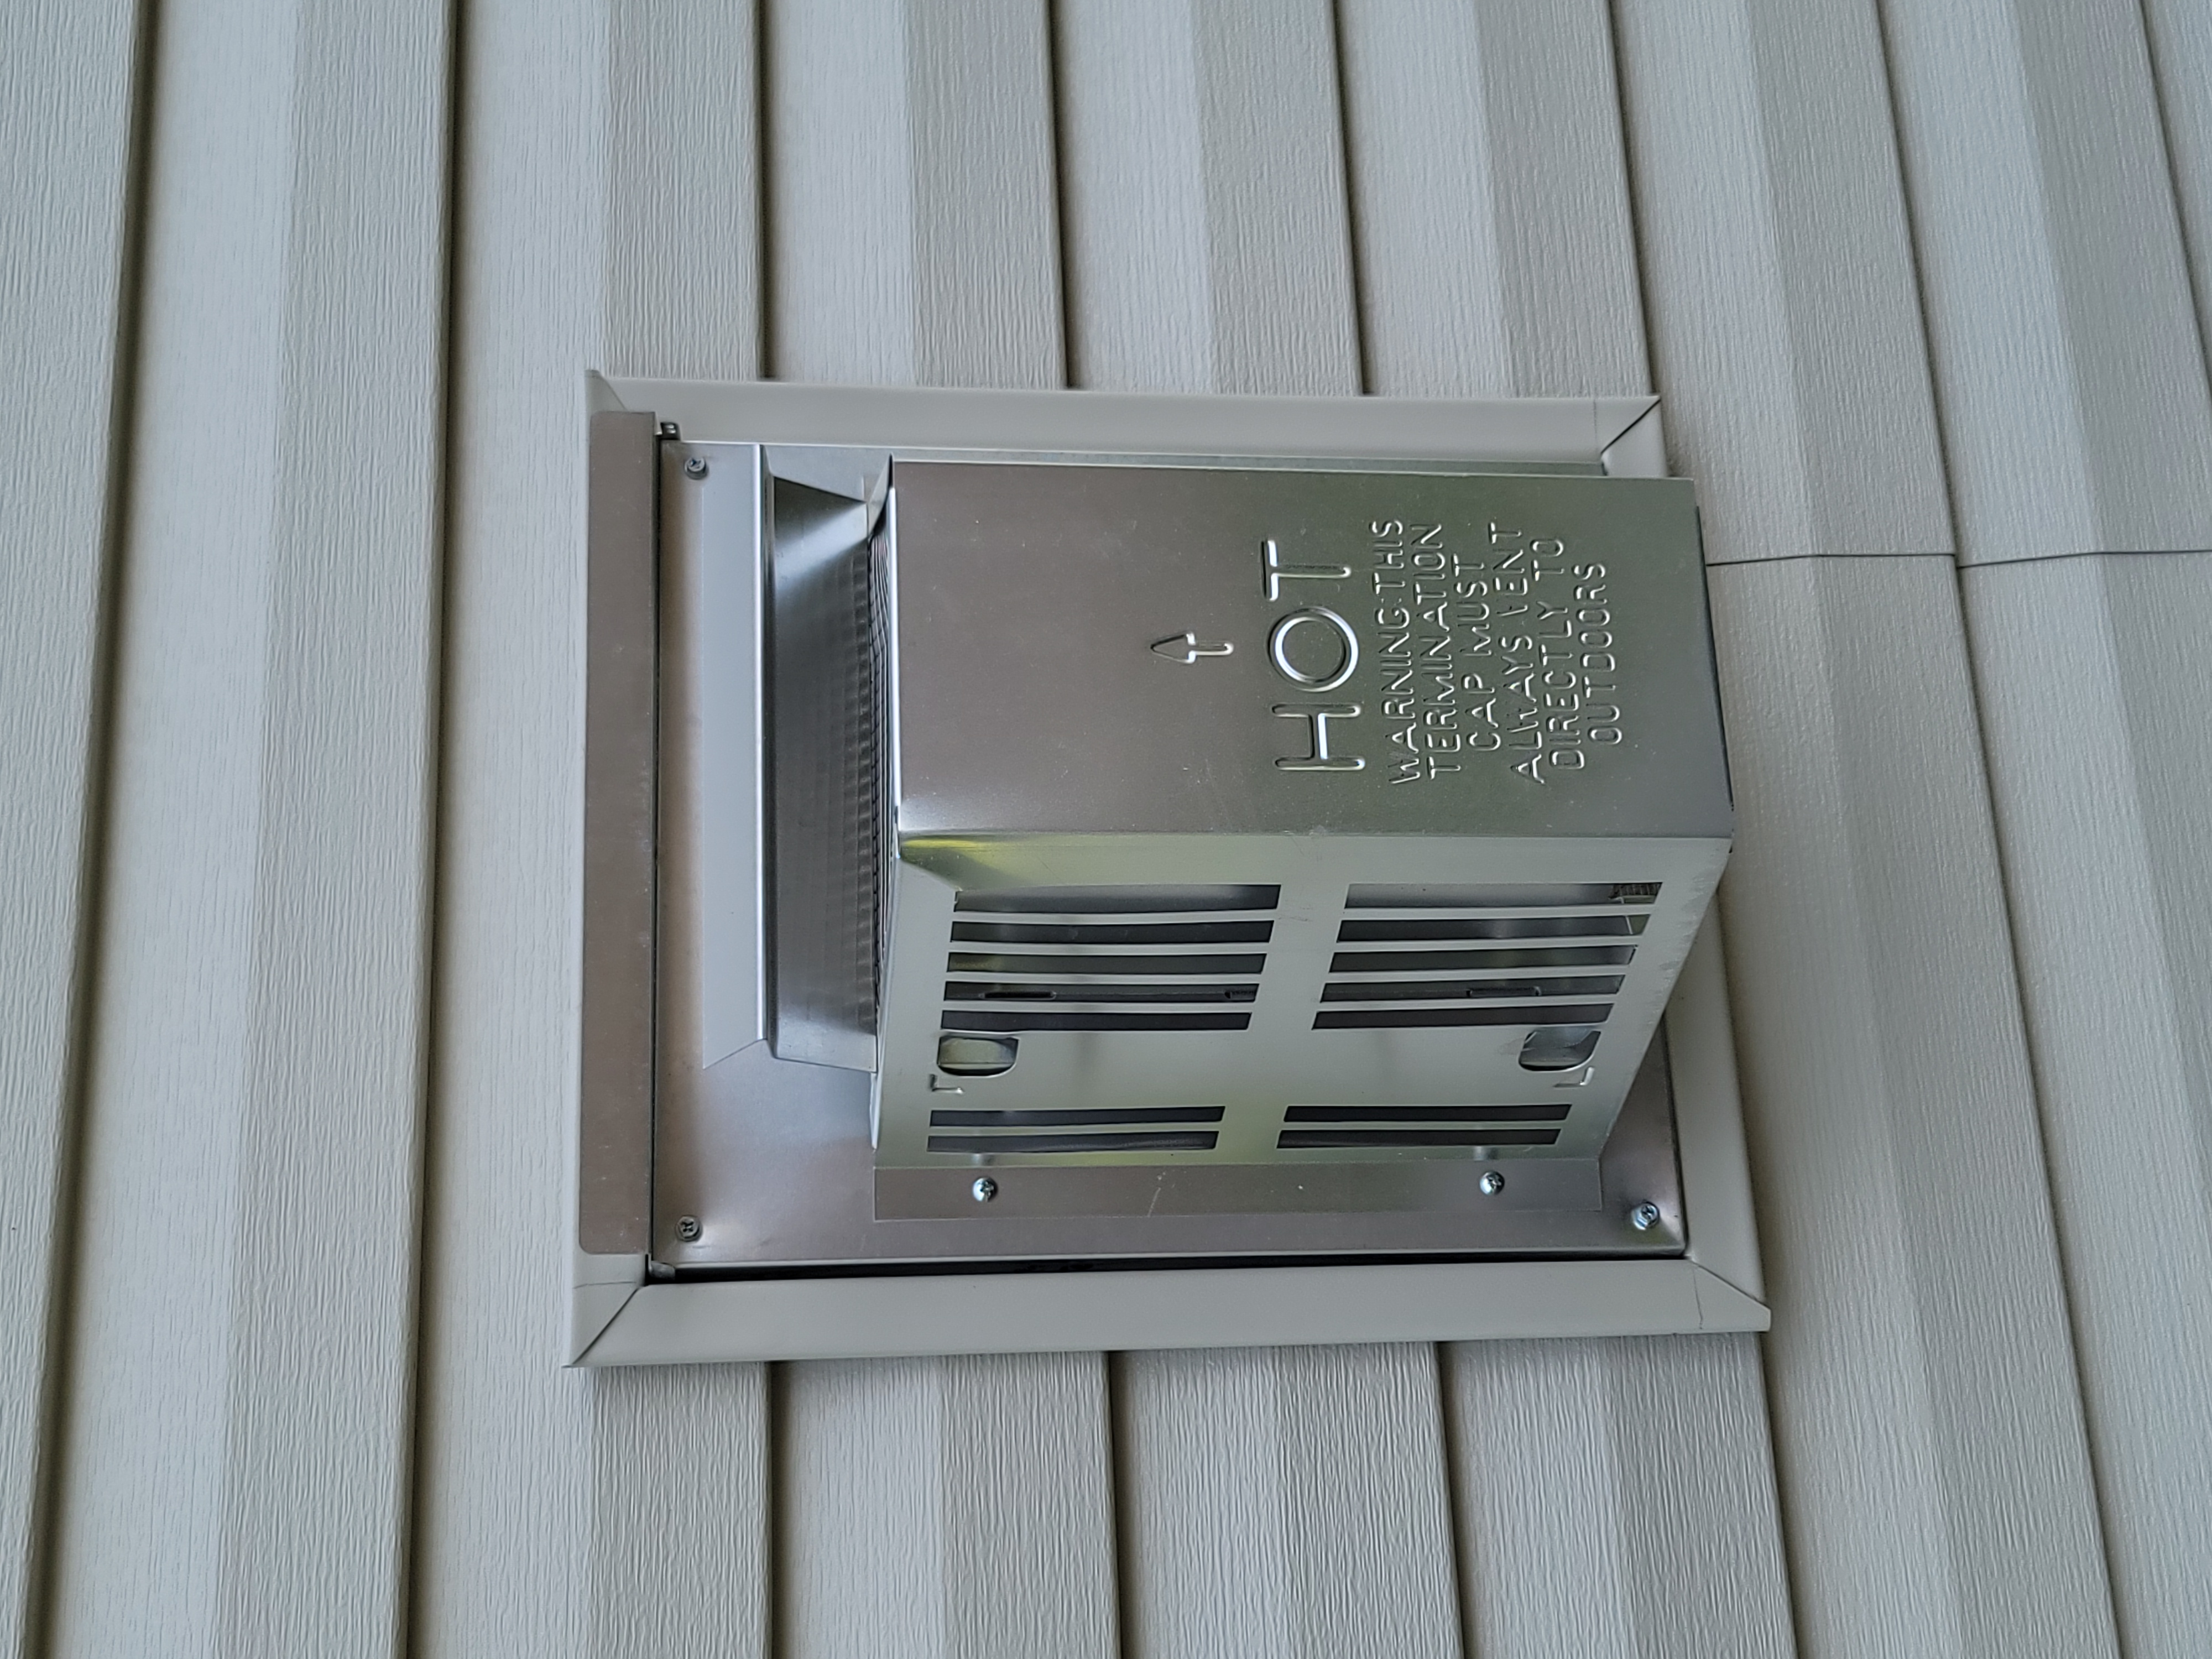
Water Heater
Water Heater ──── ────
Flue Type: Plastic Flue, exhaust discharged through wall
Properly maintain flue for safety and function.
Space Heating
Fireplace
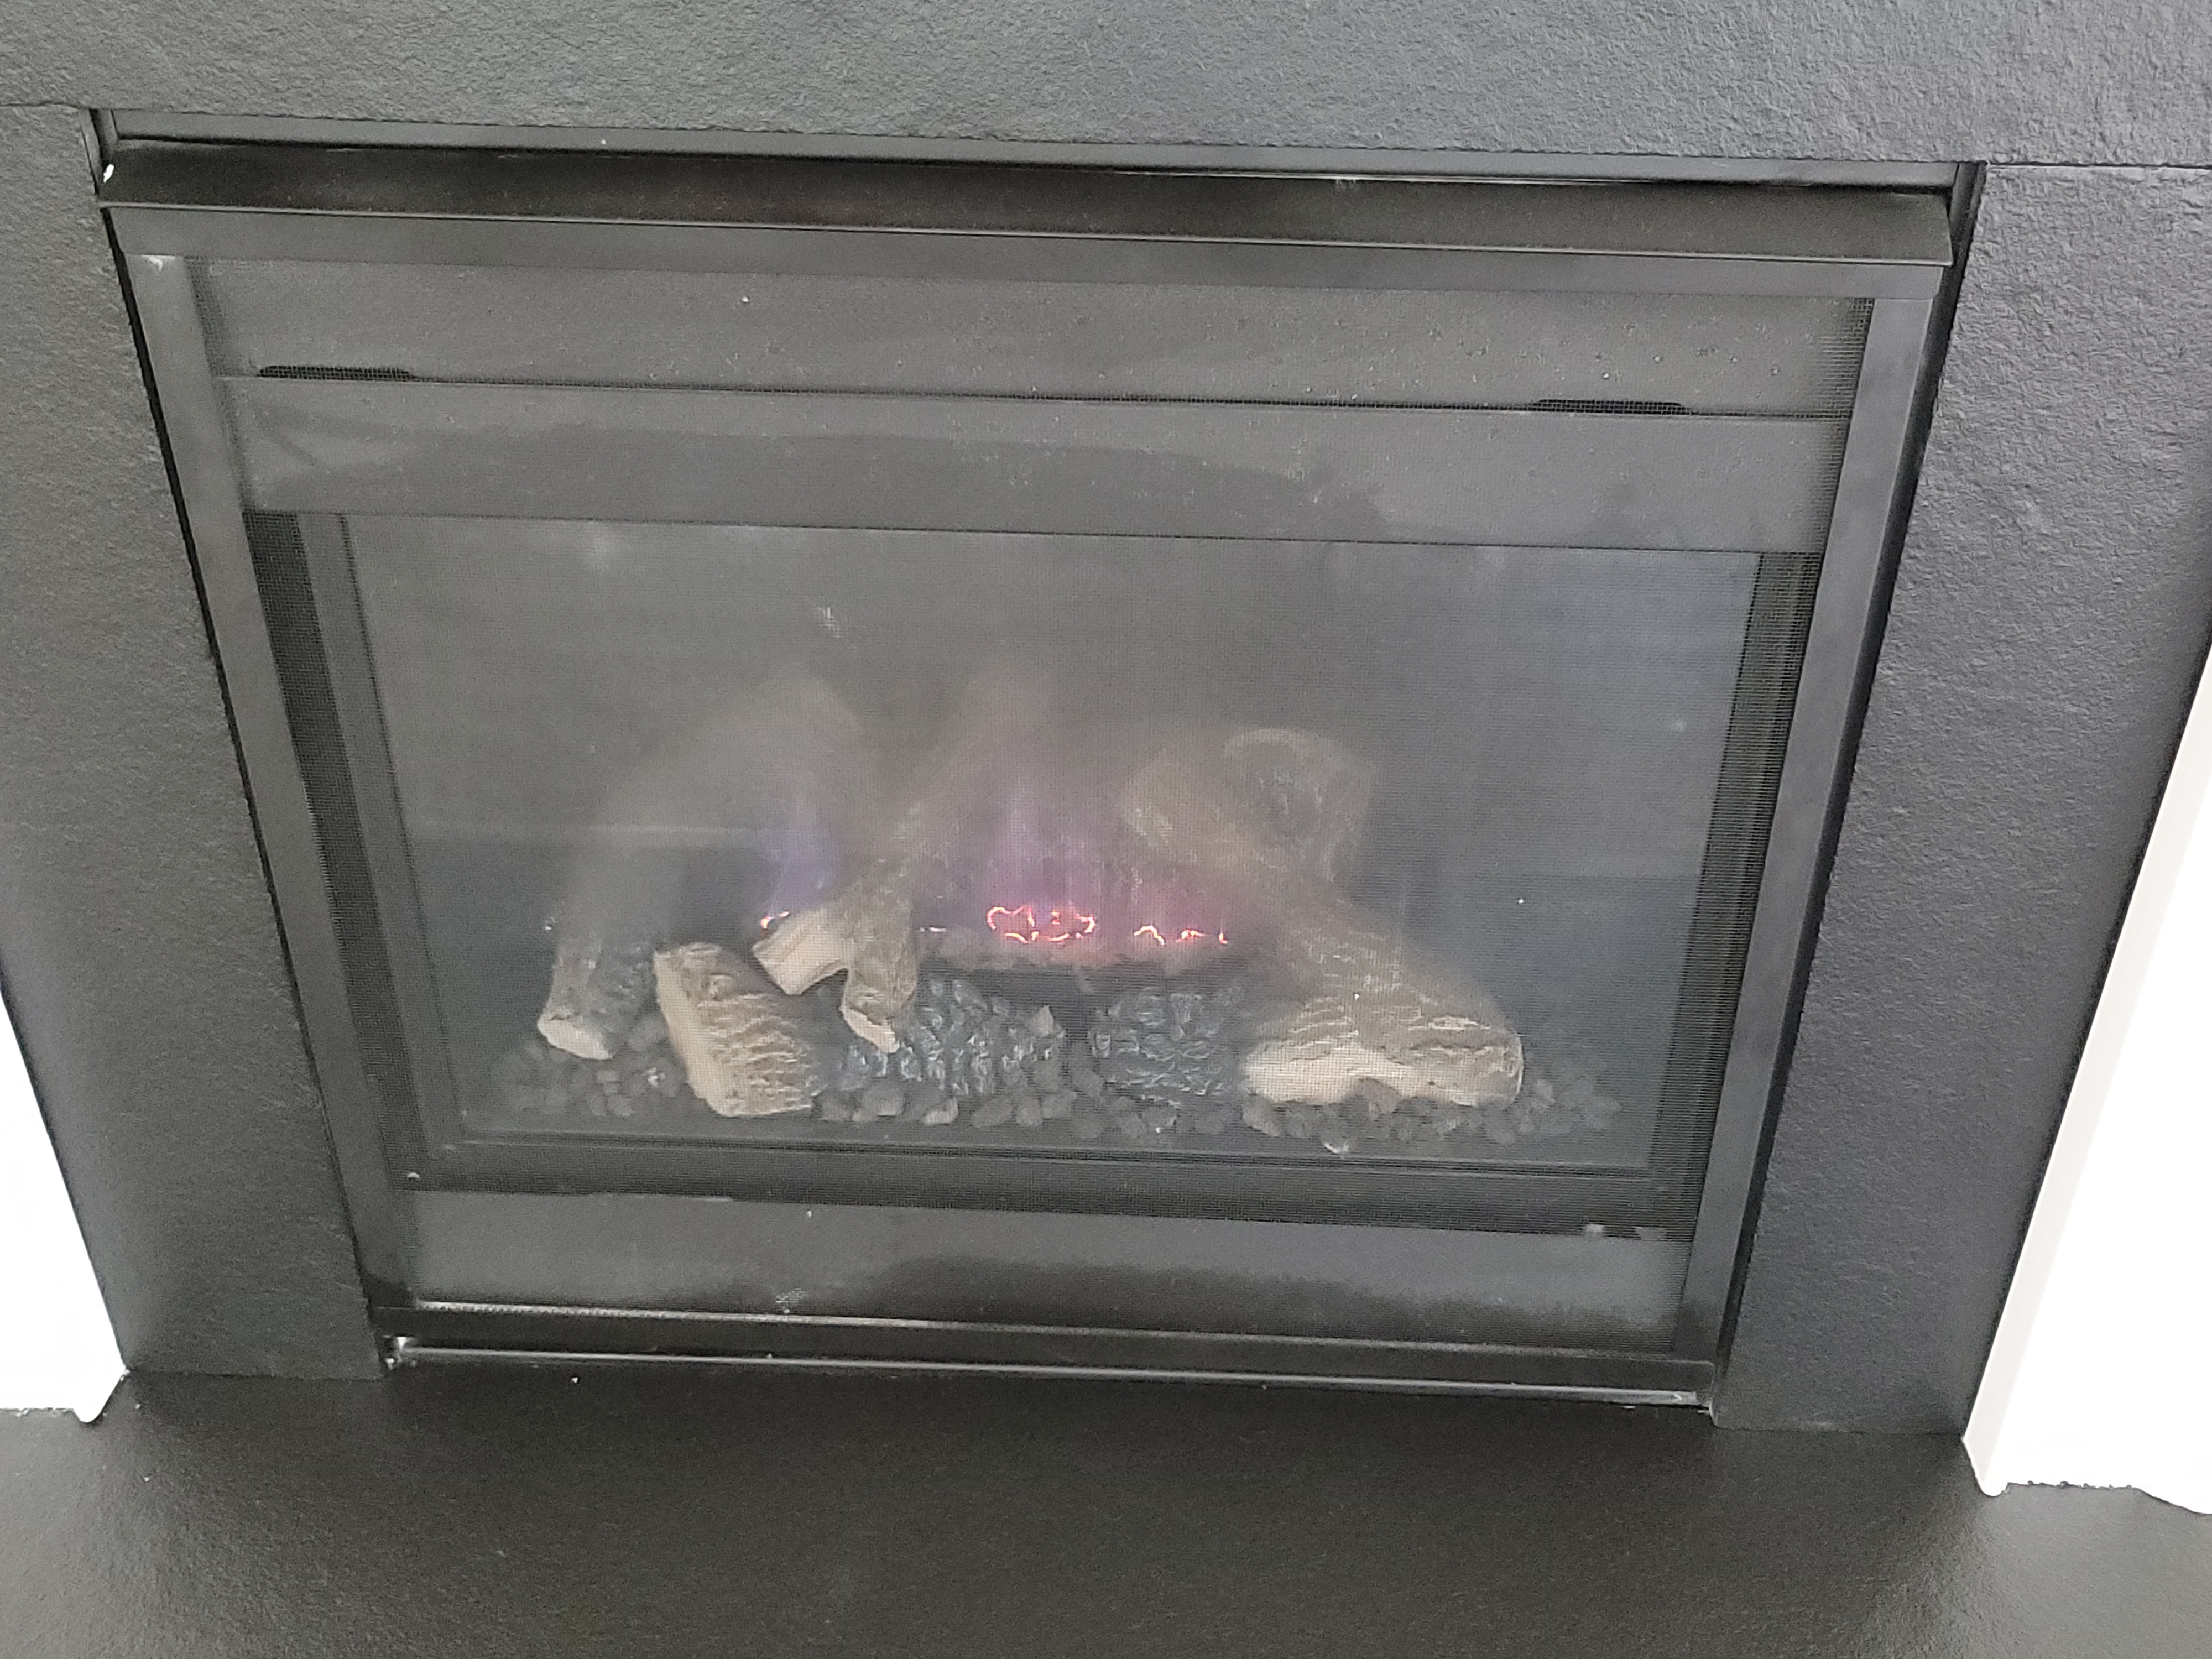
Type: Prefabricated or Manufactured Fireplace
Vented
Regarding Vented Fireplaces or Fireplaces with a Flue
This type of fireplace will exhaust directly to an exterior area in an effort to reduce or eliminate smoke, fumes and carbon monoxide build up in the interior living space areas. You should become familiar with care and maintenance procedures for any installed fireplace as some procedures will be specific to what type of fireplace is installed. If you choose not to learn about the care and maintenance requirements for the installed fireplace, you should have a competent qualified chimney specialist check and inspect the fireplace before initial use and then as directed by the chimney specialist thereafter. Properly maintain any fireplace as needed for proper function and safety.
 |
Location: Living Room
Gas Log Set Heater: Present
Gas Log Set Heater Function: Operated
The installed gas log set heater was operated using the normal controls. Gas log set heater appeared to be functional when inspected. Read and follow the operating and safety instructions for installed gas log set heater. Maintain unit as needed for function and safety.
 |
ELECTRICAL
Electrical Inspection
Electrical System Inspection
What is an electrical system?
The electrical system consists of an electrical service, distribution equipment and branch wiring. The electric metering equipment is usually at the electrical service. Distribution equipment is most often one or more installed breaker panels and the branch wiring runs to all equipment, receptacles, lighting outlets and devices such as the light switches. The inspection report focuses on wiring operating between 100-250 Volts. Most low voltage wiring is excluded from the performed inspection. Low voltage items such as a heating and cooling thermostat are operated in order to determine the function of such equipment.
There are now a wide variety of lighting bulbs or lamps that will fit into lighting fixtures. Some choices may not be appropriate for some lighting fixtures. It is beyond the scope of this inspection to verify each lamp or bulb is appropriate for the installed lighting fixture. The inspector recommends that you review the bulb or lamp installations for each fixture correcting as needed for safety and function. Common errors include 100 watt bulbs installed in fixtures rated for 60 watt max bulbs and interior rated bulbs installed at exterior or damp locations. Other types of errors also exist.
The following opinion was based on an inspection of the readily accessible and visible portions of the electrical system. The Inspector is responsible for checking a representative number of installed lighting fixtures, switches, and receptacles. Electrical installation conditions and functional issues requiring correction should be performed by a competent licensed electrical contractor. Most, if not all, electrical corrections should be considered a safety concern.
ELECTRICAL SERVICE
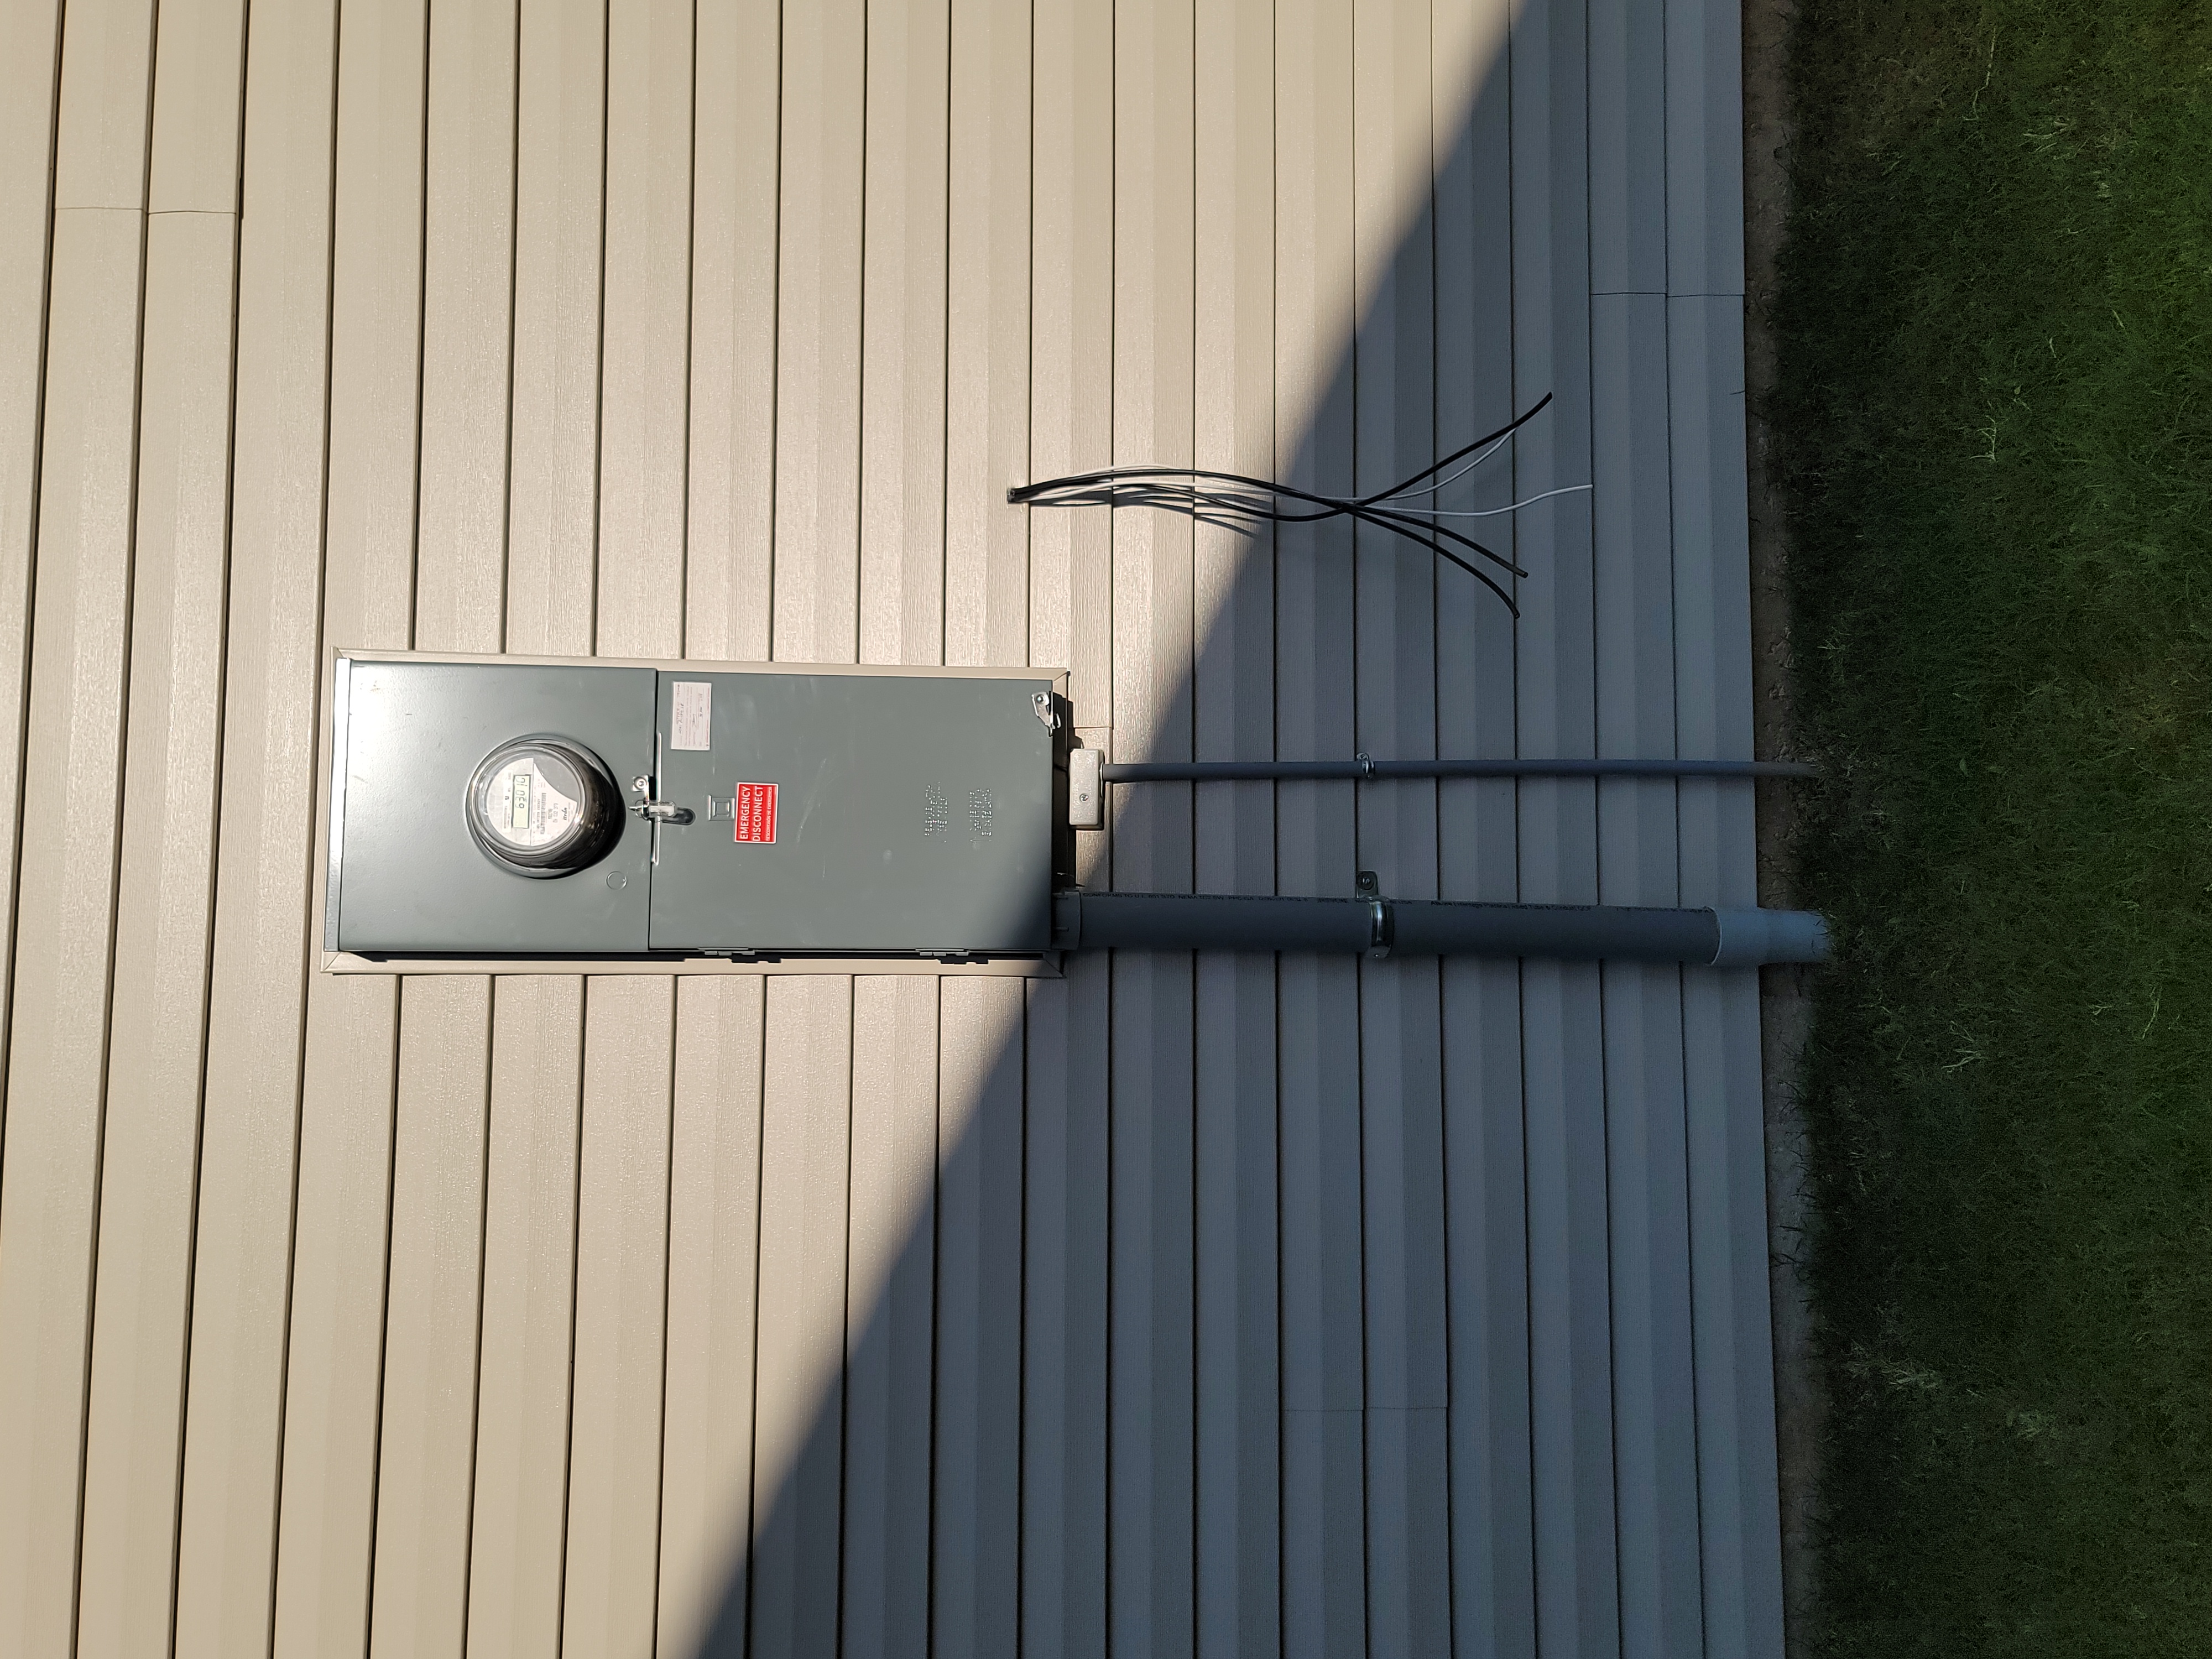
Electrical Service Type: Underground, Representative Photo
Electrical Service Representative Photo
 |
System Amps / Volts
System Amperage: 200 Amps
System Voltage: 120/240 Volts
MAIN PANEL
Location
Main Breaker Panel Exterior at Meter ────
- Breaker panel shown with cover removed by inspector.
 |
Panel Inspected
The electrical panel cover was removed from the electrical distribution panel. The interior components were viewed and found to be in satisfactory condition and appeared to be properly installed. No repairs were needed to electrical panel or interior components when inspected.
SUB PANEL
Location
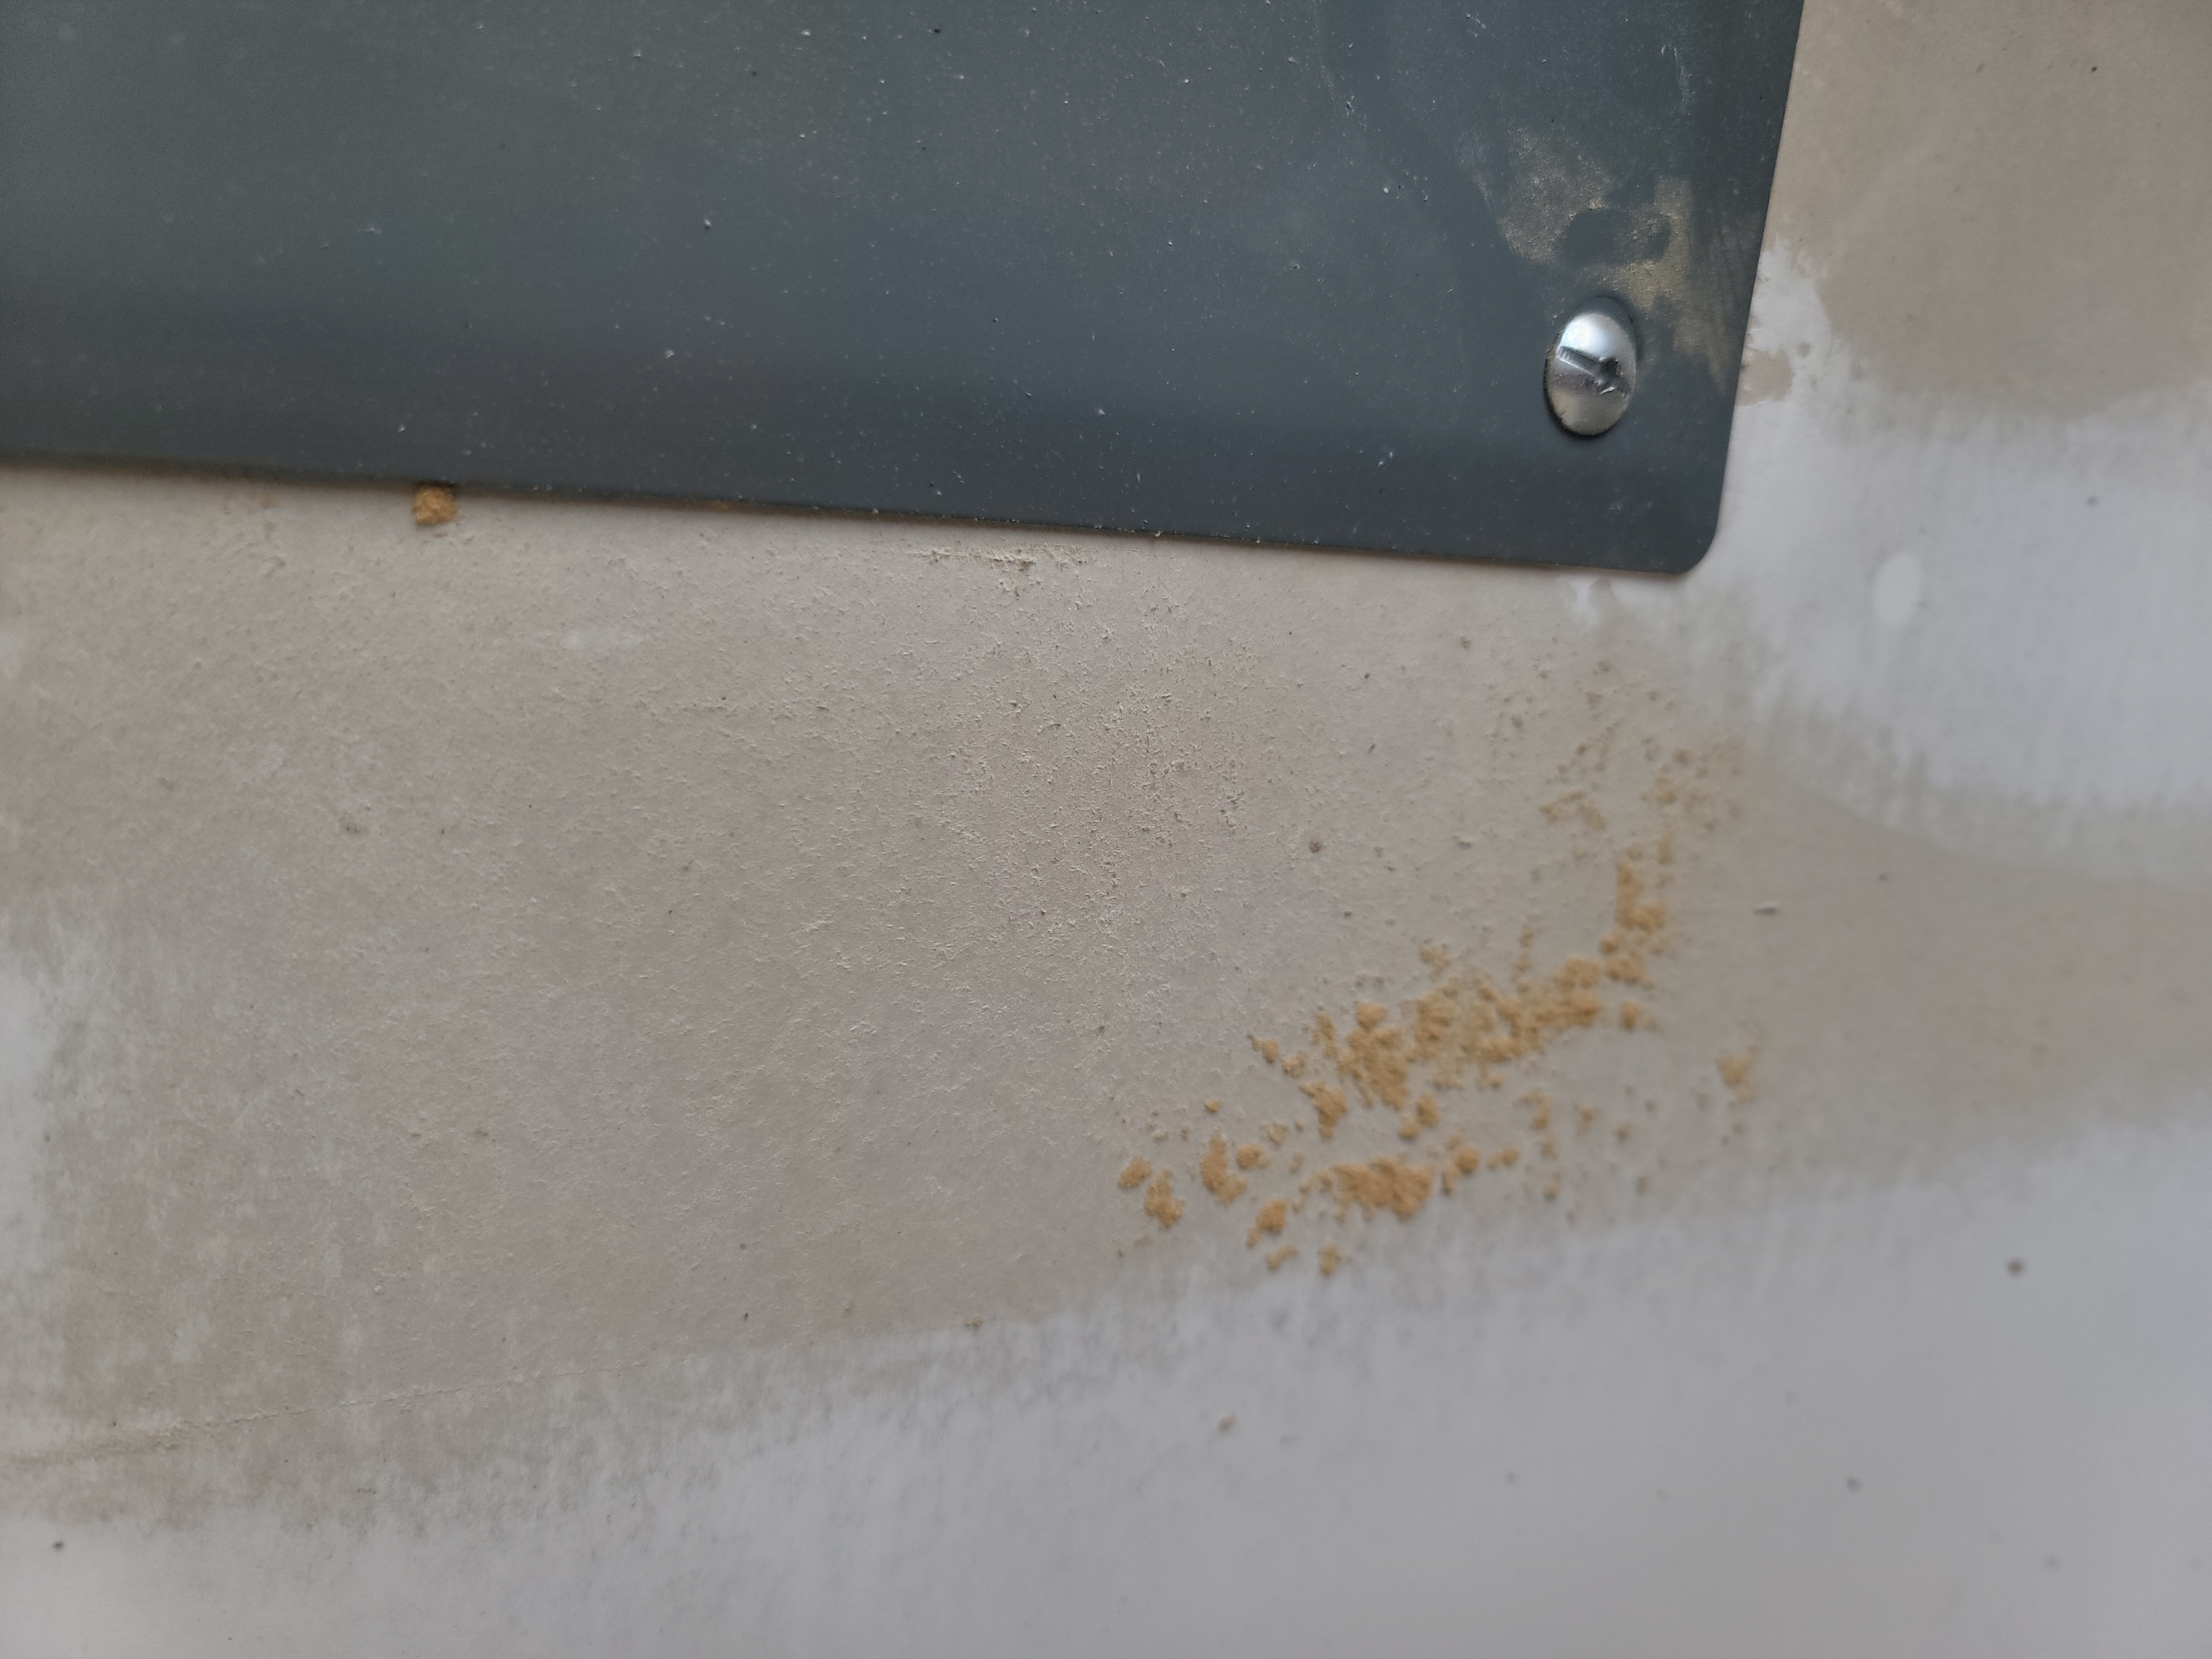
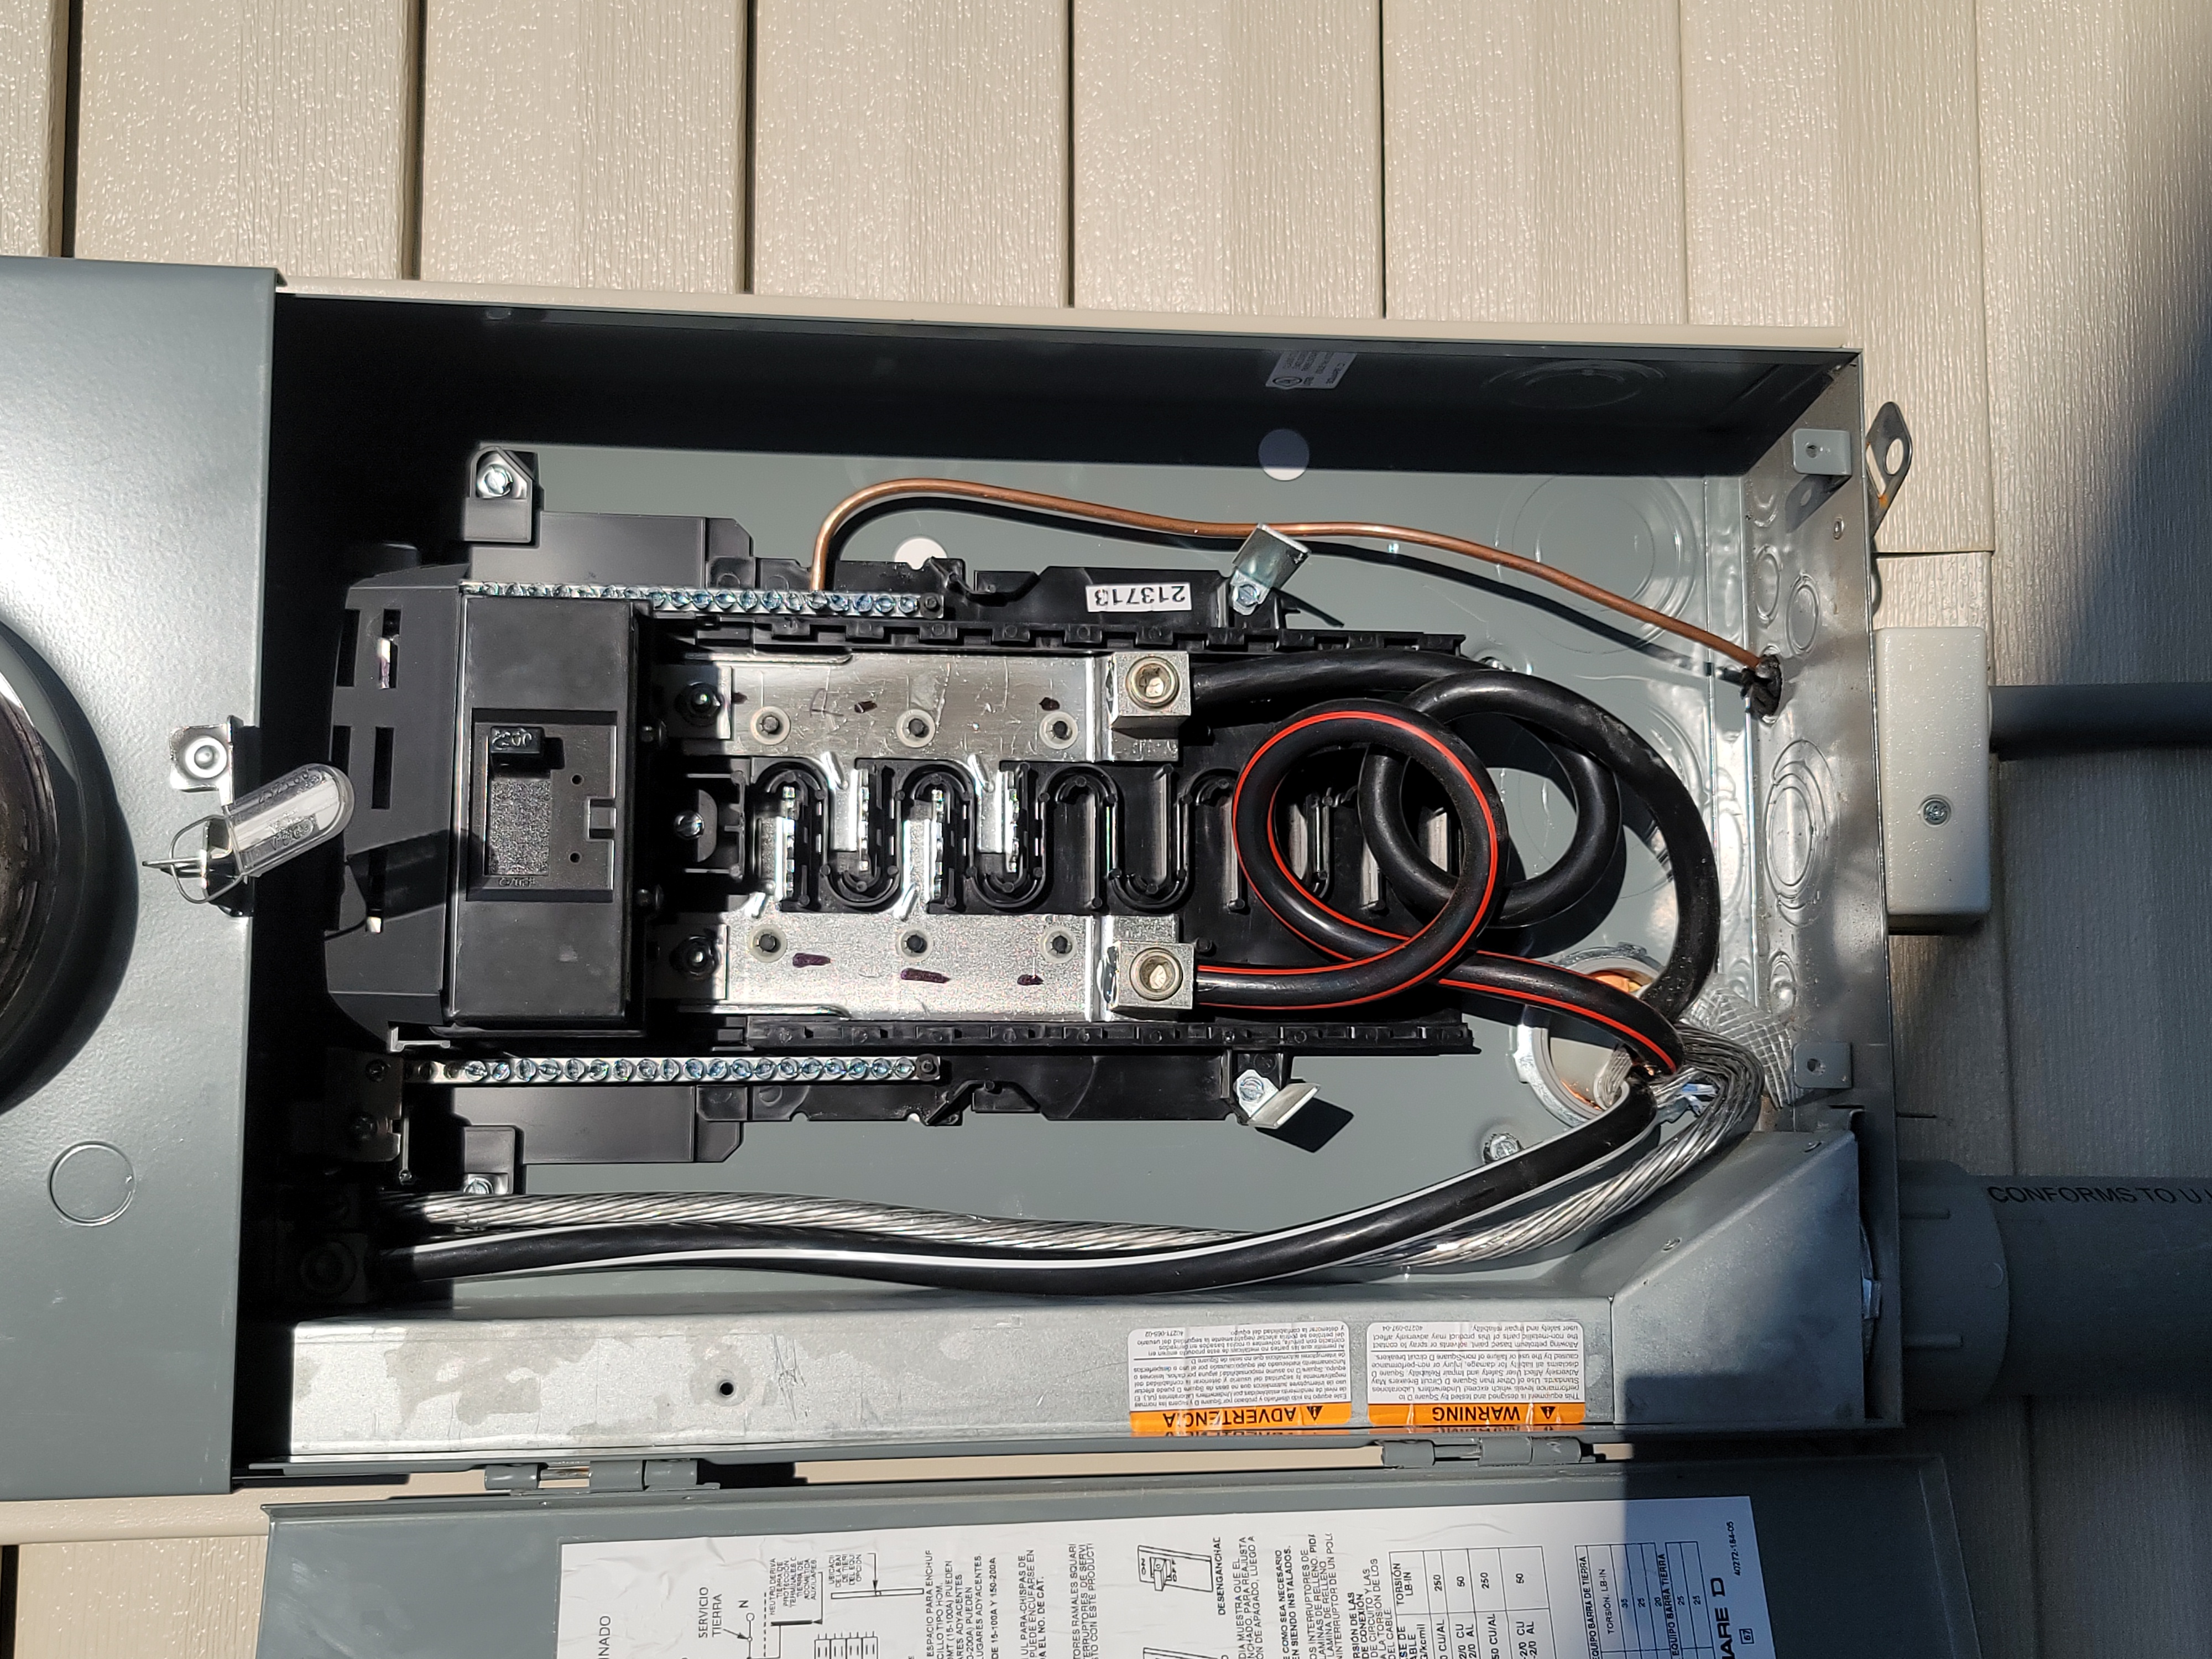
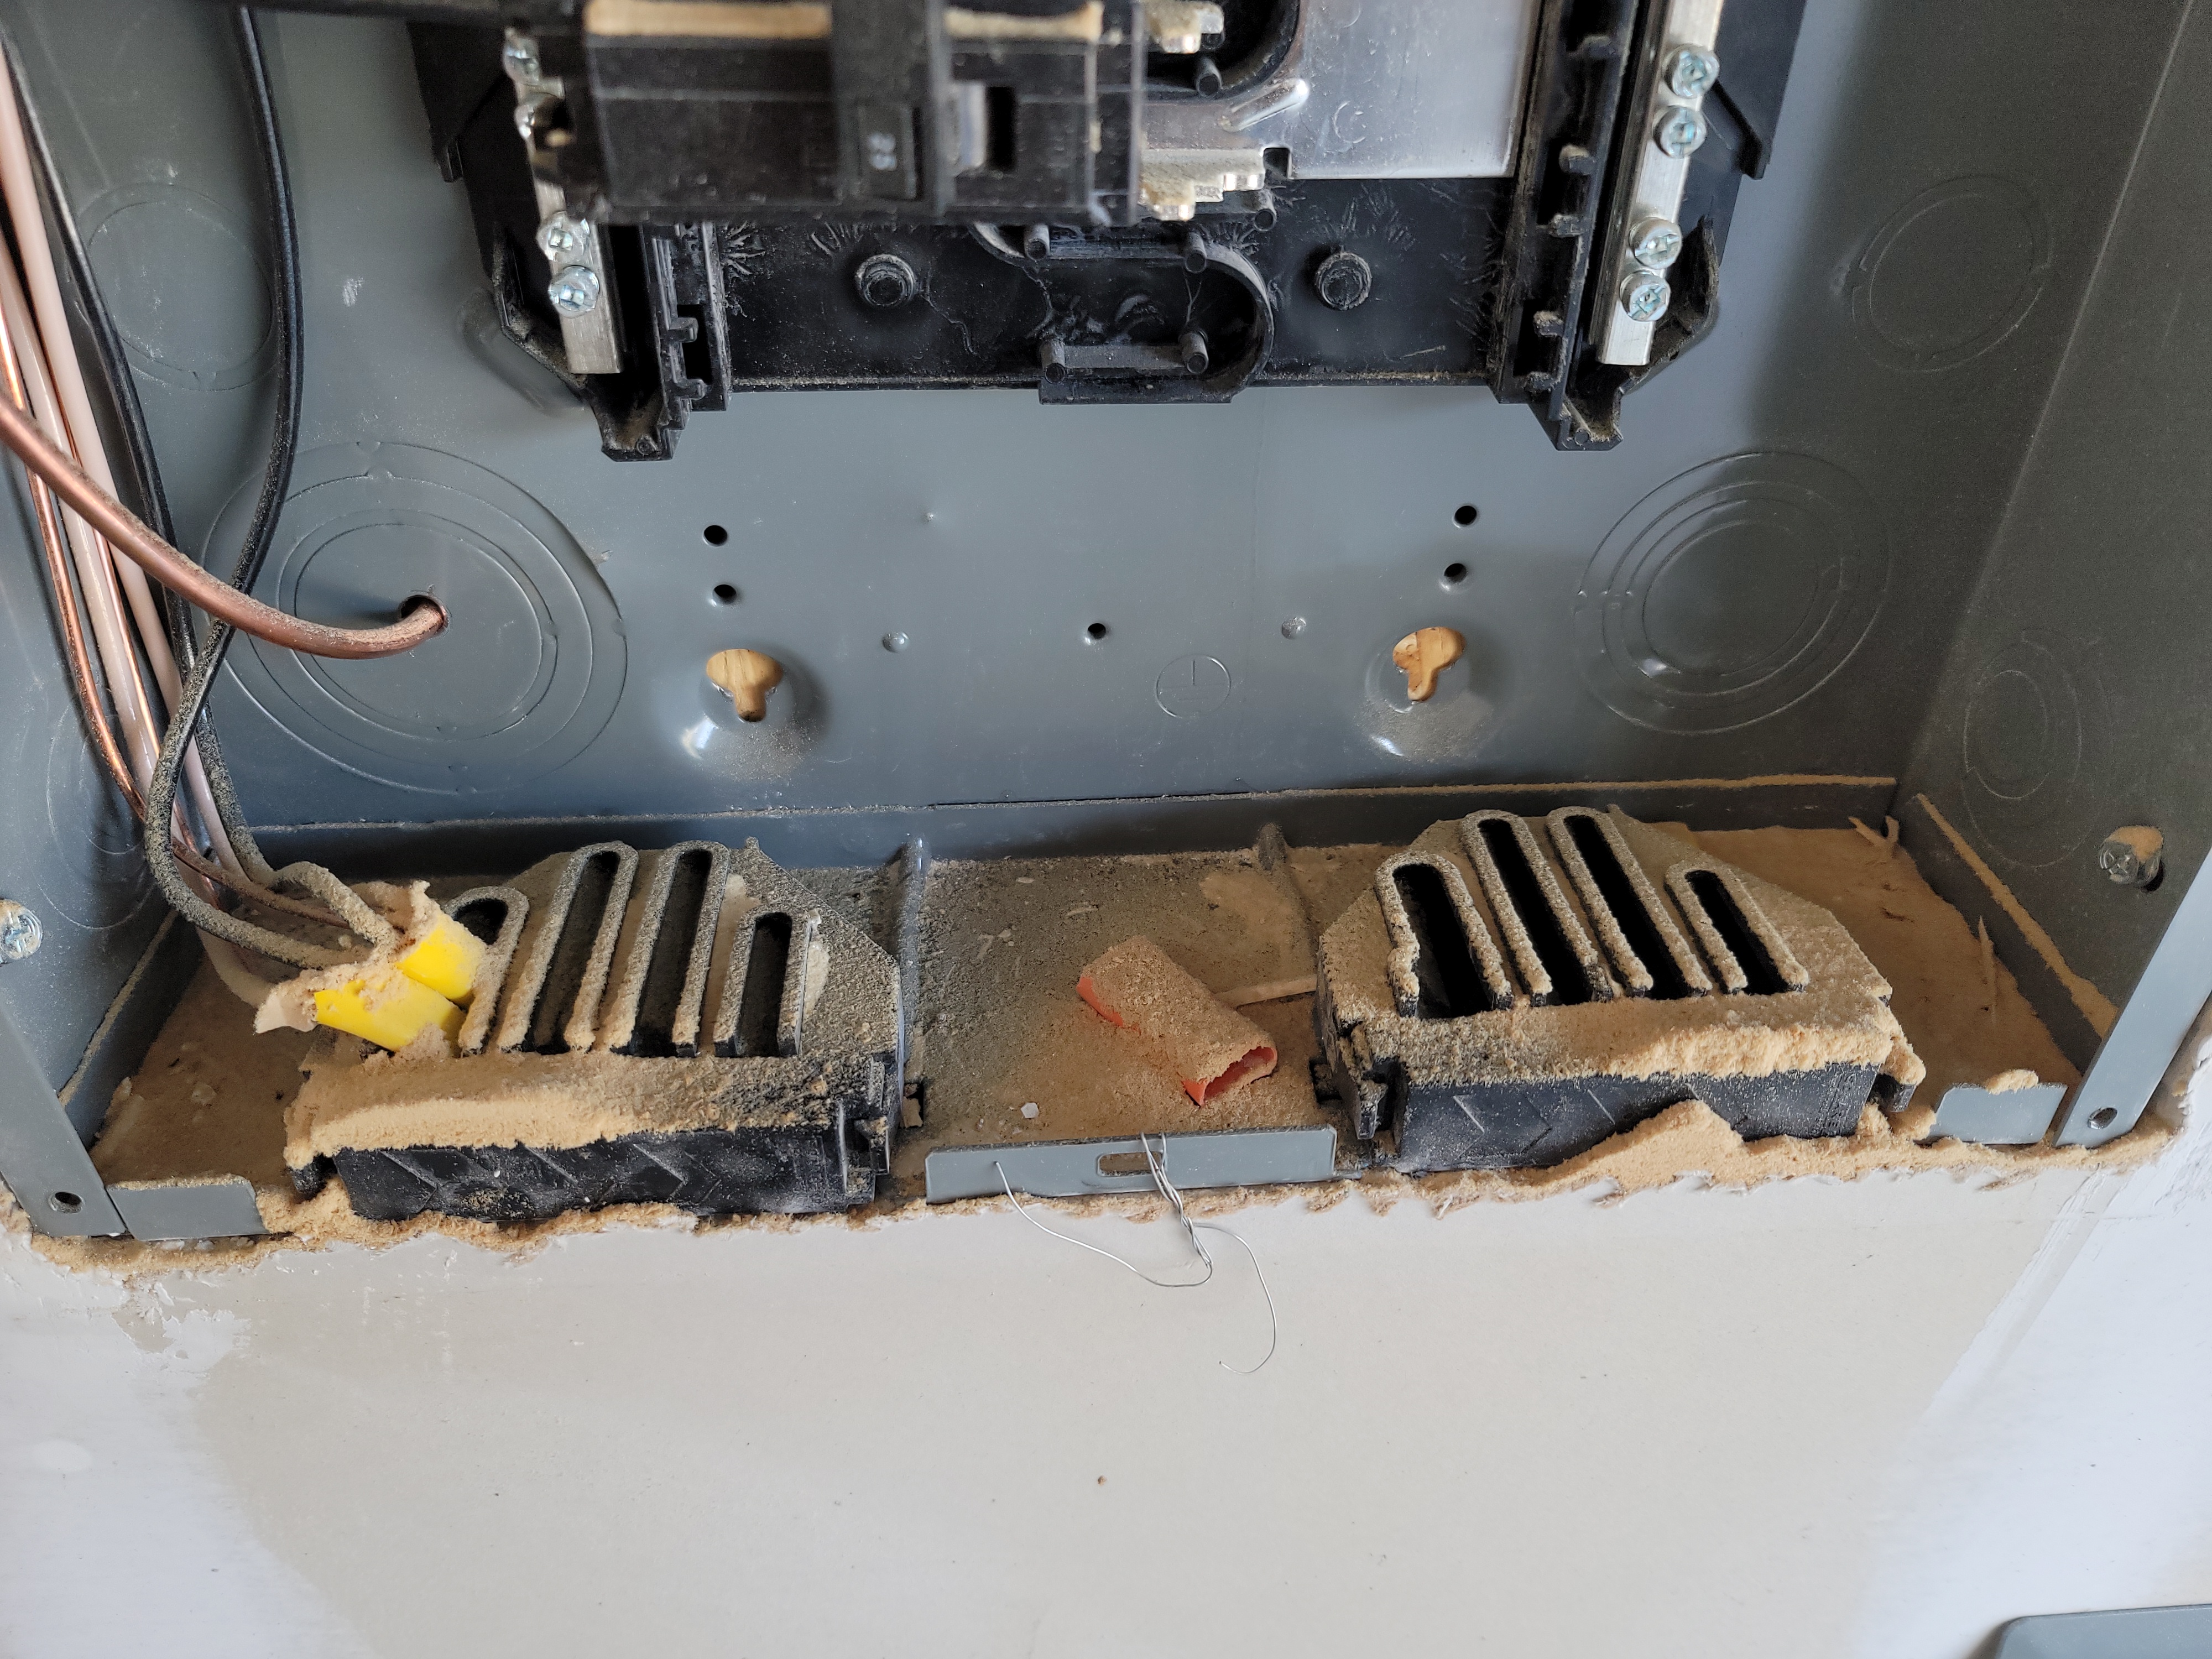
Sub Breaker Panel Garage ────
- Breaker panel shown with cover removed by inspector.
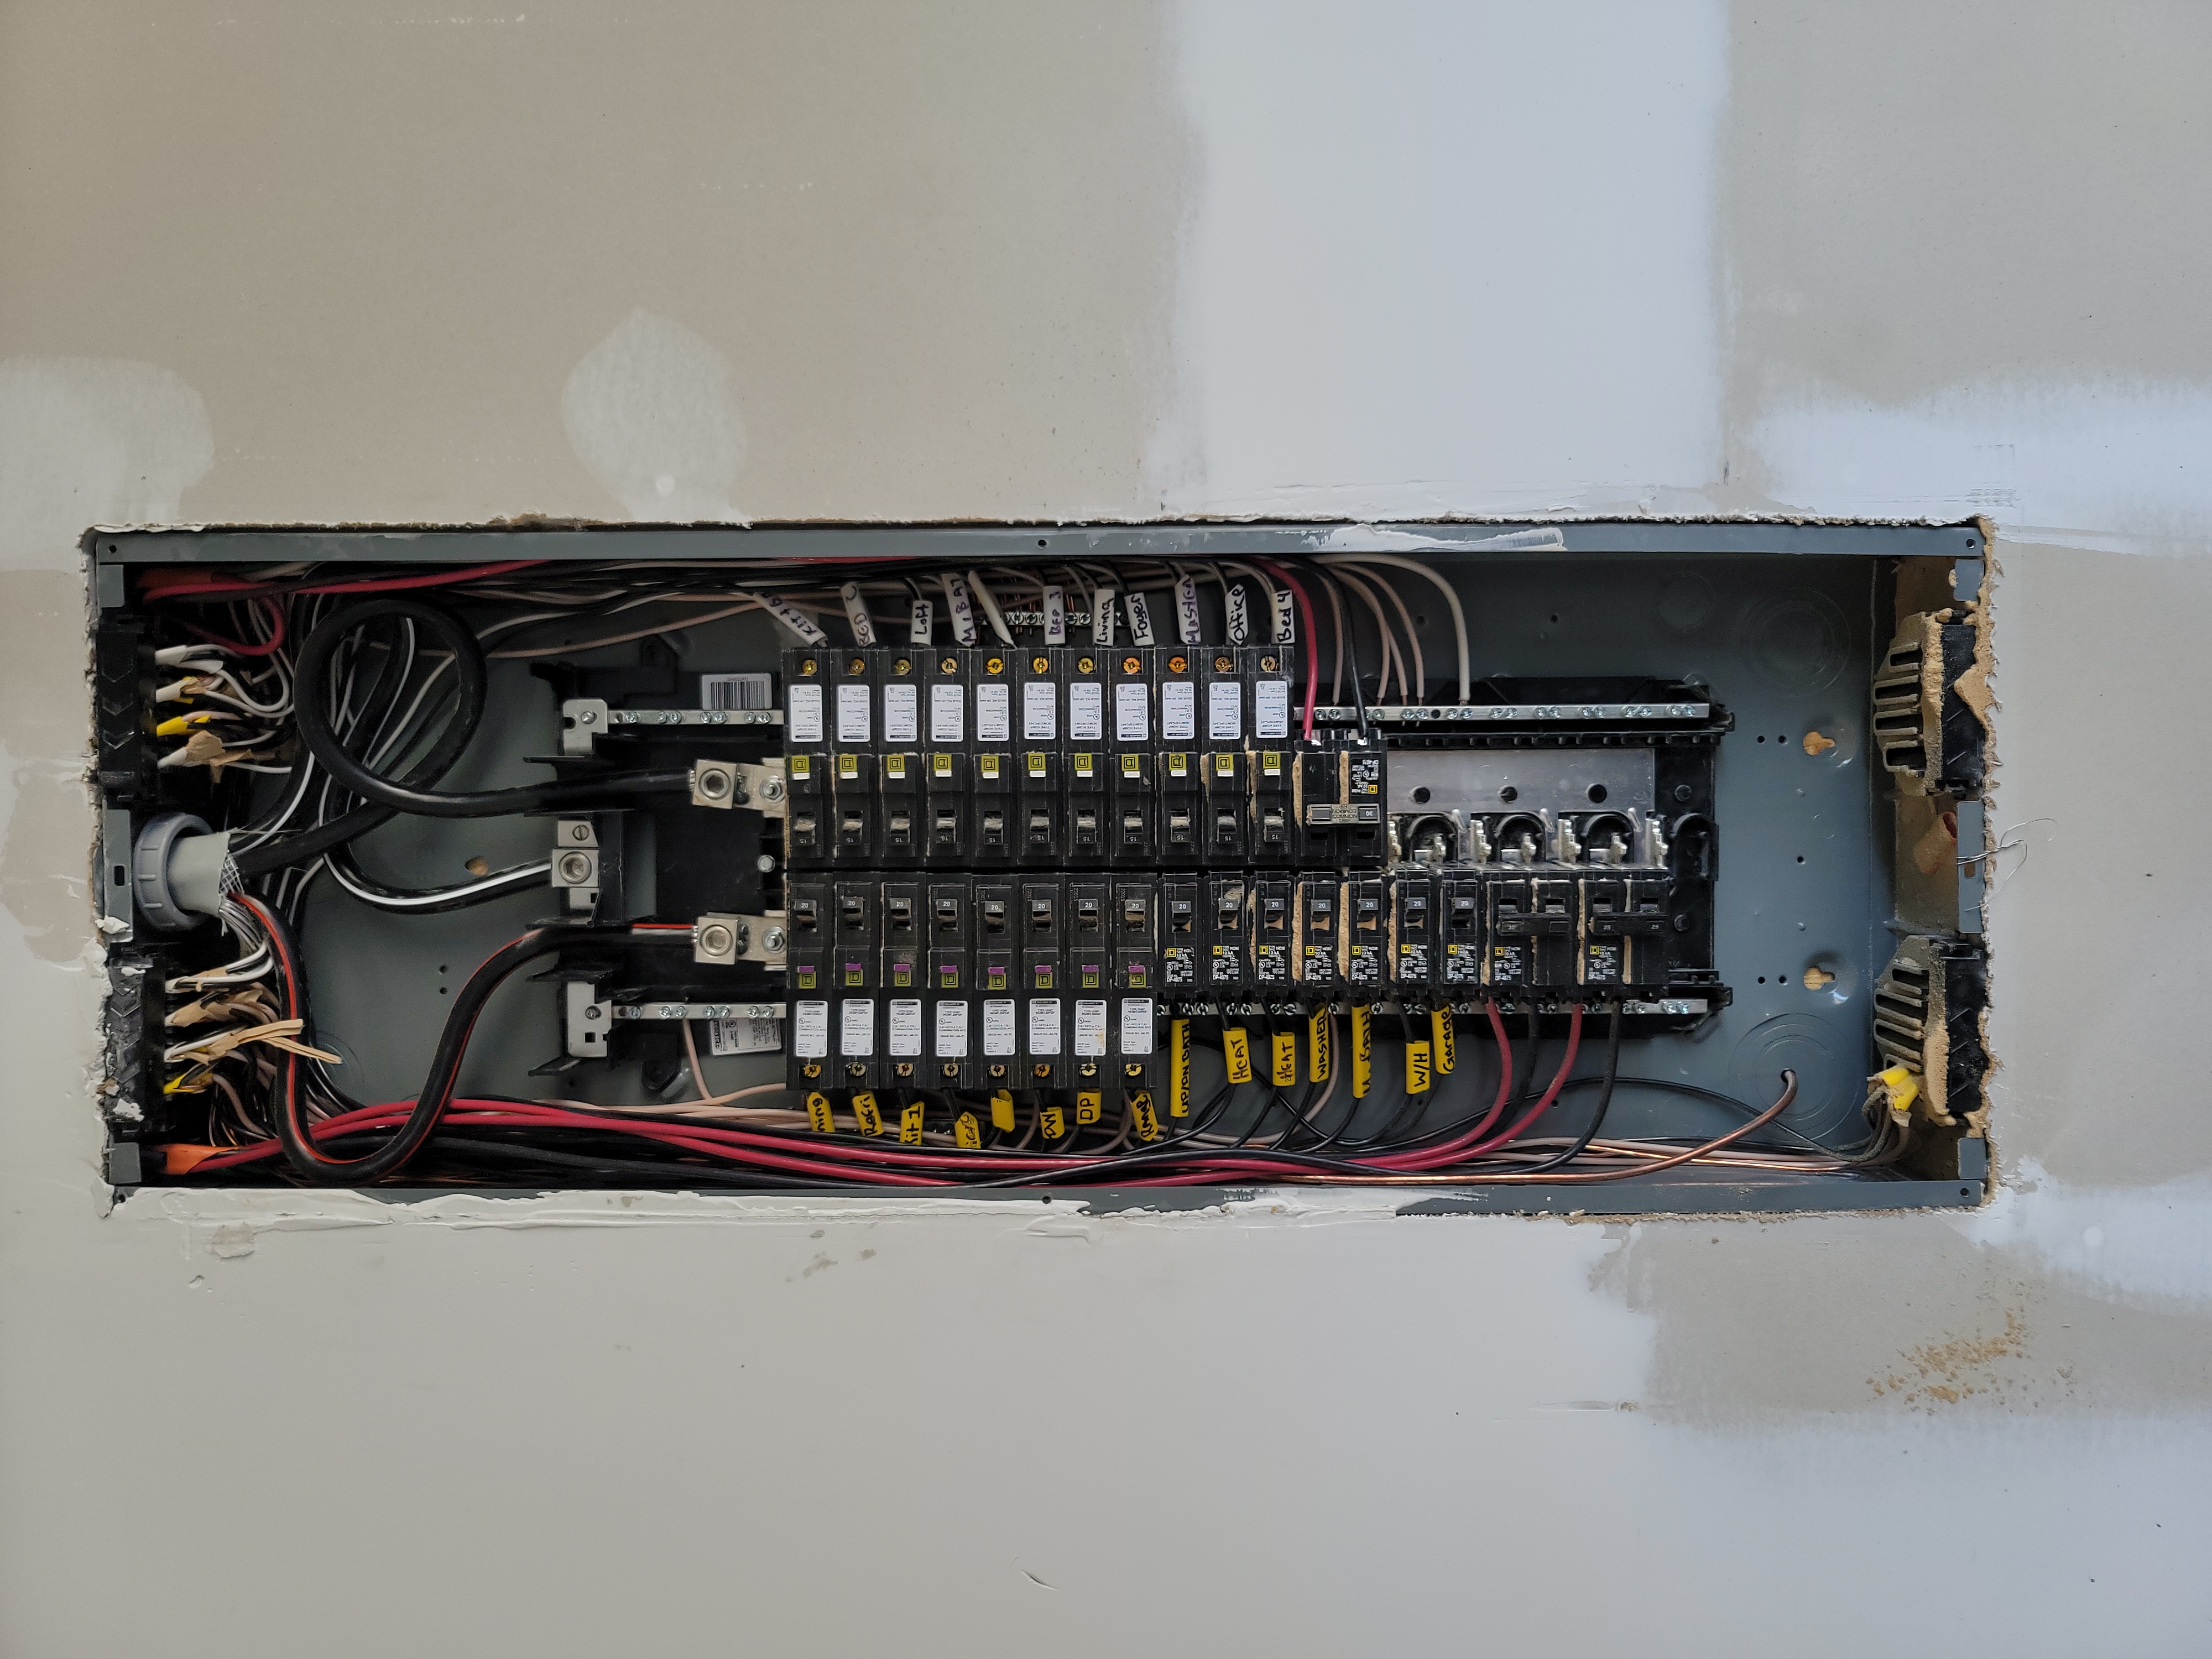 |
Index: Differentiate, Index, Index appeared inaccurate.
No two electrical circuits should be labeled the same. Differentiate circuit labeling where needed.
.jpg)
.jpg)
Properly index or label each electrical panel circuit as needed for clarity and safety.
- Breaker identified as 'Refri' did not serve the refrigerator location.
Breaker: Breakers Off Multiple
Multiple breakers observed switched off, correct as needed.
.jpg)
.jpg)
Sub Breaker Panel Garage ────
Corrections were needed at electrical distribution panel. Make proper corrections as needed for safety and function now. Refer to the full report for additional information and photos regarding obvious corrections recommended for this electrical panel.
Branch Wiring
Material: Copper
Wiring Method: Non Metallic Sheathed Cable
AFCI
AFCI Breakers OK
AFCI breakers, where installed, were tested using the push button on the breaker. The breakers appeared to trip and reset normally. Check AFCI function periodically as directed by AFCI manufacturer. Correct when needed.
GFCI
GFCI Receptacles OK, GFCI Breakers OK
Using a ground fault circuit interrupter tester, GFCI protected electrical receptacles, where installed, were checked and indicated proper function.
GFCI breakers, where installed, were tested using the push button on the breaker. The breakers appeared to trip and reset normally. Check GFCI function periodically as directed by GFCI manufacturer. Correct when needed.
Receptacle Outlets
Loose
Electrical Receptacle Outlets ────
One or more electrical receptacles were observed loose. Properly correct any loose electrical receptacles where needed for safety.
- Receptacle was loose serving kitchen counter.
Lighting/Ceiling Fans
Lighting OK
A representative number of installed lighting fixtures were observed and appeared to be functional and generally serviceable within the parameters of their given service life.
Switches
Switch Location Informational Note
Regarding Lighting Switch Locations:
While exact placement of lighting switches is considered a design issue, installing lighting switches at appropriate locations is useful to improve safety. Generally, a light switch would be located within arms length of the entry point of a room so that the lighting for the room you are entering may be switched on from an area near the doorway. Installing a switch at an inconvenient location, such as on the hinge side of a door, would not be desirable. Where the stairway between floor levels has six risers or more, a wall switch would be located at each floor level and at each landing level that includes an entryway to control the lighting for the stairway. Evaluate your need in regard to lighting switch locations. Consider updating switch locations for improved safety if desired.
Switches Erroneous
Switches
Inspector was unable to determine function of all switches present. Switches may operate flood lights, receptacles or other item. They may also be an unused extra switch.
Smoke Alarms
Test Weekly, Tested Function
Regarding Testing Smoke Alarms:
Test smoke alarms weekly to ensure proper function for life safety. Replace batteries when needed. Properly replace smoke alarms when not functioning correctly and at least once every ten years. Smoke alarms should be at least the photoelectric type and dual sensor photoelectric and ionization smoke alarms are available, and preferred. Refer to installation and care instructions for proper locations and periodic maintenance.
Smoke alarm at bedroom was tested using the test button on the smoke alarm. Smoke alarm horn sounded when the test button was pressed.
ATTIC LADDER
Installation / Condition
Location of Attic Ladder: Upper Floor
Overall Condition: Attic Ladder Correct Before Use
Box Frame Connection To Structure: Nails Missing Spring Arm Pivot Plates, Excess Gap Box Frame to Structure
Pull down attic ladder stairway was missing required 16d nails at metal brackets. Check both spring arm pivot plates. These should be properly nailed in place to help prevent collapse of stairway.
.jpg) | .jpg) |
The gap observed between the structural framing and the pull down attic ladder stairway box frame appeared greater than expected. Proper correction is needed to help prevent collapse of stairway.
- Gap between structure and attic ladder box frame was much greater than 1/4".
.jpg) |
Attic ladder was observed ready for corrections now and before use to improve the function and safety aspects of the attic ladder. Refer to the full report for additional information and photos regarding obvious corrections recommended now for the attic ladder area. A competent qualified contractor capable of reading and following the manufacturer installation instructions should check all attic ladder areas. Make attic ladder functional, safe and structurally sound where needed.
STRUCTURE
Attic Access
Pull down attic ladder stairway, properly maintain unit as needed for safety
Attic Access: Floored
Attic area viewed from areas where secured, floored, continuous, walkway was present. Some areas of attic may not have been viewed.
Roof Framing
Framing: Trusses, Wooden
Sheathing: OSB
Truss Framing: Trusses Are Engineered, Mixed Framing, Sheathing Missing
Truss systems are designed, engineered framing systems that are comprised of multiple components. Truss systems are accompanied by specific installation instructions that should be closely followed. Installation instructions are rarely available during a property inspection. Review of instructions, if available, is not part of the inspection performed. Obvious, visible defects are listed in the report, when encountered. Properly maintain truss system to meet your needs.
Dimensional (two by type) lumber roof framing and Engineered truss roof framing were observed used together to frame the roof system. Engineered lumber manufacturers discourage this practice as the different types of materials react differently to moisture and temperature changes. As it is not cost effective to correct after construction, the area should be monitored correcting as necessary in future, if needed.
 |
Roof sheathing appeared missing at some trusses where roof covering was not present. Truss manufacturer instructions typically call for sheathing even if roof covering is not to be installed. Monitor area budgeting corrections if condition worsens or if undesirable settlement occurs.
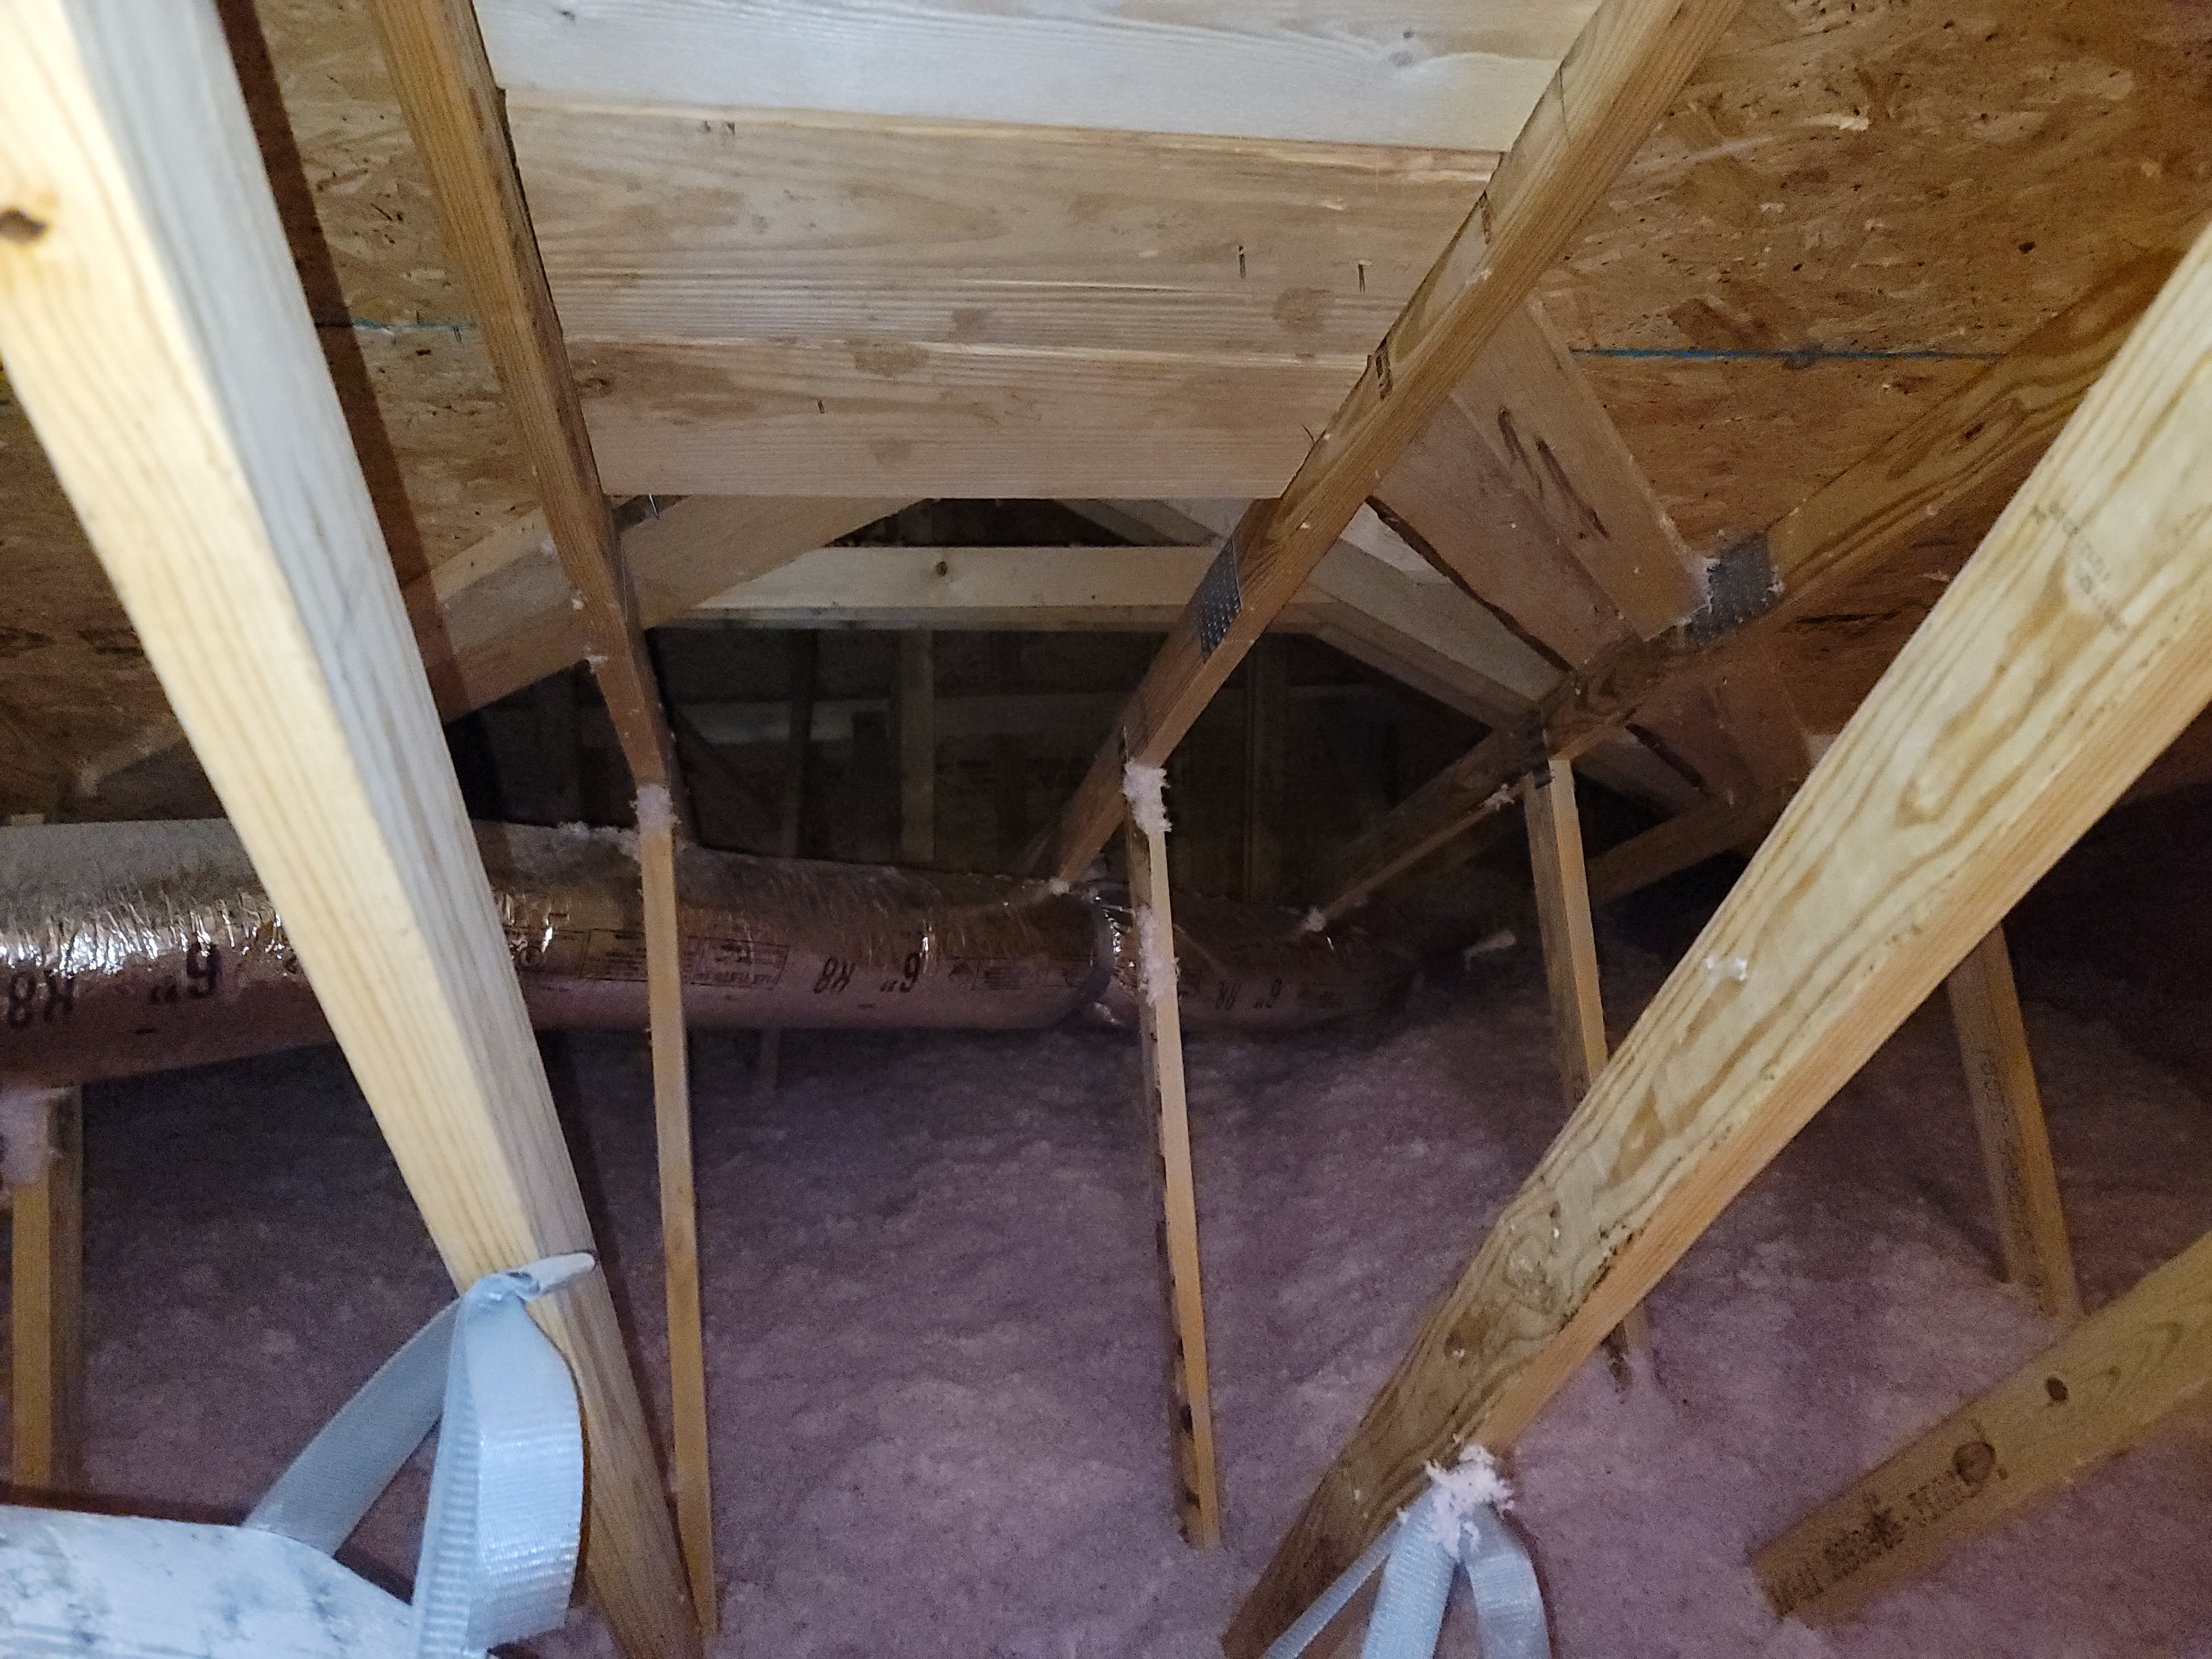 |
Damaged Engineered Roof Truss was observed unrepaired. Obtain further evaluation to verify all areas where damage is present. Contact truss manufacturer or other State Licensed Professional Engineer to design appropriate corrections. A competent qualified contractor should execute engineering design where needed. Retain stamped engineering design drawing for your permanent records.
- Damaged, unrepaired roof framing truss observed above floored attic area near attic ladder.

Damaged Engineered Roof Truss appeared to have some repair. Verify a Stamped Engineered drawing was prepared detailing how any such damage should be properly repaired. Verify any truss repairs made were completed according to Stamped Engineered repair drawings. Retain a copy of the Stamped Engineered repair drawings of any repairs made for your permanent records. Contact truss manufacturer or other State Licensed Professional Engineer for further evaluation if any truss repairs were not engineered or if engineered repair documentation is unavailable.
- Truss observed damaged at right rear attic area. Verify repair was properly engineered or properly correct as needed now.
.jpg) |
Roof Framing
Coordinate roof framing corrections needed now in conjunction with roof covering corrections needed now.
- Roof decking and subsequent shingles were not laying flat at right rear roof area. Damaged truss was visible at area.
Review of roof truss installation instructions is recommended.
Truss designs are prepared by State Licensed Professional Engineers that specialize in structural framing. Truss manufacturers require that their installation instructions be followed for warranty purpose and to help prevent unnecessary settlement of the structure. Conditions were observed that warrant a proper review of the truss installation instructions that were prepared by the truss manufacturer. Make proper corrections, repairs or upgrades as needed. Contact a State Licensed Professional Engineer for further review if truss installation instructions are unavailable.
Ceiling Framing
Truss Framing: Ceiling framing at second floor was integral with roof framing trusses.
Wall Framing
Framing Access: Finished Prevented
Finished areas prevented view of structural components. Structural areas were not observed by inspector.
Underfloor Access
Slab: Finished Areas
Finished areas prevented view of structural components. Structural components were not observed by inspector at such areas.
Underfloor Description
Slab: On Grade
Underfloor Area
Access:
Slab construction no underfloor area present
Construction Type:
Concrete Slab on Grade
Foundation:
Poured in Place Concrete
Columns or Piers:
Not Applicable
Floor Structure:
Concrete Slab Floor
Floor Insulation:
Not Applicable
INSULATION
Above Ceiling Insulation
Recommended Insulation
Recommended attic insulation depth above living spaces for this area of the country is R-38 to R-60 to help lower utility costs. This recommendation comes from the US Department of Energy. Evaluate your comfort level and utility costs correcting insulation depth if needed.
Insulation Type: Blown In, Roll or Batt
Observed Insulation Approximate Depth: R - 38
Wall Insulation
Insulation: Wall Insulation Not Observed, Undetermined
VENTILATION
Attic Ventilation
Attic Exhaust Vents: Ridge Roof Vent
Attic Intake Vents: Soffit Vents Where Installed
ROOF
Roof Covering
Observation: Representative Roof Covering Photos
Representative Roof Covering Photos
 |  |
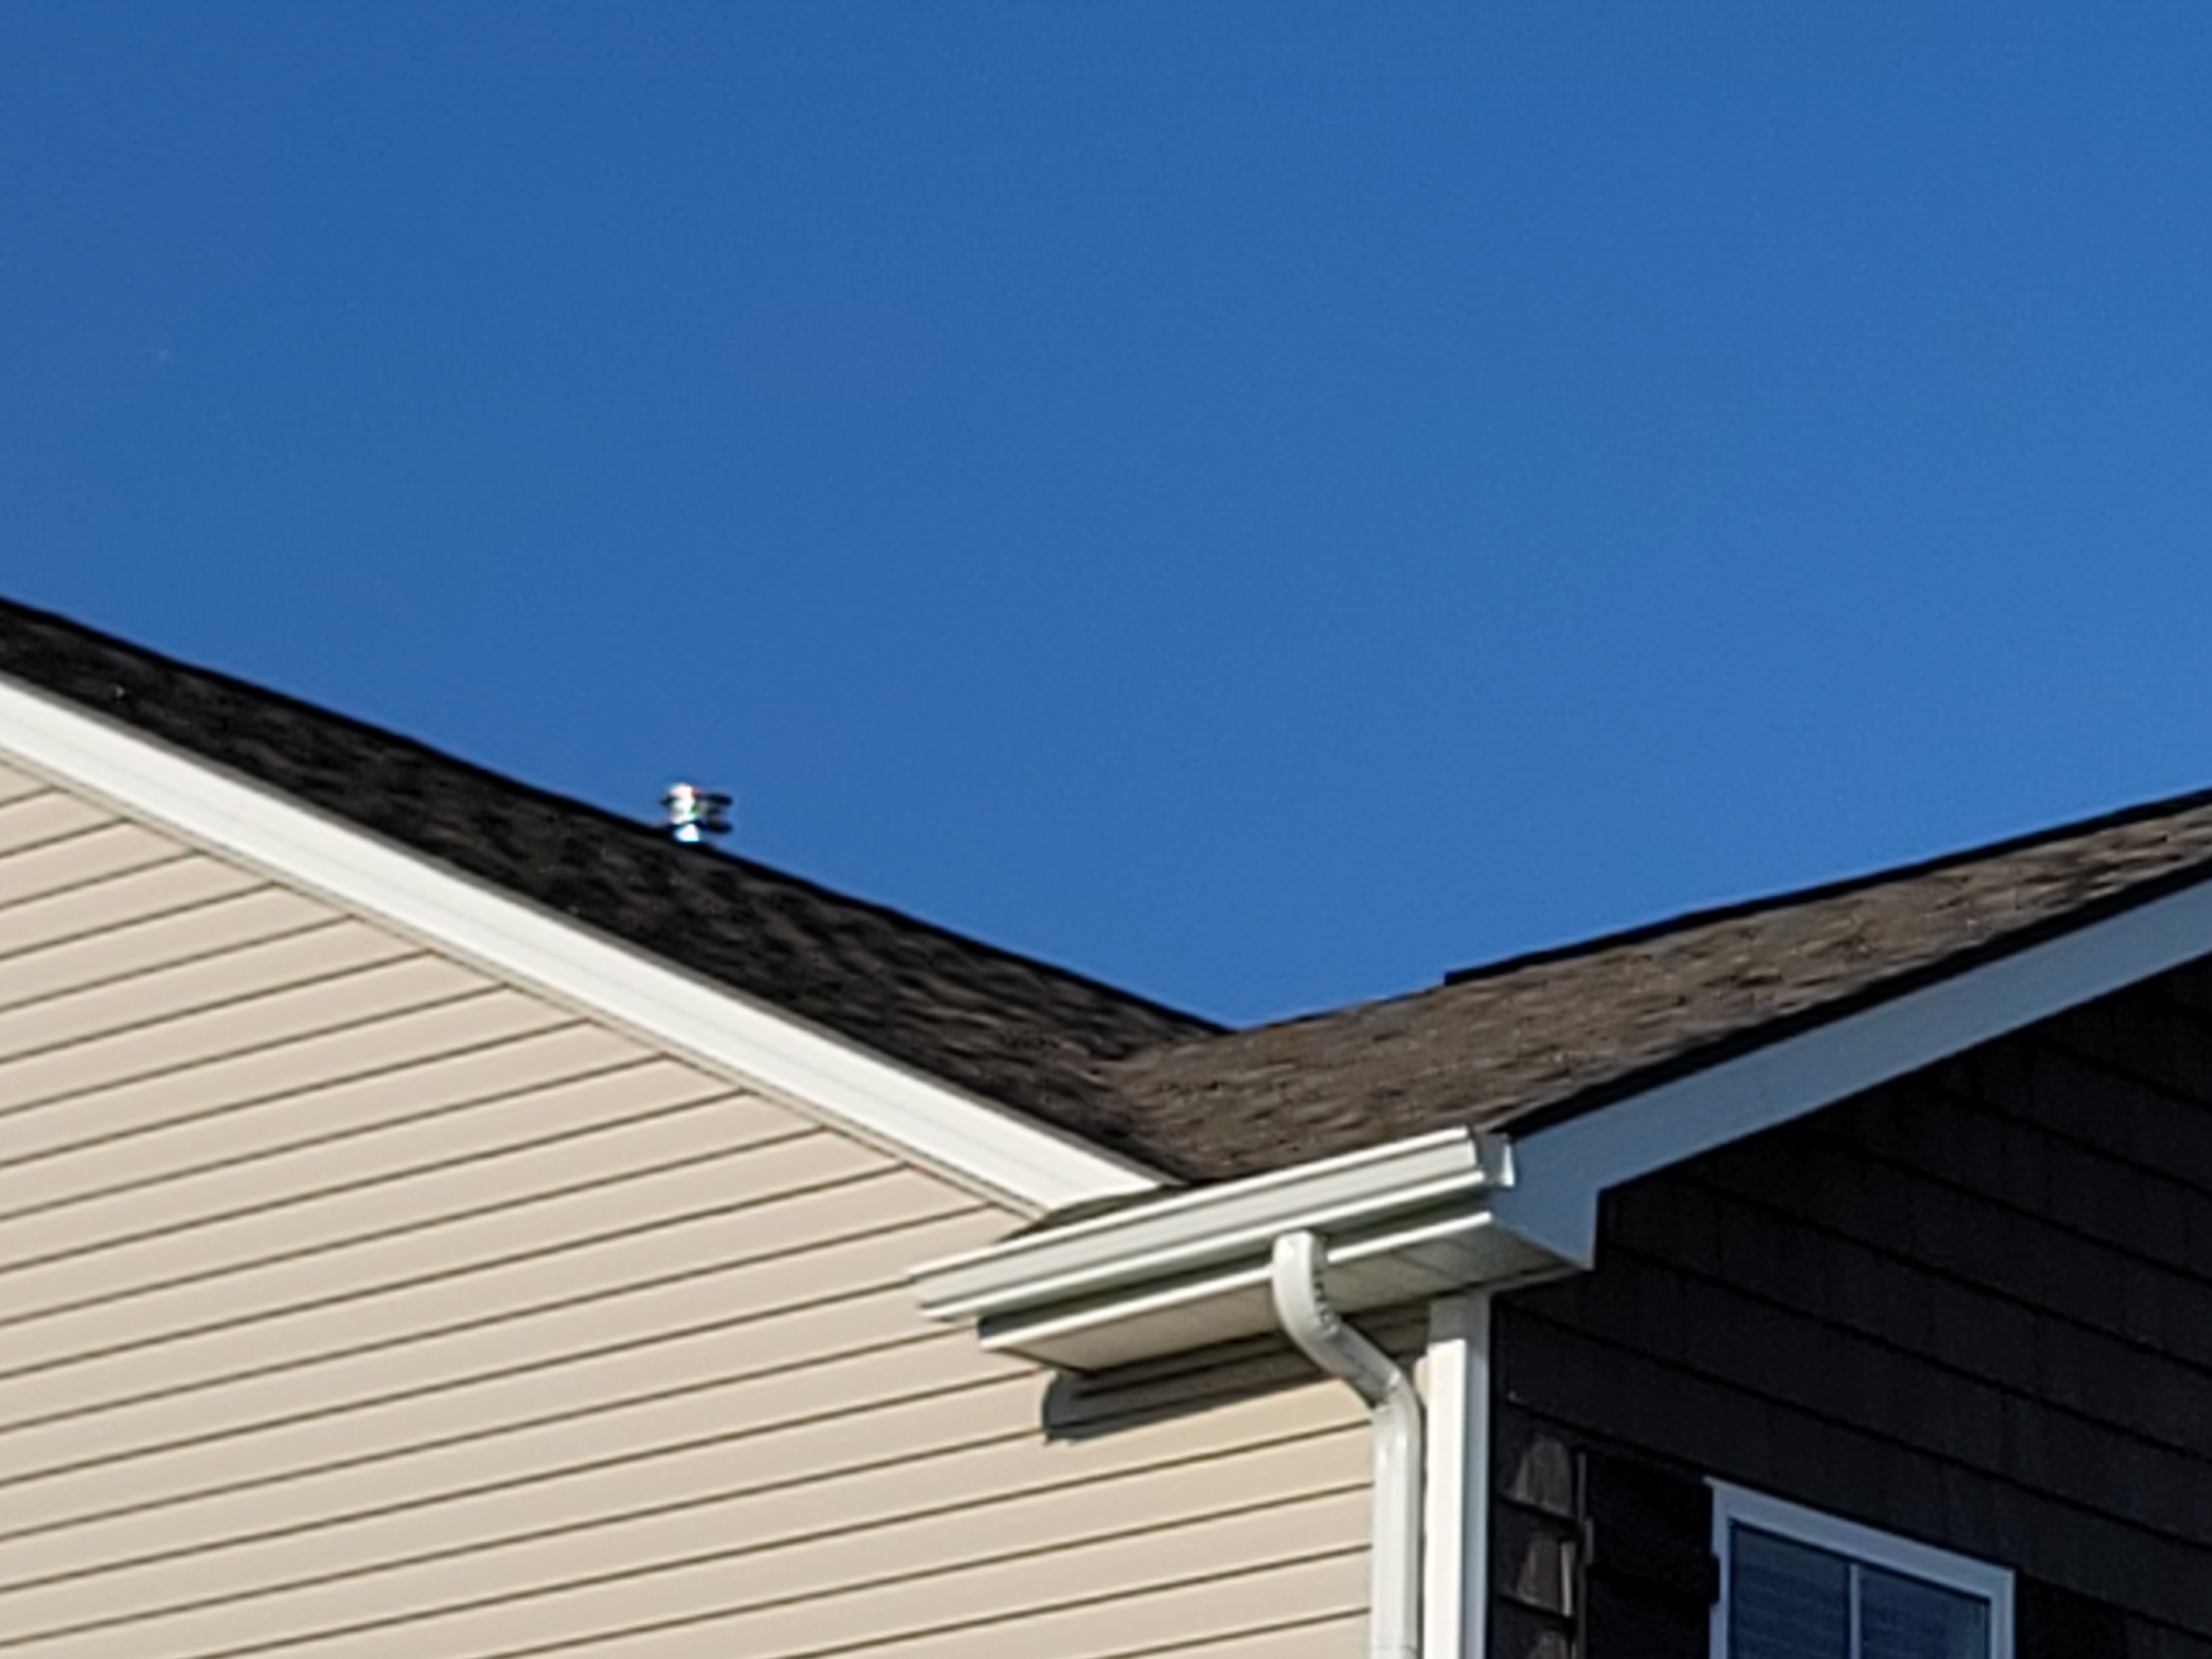 |
Method of Roof Inspection: Walked on portions of roof, Viewed from ground with binoculars
Roof Style: Gable, Shed
Approximate Age of Roof Covering: 0-1 Years
Roofing Material: Composition Dimensional Shingle
Coordinate Roof Covering with Roof Framing
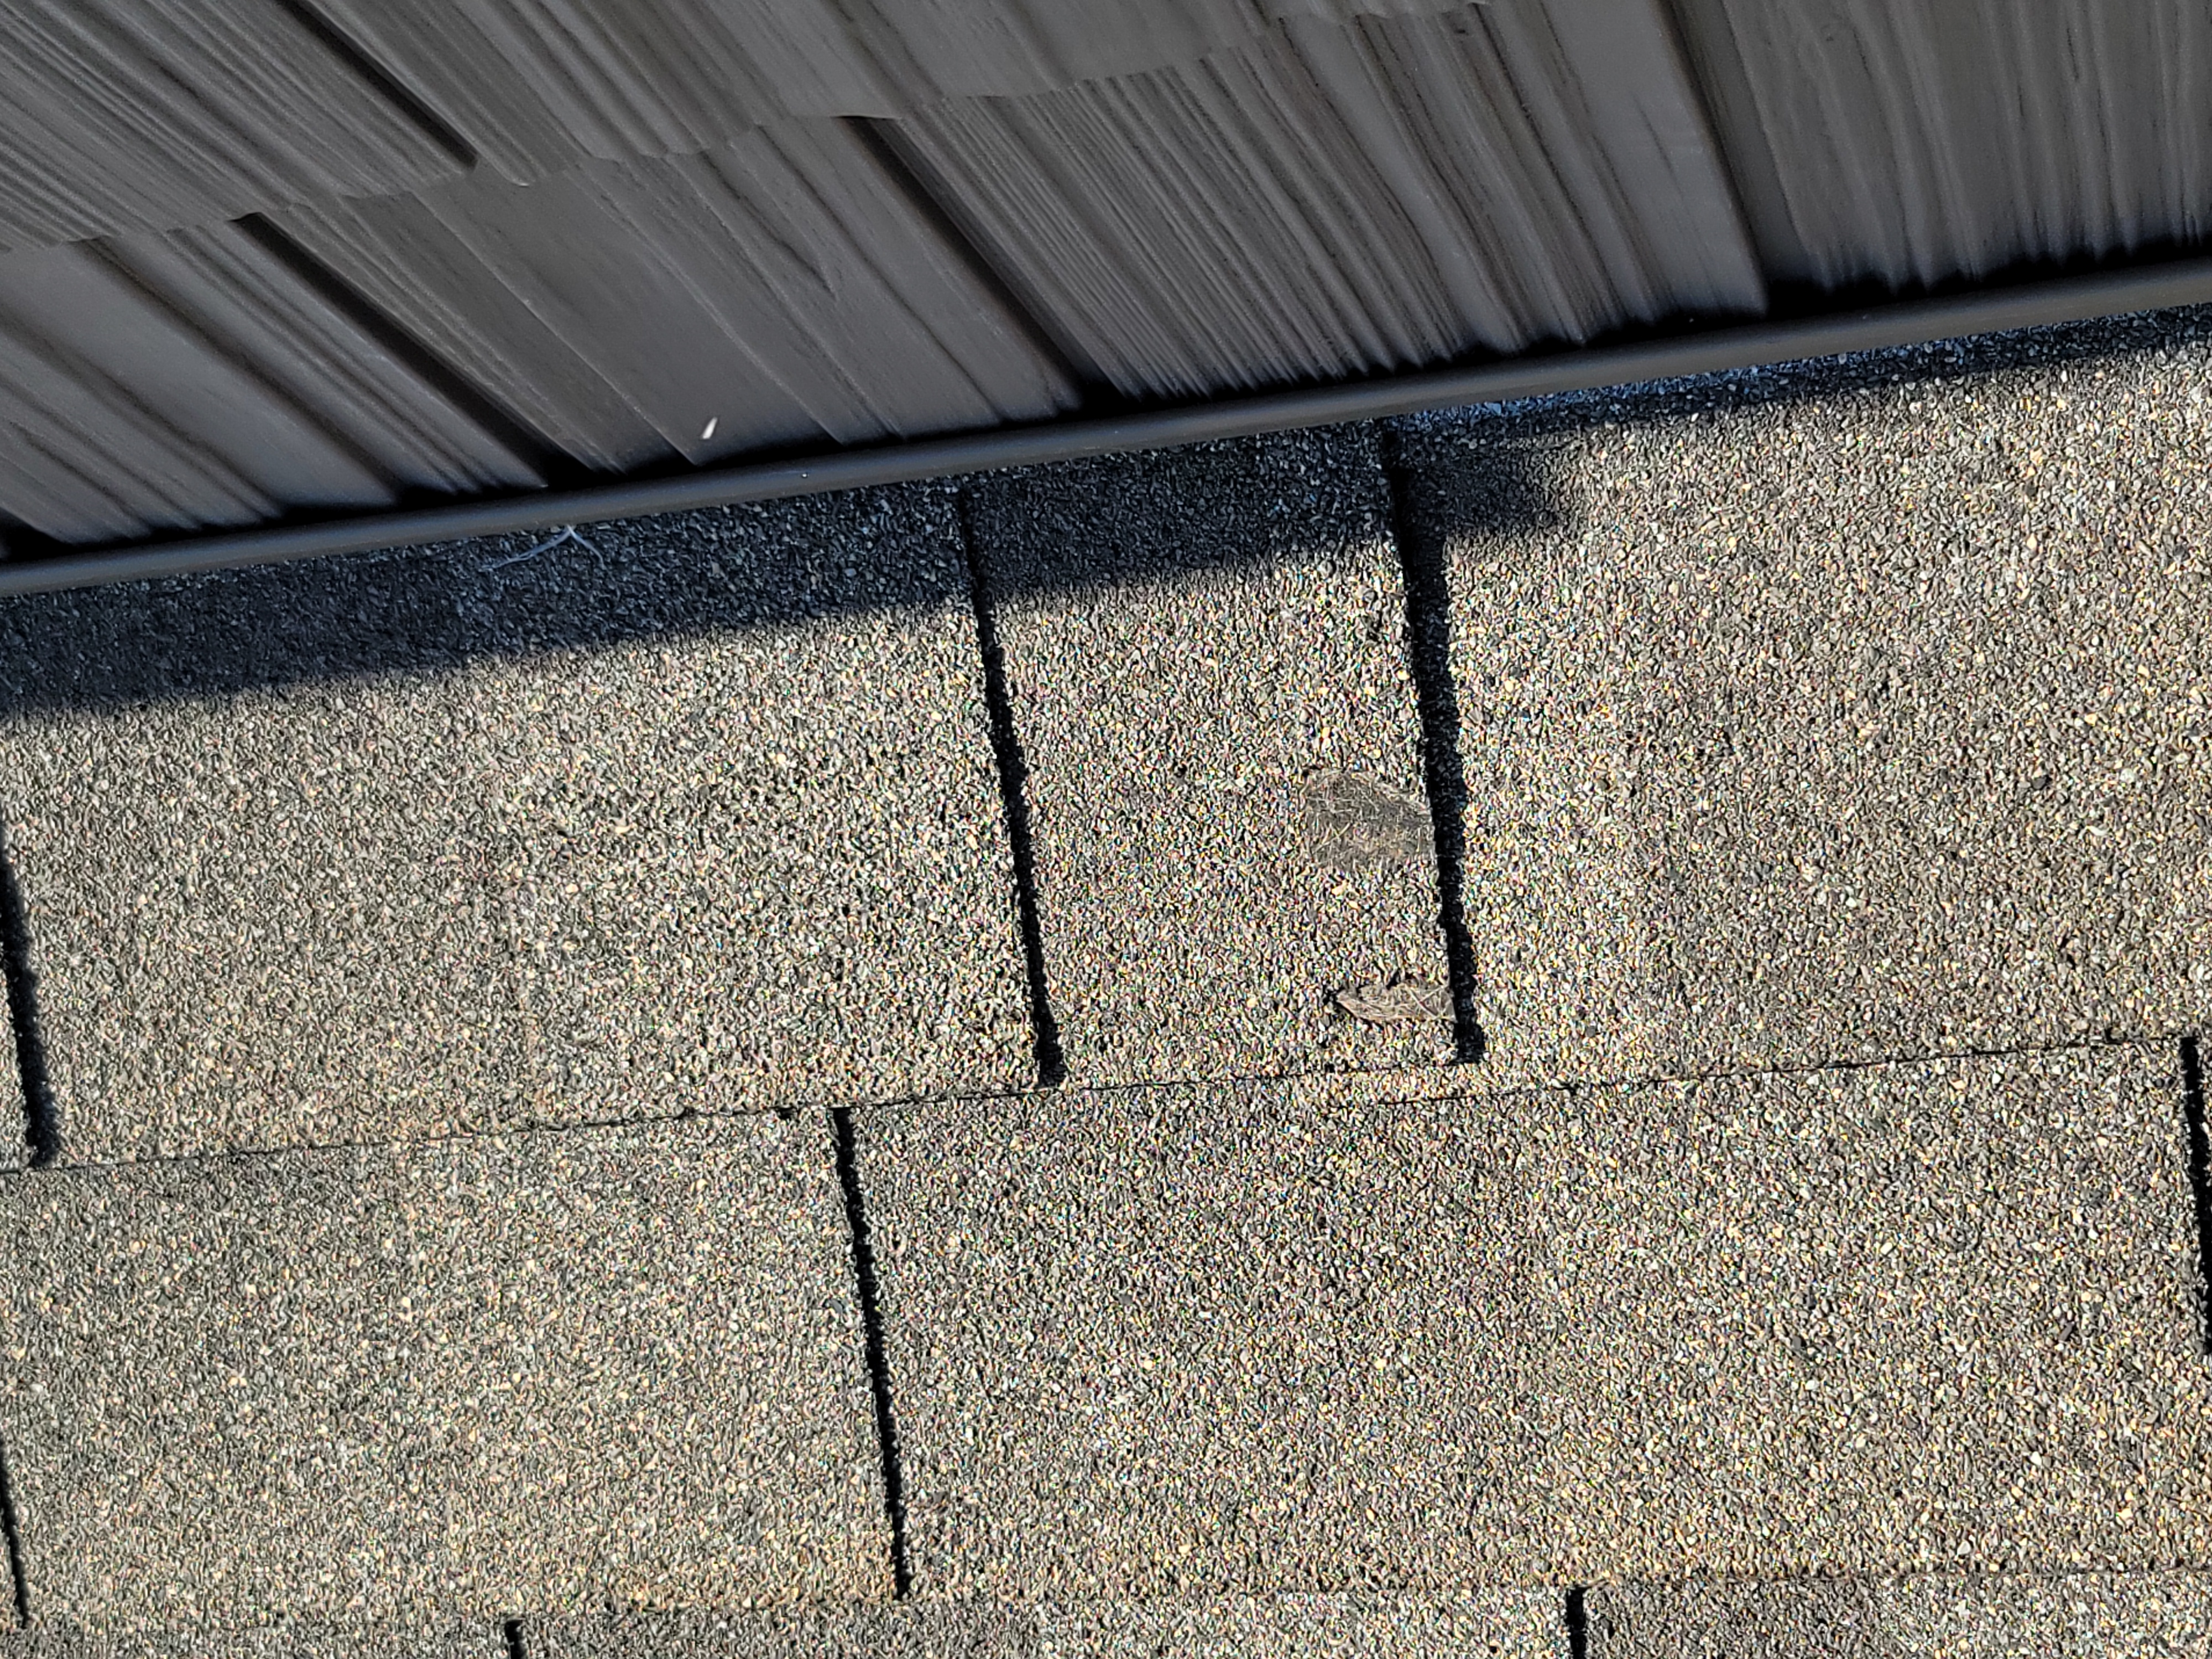
Roofing covering was ready for corrections now.
A competent roofing contractor should check entire roof system and associated flashings. Properly repair or replace roof covering system as needed.
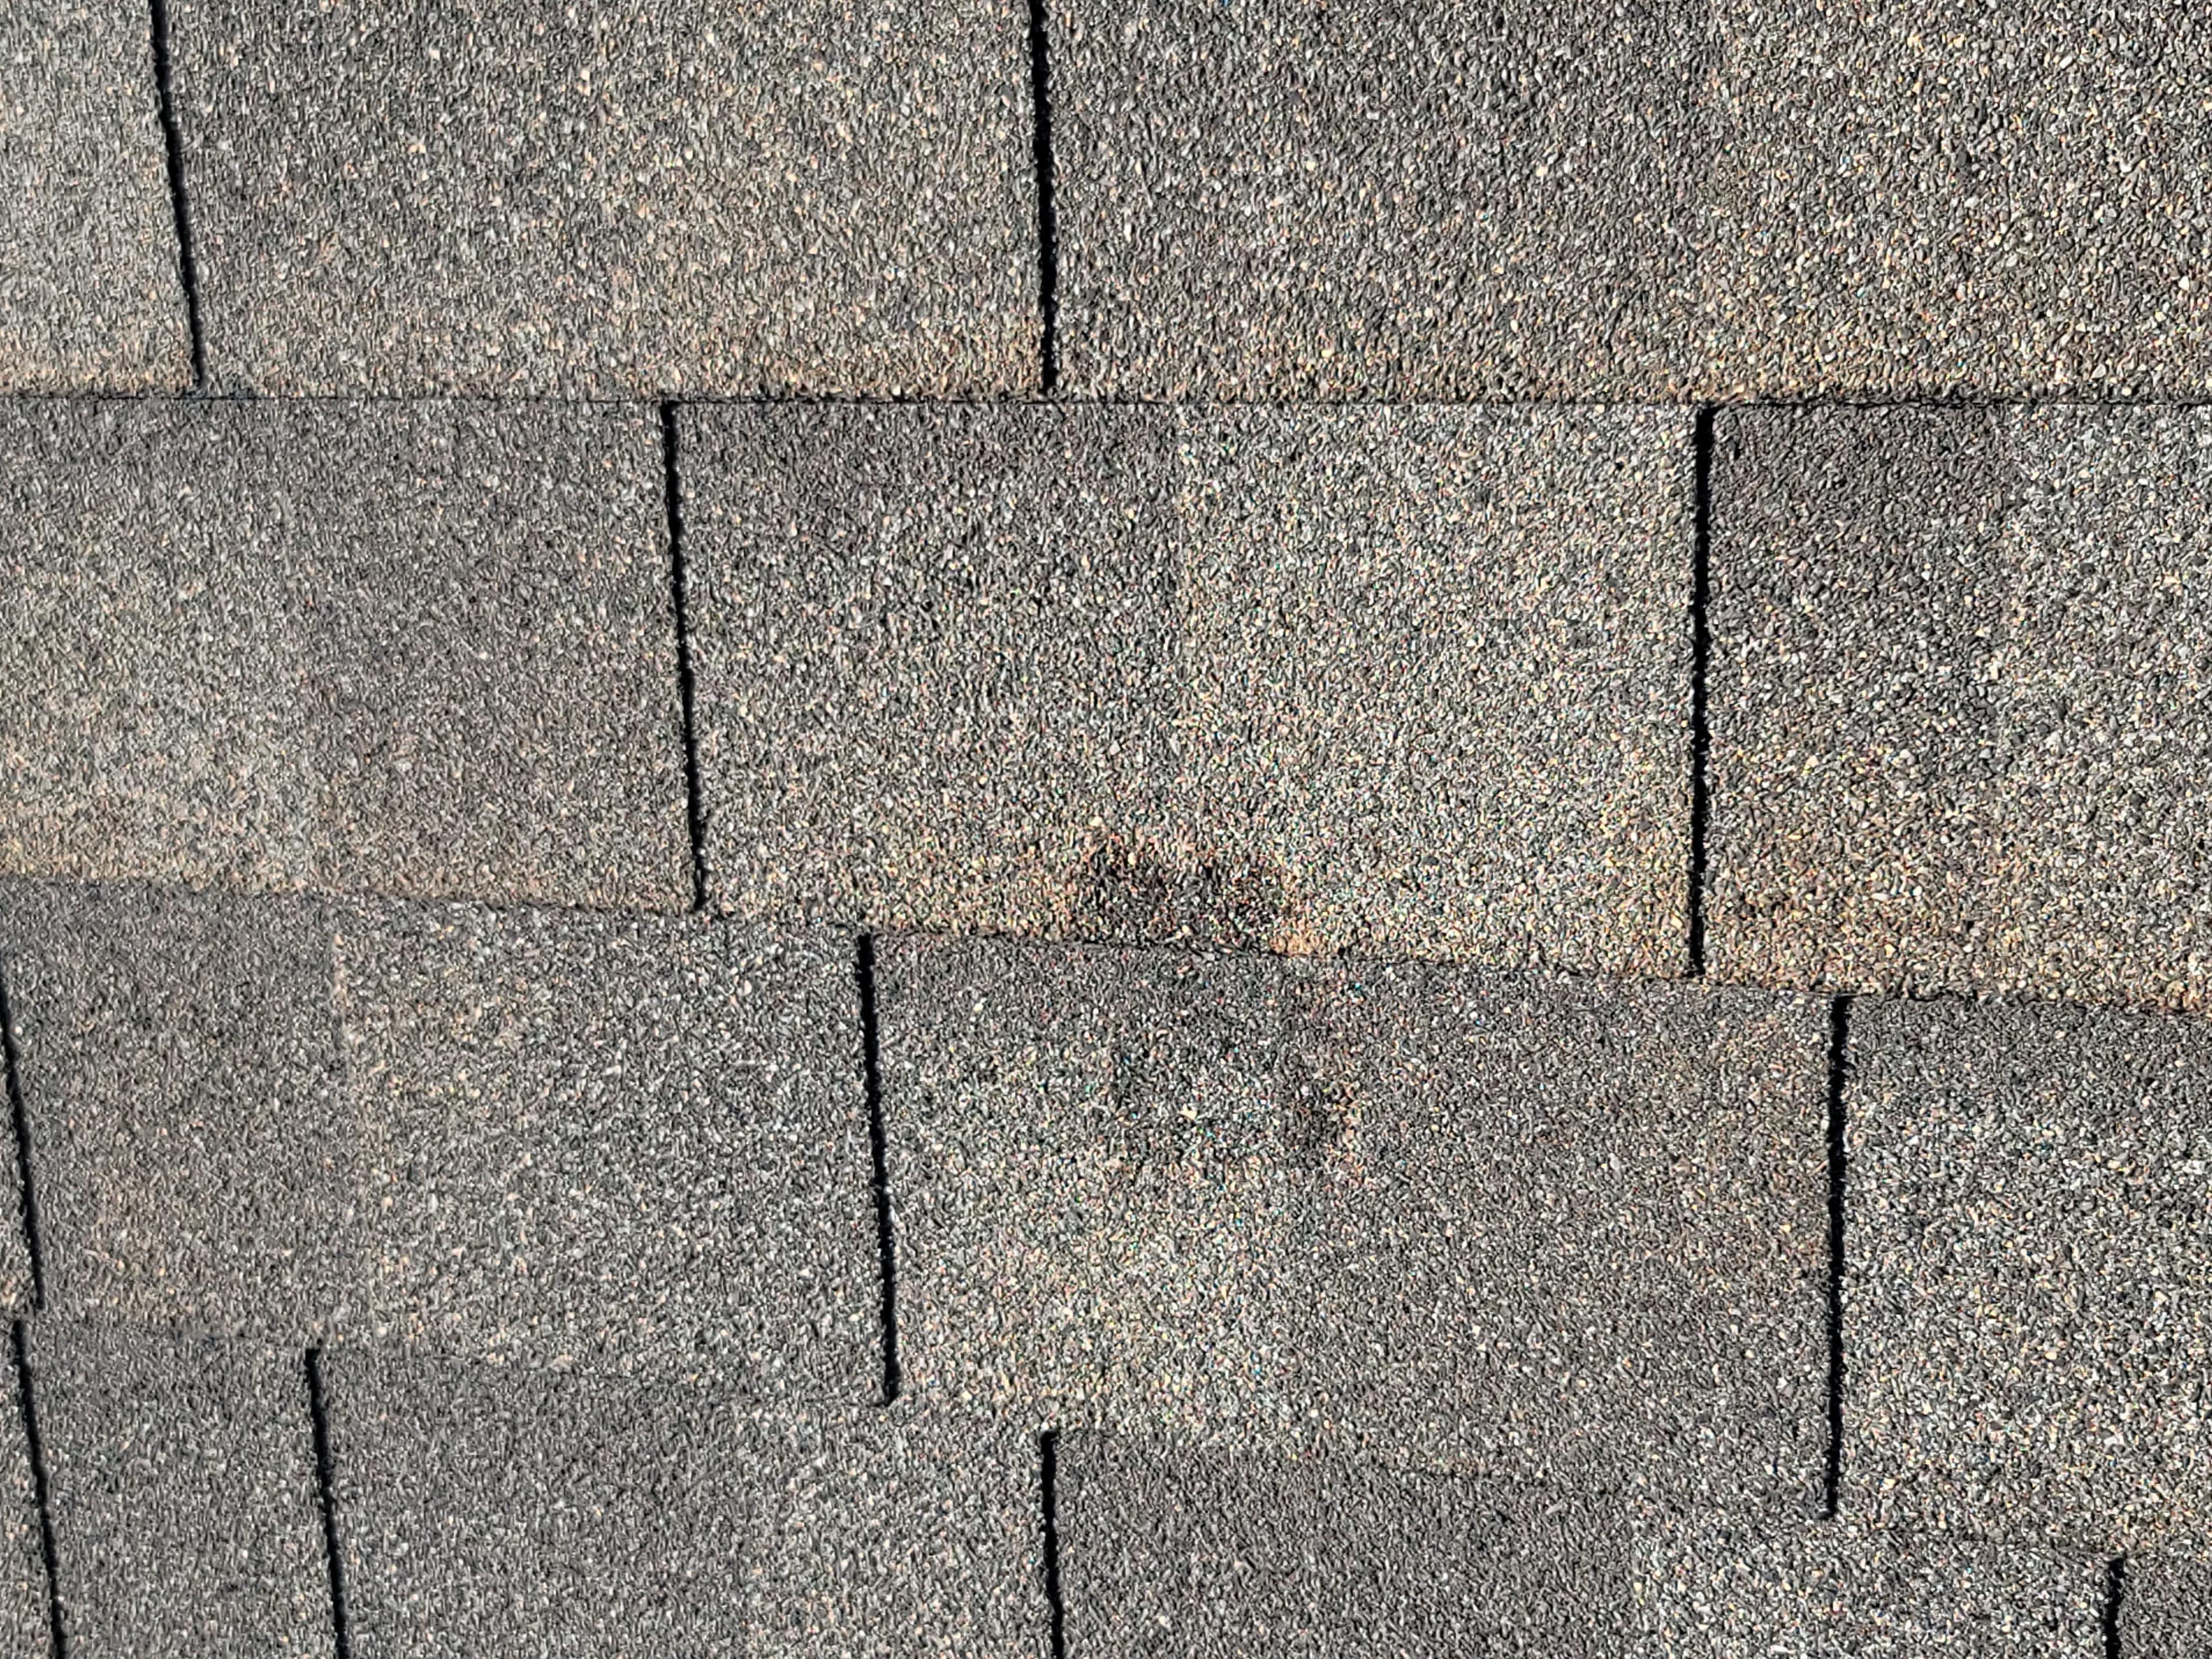
Roof Covering was Ready for Correction
- Some shingles observed damaged.
- Some shingles did not lay flat. Correct shingles and/or roof decking as needed.
- New construction roof covering should be in new, undamaged condition and free of debris.
 |  |
 |  |
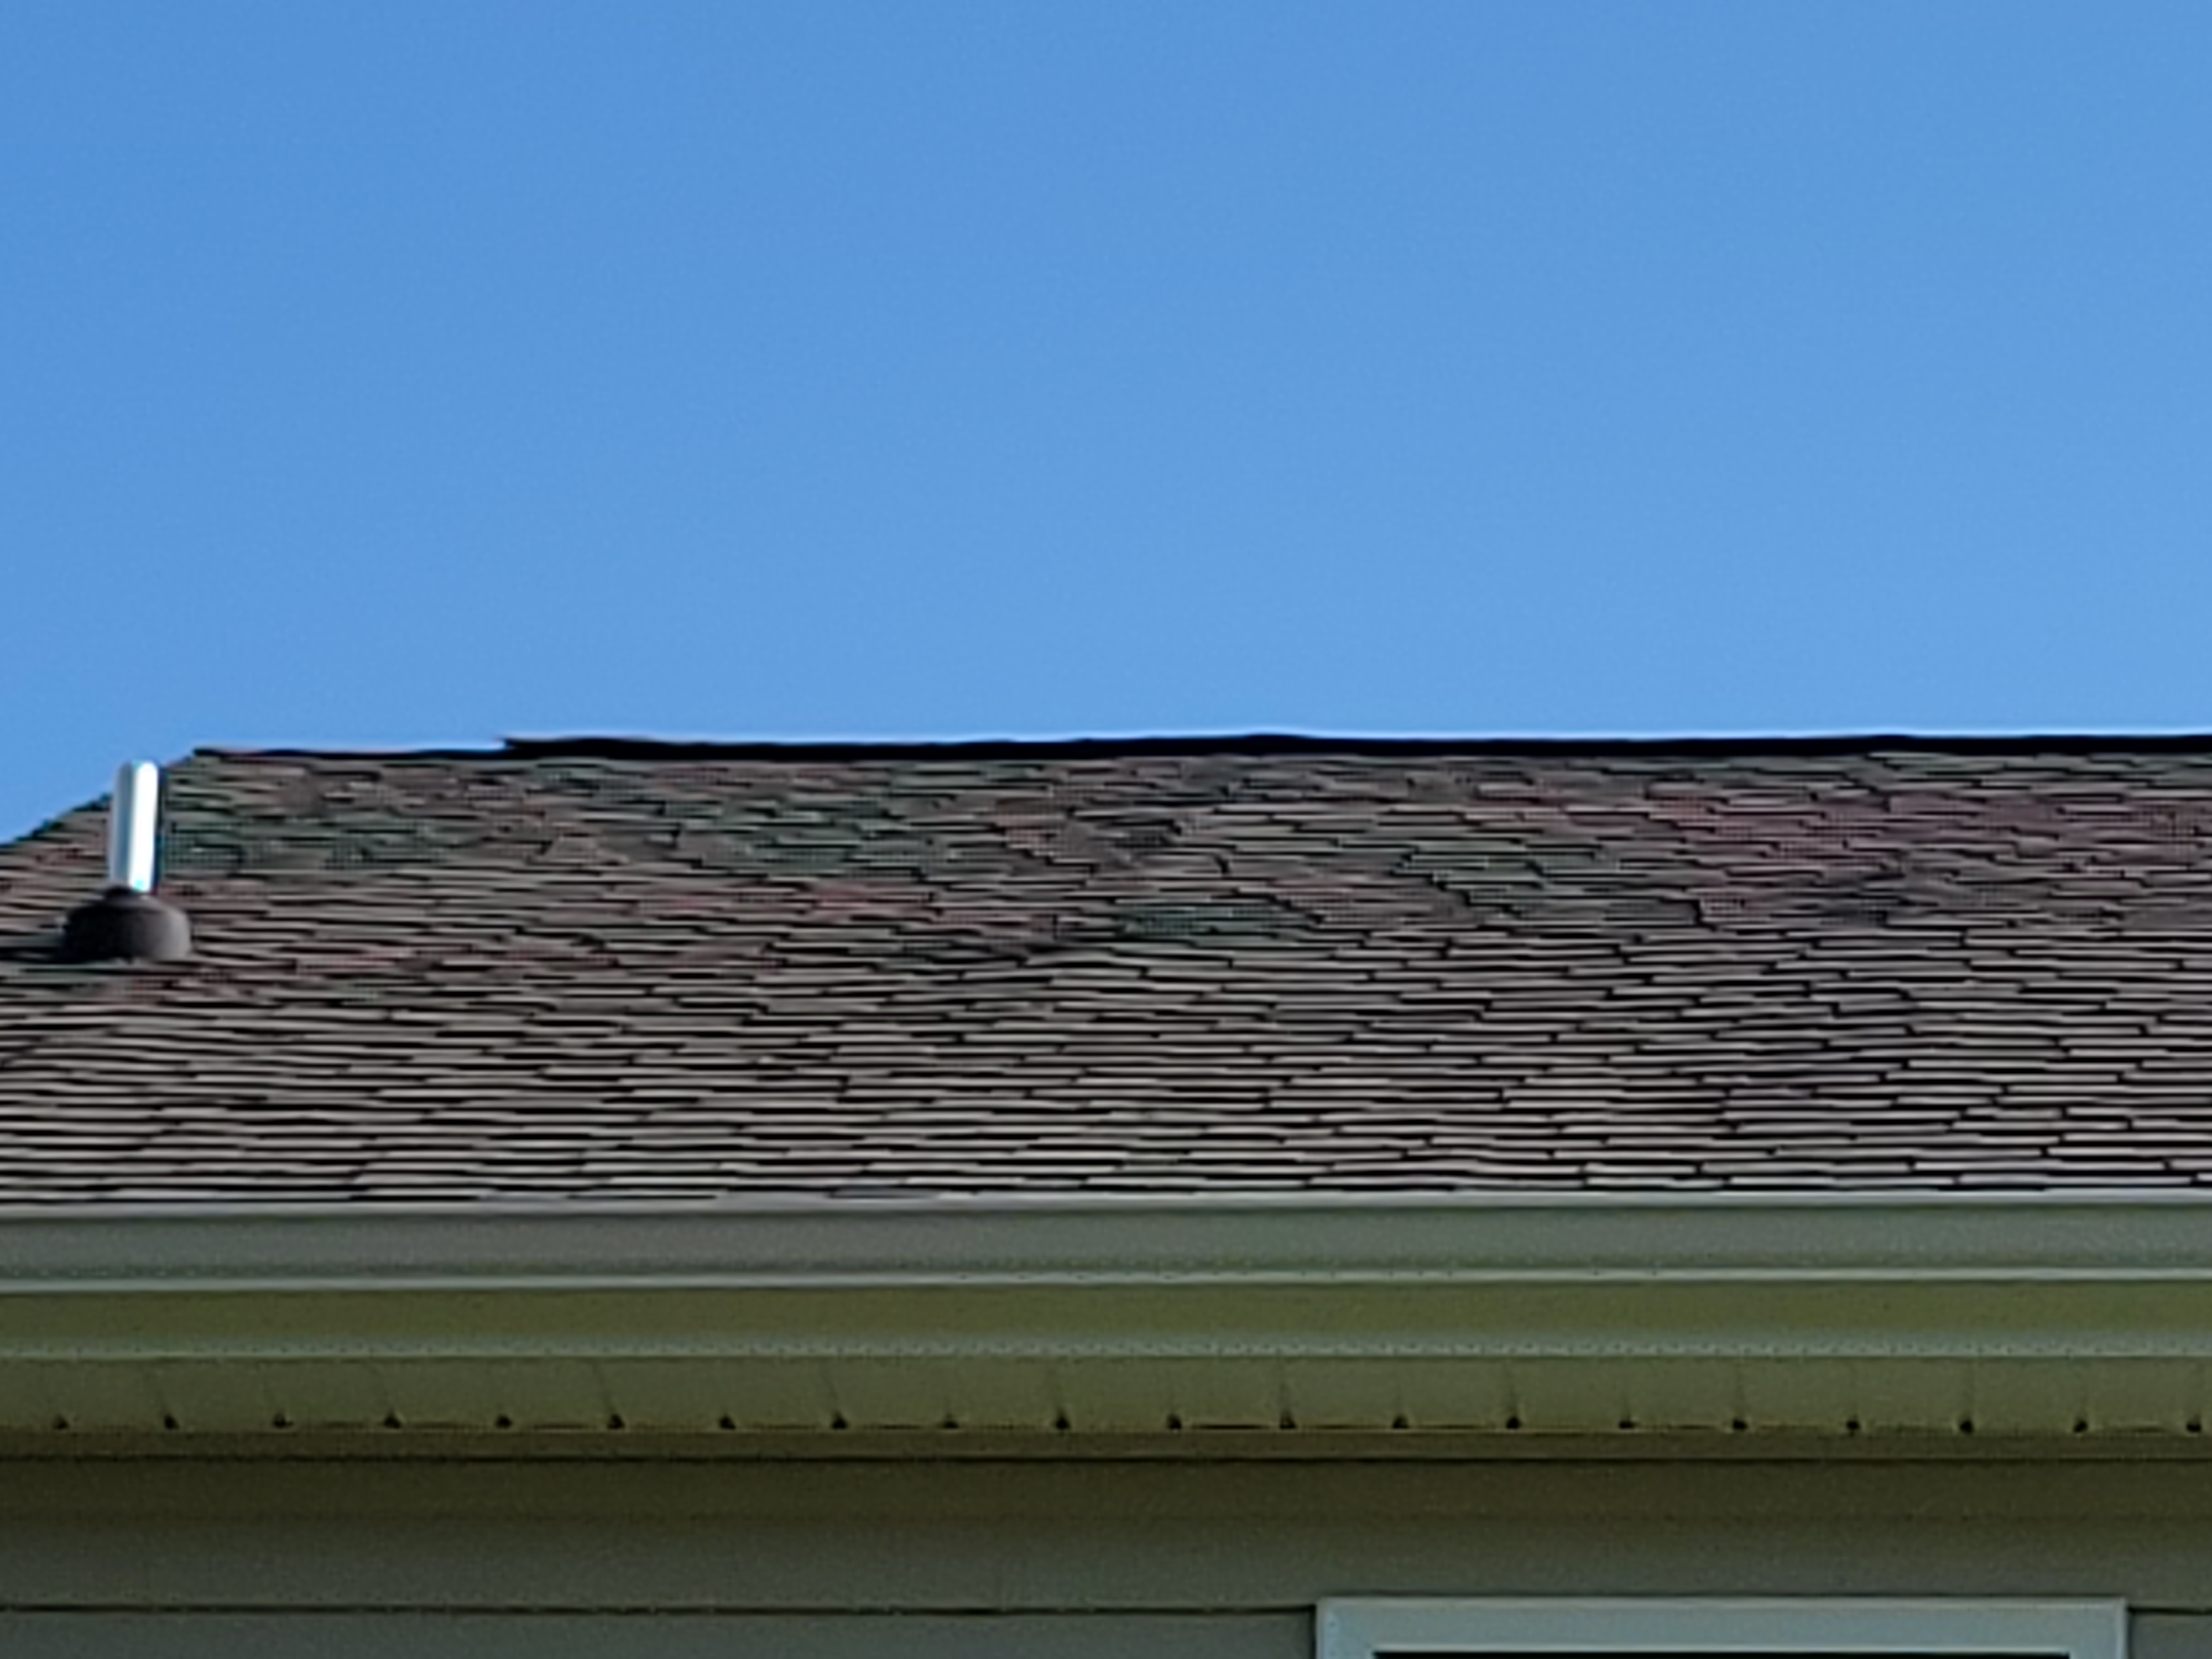 | 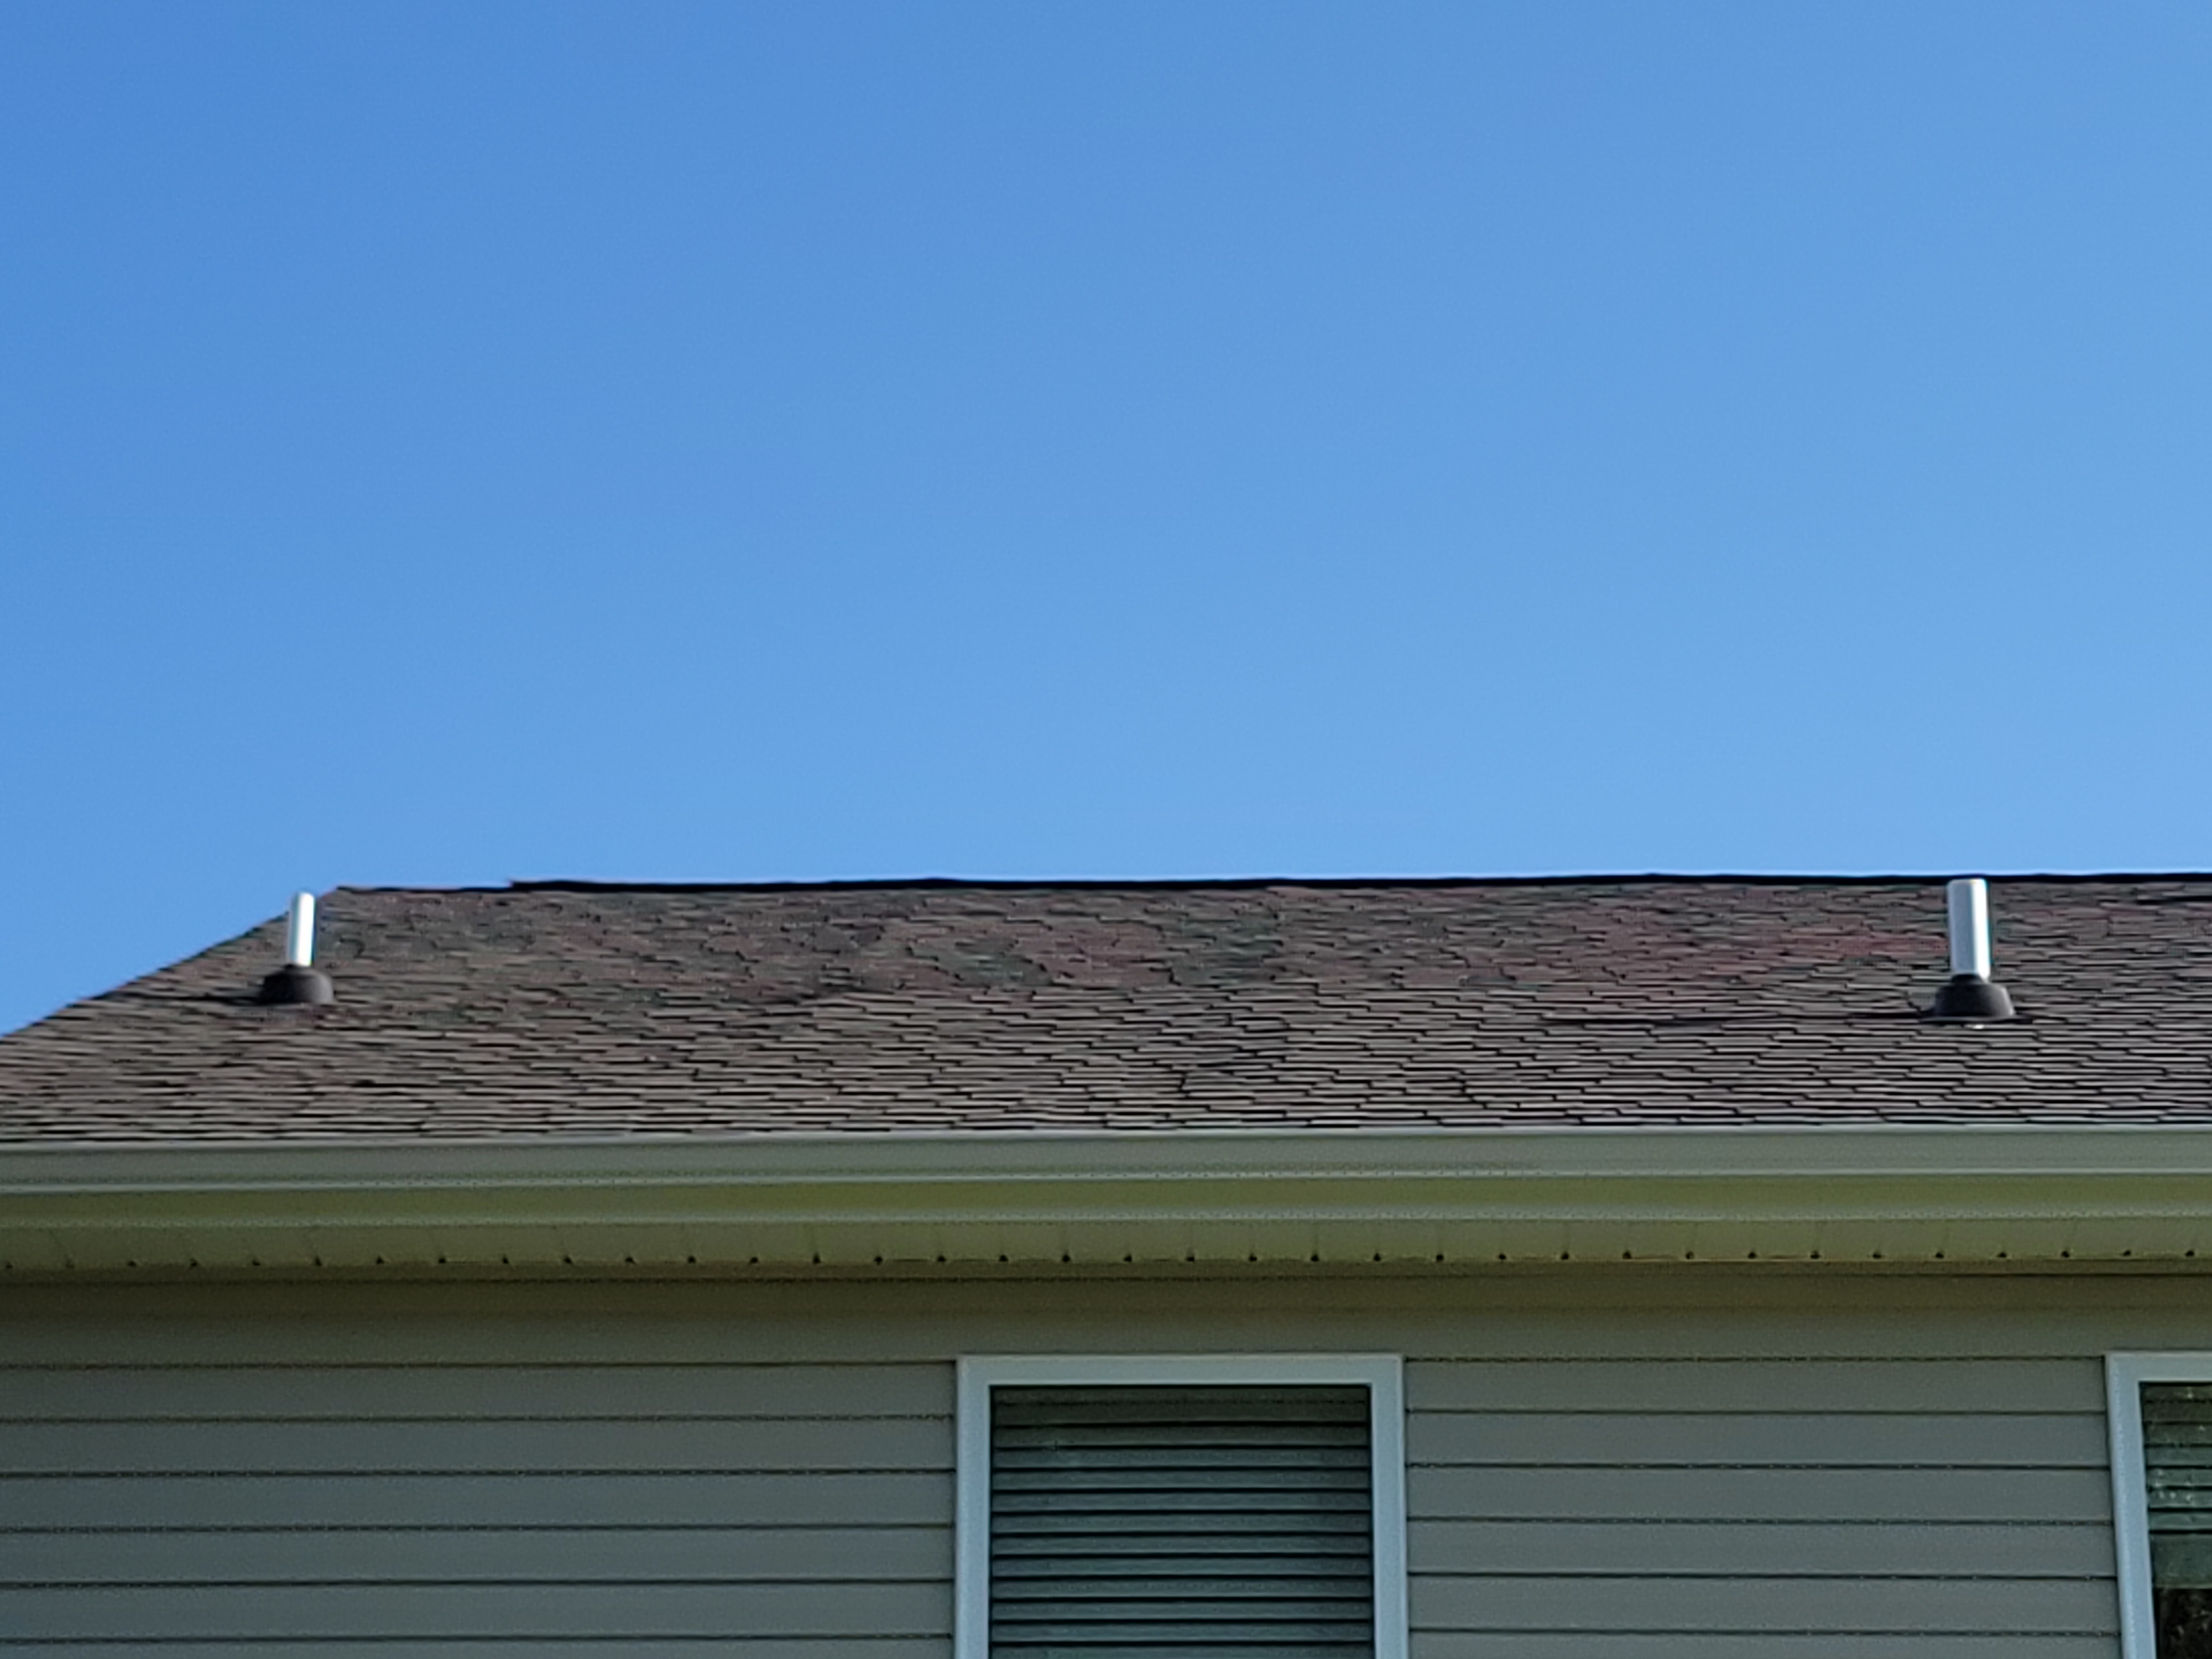 |
Coordinate roof covering corrections needed now in conjunction with roof framing corrections needed now.
- Roof decking and subsequent shingles were not laying flat at right rear roof area.
SIDING and TRIM
Exterior Elevations
Photos: Exterior Photos
Exterior Photos
 |  |
 |  |
Brick
Brick Veneer
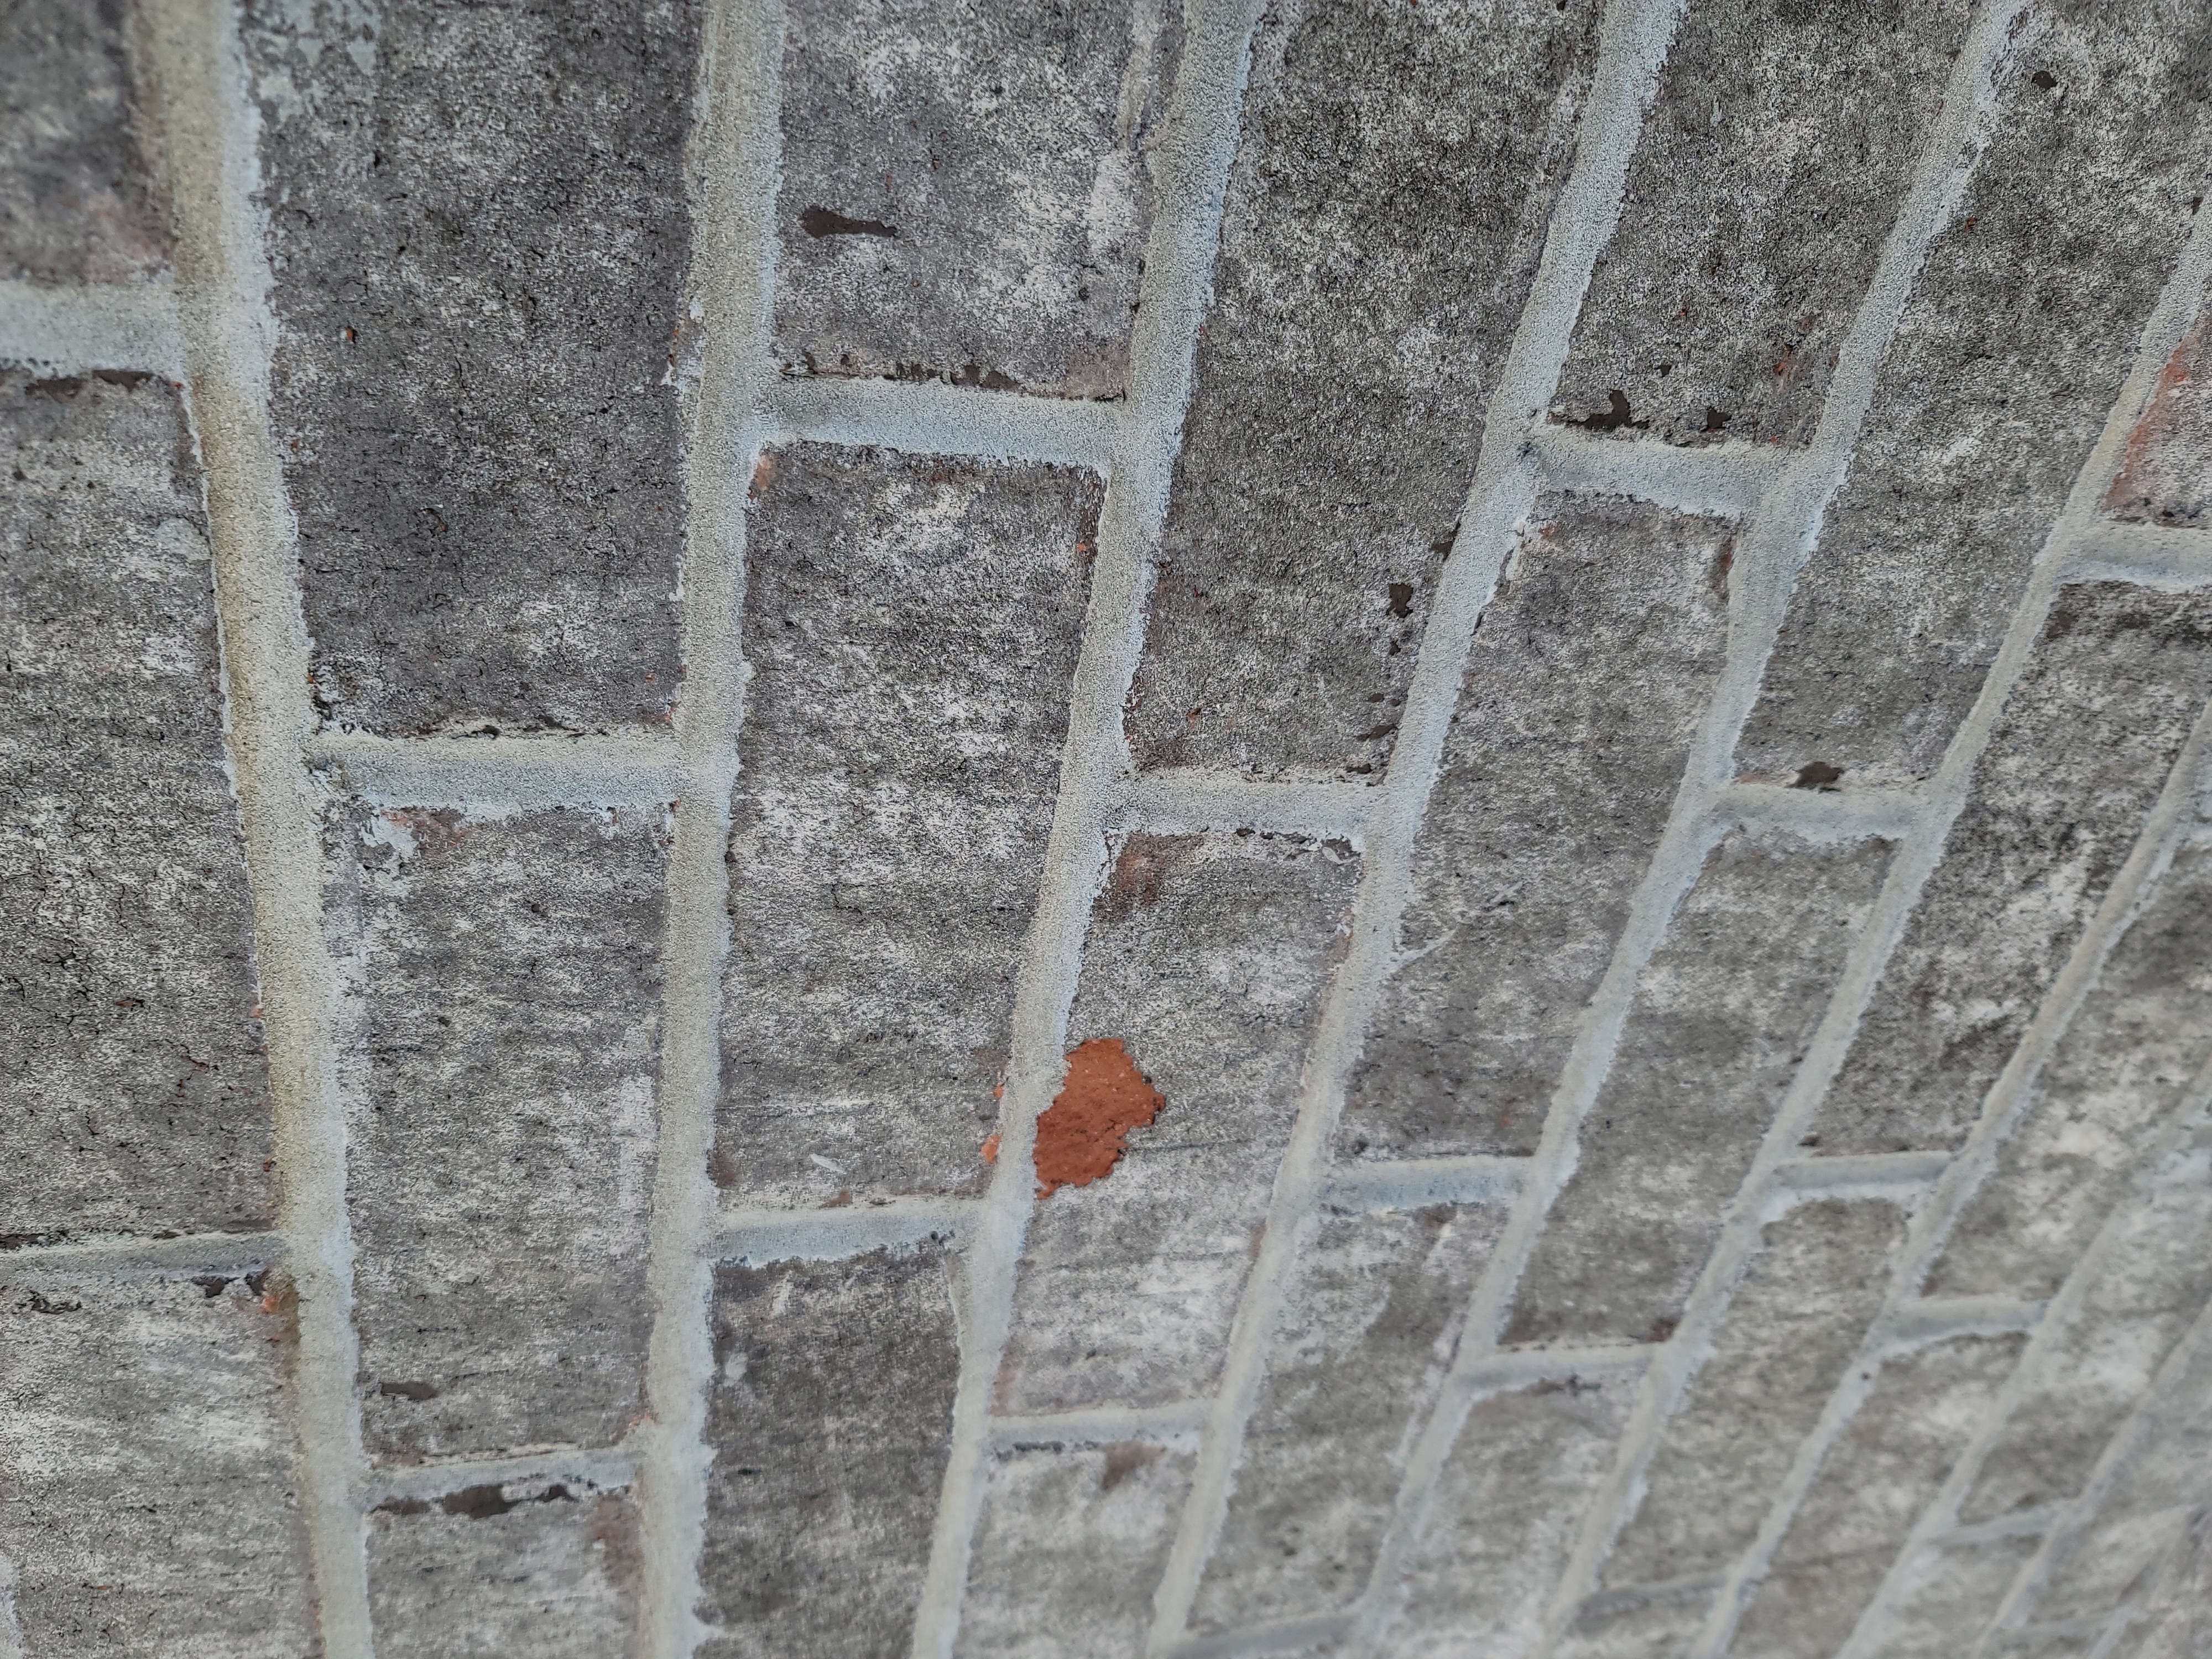
Brickwork: Serviceable
Brickwork
The exterior readily visible areas of the brickwork were inspected and appeared to be in overall serviceable condition, fulfilling its function. All siding requires maintenance. Properly maintain siding condition correcting when needed.
Siding - Vinyl
Vinyl Siding, Vinyl Eaves with Metal Trim
Siding: Close to Ground
Siding observed too close to ground. The inspector noted that portions of the siding or trim were too close to ground level, making the siding or substrate subject to damage. Siding and untreated substrate should be a minimum of 6" above soil. Properly provide separation at siding/trim and untreated substrate from soil. If it is not cost effective to lower the soil grade or raise the siding and substrate area then you should budget periodic replacement of affected areas.
 |
Trim
Trim Material: Wood where installed
Trim: Unpainted
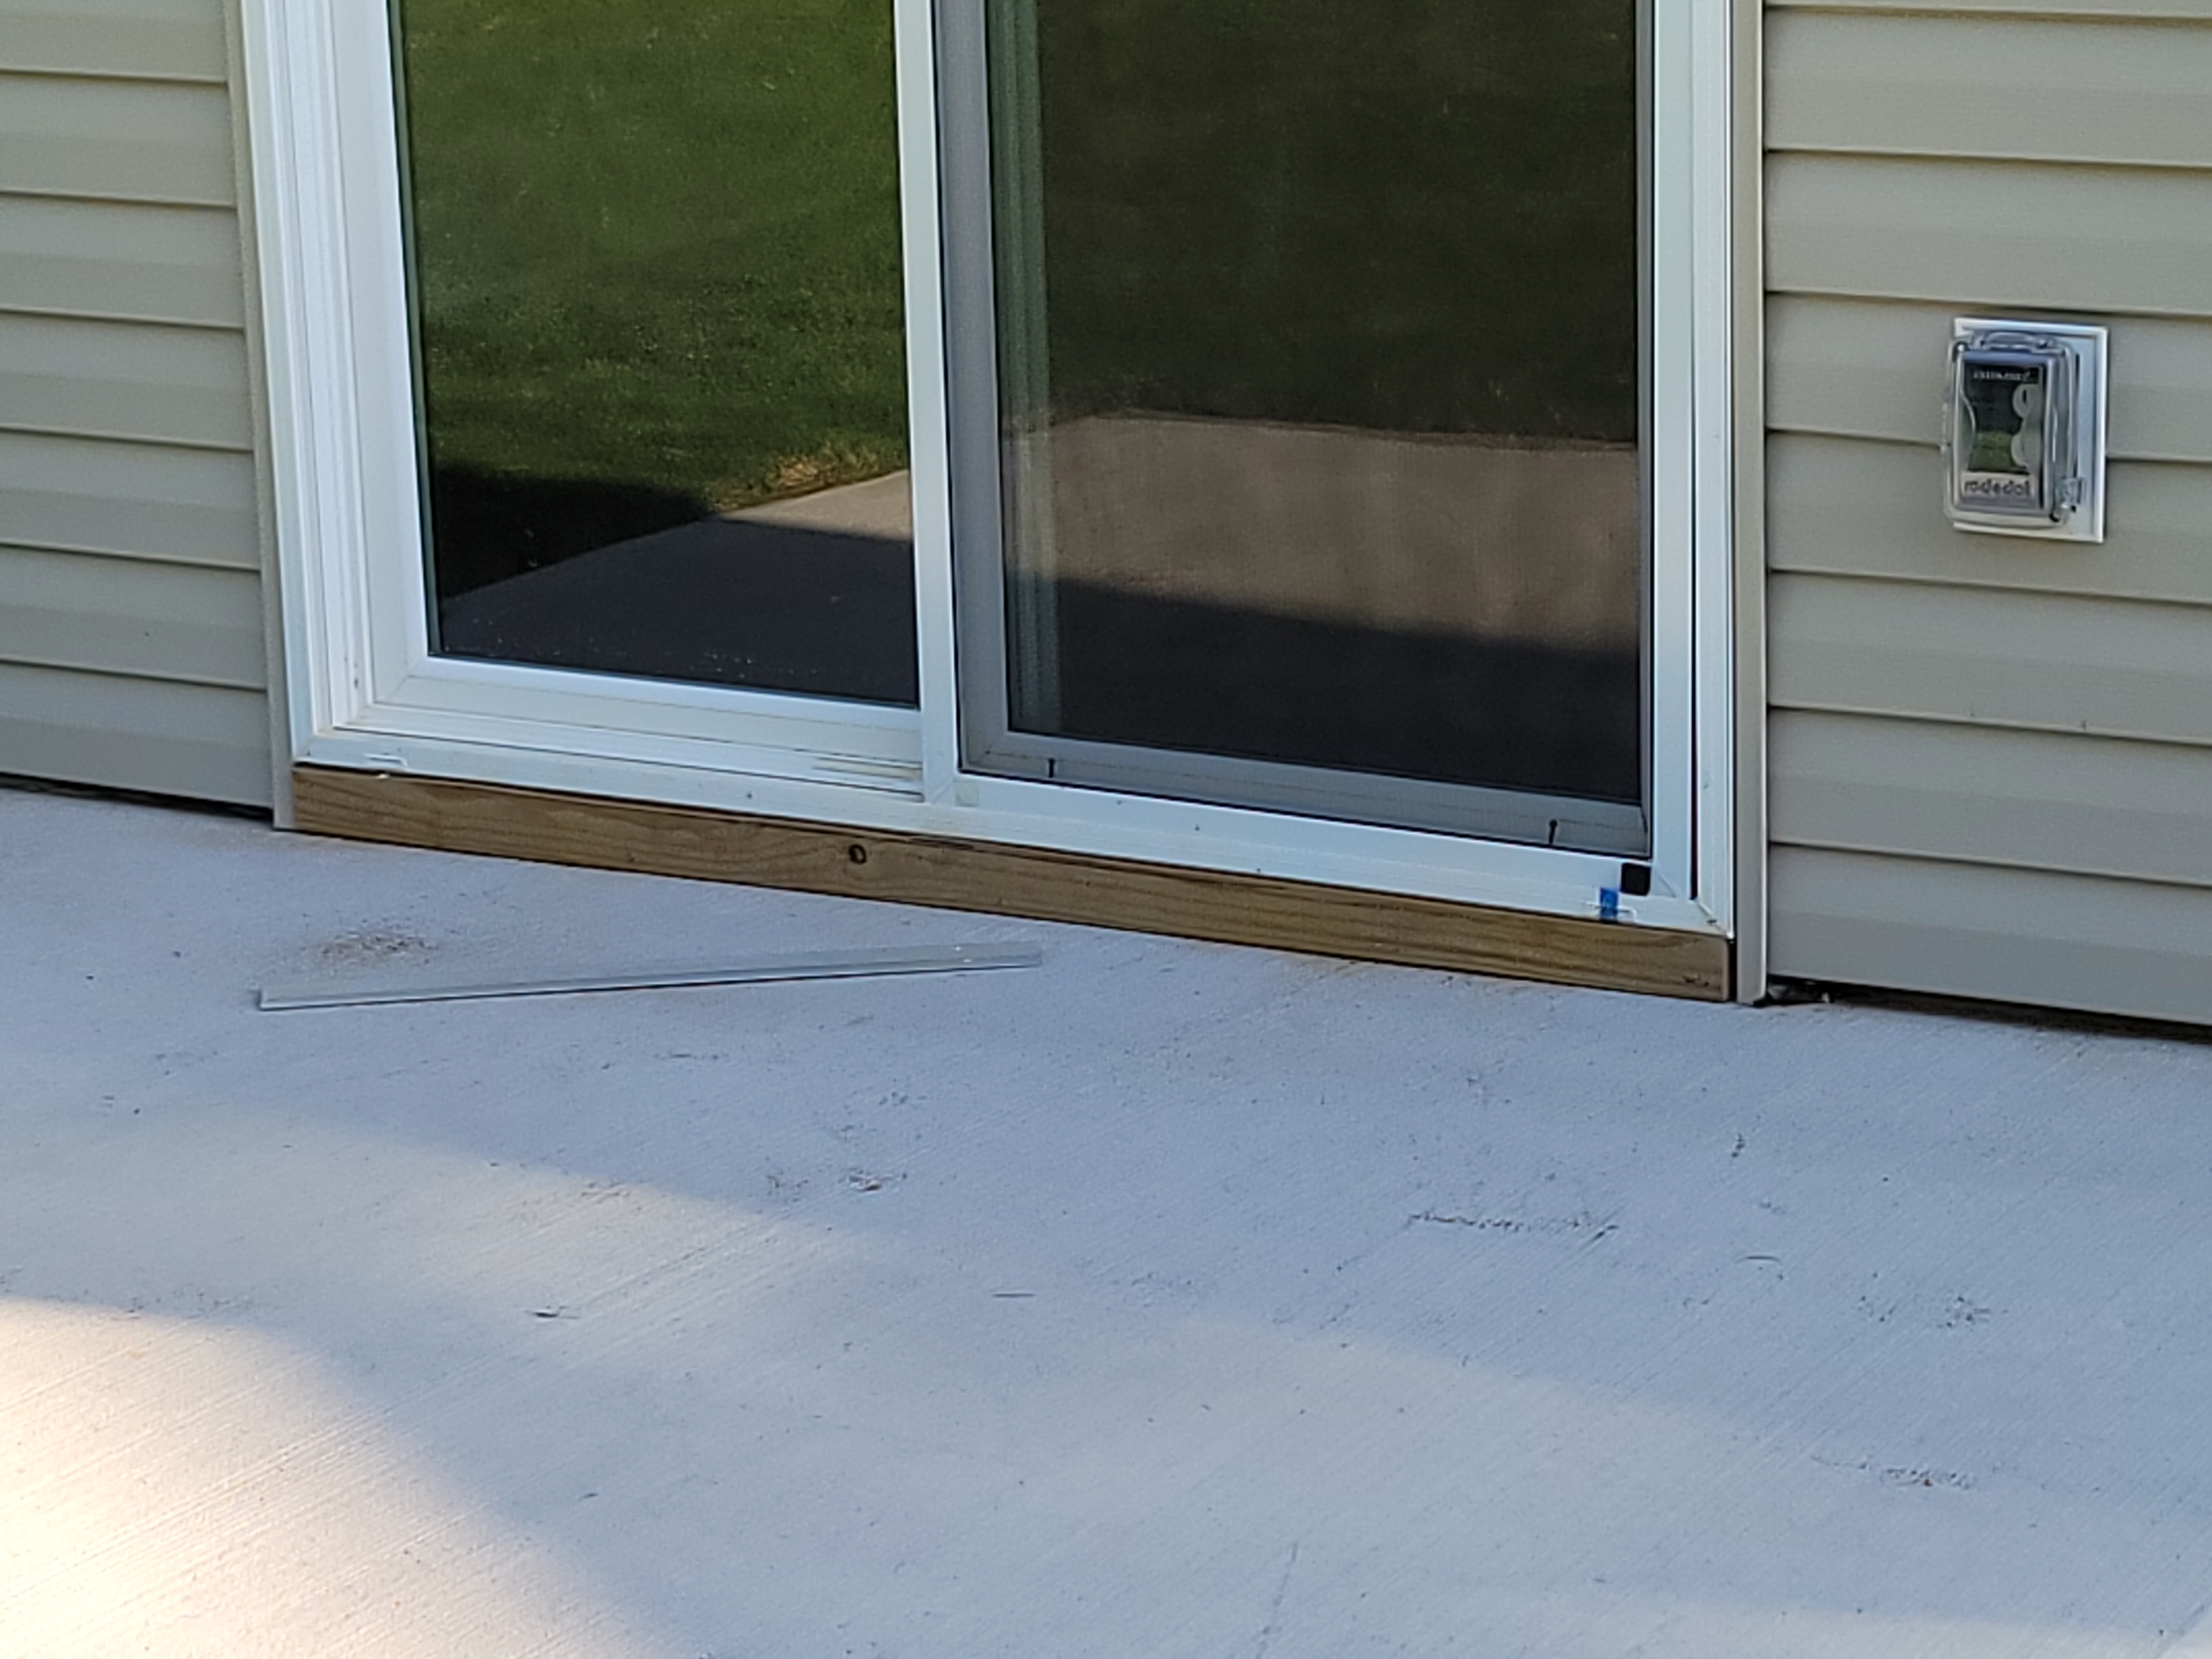
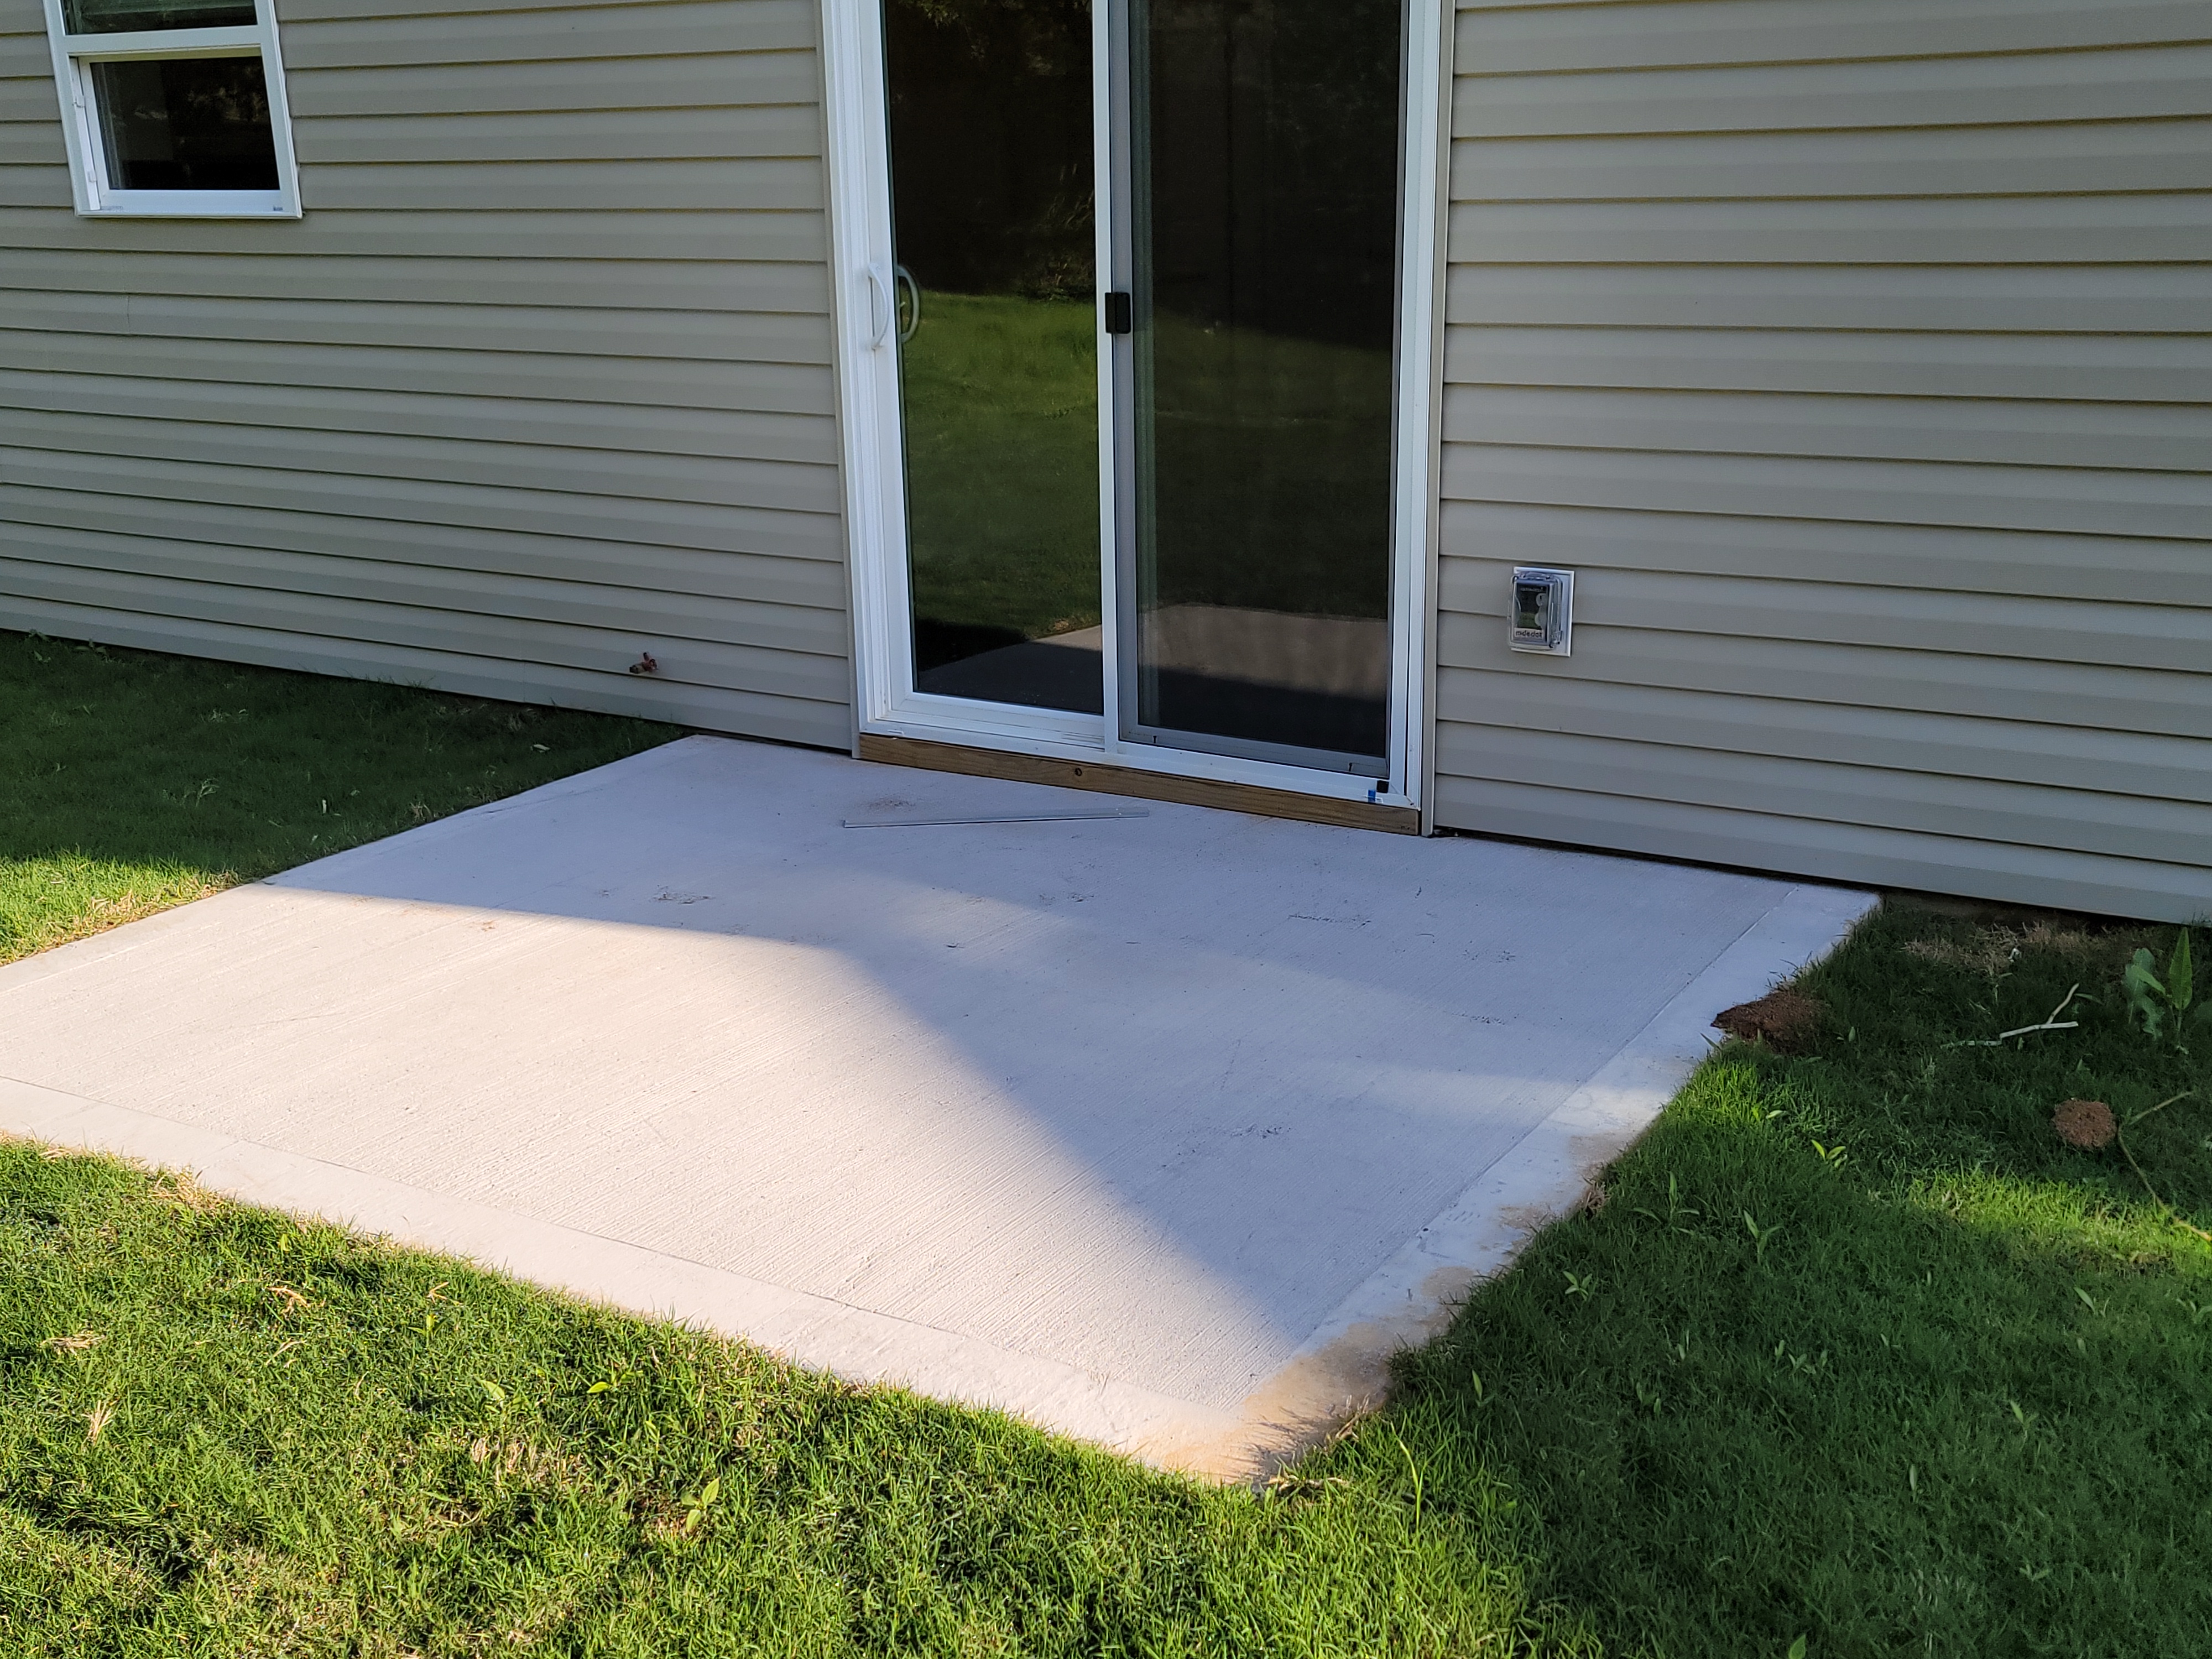
Trim - ────
Unpainted, exposed exterior area observed. All exterior surfaces should be protected from weather with paint or similar coating process or surfaces should be designed to withstand weather elements such as vinyl or glass. Properly correct where needed.
- Trim beneath patio door at rear exterior was not yet painted or stained.
 |
Extra Photos
New Construction Finishes
New construction finishes - Complete exterior final patch and painting to meet your standards if needed.
 |  |
 |  |
LOTS and GROUNDS
Patio
Concrete
Patio: Serviceable
Patio was serviceable, fulfilling its function.
 |
Walkway
Concrete
Walkway: Serviceable
Walkway was serviceable, fulfilling its function.
 |  |
Driveway
Concrete
Driveway: Serviceable
Driveway was serviceable, fulfilling its function.
 |
Vegetation
Vegetation Maintenance
Properly maintain vegetation to meet your needs. Vegetation should not touch building exterior or overhang roof. Vegetation should not interfere with access or servicing of electrical, gas or heating/cooling equipment.
Site
No adverse conditions were observed, maintain to meet your needs.
End of Report
 |
Signed Contracts
HomePro Inspection Inc
423-301-1000
Roger@HomeProInspection.com
https://HomeProInspection.com
Inspected by Roger Williamson
TN State Inspector License #: 226 TN
.jpg)
.jpg)